- Joined
- May 21, 2007
- Messages
- 1,432
I have done just a few reblades of knives and this one is challenging as it is not a factroy blade and there are some fit and geometry issues that arose. I thought it would be interesting to take pictures as I worked through the issues.
What is not shown is the pressing out of the factory pin using a arbor press. I don't like to hammer them out with a drive pin as I think that stretches the holes even more than the already are from the factory pin being set originally.
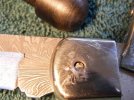
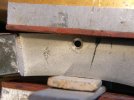
I then file flat the inside of the bolster at the point the pivot pin was origianlly set as there can be burrs or a ring from the bronze pin bushing from the original blade.
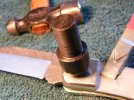
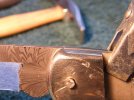
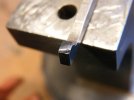
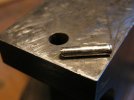
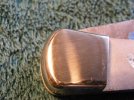
The first photo shows the rounded press pin I use to round out the top of the front bolster holes to tighten them up a bit. After the factory pins are hammered in the pin holes are fairly loose on a new pin. Putting in this tightening shoulder helps prevent a ring from showing around the replacement pin. It also help in getting the blade and bushing near centered for a test fitting.
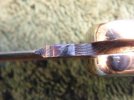
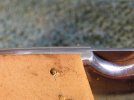
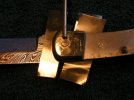
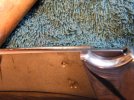
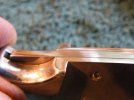
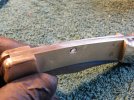
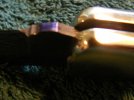
The 2nd and 3rd photos show the test fitting. In the picture of the front bolster you can see the front of the rocker arm and the blade are both a bit high but close enough to sand flat to the bolster and I can't change the location of the hole in the Damascus blade so if it does not get better when the pin is peined tight there is no other option anyway.
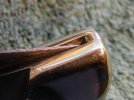
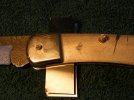
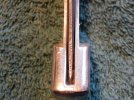
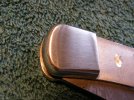
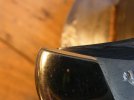
The rear looks really close to where it should be so I make a big assumption that the geometry was good to go. I should note now that this was a big incorrect assumption and I should have opened and closed the knife a few times to verify all was good to go. I won't make that mistake again.
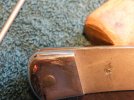
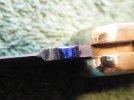
I shimmed behind and in front of the pivot pin with .002 shim stock before peining the front pin tight. I do this to try and prevent blade pinching at the bronze bushing. this is a bit more important on this Damascus blade as it is textured and my micrometer showed it could be a couple of thousands thicker than the factory blade but the etch could be causing a bit of this as it is difficult to get the same reading repeatedly.
What is not shown is the pressing out of the factory pin using a arbor press. I don't like to hammer them out with a drive pin as I think that stretches the holes even more than the already are from the factory pin being set originally.
I then file flat the inside of the bolster at the point the pivot pin was origianlly set as there can be burrs or a ring from the bronze pin bushing from the original blade.
The first photo shows the rounded press pin I use to round out the top of the front bolster holes to tighten them up a bit. After the factory pins are hammered in the pin holes are fairly loose on a new pin. Putting in this tightening shoulder helps prevent a ring from showing around the replacement pin. It also help in getting the blade and bushing near centered for a test fitting.
The 2nd and 3rd photos show the test fitting. In the picture of the front bolster you can see the front of the rocker arm and the blade are both a bit high but close enough to sand flat to the bolster and I can't change the location of the hole in the Damascus blade so if it does not get better when the pin is peined tight there is no other option anyway.
The rear looks really close to where it should be so I make a big assumption that the geometry was good to go. I should note now that this was a big incorrect assumption and I should have opened and closed the knife a few times to verify all was good to go. I won't make that mistake again.
I shimmed behind and in front of the pivot pin with .002 shim stock before peining the front pin tight. I do this to try and prevent blade pinching at the bronze bushing. this is a bit more important on this Damascus blade as it is textured and my micrometer showed it could be a couple of thousands thicker than the factory blade but the etch could be causing a bit of this as it is difficult to get the same reading repeatedly.
Attachments
Last edited:
")