Gary W. Graley
“Imagination is more important than knowledge"
Knifemaker / Craftsman / Service Provider
- Joined
- Mar 2, 1999
- Messages
- 26,345
Since this has become a Sticky, thank the Mod's
I'll edit this first post with a listing that was in the Good Bad And Ugly feed back area
There be a lot of talented gents when it comes to leather here on the forums;
Here is a list of those that are Recommended to choose from
These guys, not in any particular order, all have a passion for leather work
so this thread can be a handy reference for future folks when they search
for someone to help with their leather needs...And please note, I only posted
those that participate in BladeForums, there are others but are not active members
so I limited the list to those in our town, so to speak
Edited to add that Dwayne Puckett, aka Leatherman, started a new thread which is also a sticky
that contains posts from leathersmiths seen hmm the old link is broken with this new software, here's a fresh link to that page https://www.bladeforums.com/threads/sheath-makers-and-such-of-blade-forums.838494/
Sandy Morrissey known on the forums as Swivelknife aka helmar45789
His Email no web site that I know of
Paul Long known on the forums as sheathmaker
his Email no web site that I know of
Mike Bartol known on the forums as MtMike
his Email
Mike has a foto time where you can view some of his work Here
Dave Abramson known on the forums as Lifter4Him
His Email
His Web page
Chuck Burrows, known on the forums as Wild Rose
His Email
His Web page
Ken Collucci's Email,
His Web page
Dwayne, known on the forum as leatherman
His Email
His Web page
Mike Tea, known on the forums as Zozzie
(removed his old email addy)
Mike's a citizen of Canada as well as a noted bicyclist
Please note, Mike Tea's sheath making has stopped for a while, he replied
on a thread on August 2, 2008, but you can search the various threads
and see some of his fine work and that may inspire you to try your hands
at his style of sheaths, very beautiful workmanship.
Vess, known on the forums as Vess...he also hails from Canada...
His Email
His Web page
Ed Alpern, known on the forums as fasteddie, Ed is an up and comer, keep an eye on this fella!
His Email
no web page yet, but soon.
***********************************************************************************
And now back to the thread where it began;
Hey folks, traveling a lot lately, but now home for a bit so figured I'd add some
of what I do, there are many ways to skin a cow, this is just one of those stories")
First you start with this;
 madcow by GaryWGraley, on Flickr
well, at least part of it I buy my leather from Wickett & Craig they are out of PA
I buy what's called Shoulder leather, very tight grain, the good stuff
For Vertical sheaths I use 7/8 oz leather, depending on the size
if it's a very small knife, I'll use the 6/7 oz
For the top sections of the horizontal sheaths, I use 6/7 oz leather
for the layer beneath the knife and the belt loop section I use
a little thicker, 7/8 oz leather
And yes, it is a little thick to form, it is stubborn stuff and always wants
to retract back to it's original flat shape, so you need to KEEP working the
leather repeatedly as it goes from wet to it's dry state, that's key to making
the leather retain it's shape.
Tools, mostly from Tandy back in the day, now my tools are quite aged
much like the user, but I hear tell that Tandy is making a come back in
leather, but see this Link to Tandy for their current offerings.
if you have a tax id number, Weaver Leather also provides nice leather as well as a host of tools.
Tools;
Knife, of course a knife, this one is a Custom by a friend, Tony Bose, I made
a special request and he honored me with this gift of a small carving knife, I don't
know of another knife maker that is as kind a man as he is, thanks again Tony!

Sucker is Sharp! Link
Bone folder, used to do the majority of my shaping around the knife
I use the SQUARE end to do my shaping, there is a rounded piece that you pull off and
it shows the square end, also if there are any maker marks on the tool, sand that down
so it's VERY smooth, don't want that scratching your leather.
The pointed end of the bone folder I use to burnish the crease that I put at the opening
of the sheaths once it's about dry, I just run that along in the groove, VERY carefully as you
can slip out of the thin groove pretty easily, and that tip will deepen and burnish the groove for you nicely.
 IMG_0490 by GaryWGraley, on Flickr
Stitching Prongs, I have three that I use, a 4 prong for long stretches
3 prong for some curves and a 'custom' 2 prong for going into tight quarters
 IMG_0499 by GaryWGraley, on Flickr
Mallet for said stitching prongs and embossings
 IMG_0505 by GaryWGraley, on Flickr
Ruler and pencil, nuff said
 IMG_0500 by GaryWGraley, on Flickr
Groover, I use this to place a groove near the openings of the sheath, to me it
provides a more finished look to the sheath; Link
Edge beveler/cutter, this takes off a sharp corner of the leather, comes in
several sizes Link
Awl and custom awl made from a small screwdriver, used to hammer through thick
layers of leather to prepare for sewing, the regular awl I use to start the thread
holes and to enlarge the last few holes for the ending of the sewing;
Link
Awl-n-Awl sewing tool, some guys use the two needle system, I like this method for my sheaths;
 IMG_0495 by GaryWGraley, on Flickr
Thread I use Link
Gunk, well, sort of, Oil dye, Gum, and Atom balm wax EDITED to say that I NO LONGER use the Atom Balm wax but now use a leather preservative that is more like a paste, works better and protects a lot better!
 IMG_0503 by GaryWGraley, on Flickr
A shoe Brush to buff after the wax coating Link
I'll edit this first post with a listing that was in the Good Bad And Ugly feed back area
There be a lot of talented gents when it comes to leather here on the forums;
Here is a list of those that are Recommended to choose from
These guys, not in any particular order, all have a passion for leather work
so this thread can be a handy reference for future folks when they search
for someone to help with their leather needs...And please note, I only posted
those that participate in BladeForums, there are others but are not active members
so I limited the list to those in our town, so to speak
Edited to add that Dwayne Puckett, aka Leatherman, started a new thread which is also a sticky
that contains posts from leathersmiths seen hmm the old link is broken with this new software, here's a fresh link to that page https://www.bladeforums.com/threads/sheath-makers-and-such-of-blade-forums.838494/
Sandy Morrissey known on the forums as Swivelknife aka helmar45789
His Email no web site that I know of
Paul Long known on the forums as sheathmaker
his Email no web site that I know of
Mike Bartol known on the forums as MtMike
his Email
Mike has a foto time where you can view some of his work Here
Dave Abramson known on the forums as Lifter4Him
His Email
His Web page
Chuck Burrows, known on the forums as Wild Rose
His Email
His Web page
Ken Collucci's Email,
His Web page
Dwayne, known on the forum as leatherman
His Email
His Web page
Mike Tea, known on the forums as Zozzie
(removed his old email addy)
Mike's a citizen of Canada as well as a noted bicyclist
Please note, Mike Tea's sheath making has stopped for a while, he replied
on a thread on August 2, 2008, but you can search the various threads
and see some of his fine work and that may inspire you to try your hands
at his style of sheaths, very beautiful workmanship.
Vess, known on the forums as Vess...he also hails from Canada...
His Email
His Web page
Ed Alpern, known on the forums as fasteddie, Ed is an up and comer, keep an eye on this fella!
His Email
no web page yet, but soon.
***********************************************************************************
And now back to the thread where it began;
Hey folks, traveling a lot lately, but now home for a bit so figured I'd add some
of what I do, there are many ways to skin a cow, this is just one of those stories
First you start with this;
madcow by GaryWGraley, on Flickrwell, at least part of it I buy my leather from Wickett & Craig they are out of PA
I buy what's called Shoulder leather, very tight grain, the good stuff
For Vertical sheaths I use 7/8 oz leather, depending on the size
if it's a very small knife, I'll use the 6/7 oz
For the top sections of the horizontal sheaths, I use 6/7 oz leather
for the layer beneath the knife and the belt loop section I use
a little thicker, 7/8 oz leather
And yes, it is a little thick to form, it is stubborn stuff and always wants
to retract back to it's original flat shape, so you need to KEEP working the
leather repeatedly as it goes from wet to it's dry state, that's key to making
the leather retain it's shape.
Tools, mostly from Tandy back in the day, now my tools are quite aged
much like the user, but I hear tell that Tandy is making a come back in
leather, but see this Link to Tandy for their current offerings.
if you have a tax id number, Weaver Leather also provides nice leather as well as a host of tools.
Tools;
Knife, of course a knife, this one is a Custom by a friend, Tony Bose, I made
a special request and he honored me with this gift of a small carving knife, I don't
know of another knife maker that is as kind a man as he is, thanks again Tony!
Sucker is Sharp! Link
Bone folder, used to do the majority of my shaping around the knife
I use the SQUARE end to do my shaping, there is a rounded piece that you pull off and
it shows the square end, also if there are any maker marks on the tool, sand that down
so it's VERY smooth, don't want that scratching your leather.
The pointed end of the bone folder I use to burnish the crease that I put at the opening
of the sheaths once it's about dry, I just run that along in the groove, VERY carefully as you
can slip out of the thin groove pretty easily, and that tip will deepen and burnish the groove for you nicely.
IMG_0490 by GaryWGraley, on FlickrStitching Prongs, I have three that I use, a 4 prong for long stretches
3 prong for some curves and a 'custom' 2 prong for going into tight quarters
IMG_0499 by GaryWGraley, on FlickrMallet for said stitching prongs and embossings
IMG_0505 by GaryWGraley, on FlickrRuler and pencil, nuff said
IMG_0500 by GaryWGraley, on FlickrGroover, I use this to place a groove near the openings of the sheath, to me it
provides a more finished look to the sheath; Link
Edge beveler/cutter, this takes off a sharp corner of the leather, comes in
several sizes Link
Awl and custom awl made from a small screwdriver, used to hammer through thick
layers of leather to prepare for sewing, the regular awl I use to start the thread
holes and to enlarge the last few holes for the ending of the sewing;
Link
Awl-n-Awl sewing tool, some guys use the two needle system, I like this method for my sheaths;
IMG_0495 by GaryWGraley, on FlickrThread I use Link
Gunk, well, sort of, Oil dye, Gum, and Atom balm wax EDITED to say that I NO LONGER use the Atom Balm wax but now use a leather preservative that is more like a paste, works better and protects a lot better!
IMG_0503 by GaryWGraley, on FlickrA shoe Brush to buff after the wax coating Link
Last edited:
 initial
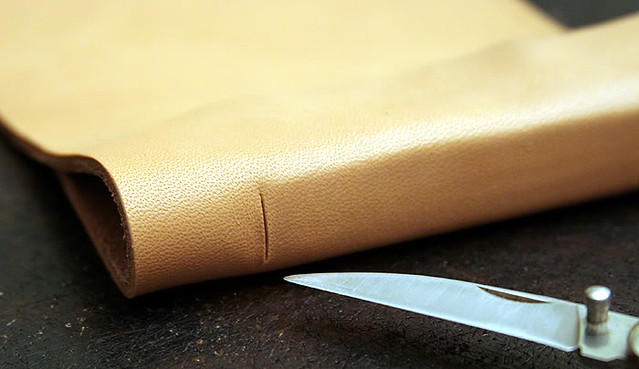 cutdown
 cutslits
 cutout
 formtightly
 DC
DC IMG_1972
 skull9
 skull10
 skull11
 IMG_1973
 IMG_1974
 IMG_1977
 IMG_1978
 IMG_1979
 IMG_1980
 IMG_1981
 IMG_1982
 IMG_1983
 IMG_1985
 IMG_1990
 IMG_1988
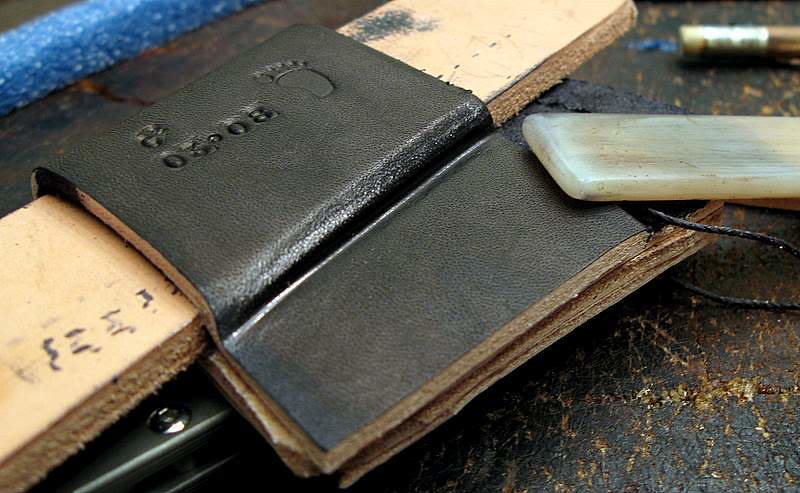 IMG_1991
 IMG_1989
 IMG_1992
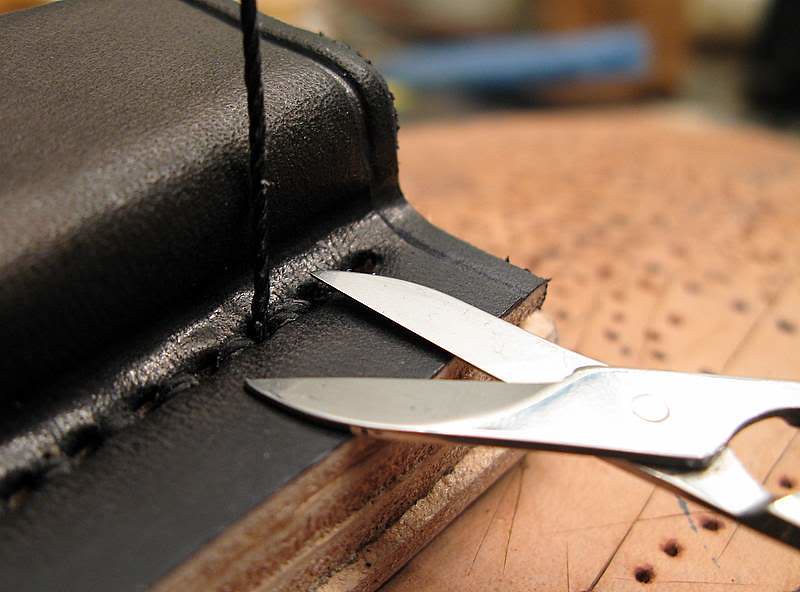 IMG_1993
 IMG_1994
 IMG_1995
 IMG_1997
 IMG_2001
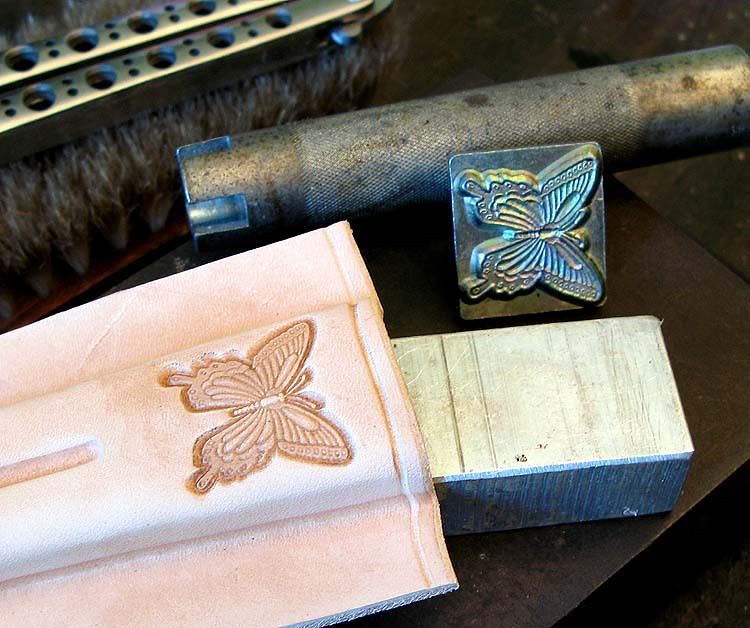 IMG_0489
 skull1
 skull2
 skull3
 skull4
 skull5
 jollybenn