TK Steingass
Knifemaker - Buckeye
- Joined
- Oct 16, 2010
- Messages
- 5,608
Greetings All:
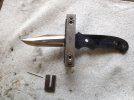
Joe Paranee asked me to do a WIP on the Loveless Style New York Special I'm making for him - it's been a few years since I've done one so maybe it's time. The photos in this WIP are how this old Warhorse makes a knife - I'm not saying it's the best way - it's just my way. Feel free to comment along the way and don't be afraid to ask questions.
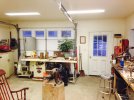
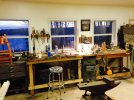
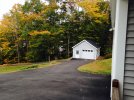
This is my second shop - I built it 3 1/2 years ago when Susan and I moved to Maine....18 x 24 building with R69 insulation in the ceiling - R23 in the walls. It's heated and cooled by a Fujitsu heat pump so I don't have to mess with a wood stove. Recessed lighting and light painted walls and ceiling to maximize lighting. It's situated high up on a hill, next to the house - my workbench has three windows which overlook pristine 700 acre Silver Lake, the drinking water supply for Bucksport, Maine
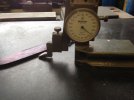
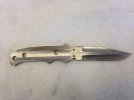
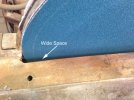
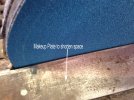
Now on to the knife. I will use .187" thick CPM-154 stock, 1 1/4" wide for the knife. After being cut to length the stock is ground flat with my TW-90 using a 60 grit belt. On my machine I can achieve parallel to .001" - good enough for this application.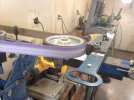
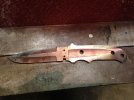
The blade will eventually go into the heat treat oven rough ground at 60 grit. Next is the layout of the pattern and grinding of the profile. The TW-90 is then set up to grind the tighter radius curves in the handle. I used 1/2" small diameter wheel on my TW-90 (great, versatile machine BTW).
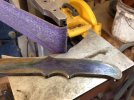
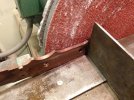
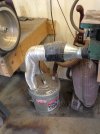
Now it's time for the biggest dust generator in my shop - the disc grinder. I use a 2HP variable speed 12" Burr King grinder to grind the profiles at a true 90 degrees - when I ground the initial profile.Here's a photo of the dust collection system I use for the disc grinder - I use an old Kirby Legend to draw on my partially water filled bucket - the water is necessary because I grind, wood, steel, bone, my fingernails and knuckles - we don't want any sparks igniting the metal/wood dust in the bucket, do we?
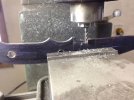
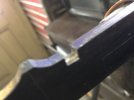
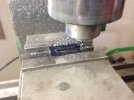
Next I'll drill out the lanyard and corby rivet holes using a letter F drill bit. The F size is .257" diameter - inserting a .250" lanyard tube into a .257" hole puts a lot less stress on the material around the lanyard hole and prevents splitting of the scale material between the back of the lanyard tube and butt of the handle.
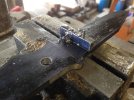
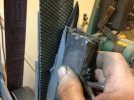
For the guard, I'll be using 416 stainless with 416 stainless rod - I will surface grind the guard to a thickness of .185" - the side that mates with the scales will be ground to 120 grit - the side that will be soldered is progressively ground using gator belts to 800 grit. I like the gator belts because they last four times longer and there's no spline jump off the platen. The orientation of the guard face to the belt movement will be vertical/120 grit, then offset 30 degrees/220 grit, vertical/400 grit, offset 30 degrees/600 grit, then finally vertical/800 grit cork belt. I find that by varying the orientation of the guard face with each grit, I see when all the previous scratches are ground out - I will then buff to mirror using green matchless at 3600 rpm. This methodology is also used for finishing the flats and prevents a washboard effect when harsh light is reflected off the surface.
More tomorrow gentlemen - it's getting late and I'm fighting the typo monster.
Joe Paranee asked me to do a WIP on the Loveless Style New York Special I'm making for him - it's been a few years since I've done one so maybe it's time. The photos in this WIP are how this old Warhorse makes a knife - I'm not saying it's the best way - it's just my way. Feel free to comment along the way and don't be afraid to ask questions.
This is my second shop - I built it 3 1/2 years ago when Susan and I moved to Maine....18 x 24 building with R69 insulation in the ceiling - R23 in the walls. It's heated and cooled by a Fujitsu heat pump so I don't have to mess with a wood stove. Recessed lighting and light painted walls and ceiling to maximize lighting. It's situated high up on a hill, next to the house - my workbench has three windows which overlook pristine 700 acre Silver Lake, the drinking water supply for Bucksport, Maine


Now on to the knife. I will use .187" thick CPM-154 stock, 1 1/4" wide for the knife. After being cut to length the stock is ground flat with my TW-90 using a 60 grit belt. On my machine I can achieve parallel to .001" - good enough for this application.

The blade will eventually go into the heat treat oven rough ground at 60 grit. Next is the layout of the pattern and grinding of the profile. The TW-90 is then set up to grind the tighter radius curves in the handle. I used 1/2" small diameter wheel on my TW-90 (great, versatile machine BTW).

Now it's time for the biggest dust generator in my shop - the disc grinder. I use a 2HP variable speed 12" Burr King grinder to grind the profiles at a true 90 degrees - when I ground the initial profile.Here's a photo of the dust collection system I use for the disc grinder - I use an old Kirby Legend to draw on my partially water filled bucket - the water is necessary because I grind, wood, steel, bone, my fingernails and knuckles - we don't want any sparks igniting the metal/wood dust in the bucket, do we?

Next I'll drill out the lanyard and corby rivet holes using a letter F drill bit. The F size is .257" diameter - inserting a .250" lanyard tube into a .257" hole puts a lot less stress on the material around the lanyard hole and prevents splitting of the scale material between the back of the lanyard tube and butt of the handle.
For the guard, I'll be using 416 stainless with 416 stainless rod - I will surface grind the guard to a thickness of .185" - the side that mates with the scales will be ground to 120 grit - the side that will be soldered is progressively ground using gator belts to 800 grit. I like the gator belts because they last four times longer and there's no spline jump off the platen. The orientation of the guard face to the belt movement will be vertical/120 grit, then offset 30 degrees/220 grit, vertical/400 grit, offset 30 degrees/600 grit, then finally vertical/800 grit cork belt. I find that by varying the orientation of the guard face with each grit, I see when all the previous scratches are ground out - I will then buff to mirror using green matchless at 3600 rpm. This methodology is also used for finishing the flats and prevents a washboard effect when harsh light is reflected off the surface.
More tomorrow gentlemen - it's getting late and I'm fighting the typo monster.
Attachments
Last edited:


