Recommendation? Adding the cutting edge to a knife

Joined
Aug 7, 2024
Messages
64
I am looking for recommendations for grinding in the cutting edge on my knives. What machines or jigs do you recommend? I am using a OBM 2x72 to get the initial bevel ground in. Thanks
 
Your 2x72 will do the job nicely, if you've got variable speed.
 
Your 2x72 will do the job nicely, if you've got variable speed.
I do have the variable speed. However I do not feel comfortable trying to free hand the cutting edge. I am more looking for a good machine with set bevels or a good jig set up. Thanks for the suggestion.
 
Get a TSProf if you aren't going to use your grinder (but I recommend the grinder also)
 
Get a TSProf if you aren't going to use your grinder (but I recommend the grinder also)
Thank you. I will look into one of those. I’d use my grinder if there was a good jig for it. I have a bad shoulder that gives out on me randomly. I need something where if my shoulder goes out, I don’t f up the blade.
 
I really struggled with using my 2x72 to establish the edge bevel on a newly constructed knife. I would always end up with 'smiley face' at the choil. Curved area where the belt cut away more than elsewhere.

I also struggled with wicked edge with flat grinds. I have since switched to hollow grinds and maybe the wicked edge would do better but had already sold it. Currently, I am using a Hapstone R2. I establish edge bevel using a coarse 80g stone, then move up in grit from there. This system has worked out much better for me and has been consistent.

It does take some time especially on harder steels, but I don't want to risk the inconsistency I had with 2x72.

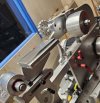
Thank you. I will get the hapstone out. What happened to yours is a worry that I’ll do to the ones I am working on.
 
I establish my edge on my flat platen. Run a brand new 120 grit at a slow speed. Then I switch to my Wicked Edge sharpening system. It makes NO sense to go straight to the sharpener and prematurely wear out the stones .
 
I have sharpened probably several thousand knives on the grinder. It takes from a few seconds to a minute.
Having a VS and reversable grinder is preferable.
I eyeball the angle because I have done a lot of sharpening. I get a very sharp and thin edge.

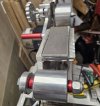
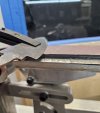
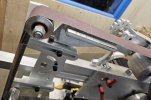
I recently built a sharpening attachment for the grinder that makes it even more accurate. It has a pyroceramic glass platen and sits just before the upper idler wheel.
I'm using Greg Reeder's sharpening attachment, but you can easily build the same thing. You can use any blade clamp you want, like the ones for Tormek or Grizzley or other brands used for stones.
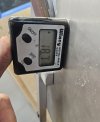
I use a Wixie Digital Angle gauge to set the edge angle. Set it on the platen and zero it, then set it on the blade and adjust the jig height to the desired angle.


Grinder4.jpg

Grinder .jpgGrinder1.jpgGrinder6.jpgGrinder7.jpgGrinder8.jpg
 
I have sharpened probably several thousand knives on the grinder. It takes from a few seconds to a minute.
Having a VS and reversable grinder is preferable.
I eyeball the angle because I have done a lot of sharpening. I get a very sharp and thin edge.

I recently built a sharpening attachment for the grinder that makes it even more accurate. It has a pyroceramic glass platen and sits just before the upper idler wheel.
I'm using Greg Reeder's sharpening attachment, but you can easily build the same thing. You can use any blade clamp you want, like the ones for Tormek or Grizzley or other brands used for stones.
I use a Wixie Digital Angle gauge to set the edge angle. Set it on the platen and zero it, then set it on the blade and adjust the jig height to the desired angle.


View attachment 2650058

View attachment 2650030View attachment 2650031View attachment 2650033View attachment 2650034View attachment 2650036

That set up looks great. I’ll have to see if I can find one to buy. I could never eyeball an angle. It would be to wonky. That’s what i have been looking for. Thanks.
 
How thick are your edged before you sharpen them?
Mine are down around 0.1mm or less after grinding and polishing, so i just go straight to a 1,000 mesh stone to put the secondary bevel on

Mine are about 1/32 before I sharpen. Haven’t actually sharpened any. Trying to find the tool that I want to use to sharpen.
 
I started off years ago by using a Lansky, which I still have, and sharpened a lot of knives over several years with it. Haven't used it in a long time. It was a pretty affordable tool to teach myself how to hold an angle and what different angles in different scenarios felt like.
It takes hundreds if not thousands of hours to get a really good feel for putting an edge on a blade because it's a skill. Skills by their nature simply take time and practice. A simple sharpening jig like a Lansky can help expedite building that skillset, keep you from messing up your knives really bad AND learn you the feel you need to do it freehand.
Lots of cool, very expensive looking, sharpening jigs on the market and a fair number of videos on youtube showing how to make one.
I use my belt grinder and add my secondary bevels by hand, because for me and what I want to do with my work these days, freehanding it is an important component of my process.
 
1/32" is .030" thick. That is WAY too thick for the edge before sharpening.
You want the starting edge to be between .005" and .010" before sharpening.

The starting edge thickness determines the "Thickness Behind the Edge" called TBE. This needs to be thin for the knife to cut efficiently. Many of us take the bevels down to what we call "almost sharp" before making the edge. If you start with almost no edge thickness the edge will be sharp and only take a few seconds to a minute to establish.

Here is how I establish the edge and sharpen.
1) Grind the HTed blade bevels to an edge thickness of .005"- .010". It will almost feel sharp. Some places may be sharp enough to cut your fingers, so be careful.
2) Carefully flatten the edge on the belt grinder at slow speed, or on a stone, to establish a smooth edge with no dips or bulges.
3) Touch up the bevels one last time at 400 grit to make sure the edge is almost sharp and even thickness all the way down the edge. At this point the bevels should be finished except for hand sanding if you are doing more than a 400-grit finish. When you are done with all sanding the bevels, tape up the blade and edge to protect it (and to protect you).
4) Do nothing more to the edge until the knife is finished.
5) When the knife is done except for sharpening I use one of several sharpening methods
A) Sharpen on a stone judging the angle by eye. This is easier than you would think.
Note - Fred Rowe makes a great tool for getting exact angles on bevels and edges called a Bubble Jig. See The Exchange. It will also teach you what different angles look like.
B) Sharpen freehand on the grinder using the belt area between the top idler wheel and the tracking wheel. I have the grinder running very slow and in reverse while doing this. The belt is moving in the direction of spine-to-edge, so it won't catch the super sharp edge. This is what I did 95% of the time before making my new sharpening setup. For a quick sharpening of my kitchen and shop knives, this is what I still do.
C) Sharpen using my edge jig and my new upper platen. This allows exact angles and very sharp sharpening. It takes a little longer to set up but makes better edges.
6) ALL sharpened edges need to be stropped to remove the tiny (sometimes microscopic) wire edge. I do this on a charged leather strop or on a charged linen buff. I don't recommend buffing for those not trained, as it can be very dangerous to both the knife and user when buffing a very sharp edge.
The difference between a sharp knife and a scary sharp knife is in the stropping. Stropping also polishes the edge to make less cutting friction.
7) After stropping, I cut down a piece of cardstock (80-120 pound paper) several times to assure the wire is gone.


TIP:
Sighting down the edge under a good light will show any minute flat spots that are not fully sharp. They will show as "glints". The sharp edge areas will look invisible, as no light reflects off it.
 
Last edited:
Yep, like Stacy mentioned that (1/32") is way too thick. That's the thickness of an edge prior to quenching if grinding bevels first. 0.005" is how thin 95% of my knives are at the edge prior to sharpening.

Much like the Lansky system Lorien mentioned, I really learned how to keep an angle freehand by using the "Razor Edge Systems" clamp on guides. They really help in building that muscle memory holding an angle, and you can use whatever stone you want, even on a belt grinder. (Hint, if using the Razor Edge clamps, put a layer of duct tape on the part the makes contact with the stone or belt. The point is to remove steel from the knife edge, not the back of the clamp!)
 
1/32" is .030" thick. That is WAY too thick for the edge before sharpening.
You want the starting edge to be between .005" and .010" before sharpening.

The starting edge thickness determines the "Thickness Behind the Edge" called TBE. This needs to be thin for the knife to cut efficiently. Many of us take the bevels down to what we call "almost sharp" before making the edge. If you start with almost no edge thickness the edge will be sharp and only take a few seconds to a minute to establish.

Here is how I establish the edge and sharpen.
1) Grind the HTed blade bevels to an edge thickness of .005"- .010". It will almost feel sharp. Some places may be sharp enough to cut your fingers, so be careful.
2) Carefully flatten the edge on the belt grinder at slow speed, or on a stone, to establish a smooth edge with no dips or bulges.
3) Touch up the bevels one last time at 400 grit to make sure the edge is almost sharp and even thickness all the way down the edge. At this point the bevels should be finished except for hand sanding if you are doing more than a 400-grit finish. When you are done with all sanding the bevels, tape up the blade and edge to protect it (and to protect you).
4) Do nothing more to the edge until the knife is finished.
5) When the knife is done except for sharpening I use one of several sharpening methods
A) Sharpen on a stone judging the angle by eye. This is easier than you would think.
Note - Fred Rowe makes a great tool for getting exact angles on bevels and edges called a Bubble Jig. See The Exchange. It will also teach you what different angles look like.
B) Sharpen freehand on the grinder using the belt area between the top idler wheel and the tracking wheel. I have the grinder running very slow and in reverse while doing this. The belt is moving in the direction of spine-to-edge, so it won't catch the super sharp edge. This is what I did 95% of the time before making my new sharpening setup. For a quick sharpening of my kitchen and shop knives, this is what I still do.
C) Sharpen using my edge jig and my new upper platen. This allows exact angles and very sharp sharpening. It takes a little longer to set up but makes better edges.
6) ALL sharpened edges need to be stropped to remove the tiny (sometimes microscopic) wire edge. I do this on a charged leather strop or on a charged linen buff. I don't recommend buffing for those not trained, as it can be very dangerous to both the knife and user when buffing a very sharp edge.
The difference between a sharp knife and a scary sharp knife is in the stropping. Stropping also polishes the edge to make less cutting friction.
7) After stropping, I cut down a piece of cardstock (80-120 pound paper) several times to assure the wire is gone.


TIP:
Sighting down the edge under a good light will show any minute flat spots that are not fully sharp. They will show as "glints". The sharp edge areas will look invisible, as no light reflects off it.

Thank you. Looks like I have way more learning to do.
 
Not related to sharpening the knife:
Is this blade from the batch you couldn't get to harden?
Did you get that problem solved?
 
Back
Top