Backpacker camp oven

Codger_64

Moderator
Joined
Oct 8, 2004
Messages
62,324
I've been looking for a beter way to cook baked foods in camp. Yeah, I can fry them or use a reflector made of foil, but I really, really want to be able to bake. Since I canoe, I can use a cast iron dutch oven, but that is a lot of trouble with prpared fires, cleanup and all. After a bit of searching, I found a real oven-like oven that collapses. I used to have one of the old Coleman camp stove ovens, but it got stolen along with my canoe about four years ago, and I really wanted something smaller and lighter. Something that could be used with my Max Mini gas stove, my Emberlit twig stove or even coals from a fire. I found the Bemco oven on the Backpacker Magazine site forum and just ordered one from the 'bay.

I was hesitant to pull the trigger because the oven requires a stove with a remote cannister. It just gets too hot in the lower chamber for the safe location of a gas cartridge there. Brunton used to make a kit to relocate the cannister, but it is my understanding they were discontinued several years ago. And buying a new stove with remote cannister does not fit my plans or budget.

Another hesitation was that the Bemco was not compatable with my Emberlit for several reasons. The oven did not have a sealed diffuser plate (oven floor) and using my Emberlit meant flame and smoke going into the cooking chamber. Smoked biscuits anyone? Another problem is the low clearance between the diffuser plate and the ground, not leaving room for the Emberlit's height.


Here are the manufacturer's stock photos:

Oven packed for carry. Relatively small package, 1 1/2" thick, 7" wide and 12" tall. Weight stated as 24 ounces.
20ozo6.jpg


Assembled oven. 7"x7"x 12" tall. Two wire racks so that both included 6" pans can bake together. You can see the recommended remote cannister stove and hinged drop down oven door.
246ncq1.jpg


The unit includes a removable temp guage... a detail that helps immensely with baking and a vast improvement over a dutch oven. There is also an adjustable top vent to help control the temp, besides controling the burner volume.
33niver.jpg


The carry weight, just like most given tent weights, is slightly more than the given for the oven itself as it includes a spondonicle (pot gripper), the two 6" pans (1-shallow and 1-deep), and a baking guide/instruction booklet with recipes. Both weights include the straps and thermometer.

This is still not that light, but I think I can overcome the shortfalls for using my two stoves with it. I will be on the lookout for the Brunton remote tank/stove stand kit so that I can use my existing gas stove with it.

A Youtube video shows the oven being fueled with campfire coals piled underneath. This tells me that if I wait until my Emberlit has burned down to a healthy bed of coals, or if I fill it with campfire coals, it will work just fine... height problem not-withstanding. I have an idea of overcoming that by using four slotted pipe legs to raise the oven to the needed height. I don't think the stove would be stable enough if I simply set it on top of the Emberlit. It would tilt or slide and fall off, particularly while opening the door and moving pans loaded with food.

I'll report back when the oven arrives and I've experimented with it some. It seems to be too heavy to be attractive to backpackers, but for canoe camping, not bad at all. The ability to really bake bread, pizza, biscuits and deserts has some value, IMHO.
 
How about a "reflector oven"?

I've used them before and they work well sometimes. They do require a large camp fire though. I cannot have large smokey fires any more because of lung problems. That is one reason I have the two stoves that I have now. Once the Emberlit is going, it is nearly smoke free and takes an amazingly small amount of fuel. And the Max Mini gas stove is very temperature adjustable. I actually have been relooking at reflector ovens though. There are several pre-made commercial units on the market now. An enclosed temp adjustable oven is a big step beyond a reflector oven. But thanks for the suggestion. :)
 
Where I got the most experience with reflector ovens, there was essentially no hardwood. But while pine and fir would not make coals, it did make flames, and that worked fine in an oven that cooks primarily by radiant heat.
 
That does make a difference. Where I camp and canoe we have some softwoods, but few evergreens. Hardwoods are much more common. I have huge oaks and hickory trees even in my yard here. Pine and fir don't even come close to the BTU content of hardwoods. Once the flames are done, coals can heat for a long time.

This video by the owner of Bemco shows his cooking with coals. You probably will not want to watch the entire 10+ minutes, but it will give you the idea.

[video=youtube;Afs3TVfWnyY]http://www.youtube.com/watch?v=Afs3TVfWnyY[/video]
 
Have you looked at the Outback Oven?

I saw them and they are interesting. seems a bit expensive for a diffuser, pan, lid with temp range indicator (warm, bake, burn) and a cozy. Do you have one or have tried one yet? I can't see the Outback overcoming the stove gas tank issue and the Emberlit flame issue though it would excluse smoke. Is the cozy asbestos fiber?

ETA: The cozy is aluminized fiberglass.
 
Last edited:
My boys and I have been playing around with a campfire method called the Dakota fire hole which would work well under this oven. The idea of a DFH is you dig one hole 8 inches wide by a foot deep in a vertical and a second hole a foot away to one side but slant it to the fire hole so they intersect at the bottom. The second hole is your air supply to the fire hole. When you get some twigs and sticks going it drafts real well and makes very little smoke, burning efficiently with small wood being all you need. We propped some hotdogs up over ours today for lunch. You could set a cooking rack over it and use pots and pans or use your cook oven after it burns down to coals. Do a search for Dakota fire hole and you will see what I am talking about. The only caution is you have to be sure your soil is not peaty or full of organic matter because it could set the subsoil afire. To put it out just flood the hole with water and push the dirt back in where it came from.
 
What a stove! The first thing that popped into my mind was a Camp Chef, a lot of folks seem to like them, but they are way too big and heavy for canoeing probably. I like your a LOT.
 
Well, we'll see how easy it is to transport, assemble and use. I looked at it a long while before buying it. I like the fact that one does not have to guess at the oven temperature. And it can be easily opened to view the pans to see how cooking is progressing. And it doesn't take (hopefully) a special dedicated stove as a heat source. Used with either of my stoves (if they work with it) is to my liking as they are both low environmental impact. It doesn't require any chopping, digging or blackening of stones like a firepit. This should also translate into less effort.

If it doesn't meet my expectations and needs, I'll pass it along and build my own incorporating the features I do like. It is sorta like a smoker and I suppose would function like one with a fire bowl below it. It should ship from California tomorrow and be here before next weekend. Then we'll see if it will make two supreme personal pan pizzas at once. I've already bought the ingredients. And have a good stock of dry hickory wood.
 
In Scouts in England
We use a hard tack/biscuit/cracker tin, with the round pop top
We dug a trench and put the tin at the end of the trench so you could feed it with coals underneath it
The top faced the trench
We covered the tin with mud that dried after a while

We could easily bake bread
 
Last edited:
Yep, back last century when I was a Scout, all sorts of activites were encouraged and taught which today don't meet with acceptable practices. Our population here has nearly doubled since then and a larger percentage of that population lives in cities where outdoor recreation is minimally available. For instance we were taught to trench around our tents, cut green poles and stakes for our tents and build very large camp fires. Modern practices frown on such activities because, by sheer volume of users, public lands were showing the effects of nabobs camping "old-style". As previously mentioned, my search for new gear for my camping is directed at low impact. Meaning no trenching, cutting of live wood, building structures or burning copious amounts of deadfall. Besides, the collateral benefit of allowing me to move from site to site without having to expend a lot of time and energy deconstruction and reconstructing ammenities. And it is pleasant to camp in a spot that is fairly pristine and leave it that way for others that follow. Of course we each have our own take on LNT practices (leave no trace) and "ethics". I don't pretend that everyone should emulate my camping style. What fun would that be? :)
 
That's really neat.

I like to bake pepperoni rolls and pizzas so that would be cool.

Normally what I do is carry a bunch of heavy aluminum foil in my pack.

When I camp at a spot with a fire ring I put a large flat stone on one side of the fire ring.

Then I build the fire on the opposite side, and gradually move coals around the flat rock.

Then I put whatever I'm baking in the foil, I usually coat the inside with olive oil or butter and then lay it on the flat rock.

Takes some getting used to but it works. But I like that you can check the temp with your setup.
 
HD, I do hope this oven meets my expectations. But, as I said, if it doesn't I will design my own "Codger-Q Oven". I already see a few changes I could make to simplify it and possibly make it more efficient. And hopefully avoid the seperate gas tank restriction.

The other oven pointed out uses a reflector collar between the stove and tank to lessen the effects of heat on the tank. That one also does not semi-enclose the tank in the stove base which, while allowing the tank to remain cooler, allows for less efficient use of the stove heat. It makes up for the heat loss by use of the cozy to insulate the oven. Both use a diffuser plate. But I see a way to improve that too.

Of course if the oven works as envisioned with the Emberlit, I doubt I will modify much if anything.
 
We cut the turf, watered it and put it back still green over our filled trench
Our main fire was on an alter off the ground
The ashes were buried
Bash burn and bury was the trash
And we cut no live wood, only fallen branches.

We left no trace
 
I have used the ultralight version of the Outback Oven many times. It works well once you get the hang of how to judge temperature based on the rudimentary thermometer. Many batches of cinnamon rolls, among other things. You definitely need a remote burner style stove. I have used it with an MSR Dragonfly.
 
My Bemco oven still hasn't arrived. Perhaps it will tomorrow.

I have noted people using the Outback Oven with a canister mounted stove by placing a heat shield between the canister and stove. I just picked up a pack of electric stove burner aluminum foil liners and the small size fits my Coleman Max Micro. On this stove, I have to put the shield/liner between the valve and burner head because of the plastic valve body. We'll see how it works when the oven arrives.

But mostly I want to see if it can be used with the Emberlit. I've been talking to Brian Marsh, Bemco Oven inventor, about adapting his oven. If neither works, I'll make my own oven. Since I began my search, I have been examining the various features and construction methods of camp ovens back to the early 1900's. And I've been talking with other MYOG oven inventors who have been very helpful and encouraging.

More accurate oven/grill thermometers are available on the web. Do you think that would help your Outback Oven?
 
The oven arrived this morning. The actual assembled oven weight on my digital scale is 1# 8 ounces. This is without the two provided pans, the spondonicle and the two storage straps. Adding these items brings the packed carry weight to an even 2#.

Assembly of the unit's seven major components is rather straight-forward and intuitive. However, it would be a good thing to pay attention to the included instruction booklet when attempting to restow the unit. With the caveat that you need to make seperate provisions to stow the spondonicle, thermometer and pans as they do not fit within the collapsed and strapped oven unit. Even though a position is illustrated for the thermometer, it is best carried seperately. I did not buy the optional storage bag for the unit which, stowed, is 12" x 7-1/4" x 1-3/4" thick. The securing straps are 1/2" x 20" "uni-Velcro", or whatever it is called. Both hook and loop run continuously on opposite sides rather than being separate strips of hook and of loop sewn together end to end.

My first overall impression of unit quality is... meh. All components fit together as they should and make a fairly rigid structure with few air gaps in the cabinet. Overlooking slight surface scratches which are normal for light aluminum alloy, there are machining marks on both sides of every flanged edge. As if the wheels on the flanging tool was aggressively toothed. This does not affect function, but is a bit distracting from the overall appearance of a new unit. Panel corners are not smoothly and consistantly radiused. Some edges have been left sharp with slight burrs. All of the unit's hinges (there are 9 of them) are attached with aluninum rivets. The shelf support pins (12 of them) are peened as a means of attachement.

The aluminum U.S. made spondonicle weighs one ounce. It is quite functional in use, but obviously selected for low acquesition cost and or small size to fit inside the stowed pans (4-7/8" long). IMHO, if you have an older one from a cook kit like the Optimus 99 or whatever cook set you already have, use it instead.

The deep pan weighs 2 ounces and has a factory flanged rim. The shallow pan weighs 3 ounces and is much thicker material with no rim, likely from a different source rather than just a cut-down deep pan. You might want to forego these and source your own, either foil or titanium or lightweight aluminum. Finding the right size might be a trick (without buying an entire unneeded cook set), but might be worth the effort.

The two wire shelves weigh in at one ounce each. They are factory welded 1" x 1" wire grids 7" x 6-1/8". They are quite light guage, but seem sturdy enough for the job given that they will not sit directly on a flame. I am not sure of their composition, but they aren't aluminum and don't appear to be chromed.

The diffuser plate is heavy milled steel. It weighs 4 ounces and I do not see how the weight could be reduced and still achieve the desired even spreading of heat in the oven, preventing a major hot spot in it's center.

The assembled oven will sit on top of my Emberlit if I place the heavy steel diffuser plate beneath it's support pins and let the weight of the stove sit on that. As I had feared, the oven is too tippy to sit on top of the Coleman Max Micro's three pot supports. I'll be making some legs before I try the oven out unless I fire it up using charcoal. The legs will need to raise the oven about 4-1/2" off the ground to work with both stoves.

Concluding my first impressions, I understand why Brian used the sourced components he did. He needed to keep the weight down and at the same time keep the retail price down without having buyers scurrying this way and that to find components to complete the oven for use. Likewise, having done all of the design work himself, he did most of the fabrication and marketing himself to keep overhead low. I should not expect the manufacturing materials, ancilliary components and finish that I would expect from a multinational corporation. I am still on the fence as to how well the oven will work for me. I'll be reporting back after I have given it some test runs.
 
Last edited:
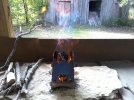
Well, the legs worked. I lifted the oven 4" and it worked with both stoves. First I fueled and fired the Emberlit and let it burn down. Or so I thought. Then I put the oven over it and watched the needle climb. It quickly pegged out at 700 degrees and before I could open the door and remove the top, every panel buckled (they returned to normal when cooled down).

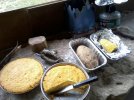
So I let the Emberlit burn down some more, put the top bacl on and closed the door with the top damper open. It climbed slowly back up to 400, then began to decline toward 300. I added pencil sized sticks one at a time and adjusted the damper until I go an even 350 degrees. Then I put in the deep pan with cornbread mix in it. I still had to monito the temp guage occasionally and add a new twig from time to time to maintain 350. Eventually the cornbread came out perfect. After the oven cooled down, I pulled the Enberlit and replaced it with the COleman Max Micro. It took a few minutes to reach 350 and a few more to stabilize it below 400. Once there, I put in the shallow pan of cornbread, a wrapped corn on the cob and a baking potato. All came out nicely done, not burned. There are still some things I would change, but all in all, the oven did a fair job.

Photo215.jpg
Photo223.jpg
 
Back
Top