Beckerhead Knife Making and Modification Thread

Anyone have a simple home DIY method for this? And what I will need to accomplish darkening the logo after deepening it? And what is the ratio of the solution I should mix to use to deepen the etching if anyone has the specifics before I do a trial and error approach?

AC will darken, DC will etch. Tho you do want to make sure you get your DC direction correct. I believe the positive terminal goes to the tang, and the negative on the contact touching the etchant/mark. I do not know what AC voltage is appropriate, and you almost certainly don't want to put 20A thru your blade.

Or you could just etch it deeper, fill it with some paint or nail polish, and then sand off the coating.
Or strip it all, then put some color in the mark and wipe the surface clean. Don't have to get too technical. Also don't have to darken it at all - light hitting it differently because of the relief will leave it quite readable.
 
Hey, I am hoping to get some advice from some of you DIY strippers and mod guys.

I was going to strip a couple blades while I have some free time soon but I thought I might try to deepen the logo a bit first. I recall reading a simple method using a battery charger with q-tips and a water/vinegar/salt solution. But I don't remember the process that was used to darken the etched letters after deepening the logo.

Anyone have a simple home DIY method for this? And what I will need to accomplish darkening the logo after deepening it? And what is the ratio of the solution I should mix to use to deepen the etching if anyone has the specifics before I do a trial and error approach?

Any help is greatly appreciated! I think I'll try it out on an old BK16 first and hoping to eventually finish one of my 18s and another of my 15s when I have the process down.

Thank JJ
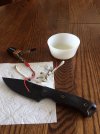
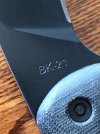
Recently did the 18 below. Using a 9 volt put the positive to Ground the Negative on a Q-tip salt Heavy water solution.Most important clean logo first with alcohol. Works quickly :thumbsup:
C5612699-17D7-4B26-8335-2776E15359BA.jpeg 8C7653B2-FB0E-4198-971C-1D22274D73AD.jpeg
I just hold the positive wire to the edge :D
695C7307-18C2-45C8-BC8D-E655856110C6.jpeg 8289E1C2-EEC0-4164-8E5F-710194FA9EBA.jpeg
 
Last edited:
Recently did the 18 below. Using a 9 volt put the positive to Ground the Negative on a Q-tip salt Heavy water solution.Most important clean logo first with alcohol. Works quickly :thumbsup:
View attachment 1339618 View attachment 1339619
I just hold to positive to the edge :D
View attachment 1339625 View attachment 1339626

Thanks! ... that verifies the steps I thought to deepen the etch. Does that step alone darken the logo to show better if stripping the blade after?

I remember reading there was another step to darken it but I can't recall what exactly it was. And so far haven't found that post.

It seems that it mentioned using the current reversed from etching ... but that it required using a setup limiting the electrical flow ... and again if remembering correctly it mentioned something like a doorbell circuit set up? But I am not familiar with that process at all.
That old fart GSOM wrote up a post on AC/DC etching and darkening...it’s always what I refer to when going to do it. He made a pretty fancy setup for himself; but fortunately he explains it pretty thoroughly, so you’ll be able to follow along with whatever you have on hand. Myself, I use a car battery charger to etch the blade, then a doorbell transformer to darken it if I remember. Anyways, here’s the thread:

https://www.bladeforums.com/threads...ng-electrochemical-etching-on-a-bk12.1157003/

Hope that was what you were looking for.

Thanks for the link! That is the post I recalled reading but couldn't remember every detail.

I had the etching part down but I'll need to reread the second step to darken it before stripping the blade.

Much appreciated!
 
Patina will darken the logo with a good look. I never messed with the AC voltage to darken the logo :D the older roll stamped blades after stripping the factory coating stayed in the logo :p I thought that looked good so I would smear paint in the logos that I deepened :thumbsdown: see how you like the look after you get the depth you like and do what you think you like :) I put some vinegar in the 18 logos they look dark I’m also going to leave the coating on it for now as the Black costs more . That’s not why It just seems so durable and it’s fairly smooth will see down the the road :thumbsup: Good luck JJ and be sure to share some pics :)
 
Last edited:
Patina will darken the logo with a good look. I never messed with the AC voltage to darken the logo :D the older roll stamped blades after stripping the factory coating stayed in the logo :p I thought that looked good so I would smear paint in the logos that I deepened :thumbsdown: see how you like the look after you get the depth you like and do what you think you like:)

I thought I might try it on an old 16 and see if I liked it anymore than just etching it and stripping it. But it may not be a lot different unless I sand and take the strip to a more refined state anyway.

But wanted to give it ago on an older knife before starting on one of the 18s or stripping my last 15s before bbq season got in full swing.
Yea good to always take your time before any changes:thumbsup: It’s all what you like and best to be sure :thumbsup::thumbsup: the new etched logos seem to look alright with out deepening to :thumbsup: the first ones pretty much disappeared after stripping. But they all look fine anyways :)
 
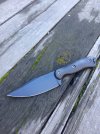
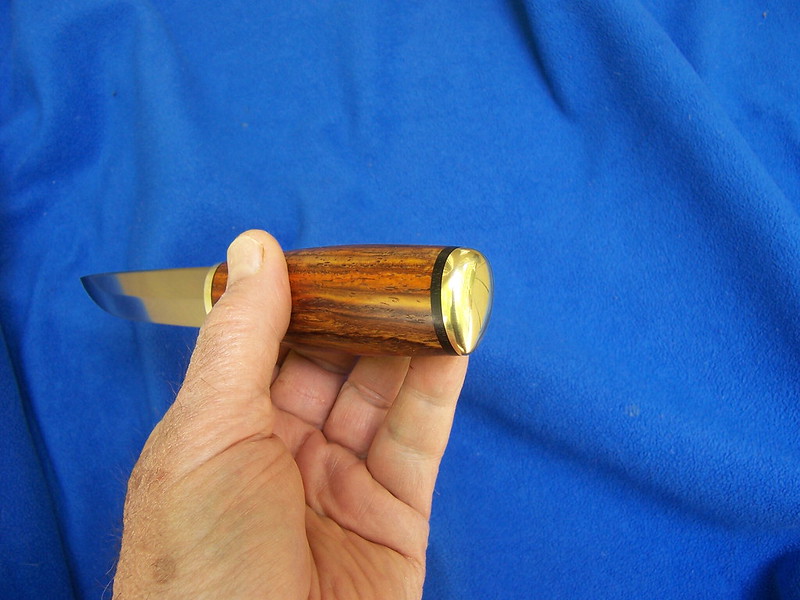
Newly completed puukko May 2020. 110mm x 22mm 80crv2 blade with an 800x polish and gray Scotch Brite satin finish, spine is a continuous curve from bolster to tip and has a bevel along the entire length. Bolsters are brass with a peened finish on the front and rounded polished rear. The cocobolo handle has ebony spacer at the rear and black fiber up front.

[url=https://flic.kr/p/2j24iK6]

[url=https://flic.kr/p/2j22KyJ]

[url=https://flic.kr/p/2j1Z7wt]
https://www.flickr.com/photos/158694019@N03/[/url][/url][/url]
 
Newly completed puukko May 2020. 110mm x 22mm 80crv2 blade with an 800x polish and gray Scotch Brite satin finish, spine is a continuous curve from bolster to tip and has a bevel along the entire length. Bolsters are brass with a peened finish on the front and rounded polished rear. The cocobolo handle has ebony spacer at the rear and black fiber up front.


Beautiful.
 
Newly completed puukko May 2020. 110mm x 22mm 80crv2 blade with an 800x polish and gray Scotch Brite satin finish, spine is a continuous curve from bolster to tip and has a bevel along the entire length. Bolsters are brass with a peened finish on the front and rounded polished rear. The cocobolo handle has ebony spacer at the rear and black fiber up front.


That cocobolo sure likes striking with the ebony and brass combo. Nicely done! :thumbsup:
 
I couldn't leave the rebar knife well enough alone. Had to cast the tang in epoxy (while already attached), dyed the wood, and rolled some inner tube over that slippery ferrule. Kinda diggin' the new look:

IMG_20200515_110011-small.jpg
 
Daizee - that's looking pretty nice.
next you should make a couple RR spike knives (one regular and one HC) and see where they RC.

The only RR spikes I have are vintage. No idea how they compare to other available versions. They're definitely too low-carbon to harden well. I got very little out of my trowel-hardening attempt, but it was forged burly enough not to need to be especially hard.
 
Back
Top