Carving Animals is Hard

Good stuff man! I wish my first carvings came out that nice. A couple things to consider next time would be to use a set of wing dividers to mark your border about a half inch from the edge of the sheath then bevel that down and consider using an antique type dye. Both will add some depth and dimension to your design.
 
I don't do any figure carving, or at least haven't for 30 plus years, so I haven't said much in this thread. But I would agree on the border when ever possible and great job!
 
Hey thanks fellas I appreciate the feedback. I went back and looked at Grogimus' Crow, which actually does break out of the border, which is what kept me from doing it. But his looks great, almost like it's escaping the sheath, and it also wraps around the fold (another concern) with no detrimental impact so border it is on the next one. I'll play around with antiquing too, never done it nor dye, but Dave F Horsewright had a great how-to on that recently (page two now).
 
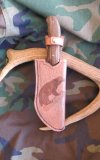
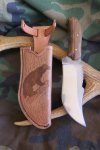
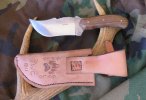
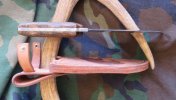
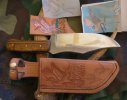
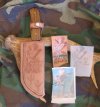
Here's the next one with a border and a darkened up animal. If I had it to do over the snout's a little thicker and longer than I was aiming for but still in the ballpark I think. The border worked fine, definitely added something I can't really verbalize. Included is an edge picture I'd like to know if I'm at about par with what others are doing as far as smoothing and burnishing? Starting at a damp 120 on a 3x21" belt until everything's even, then damp 220-600 by hand at 50 passes each minimum, then a burnishing stick with saddle soap. Does that sound about right?

By the way if anyone's doing this tie down through the belt loop style I highly recommend a standard 1/2" wood chisel. You still have to cut out the top and bottom with a razor knife but the long cuts are very clean. In this case I went 5/8" wide so punch the 1/2", then move the chisel up for the extra 1/8".

Thanks everyone for the help and encouragement, and Happy Easter.

18-11-1.JPG 18-11-2.JPG 18-11-3.JPG 18-11-4.JPG
 
Good deal. Looking good. Here's what I think a border does for ya visually. To me its like looking at a painting thats not framed. It just seems unfinished and your eye wanders. The border is your picture frame. It focuses your eye on the work. I often get folks that want their intials in the center of a pancake sheath without the border. I often try to talk em into the border, heck I'll even do the border for free. I have had many customers say they were sure glad I talked em into the border, I've never had one say they wished that I hadn't. For the thickness of your edge I'd like to see it more rounded, what size edger do ya use? I'd be using a #4 on the welt edge and a #2 on everything else. Ya also have quite a bit of glue lines showing for that much sanding. Really shouldn't see any glue at all. Another little tip for a more professional job would be to crease your retainer strap and belt loop. Gives it a little pop. I'd also either round those corners on the strap and where the belt loop sews on or I'd cut little 45s. Sharp points don't wear well over the years. The wood chisels are a great little trick. I keep a set around too. I use em for cutiing the striaght line cut for a sam browne stud or for the spur button on a pair of spur straps.
 
OK I'm back. Dave I only have a #4 that I use for everything but I try to be minimize the amount removed. So you are saying you'd prefer more leather removed by the edge beveler on the welt edge side, and a bit less on the loop and strap?

I usually do round belt loop attachment points and around the snaps but saw a squared up one here that looked real nice so thought I'd try it. I'll stop doing that I promise. What do you think of a compound 45 degree cut that includes a vertical cut and a bevel cut?

I'll look into creasing some more, I saw a google archive from 2011 where you mentioned it, pics were long gone.

Finally, do you think if I started over on the welt edge I could get rid of the glue lines? Or is it glue "all the way down". Do you think I have enough space left between the edge and stitches?

Thanks again for your patient help.
 
What kind of glue are you using? I changed to Weldwood from Barge, and it helped my glue lines tremendously.
 
In my videos I try to teach folks to recognize a potential problem and correct the issue before it has a chance to become the problem.

Having said that, way back in the beginning when you are developing your paper pattern make sure you designed at least 1/2" welt width which will later translate into ample room for a 1/4" stitch line from the edge AFTER you have squared up the edges PRIOR to grooving the stitch line. Squaring up the edges using a rotor sanding device (see thoughts below on hand sanding) will remove all the cement that was visible on the edge, and ordinarily removes about 1/32" of the former 1/2" available space. AFTER this step you groove the stitch line ( I use 1/4" from the new edge.) Then after stitching I do the final finish on the edges.

Now, even before that, since you know there could be a cement/glue problem , be sure to exercise some extra caution when you apply the glue. This is not a place to be sloppy, be careful and precise in applying the glue to be being very mindful to keep it off surfaces that will be the exposed edges. If it's not there to begin with makes the job a lot easier.

Finally when you are squaring up the edges initially, (prior to stitch grooving) be very sure the edges are smooth and flat and all the cement has be removed. In the photo example above jwcustoms quit before he was finished.:cool: This is a continuing occurrence when hand sanding to square and finish the edges. You tend to think,"this is tiresome and that's good enough".
Well, unless it's perfect, it's not "good enough" so don't stop until you are finished, and the edge is clean, square and perfect!

Once again, this is the way I do it, not the only way, and not necessarily the best way.......but it is MY WAY.

Paul
 
Last edited:
Hi ANovinc, I just have the Eco flo from Tandy, I'll try yours next. Paul you are spot on, I ran a fingernail over the edge this morning and can barely feel where the 3 edges aren't perfectly flush where the glue shows. It sure doesn't take much to show up! I should be able to remedy that, I don't want to be THAT guy.;) And your method makes perfect sense, thanks to both for your time and generous advice.
 
Thanks a lot for all the valuable help everyone. I will use these tips going forward. I want to try a Sandhill Crane next, I hope it doesn't look like a goose!!
 
Hello again, I finally got a Sandhill Crane I can live with. The sheath is unfinished but I think it turned out well enough, how about you? Any tips like "lose the background" or anything else? I'd really like some advice or your feelings on colorizing as shown in the practice piece before I apply the Fiebrings.

18-15 sheath 1.JPG 18-15 sheath.JPG
 
Your general talent for figure carving is progressing nicely. It will keep improving with each piece. If you have not already obtained a copy of "Figure Carving" by Al Stohlman, I would suggest you invest in that and refer to it frequently. It will keep you moving forward. Regarding coloring, I am not generally a proponent , mostly because I lack the artistic talent the shadings require, but beyond that, I like the natural finish that Neatsfoot Oil or similar will give me.

Paul
 
Wow, there is some serious skill in this thread. I used to doodle a lot as a kid and wanted to improve but I was never any good. Beautiful work guys.
 
Just my opinion: Leather is a crude drawing surface. Can't put marks in leather close together like you can with pencil on paper. Leather animal carving, like cartoon drawing, is a study in simplifying details, not reproducing them. Chose a characteristic shape and include only the elements that convey the unique features of the animal. Your crane, dragons, leaf, elk, crow and Spartan are examples of simple, characteristic shapes with details that complement without overwhelming. In last wolverine you pulled off the fur detail better than I thought possible by using the shaded brown coloring to bring it altogether as a unified body, but the wolverine's head seems stuck on, instead of being an organic extension of body.

By the way, I think your leather carving is spectacular. Overall great carving work. Most of us are jealous and envy your gift.

Edges:
1. Be careful to trim sheath edge straight and flat. Easy to cut it with little dips that can't be sanded out.
2. The tough paper-thin top surface of leather sands slower than the rest of leather. Result can be that some of the thin top layer of leather (and the glue attached to it) lays over on the sanded edge and doesn't get sanded away. Use a magnifying glass to confirm. Only way to correct that is to use a thin blade to pull that thin top leather away from the edge and cut it away with razor.
3. Key to great, smooth edges is not sanding, although sanding is essential. Key is burnishing: hard and rapid rubbing of edge with a smooth object to generate heat, and that heat and pressure glue the leather fibers together into a dense, solid mass. First, wet the edge. Better, wet edge with saddle soap or QuikSlik, which acts like a glue for leather fibers. To burnish a flat edge, use a cylindrical shaped burnisher. To burnish a rounded edge, us a burnisher that matches rounded shape of edge. Burnishing takes time. Don't rub like brushing teeth. Rub like your are trying to start a fire on the edge. Rub hard and fast until you are tired. Then do it again. And again. Try it. You will be pleased.

Finally, I suspect you are using crappy leather. Buy the good stuff, the best. Try buying from Wickett & Craig: you must buy a large piece, but cost per sheath is only a little more. You will be astounded by how much better your results are with good leather. Doing good leather work like yours on bad leather is a waste of your time and talent.
 
Paul, thanks for that and all your advice. The book is on my to do list, hopefully soon. I've decided to go au naturale on this one, after a few friends like it as is. Bob, thanks for the explanation, I'm pretty much doing the edges like that, just haven't quite got it nailed down yet but better each time. I just finished sanding the recent one and it looks pretty darn smooth before burnishing. I probably do need to increase the pressure as you suggest.

I fear your're right about the leather. My stock is VERY old, about 20 years but bagged and stored in a closet and it looked OK to me but I'll probably be happily surprised as you say. It is from my first iteration as a knifemaker. It's Tandy, since there's a store near my house, and I've been using it since I didn't know any better.

I'm running low so Wickett and Craig is on my radar. What weight should I be looking at? 8-9oz seems pretty much the standard for sheaths around here but wanted to be sure before I buy. Another detail I saw on their website they have Standard, Utility and Special grades. What do you guys buy?
 
I switched to W&C last year--you won't be disappointed. I now buy the Utility grade (my first few purchases were the Standard grade), tooling/carving/holster leather in 6-7 oz--probably a bit thinner than most use, but it's what works for me. I recently carved a Fire Bird on a sheath--as soon as I can figure out how to make the file size smaller I'll post it on here for you to see. (i'm still working on my carving skills, too!)
 
Hi ANovinc, I use microsoft office picture manager from the right click/open with menu, go to pulldown menu: picture...crop. when done cropping go to picture... resize. I resize to 60% and usually files drop from 5 to 1 mb after these operations. Really looking forward to the firebird.
 
We use Wickett and Craig 8/10 Oz russet saddle skirting for all our carving. 7/8 oz if stamped or plain. If a larger knife we go up to the heavier stuff too for that. Always standard grade.
 
Back
Top