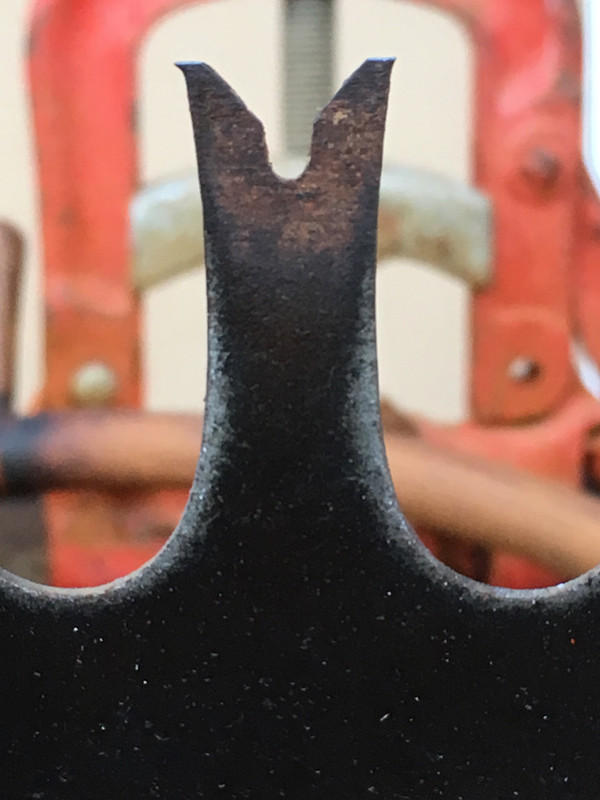
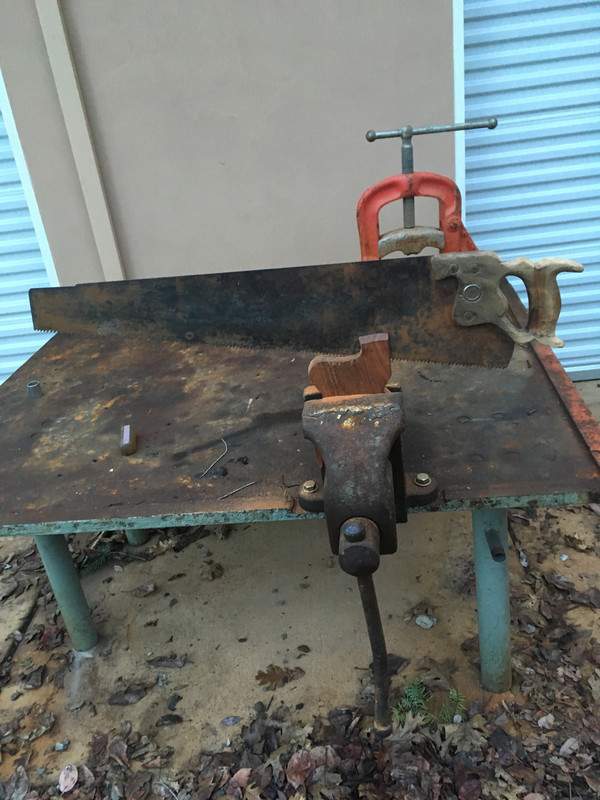
Crosscut Saw Thread

After a mere 4 months:eek: I finally got around to cleaning the rust off the entire blade of my disston and making a new handle for it. The handle material is a ipe decking cutoff. Surprisingly, it only took 2-3 hours of working on it to get it from board to saw. It still needs the depression for the nut heads to go into drilled out, however. Half an hour at the most I'm sure. The tools I used are two rasps, a drill, a few bits for the screws and drilling out the grip, a coping saw to cut the wood between holes for the grip, a backsaw for getting it to rough shape, my Stiletto rip saw for the blade slot, a hatchet for roughing part of it, and a random orbit sander for finishing it. Now I just need to make a helper handle. Maybe in May....
IMG-1727.jpg

IMG-1728.jpg

IMG-1731.jpg

IMG-1732.jpg

IMG-1734.jpg
That is beautiful! Amazing job doing with hand tools too. Ipe is frigging hard and that must've taken awhile. I need a perforated lance tooth still. One of the many things i don't have. Yet.
 
Ipe throws sparks from a circular saw and dulls drill bits like steel yet a rasp goes through it like butter.:confused: I don' know why it does it, it just does. Don't worry about finding a saw. I thought I was out of luck when it came to crosscut saws and then I found a (my) fairly unused Disston on a pallet in a quarry. Just goes to show you never know where you'll find one. Another example is for 16 years generally about once a week we drive by a church. Only last week I saw that what I thought was a brown painted board with a verse of scripture on a shed (try and guess where this is going) was a two man crosscut saw sans handles with a good amount of tooth length left. Soon a rescue mission will be attempted....
 
After a mere 4 months:eek: I finally got around to cleaning the rust off the entire blade of my disston and making a new handle for it. The handle material is a ipe decking cutoff. Surprisingly, it only took 2-3 hours of working on it to get it from board to saw. It still needs the depression for the nut heads to go into drilled out, however. Half an hour at the most I'm sure. The tools I used are two rasps, a drill, a few bits for the screws and drilling out the grip, a coping saw to cut the wood between holes for the grip, a backsaw for getting it to rough shape, my Stiletto rip saw for the blade slot, a hatchet for roughing part of it, and a random orbit sander for finishing it. Now I just need to make a helper handle. Maybe in May....
IMG-1727.jpg

IMG-1728.jpg

IMG-1731.jpg

IMG-1732.jpg

IMG-1734.jpg

That's a beautiful handle you have carved A17
 
That came out great.
I've got a saw that I bought covered in silver paint, with half a rotten handle, that I'm intending to do the same for. Someones outside garage wall ornament. After getting some of it off, I find it to be a "western logger". Lance tooth, similar size to yours there.
After a mere 4 months:eek: I finally got around to cleaning the rust off the entire blade of my disston and making a new handle for it. The handle material is a ipe decking cutoff. Surprisingly, it only took 2-3 hours of working on it to get it from board to saw. It still needs the depression for the nut heads to go into drilled out, however. Half an hour at the most I'm sure. The tools I used are two rasps, a drill, a few bits for the screws and drilling out the grip, a coping saw to cut the wood between holes for the grip, a backsaw for getting it to rough shape, my Stiletto rip saw for the blade slot, a hatchet for roughing part of it, and a random orbit sander for finishing it. Now I just need to make a helper handle. Maybe in May....
IMG-1727.jpg

IMG-1728.jpg

IMG-1731.jpg

IMG-1732.jpg

IMG-1734.jpg

The Ipe wood sounds like a good choice for a handle, it should last a long time. However, since you made the handle from scratch and had the option of making it any shape I have to ask why you included the sharp point on the bottom of the handle. For cutting from the top down as on a sawbuck the point is not a problem. However when cutting logs in the forest they often have to be under bucked (cut from the bottom up) to work with the stresses in the log. Then the handle point is simply a pain in the hand a serves no functional purpose.
163138359.4CSMGsSI.P5020984a.jpg


163138358.EzAwenes.P5020983a.jpg


I think rounding off the point would help to make the saw more user friendly for all cutting jobs.

Jim
 
I put the bottom horn on there because the original (wrecked) handle had it. Now I'm thinking I might remove it and make the handle look like the sketch in the photo below. OR get a broken two man saw a neighbor has and make a western? handle and use that one for underbucking. Anything for a "legitimate" excuse to get another saw.:rolleyes:
IMG-1730.jpg
 
I was sharpening my saw the other day when it dawned on me, I know jack squat about sharpening saws. After that realization I decided to bug y'all with the stuff I'm clueless about.
1st: Is this what a raker should look like after being jointed ie. should the top be flat?
IMG-1894.jpg

2nd: My cant saw file doesn't match my rakers. Is that bad?
IMG-1897.jpg

3rd: Only the top of the teeth are "set" Is that good or is the entire tooth supposed to be bent?
IMG-1903.jpg

4th: M muleman77 , can I stop by your house in the next couple of months or so and have you teach me how to sharpen this saw?:D
I wish i could share what I've learned so far... I'm chomping at the bit but I'm gonna refrain. Others on here have loads more experience with it. I will say, no, rakers aren't supposed to look like that! Haha. Good luck with it man!
 
  • Like
Reactions: A17
Those videos are a good place to start.

Your questions, briefly.....Rakers after joining should be flat on top, but I'd shape yours deeper on the inside. They will be pointed again after finishing the shape correctly, with a tiny flat, just enough to see. Then swedge.
Just the tooth tips are set.
Cant files work good, but I think slim taper files are a better angle usually. It doesn't really matter, file one side of it, then the other and you can get any file to do what you need.

Theres a lot of details to get right filing saws, but if you're good with tools, it's really not that hard. More tedious than anything.

Just take your time, pay attention and you'll be fine!
 
Last edited:
Can u change the name of this to Misery Whip Thread.
Here is one we found in the Bitterroots...
fmto53.jpg
how the hell does that even happen

Do you think that was a drag saw?
no drags normally dont have the 4 cutter set up that far down, seeing how long that... i'm just gonna call it the handle section is and how short the saw is, i think it was a topping saw.

plus he's supporting it with 2 fingers and that would definitely not happen with a drag saw, them things are heavy
 
Just an anecdote that may somehow apply to that saw in S Snowshoein s hands

There was a late 1800s to early 1900s logging railroad that had a bunch of camps in mountains around here. You can still see the grades, and even the ties in some stretches. It was all crosscut work they did. Some of their old cedar stumps are still there too.

I was with an archaeologist, who was doing FS fuels project mapping of arch sites. He found a saw, just laying there next to big old oak tree where a camp had been. In about as good of condition as your holding there. It was worn to nubs, like yours, but there was a kitchen knife shaped hole chiseled out of it.
Waste not, and it's a long way back to town....

He said it wasnt uncommon for the cooks to do that with a worn saw, had seen it before.

All this to say, maybe that saw was in a similar line of work before whomever abandoned it there moved on.
Whether knives, or some other need for steel.
 
A17,
Check out this manual and video for a good overview of sharpening, at:
http://www.bchw.org/Tech tips/Crosscut Sharpening.htm

#1, When you get done the points of the rakers should not be flat, they should slope down about 15° or so. #2, The shape of the "V" in the raker depends on if the raker if swaged or not. It they are swaged the "v" needs to be much deeper then in the photo and if not swaged it really does not matter as long as they are sloped down about 15°. #3, Normally only the tip of the cutters are set however sometimes bending the whole tooth to get the set has some advantages and disadvantages.
Jim
 
I was sharpening my saw the other day when it dawned on me, I know jack squat about sharpening saws. After that realization I decided to bug y'all with the stuff I'm clueless about. 1st: Is this what a raker should look like after being jointed ie. should the top be flat?
Your flat-topped rakers will act as skids and prevent the saw's teeth from biting in to the wood. Rakers don't need excessive swaging, but the tip should flare back from the V at an angle that will peel out the shavings. The tip of the raker should be sharp but not wire thin. An Anderson raker gauge will cut the tip at a back-sloping angle.

kKLg05L.jpg

ZTvNfKx.jpg
 
Back
Top