Frame handle hunter WIP...hope this isn't a disaster

Joined
Dec 5, 2013
Messages
1,180
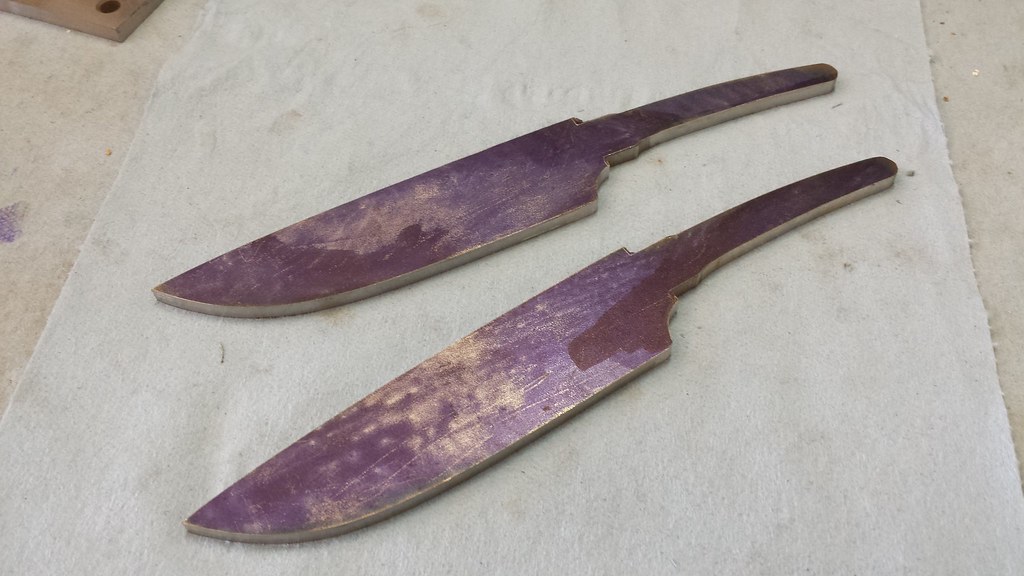
So I got a phone call about a week after the Little Rock show from a very nice gentleman I met there. He was a retired Army Ranger now in his seventies but we had the common connection and really hit it off. He said he really like how far I've come in such a short time and would like to challenge me to push my limits. He gave me some basic guidelines; it should be a drop-point hunter, it should have stag on the handle and it should have a hamon. Other than those requirements, everything was up to me.

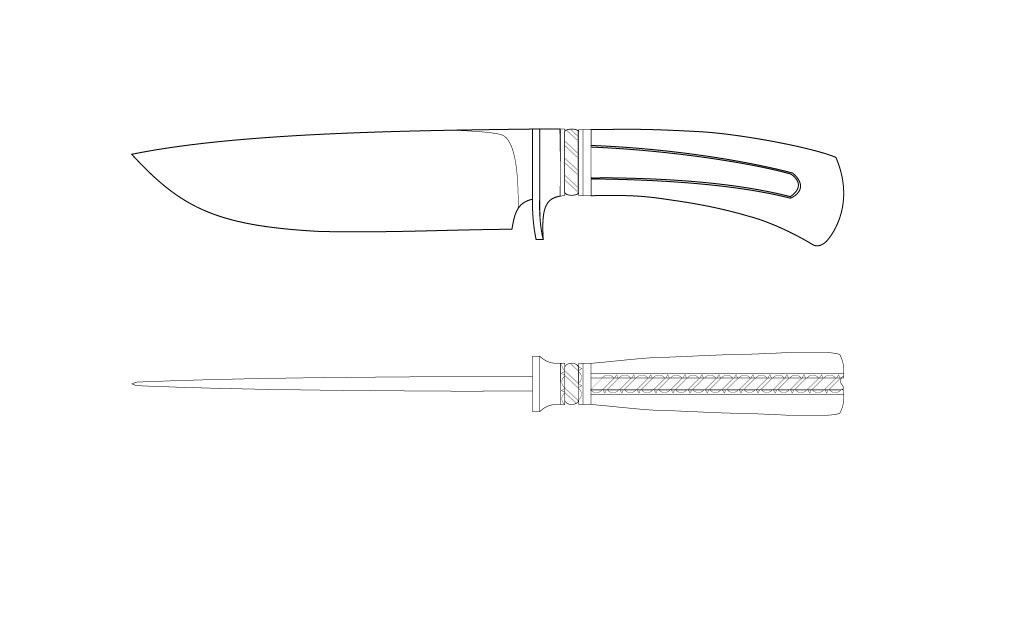
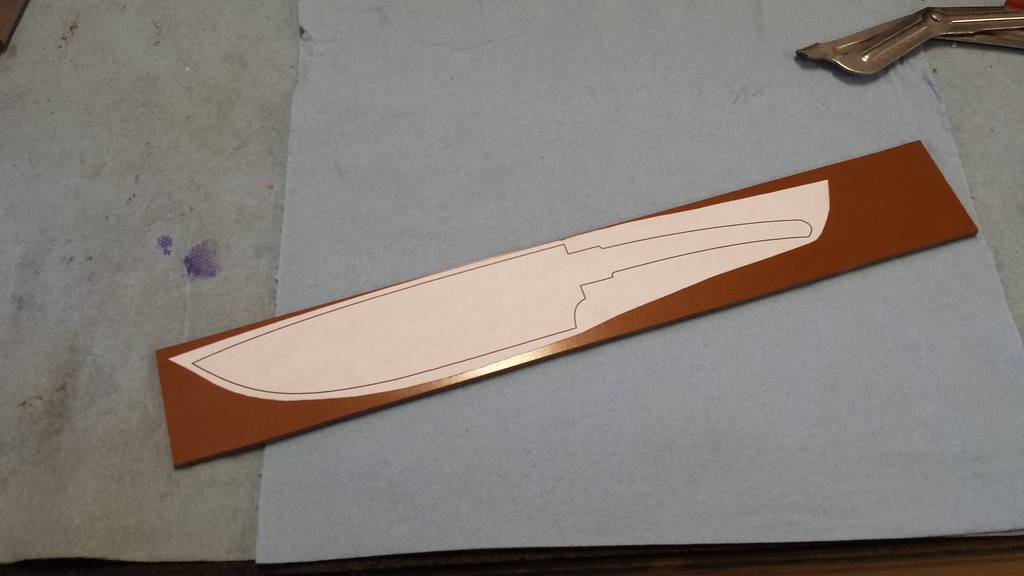
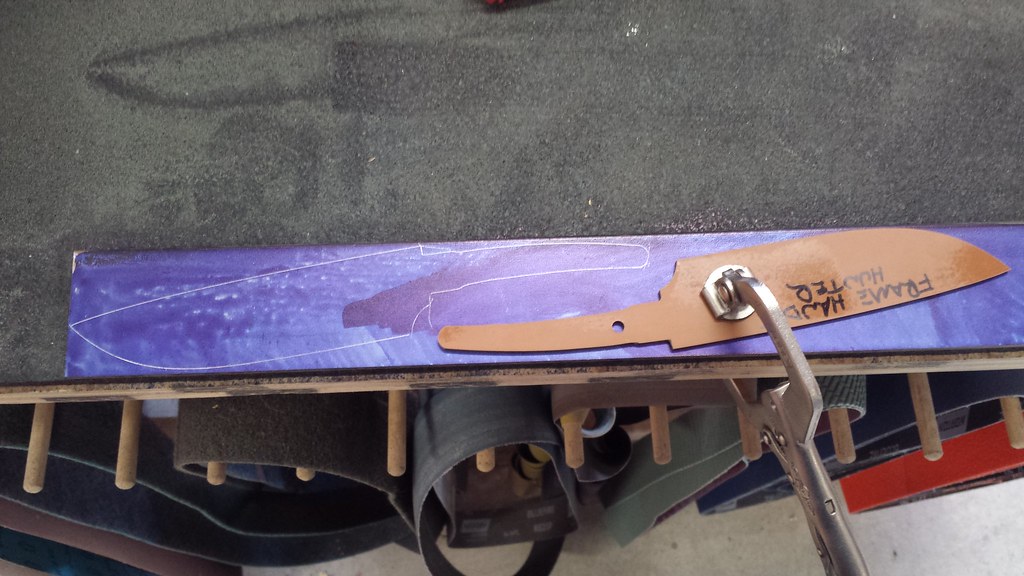
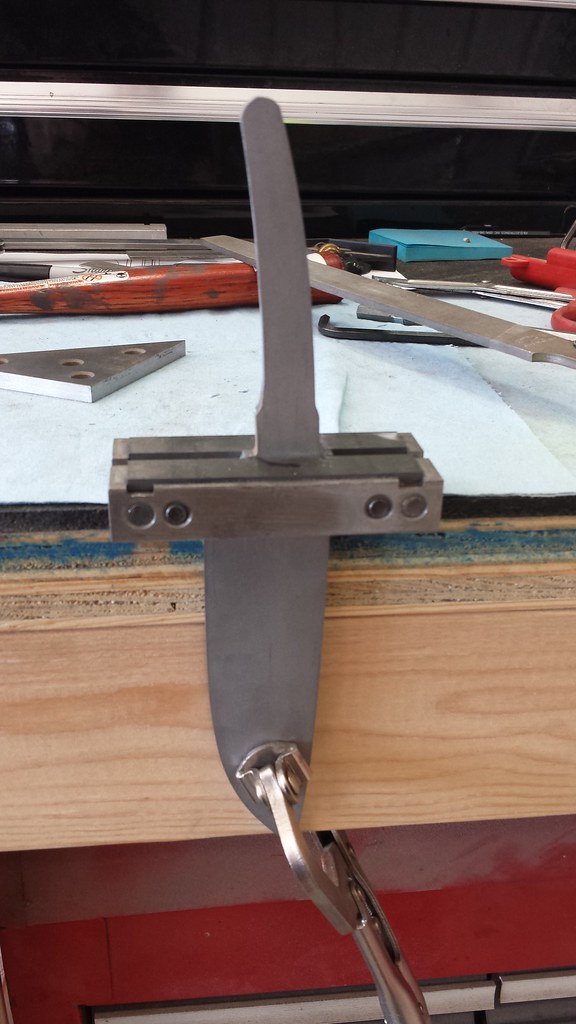
So, there are a lot of new things for me in this knife and I feel up to the challenge. I've ordered up some W2 which I've never worked with so that will be fun. I've spent a good deal of time brainstorming and drawing and have come up with a plan to make a frame handle which is also something new for me. I'm going to do a stack on the guard and I'm planning to put liners between the scales and the frame. I have to admit, a lot of my inspiration for this knife comes from Bruce Bump's and Kyle Royer's knives. Hopefully I won't embarrass myself.

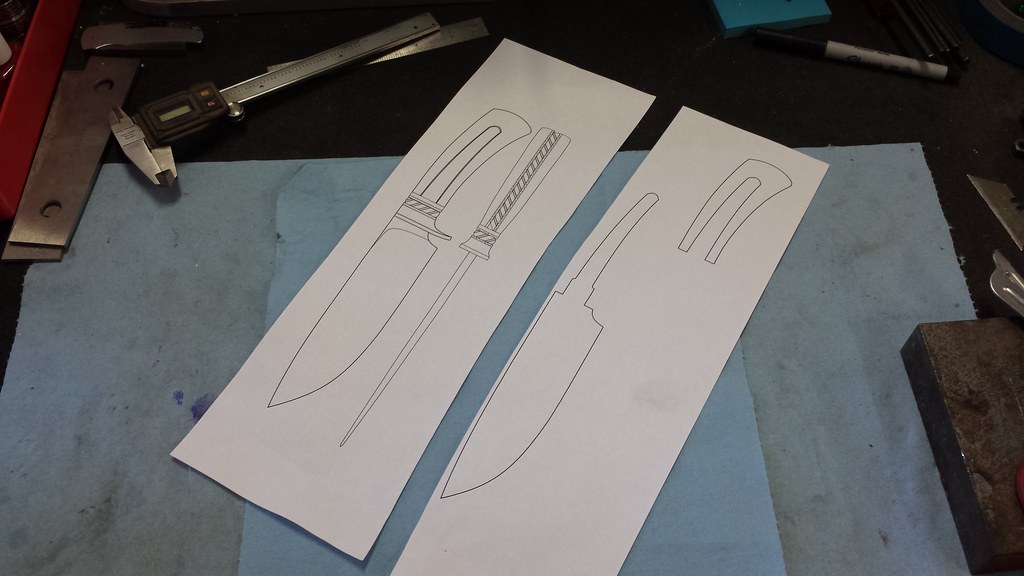
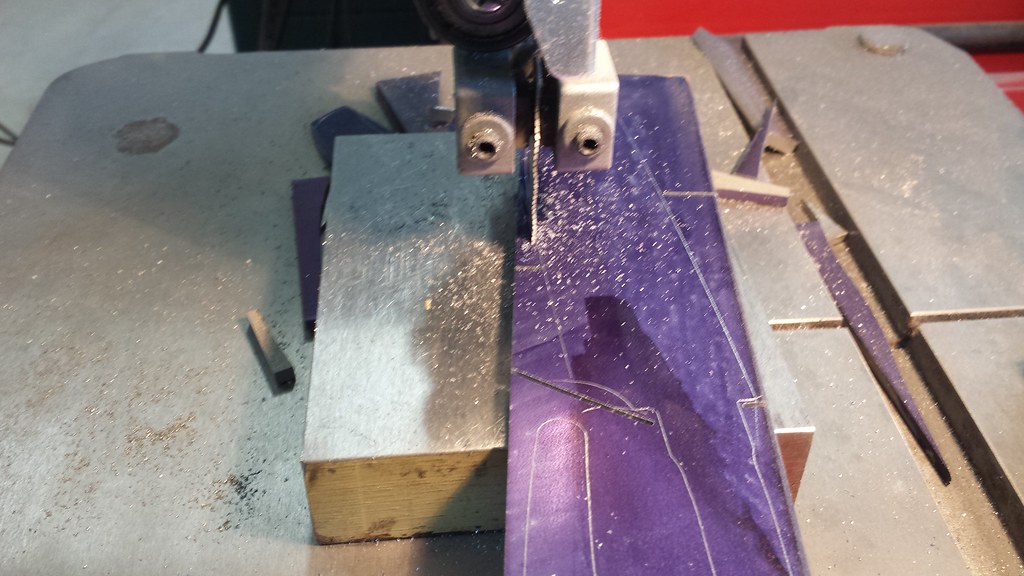
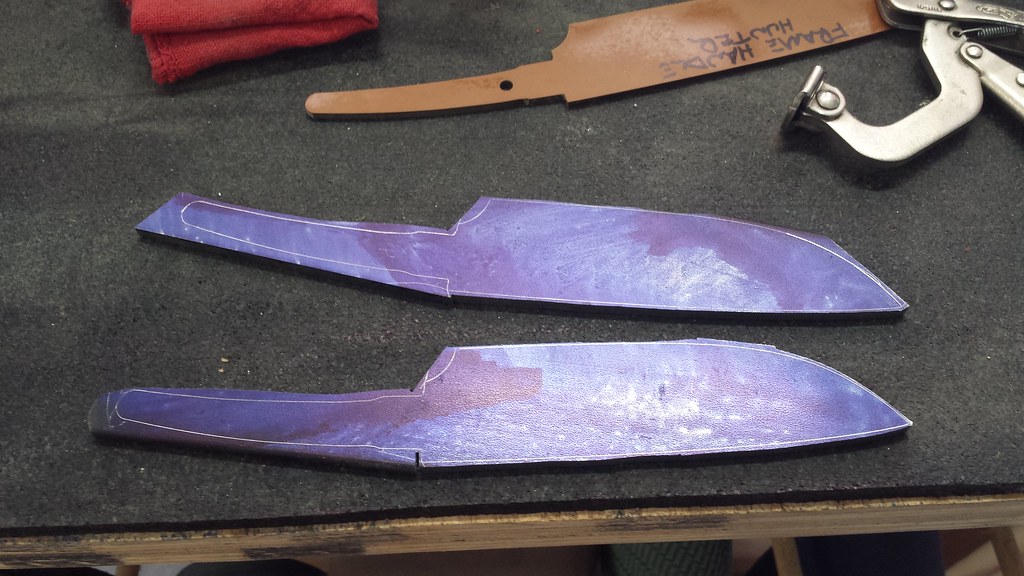
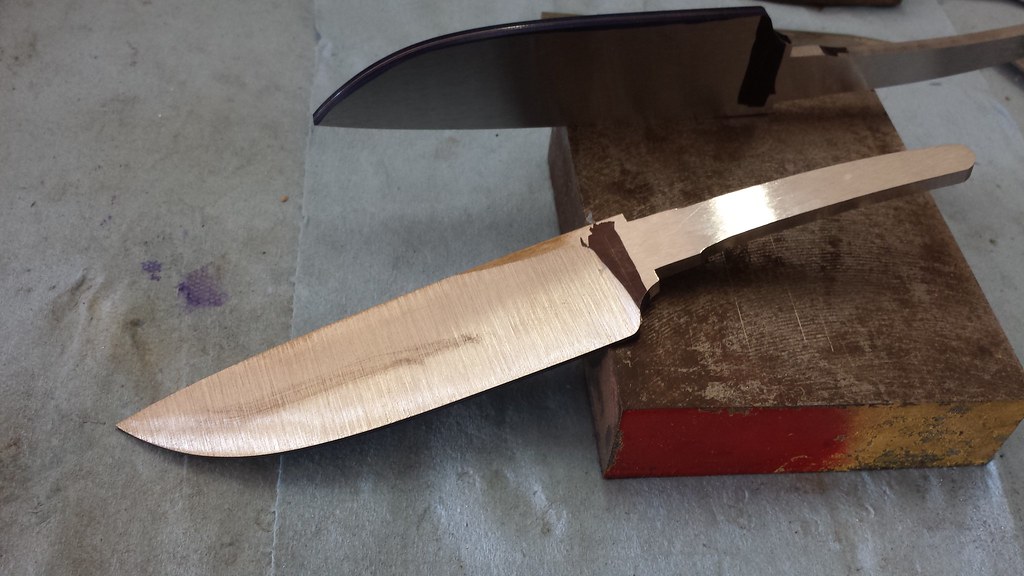
This will be a real-time WIP so it may move slowly at times. I have a few more knives to finish before I can really dive into this one but, I have some drawings that I can share. I'm still deciding on blade profile but, leaning toward one of the bottom two. Overall length will be about 9.75". This will not be an authoritative build, it will be more of a "Can he pull it off?" daytime drama. Comments are welcome.

Bob

STAG-HUNTER by Ranger_Bob, on Flickr
 
I am really liking that bottom profile, the belly gives it a nice stout look with good proportion. I think it will give that hamon a nice sized canvas to draw on. All three are nice looking designs though.
 
I like the top profile for a "hunter". If you make the belly a little fuller at the front, the bottom profile would be a good "skinner", IMHO. Are you doing a frame handle because you have never done one before, i.e. a learning experience? In any case, all three look good and I will be interested to see the finished product.

Tim
 
All look good. The only change you might want to explore is placing a slight back curve to the finger guard part of the guard. That tiny curve sometimes is all that separates a nice knife from a "WOW" knife.
 
Bottom Shape.

The full belly makes it more useful for purposes from caping to rocking over a cutting board in the kitchen . .. yet leaves a significant length of a straight cutting edge for other tasks.

My opinion.

Mike L.
 
Ok, settled on the bottom blade profile. I completely agree with Stacy on the curve of the guard. Two reasons for choosing frame handle construction are; one, I've never done it before and two, it will allow me a level of embellishment that I would not be able to achieve with other techniques.

I am pretty sure I am going to make the main components of the guard and frame from 416 stainless. I intend to heat color or nitre blue the pieces with the rope pattern filework and for the liners/spacers I'm thinking 510 bronze. This is a rough drawing showing a little more of my plan. If anyone has worked 510 bronze I'd like to hear your thought as to difficulty.

Bob

STAG-HUNTER-PT-2 by Ranger_Bob, on Flickr
 
Bob - this is going to be a neat WIP which I WILL be following. A frame handle is something I want to do sometime this year..... or next. Too many projects and not enough time!

Ken H>
 
Bob, I really like the looks of this.
Hint- hint : When you finish this one. How about a fighter / Bowie? :D

Thanks for sharing
Bing

Thanks Bing, I'm pretty excited about this one. I don't know on the fighter/Bowie, might need to find someone to make me a great piece of Damascus.

Bob
 
I am looking forward to watching this. That will be a stunning knife.

Have you decided on the handle material. That can make or break a show winning knife, too.
 
That's a great looking design.....only change I'd make is to knock the sharp point/corner off the ricasso. They tent to snag on hide and such for hunting use. A slight rounding there would fix that tendency.
Darcy:)
 
Very Nice design.....I vote Mammoth Ivory handle material to push this over the top!!! :thumbup:
 
I am looking forward to watching this. That will be a stunning knife.

Have you decided on the handle material. That can make or break a show winning knife, too.

Handle material will be amber dyed Sambar Stag. I just got off the phone with Culpeppers and it looks like I will have to wait for them to dye the next batch but I got a nice pair of slabs picked out.

That's a great looking design.....only change I'd make is to knock the sharp point/corner off the ricasso. They tent to snag on hide and such for hunting use. A slight rounding there would fix that tendency.
Darcy:)

Good point there. I can totally see that and will make sure I break that corner over.

Bob
 
Ok, the W2 did a little U.S. tour thanks to FedEx but it is finally here. I ordered the bronze from McMasters and it is here as well and I just got a shipping notice from High Temp Tools that my Satanite has shipped. I've read several threads discussing HT of W2 and watched a couple good Youtube vids on creating the hamon. Still, I have questions. With the stainless steels I am accustomed to working, I grind the bevels after HT. I assume I will need to grind my bevels first on this knife in order to be able to develop a good hamon. My question is, will the pre-HT edge thickness have any effect on the hamon? I'm thinking that I will grind down to about .030" edge for HT and then bring it down to around .005" after.

Another question, edge quench or submerse for the best hamon? I'm of the mind that submersing will give more reliable edge hardness but edge quenching may produce a more striking hamon.

Still have about a weeks worth of other knives before I get started on this one. Just trying to make sure I have a good plan.

Bob
 
I started on this project today. I will try as much as possible to cover everything, good or bad. If I leave anything out or there's questions about how I do something (or a good idea on how to do it better) please chime in.

First up I printed out a copy of the drawing with some of the components separated then cut the components out.

Untitled by Ranger_Bob, on Flickr

I then glue the pattern to a piece of 1/8" garolite with 3M Super 77. I used to make my patterns from 16ga steel but they rust and are a little more time consuming to finish out. I get the garolite from McMasters and it is pretty cheap so I will likely stick with it now.

Untitled by Ranger_Bob, on Flickr

I cut out the pattern then clean it up. I brush on a coat of Dykem and scribe the profile with a carbide scribe. I am going to make two blades because I've never worked with W-2 or created a hamon before and I think it will be a good idea to have a backup. This is 3/16" W-2 from NJSB and is currently about .205" thick.

Untitled by Ranger_Bob, on Flickr

I rough them out on the bandsaw. This is the Jet bandsaw that I ended up purchasing back in December (Discussion thread here). It is a metal and wood cutting saw but, I just use it for metal and other tough composites. Overall, I've been pretty happy with it. Wish it had a chip blower but, I'll take care of that eventually.

Untitled by Ranger_Bob, on Flickr

This is as close as I try to get with the bandsaw. The grinder will take material off pretty fast so I try not to waste a lot of time getting thing really clean on the bandsaw.

Untitled by Ranger_Bob, on Flickr

Profiled on the grinder. I didn't take any pics of the profiling but I hog down to about .015" from the line on the flat platen using a 50 grit belt. I then switch to a 120 grit and flip the grinder to horizontal and bring everything right to the line using the flat platen for outside curves and smaller wheels for inside curves.

Untitled by Ranger_Bob, on Flickr

Here I'm squaring the shoulders. My file is dull as can be on most of the cutting face but I use the edge to cut in toward the tang while holding the file flat against the guide. Works really well and keeps me from ruining a new file every time I use the carbide guide.

Untitled by Ranger_Bob, on Flickr

My buddy enjoying the cool concrete and the fan; not so interested in the knives.

Untitled by Ranger_Bob, on Flickr

More to come...
 
Got a few more pics for tonight.

Since I've never used this steel before, I wanted to flatten it out now before going any further. I have to say this was by far, the cleanest, flattest steel I've ever worked. It had a mill finish and was flatter and cleaner than the Blanchard ground S35VN I mostly use. I took .003" off each side but, it really only needed two thou per side to clean up completely. Yes there is sawdust all over the surface grinder; I use it to get dead flat scales.

Untitled by Ranger_Bob, on Flickr

To scribe my grind lines, I first run the cutting edge back across the grinder with a 120 belt and the grinder in the normal/vertical position. I feel this fine scratch pattern helps the scribe lines show up better when grinding. I then coat the edge with Dykem, take a thickness measurement at the choil, divide by two and add half of my edge thickness.

Untitled by Ranger_Bob, on Flickr

I set that number on my height gauge and scribe my lines. In this case, I'm looking for .025" edge thickness.

Untitled by Ranger_Bob, on Flickr

This is what I got ground today; one side of one blade with 50 grit. I started on the other side but my hands and eyes were shot. I stopped before I screwed something up. My hands are in pretty rough shape after years of abuse in the Army and they get really sore with a full day of use. I will grind these to an A65 Trizact in the morning when I'm fresh.

Untitled by Ranger_Bob, on Flickr

I did do one more thing in the shop before calling it a day. I assembled my new Beaumont disc grinder work rest. Pretty slick piece! Yeah, I know it's not put together exactly right. I need to figure out why my disc won't go all the way on then, I'll put the blocks to the back.

Untitled by Ranger_Bob, on Flickr
 
Last edited:
Back
Top