Frame handle hunter WIP...hope this isn't a disaster

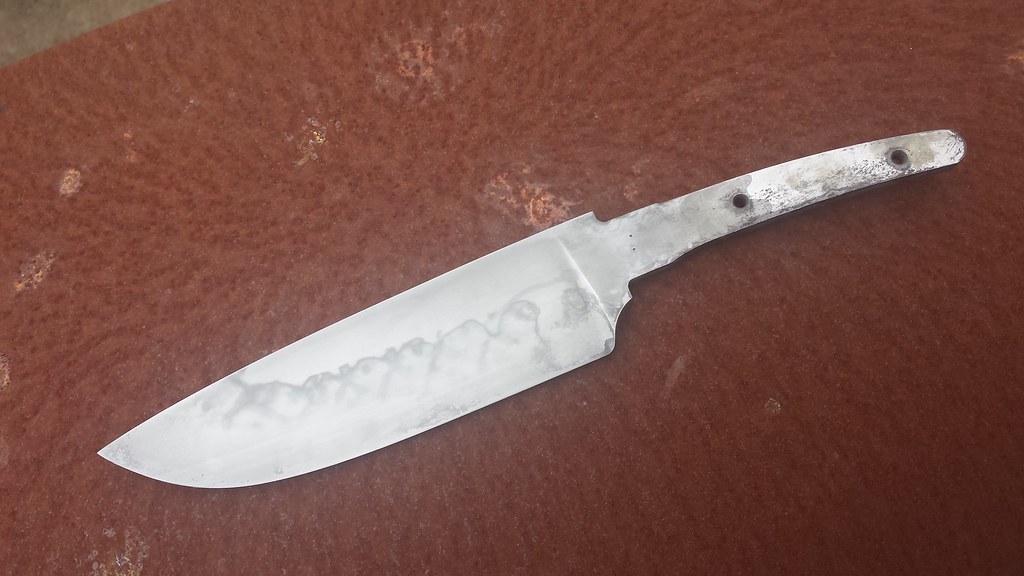
I'll give you my thoughts based on the photos:

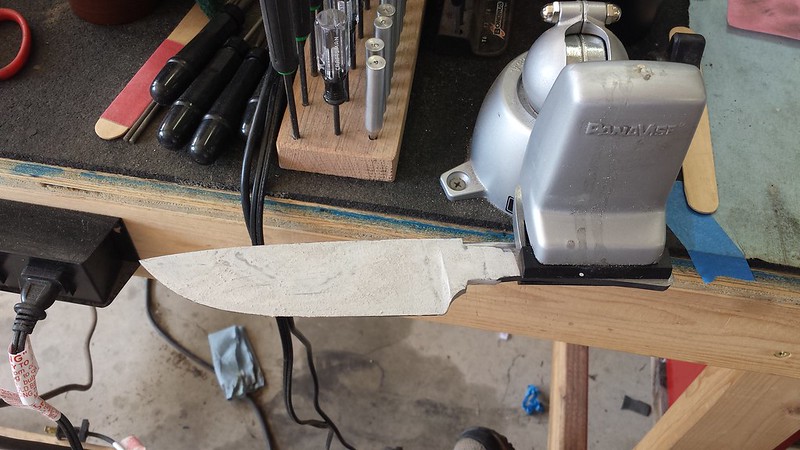
First, a thin wash of clay over the entire blade helps. Make a cream thick slurry, cover the blade, and clamp in a vise horizontally (spine down-edge up) to dry.

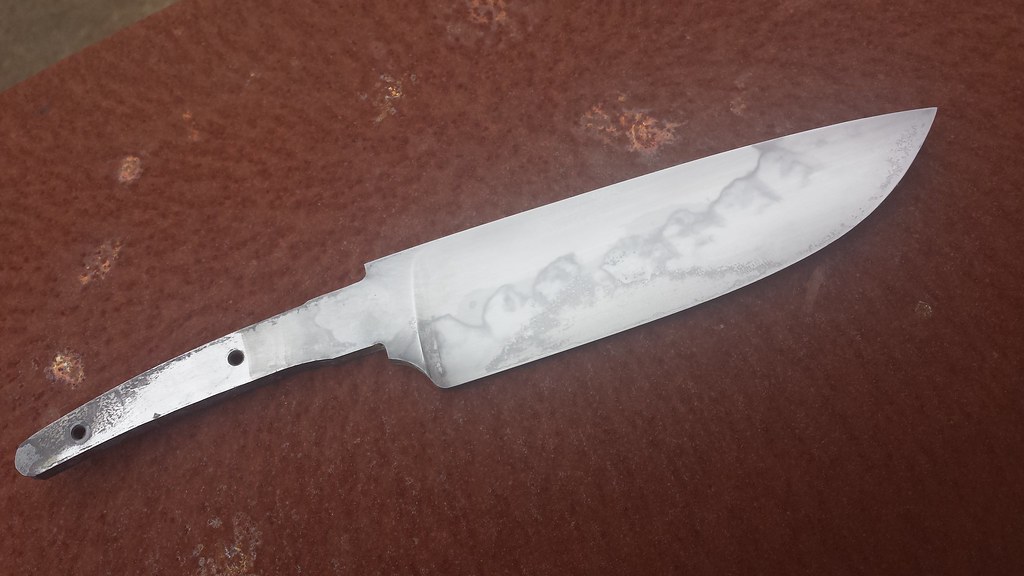
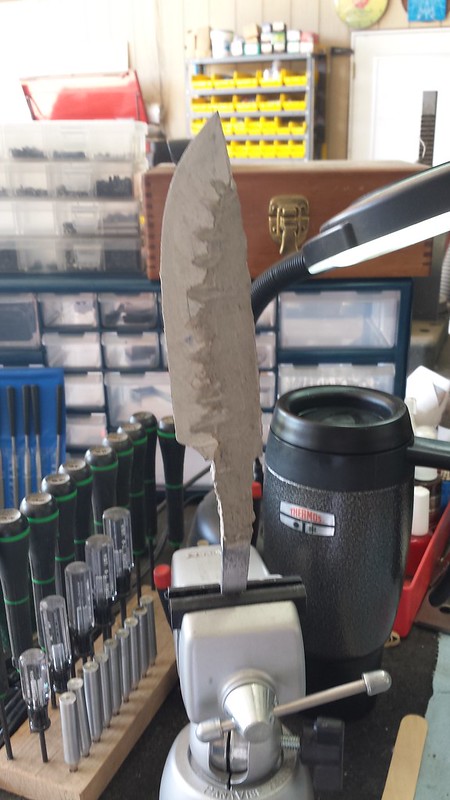
Next, the spine clay looked a bit thick in the first photo. Too thick holds back too much heat,...which bleeds down into the edge and moves the hamon too far down. It should be about 1/16" thick to a max of 1/8" thick at the spine. The second photo looks better.

Last, lower temps work better for hamon formation. It reduces the drop time for the edge and also gives less reserve heat under the clay. A 10 minute soak should be more than ample.
 
Last edited:
Hey Bob. Nice WIP going. The folders look great too, especially that flipper.

You might have too much clay on that blade and I'd consider getting rid of the thin wash coat altogether maybe. You definitely don't need to (or want to) soak w2 for 20 minutes. If you know you have good temp control, your temps should be fine. Higher temps and longer soaks are going to work against you a bit if you're going for hamon.

I'd agree with your assessment about the clay being the issue. And too much clay and that wash coat are the first two things I'd suspect.
 
Stacy and John, thanks for chiming in on this. Some nice nuggets of info there. I'm going to give this another shot today.

Bob
 
Are you normalizing and thermal cycling the steel before heat treat?

1650f for 10 min. Gets the grain even, and all the alloys and carbides into solution and evenly distributed. Cool to magnetic.

1550 for 10 min. Cool to magnetic. Grain refinement.

1450f for 10 min. Cool to magnetic. Grain refinement. Alloys are evenly distributed, carbides are refined.

You have had 30min soak of the alloys already. Now all you want to do is get the carbon into solution, but only 0.85% of it. The rest needs to stay bound up in the carbides. This is why the austentizing temp is 1450f, increased carbon over 0.85% lowers austentizing temp, and W2 is close to 1% carbon. A short soak is all that is needed. Soaking too long will decrease the Hamon potential, as the clay and spine do not have to reach and soak at full austentizing temp. If they are a bit cooler, they will make a better hamon, as there is less heat sink to deal with. 3-5 min is all that is needed to get the edge up to heat and get the thin cross section back into solution. Don't work against your goal. For a fully hardened blade, 10 min is a good idea, but not for a hamon.
 
Ok, I scraped the clay off and did the thermal cycling just the way Warren outlined. I then ground all the scale off and re-clayed the blade with even less clay. I waited until the clay was dry to the touch and put the knife back in. It is probably worth noting that I did not do a thin wash of clay first. The oven was at about 400 degrees when I put the blade in. I set it to go to 1450 and hold for eight minutes. When I went to pull the blade out I missed the first grab with my tongs which probably cost me close to a second. So, from opening the door to getting into the oil was likely close to two seconds. The clay came off the right side of the blade pretty quickly and the left side bowed away within a few seconds. When the blade was hand-holdabe, I cleaned it up on the disc grinder. I can't see any hamon.

I know that doing the wash of clay may have helped keep my clay on the blade. I've also read that the blade needs to be in the oil in less than a second. This is becoming a comedy of errors. The blade just finished the first temper. I will temper it again and then clean it up and see what I've got. Not really expecting much.

Bob
 
Bob, just the other day someone posted a video where it was said that a wash of (thinner) clay was actually to aid 'efficiency' of the quench- 'prevents' forming of the vapour pocket around the blade.

[video=youtube;vNNJu5-SG1o]https://www.youtube.com/watch?v=vNNJu5-SG1o[/video]

BTW, knife looks very nice... looking forward to seeing further progress. :)
 
Ok, draws are complete and I cleaned it up on the disc grinder then hand finished to 1500...again. I then etched in FC twice and rubbed it out with Flitz after each etch. I am happy that I got closer to what I was trying to do but there are things going on here that I do not understand. Left side of the blade is not too bad; the ricasso is on the wrong side of the line so that is a problem. I think less clay in that area would fix that. The right side is really puzzling. Can anyone tell me what happened there? Also, the blade warped slightly off to the right; how hard is this to fix on a differentially treated blade? I've never had to deal with a warped blade because I've always plate quenched and ground my blades hardened. I think this blade is about used up so I'd really like to get the next one right. I do have three more feet of this W2 left though.

Bob

Untitled by Bob, on Flickr

Untitled by Bob, on Flickr
 
I'm no expert, heck I've never even tried to do a hamon, but it looks like maybe the clay was thicker on the right side than the left near the edge? or maybe it wasn't heated evenly? As far as the correction of warp goes, clamp it to a chunk of angle iron ore some other metal scrap with a shim or two over correcting the warp, then re-temper. A little experimenting and you'll get just the right amount of over correction and you'll have a straight blade!
 
It's hard to tell from pics, but I wonder if you have some decarb left on the knife at the ricasso on the left, and along the hardened oart on the right? Nice activity btw :thumbup:
 
It's hard to tell from pics, but I wonder if you have some decarb left on the knife at the ricasso on the left, and along the hardened oart on the right? Nice activity btw :thumbup:

Definitely no decarb. I ground it down to bare, clean metal on the disc before working back up through the grits. I should have taken a pic before the etch but the blade was a beautiful 1500 grit hand finish with a very slight hint of some activity. I'm wondering if the oil boiled off that side and slowed down the cooling.

Bob
 
I looked at the pics on my computer in full size, and I am 99% sure you didn't get through the decarb. It can be pretty thick with all the thermal cycling, and it's a pain to get through on this steel. It's like it just smears as you sand. If you do a quick etch in heated vinegar, the decarb has a white frosty look. I would suggest starting with the "bad" side at 220g, and seeing if the edge of the weird looking line moves as you sand. If it does, it's the edge of the decarb moving as you get through it.
 
Ok Warren. This whole decarb thing is new for me so I will play with this and see what happens. Is it possible to chemically remove decarb? Thanks for the help.

Bob
 
Ok Warren. This whole decarb thing is new for me so I will play with this and see what happens. Is it possible to chemically remove decarb? Thanks for the help.

Bob

You can't remove decarb chemically. Decarb is a whitish look. It's different from scale which is the black layer.
 
I am thinking Willie is right.

I'd sand that blade again starting with 220 grit. Take down all the surfaces, then sand it up to 400/800 grit and etch again. I bet the pattern looks different.
 
I had a similar issue with a carbon blade that I was etching. It was not a hamon but I kept getting blotches that wouldn't etch. Turned out to be decarb. Sanded some more and finally got it even.
 
Bob, just the other day someone posted a video where it was said that a wash of (thinner) clay was actually to aid 'efficiency' of the quench- 'prevents' forming of the vapour pocket around the blade.

[video=youtube;vNNJu5-SG1o]https://www.youtube.com/watch?v=vNNJu5-SG1o[/video]

BTW, knife looks very nice... looking forward to seeing further progress. :)

funny how many times I've see this old video of mine pop up lately ;-)

for straightening I like to take a heavy bar of steel (I use 1/2 x 1 1/2) and using small C clamps and washers I'll clamp the blade with a reverse curve equal to the bend needing to come out.
Take that whole shebang and run it through a temper cycle.

usually this gets it dead right in one try, sometimes I find that I created a new bend the other way and will have to go back again.

Hey Stephan, I enjoyed looking at your knives at Blade. We talked a little but I failed to introduce myself and you had a lot going on. Congratulations on JS. Thanks for the tip on straightening.

Bob
 
Ok, take two. Today I thermal cycled the second blade; 1650° x 10min, 1550° x 10min, and 1450° x 10min. I then cleaned up the blade on the disc grinder with 180 grit paper and applied a wash of clay.

Untitled by Bob, on Flickr

Once the thin wash was dry, I added the clay to the spine and upper blade and will let it dry overnight. The clay is slightly thinner than a dime.

Untitled by Bob, on Flickr

I also managed to do my first practice gemstone setting today. I actually did a couple and will likely do a couple dozen practice settings before I try putting one in a knife. I'm thinking backspacers on folders.

Untitled by Bob, on Flickr

Bob
 
Back
Top