You are using an out of date browser. It may not display this or other websites correctly.
You should upgrade or use an alternative browser.
You should upgrade or use an alternative browser.
Frame handle hunter WIP...hope this isn't a disaster
- Thread starter Bob Ohlemann
- Start date
- Joined
- Mar 4, 2010
- Messages
- 661
Watching with anticipation:thumbup:
Bing
Bing
- Joined
- Dec 5, 2013
- Messages
- 1,180
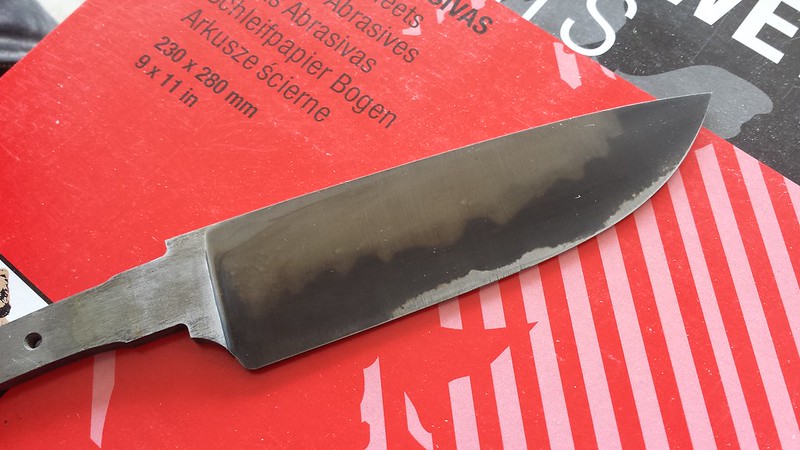
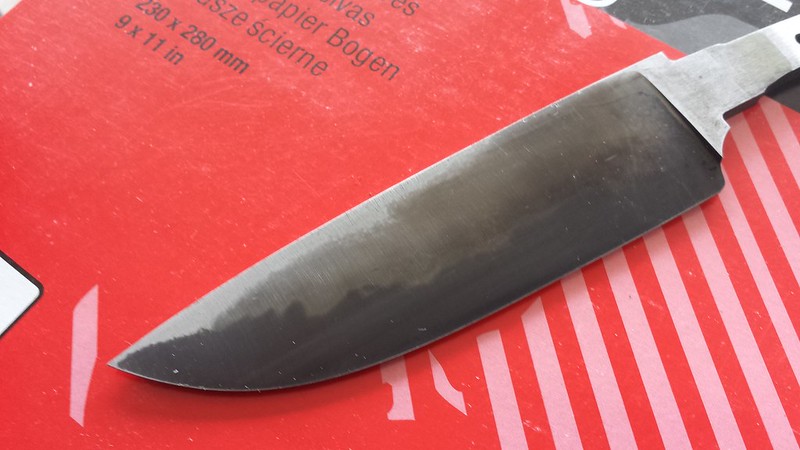
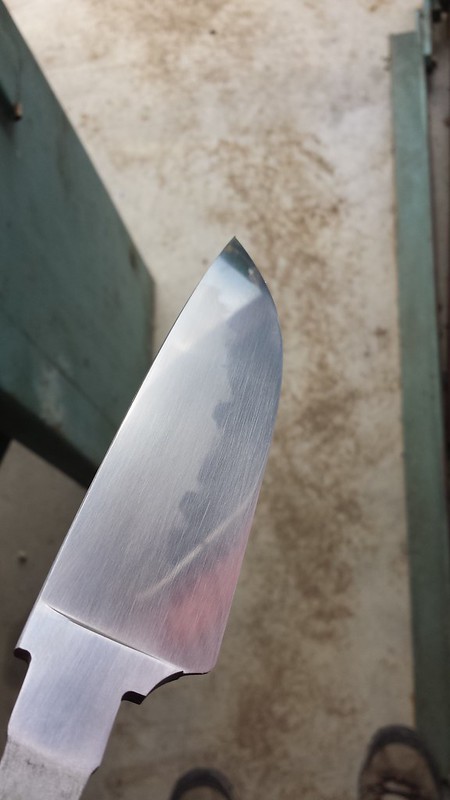
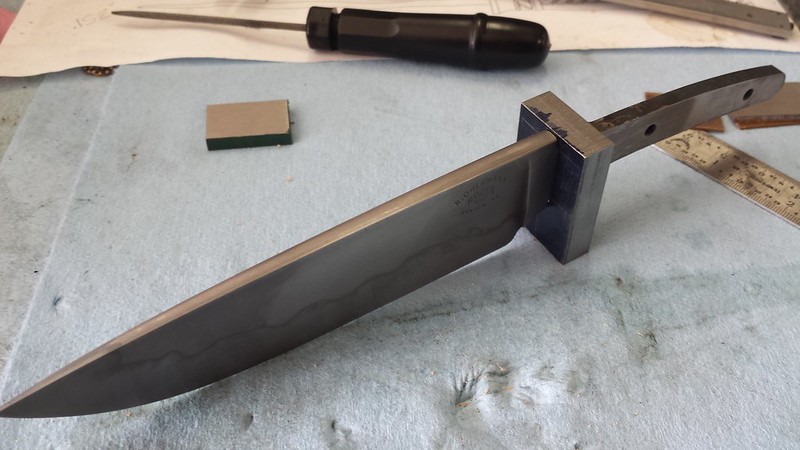
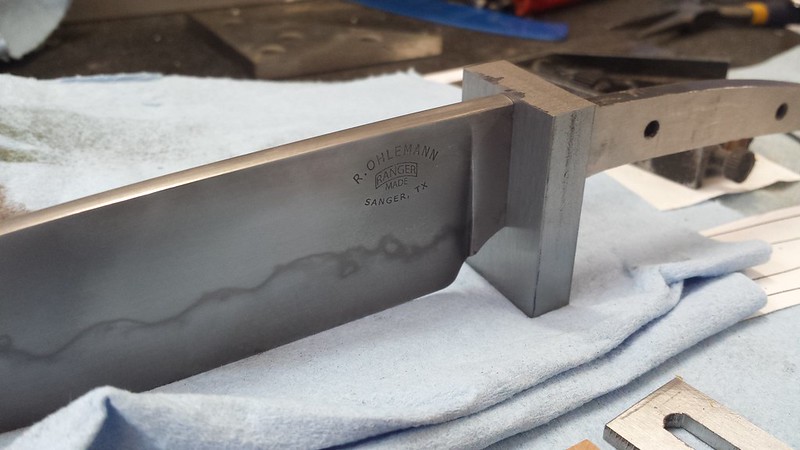
Did some more work on this knife today. I re-scribed a center line and took it back to the belt grinder with a 50 grit Blaze and brought it down closer to final shape. I don't usually grind with a file guide but today I decided to give it a try. I have the Uncle Al's carbide faced guide and the main reason I decided to use it was because I was planning to do a lot of work with the disc grinder. These first two photos are after the 50 grit and a A160 Trizact then a quick dunk in FC to see what I had. Obviously, I still have some decarb to deal with. The next time I try a hamon, I will leave more meat on the blade to remove after HT.
 Untitled by Bob, on Flickr
 Untitled by Bob, on Flickr
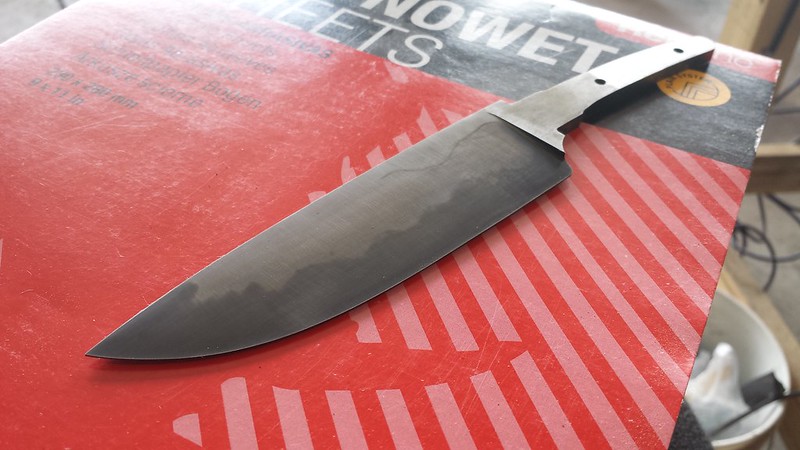
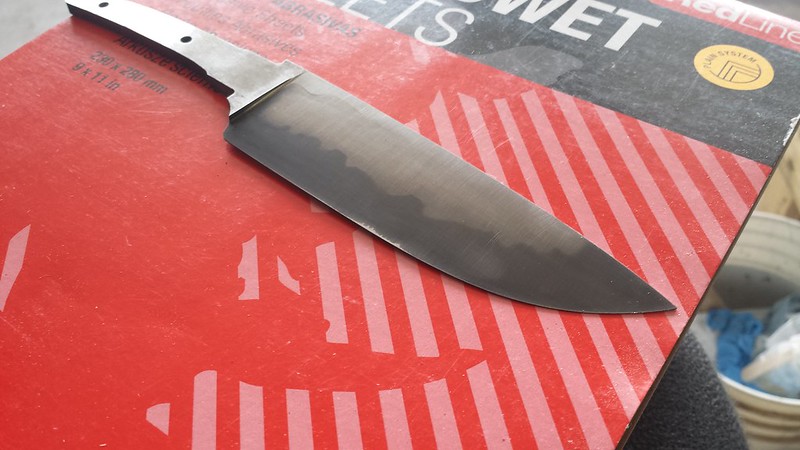
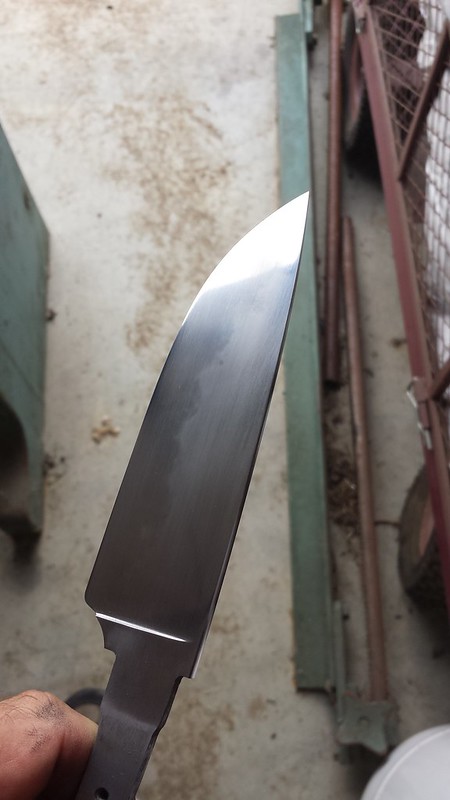
This next pair of photos are after working on the disc grinder from 80 grit up to 320...twice. The decarb was really a pain to get rid of. I probably etched five or six times before I finally had the decarb under control. There is still a very thin line of it in the second photo. The blade edge was getting pretty thin and I figured I would get the rest of it between hand finishing and sharpening.
 Untitled by Bob, on Flickr
 Untitled by Bob, on Flickr
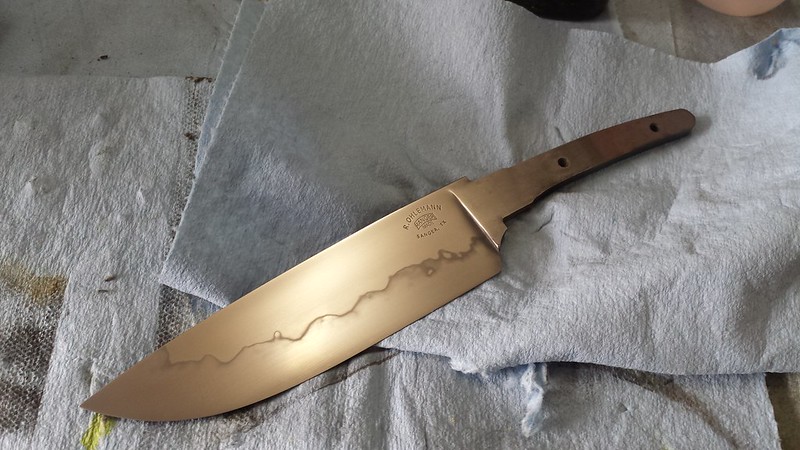
Hand finished to 1500.
 Untitled by Bob, on Flickr
 Untitled by Bob, on Flickr
I went with FC for etching and polished it out with Flitz and makeup remover pads... times four.
 Untitled by Bob, on Flickr
 Untitled by Bob, on Flickr
I'm pretty happy with this so I will finally start moving forward on this project. I definitely learned a lot about hamons and W2.
Bob
Untitled by Bob, on FlickrUntitled by Bob, on FlickrThis next pair of photos are after working on the disc grinder from 80 grit up to 320...twice. The decarb was really a pain to get rid of. I probably etched five or six times before I finally had the decarb under control. There is still a very thin line of it in the second photo. The blade edge was getting pretty thin and I figured I would get the rest of it between hand finishing and sharpening.
Untitled by Bob, on FlickrUntitled by Bob, on FlickrHand finished to 1500.
Untitled by Bob, on FlickrUntitled by Bob, on FlickrI went with FC for etching and polished it out with Flitz and makeup remover pads... times four.
Untitled by Bob, on FlickrUntitled by Bob, on FlickrI'm pretty happy with this so I will finally start moving forward on this project. I definitely learned a lot about hamons and W2.
Bob
- Joined
- Nov 13, 2013
- Messages
- 201
I think you nailed it! Well done!
- Joined
- Dec 5, 2013
- Messages
- 1,180
I guess I missed posting a step...heat treating. The morning after I clayed the blade, I set the oven to bring the blade up to 1450° and hold for four minutes. I actually wiped some of the clay wash off the first 3/8" of the edge of the blade before I put it in the oven. I was able to get a quick quench with no issues and the clay stayed on throughout the process. I then did two draws at 400° for one hour. I'm now heading out to the shop to work on my guard stack.
Thanks for the comments guys.
Bob
Thanks for the comments guys.
Bob
- Joined
- Dec 5, 2013
- Messages
- 1,180
Started on the guard today. I don't feel like I made a lot of progress for seven hours work. My plan was/is to fit all the pieces to the tang first, then drill for alignment pins. I managed to get everything fit to the tang with a pretty good fit at the ricasso. I ran all the magnetic components on the surface grinder to get them flat. I thought I could get away without surfacing the bronze parts but, now I'm not so sure.
 Untitled by Bob, on Flickr
I milled the slots and then fit with files. Here the fit is getting there but still needs a little more work.
 Untitled by Bob, on Flickr
Here are all the parts for the guard. The front and rear piece are 1018 mild steel and will get hot blued. The center piece is 416 and will get rope pattern filework. The 510 bronze pieces will also get some filework.
 Untitled by Bob, on Flickr
 Untitled by Bob, on Flickr
I had to make a few different tools today for pressing the guard on and off the tang so that probably chewed up some of my time. Mostly, I just found this to be very time consuming work.
Bob
Untitled by Bob, on FlickrI milled the slots and then fit with files. Here the fit is getting there but still needs a little more work.
Untitled by Bob, on FlickrHere are all the parts for the guard. The front and rear piece are 1018 mild steel and will get hot blued. The center piece is 416 and will get rope pattern filework. The 510 bronze pieces will also get some filework.
Untitled by Bob, on FlickrUntitled by Bob, on FlickrI had to make a few different tools today for pressing the guard on and off the tang so that probably chewed up some of my time. Mostly, I just found this to be very time consuming work.
Bob
- Joined
- Mar 4, 2010
- Messages
- 661
Bob, this is coming along very nice. Looks as though you got the Hamon thing figured out. My excitement grows with every update.
It was great to visit with you and the wife at Blade.
Bing
It was great to visit with you and the wife at Blade.
Bing
- Joined
- Nov 25, 2003
- Messages
- 1,017
Really enjoying this WIP. Thanks for taking the time to share it with us, Bob. ")
Willie71
Warren J. Krywko
- Joined
- Feb 23, 2013
- Messages
- 12,214
It looks really good! I personally like the vinegar/lemon juice etch, but that is a personal preference thing. Nice activity. Each will just get better, or worse depending on the hamon faries' mood, but this one is quite nice. Its not too high or low, good contrast, and some nice whispy activity.
- Joined
- Dec 5, 2013
- Messages
- 1,180
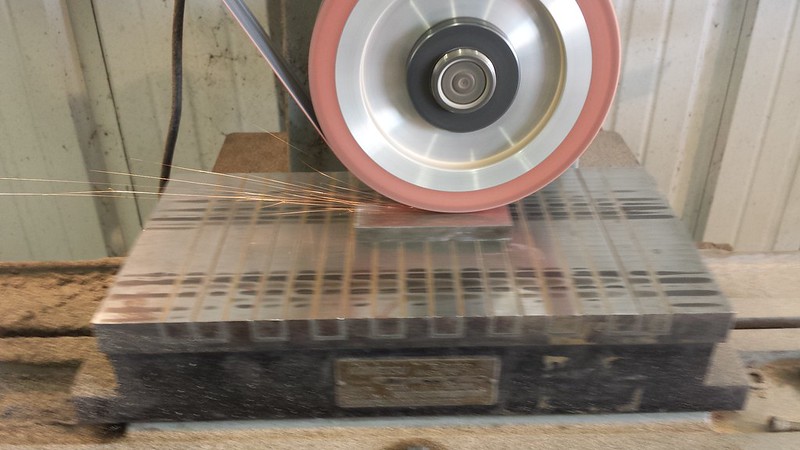
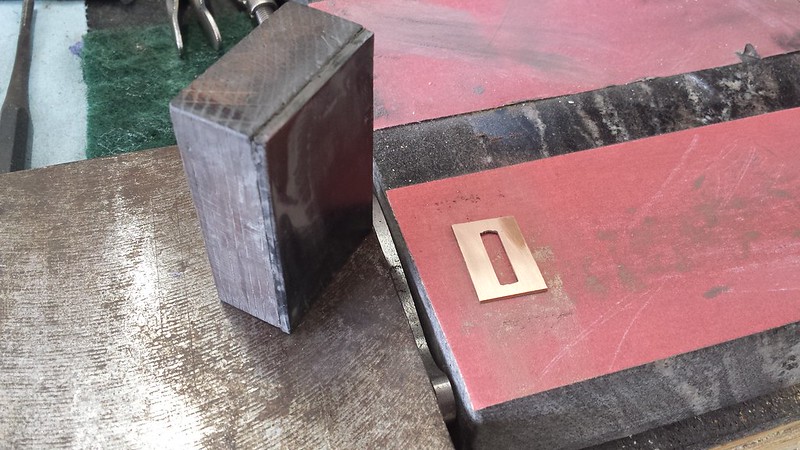
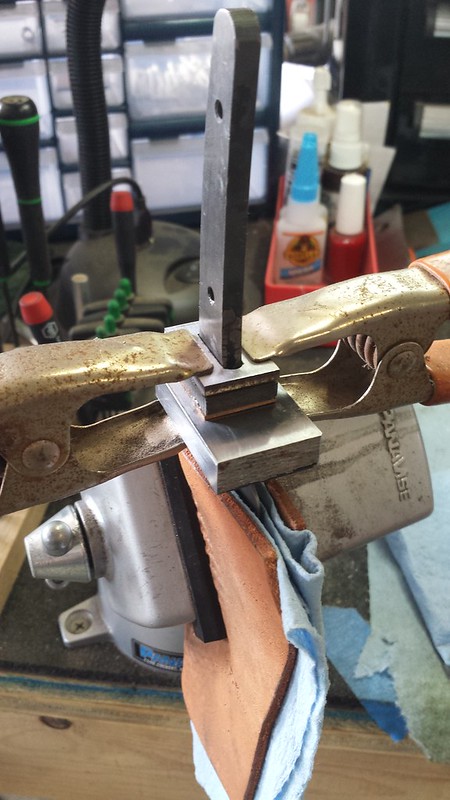
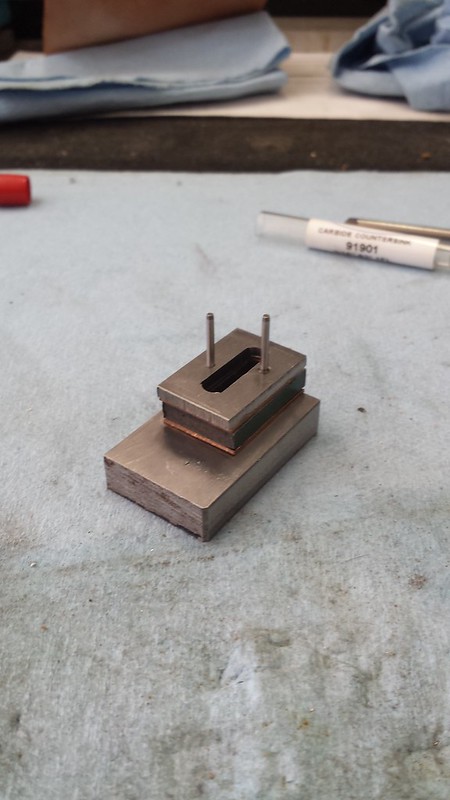
Did a little more work on the guard today. First thing I did was get the bronze inserts flat. I considered supergluing them to a machinist parallel and putting them on the surface grinder but, the heat from grinding could loosen the glue and send the inserts flying; I try to avoid that. I remembered that Nick Wheeler build a really cool little device specifically for lapping small parts and I considered making something similar. On a whim, I decided to try using one of my rubber backed sanding blocks on a granite surface plate. I usually keep this plate set up with 220 and 400 grit for quick touch-ups and such. I laid the insert on the 400 grit paper and put the block over the top. I pulled in smooth strokes while keeping even pressure in the center of the block. I checked the sides and corners frequently with a caliper to ensure it was coming down to a consistent thickness. This worked really well. In the photo, the top right corner is still off by .002"; I kept going until both sides were flat and parallel.
 Untitled by Bob, on Flickr
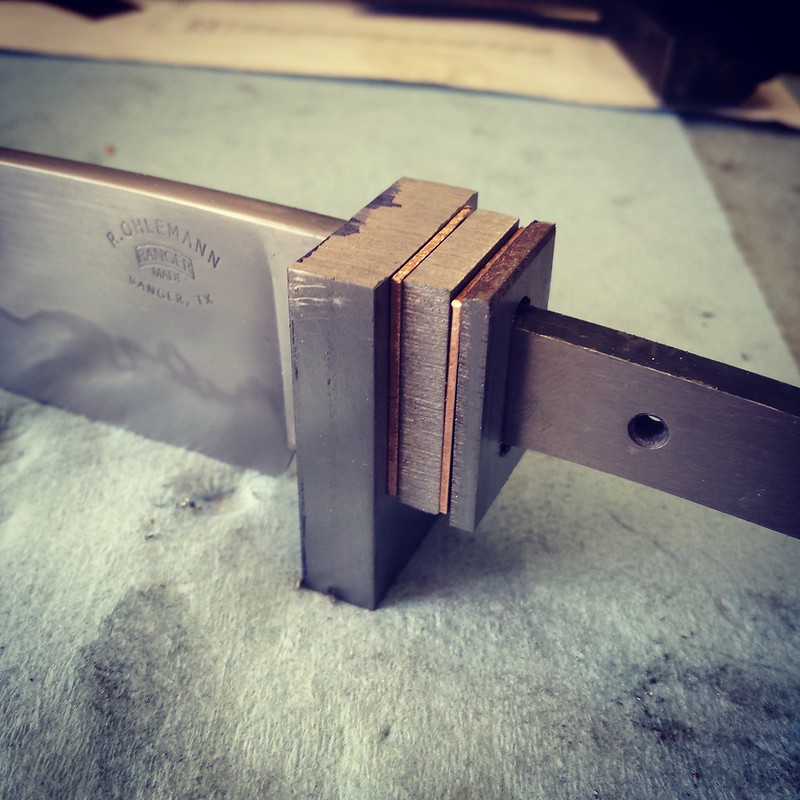
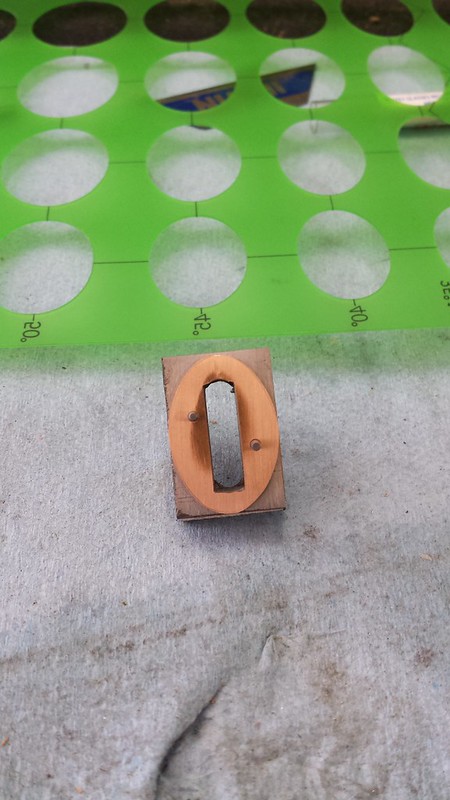
Next, I worked on the fit of the face of the guard. I initially thought I might be able to get away without soldering this joint so I wanted to make it as tight as possible. Now I'm thinking that I should solder it but a tight joint is just a good idea anyway. The fit was already pretty good but I did a light peening around the slot with a slightly rounded punch and a 4oz hammer.
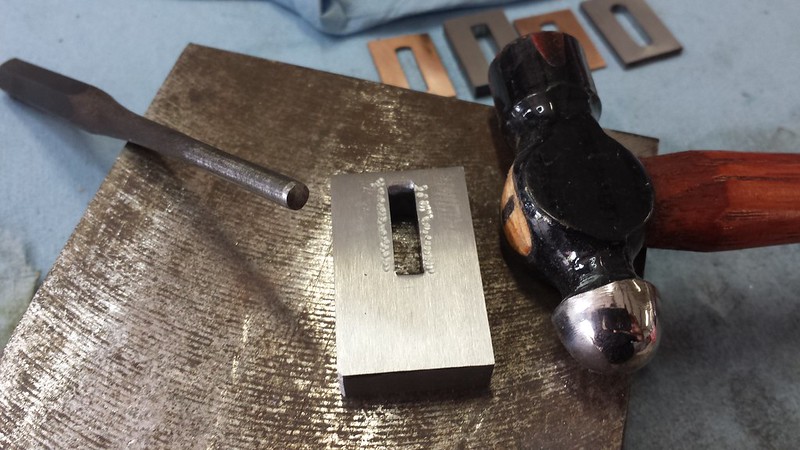 Untitled by Bob, on Flickr
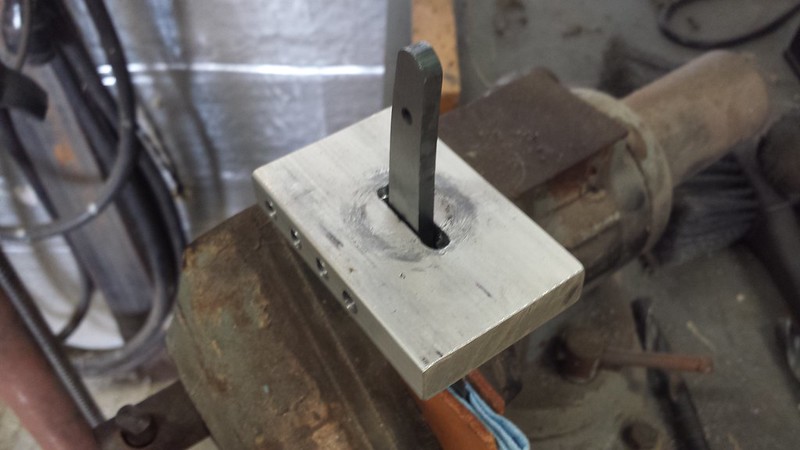
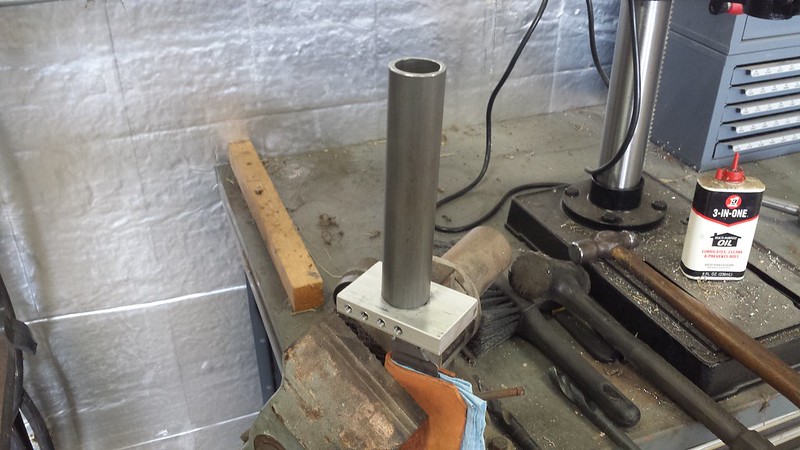
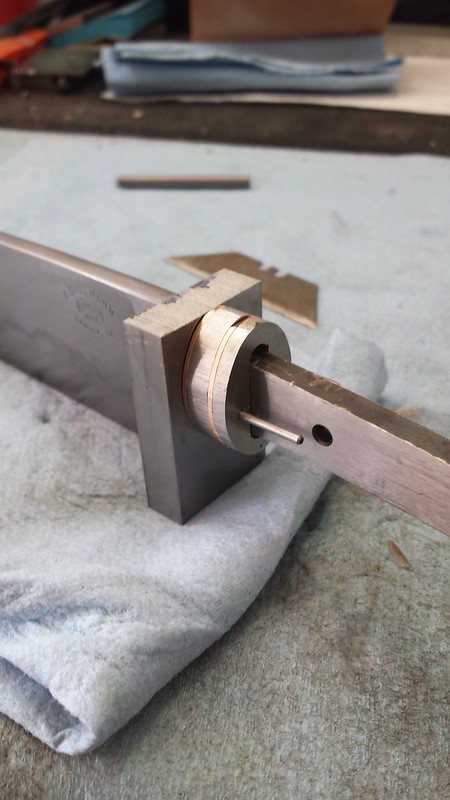
I then pressed the guard back onto the blade using my high-tech setup I copied from a Manuel Quiroga video.
 Untitled by Bob, on Flickr
 Untitled by Bob, on Flickr
 Untitled by Bob, on Flickr
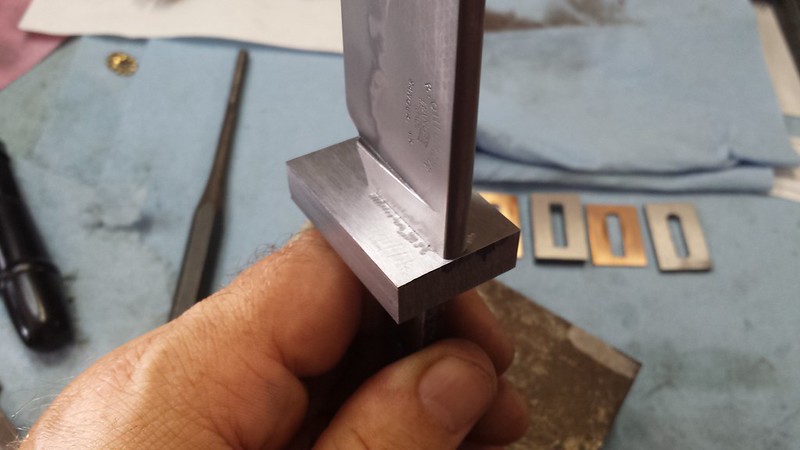
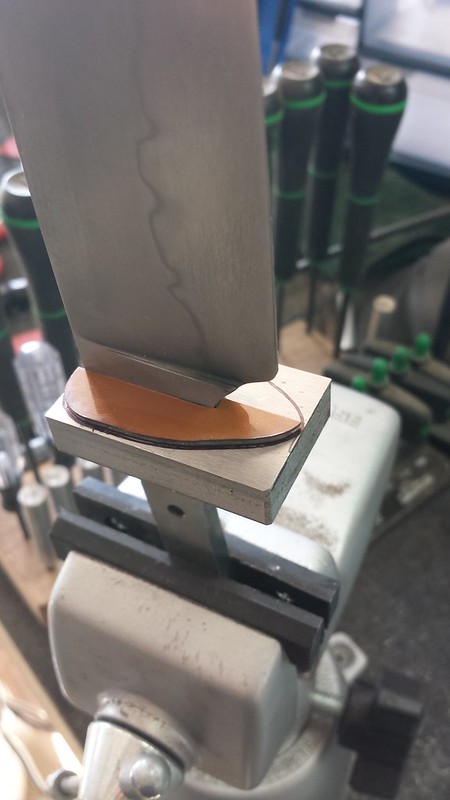
...Which gave me this. Also, if you look at the first photo in the set above, you can see I peened the backside of the guard as well. This was to get the guard to sit exactly 90° to the axis of the blade.
 Untitled by Bob, on Flickr
I then knocked the guard back off the blade and put it back on the surface grinder to remove the peen marks.
 Untitled by Bob, on Flickr
I was hoping to pin all the pieces of the stack today. I remembered watching a video where the gentleman (I don't remember who) said he preferred pinning with 1/16" stainless welding rod. I have plenty of that on hand and was planning to use it. I did some quick tests on a piece of scrap steel and found that the tolerances are too loose for my liking. I've ordered some high-precision dowel pins and a 1/16" reamer and should have them by this weekend. I might have to start another folder while I am waiting.
Bob
Untitled by Bob, on FlickrNext, I worked on the fit of the face of the guard. I initially thought I might be able to get away without soldering this joint so I wanted to make it as tight as possible. Now I'm thinking that I should solder it but a tight joint is just a good idea anyway. The fit was already pretty good but I did a light peening around the slot with a slightly rounded punch and a 4oz hammer.
Untitled by Bob, on FlickrI then pressed the guard back onto the blade using my high-tech setup I copied from a Manuel Quiroga video.
Untitled by Bob, on FlickrUntitled by Bob, on FlickrUntitled by Bob, on Flickr...Which gave me this. Also, if you look at the first photo in the set above, you can see I peened the backside of the guard as well. This was to get the guard to sit exactly 90° to the axis of the blade.
Untitled by Bob, on FlickrI then knocked the guard back off the blade and put it back on the surface grinder to remove the peen marks.
Untitled by Bob, on FlickrI was hoping to pin all the pieces of the stack today. I remembered watching a video where the gentleman (I don't remember who) said he preferred pinning with 1/16" stainless welding rod. I have plenty of that on hand and was planning to use it. I did some quick tests on a piece of scrap steel and found that the tolerances are too loose for my liking. I've ordered some high-precision dowel pins and a 1/16" reamer and should have them by this weekend. I might have to start another folder while I am waiting.
Bob
- Joined
- Dec 5, 2013
- Messages
- 1,180
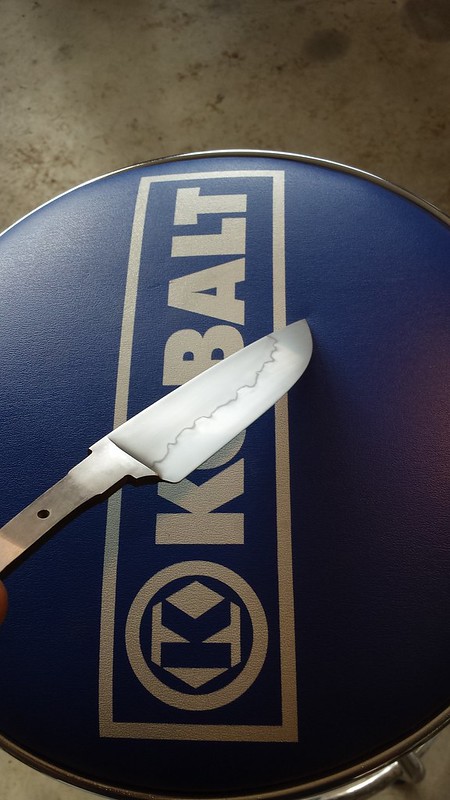
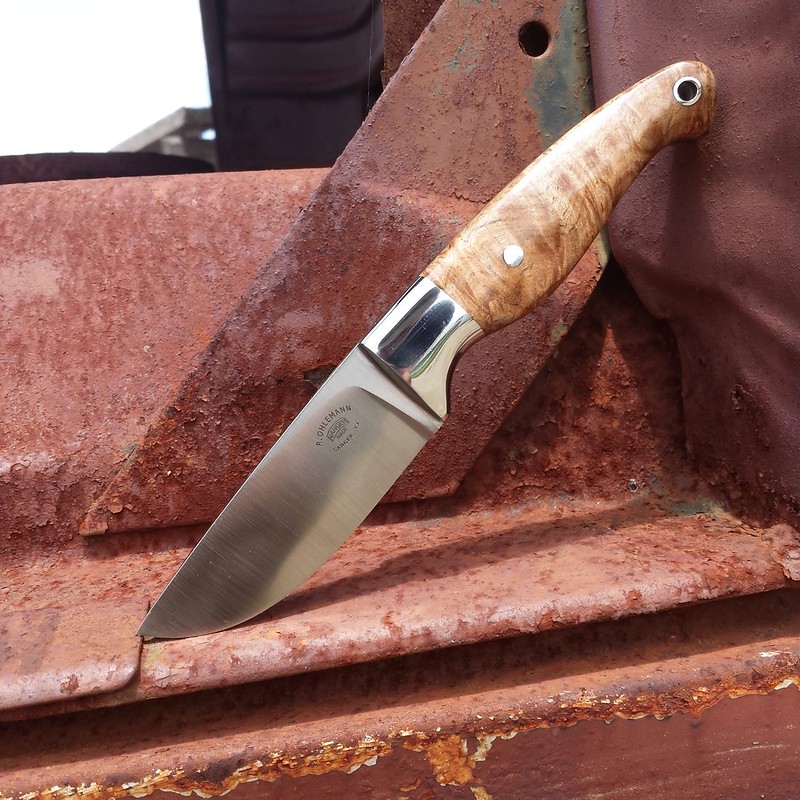
Don't know if I'll make it into the shop today. The weather here is pretty bad and I have other chores that need to get done. I thought I would post a pic of a little field grade skinner EDC that I finished up on Monday. I do these little EDC's in five different blade shapes and varying finish levels. Probably sold 40+ of these little dudes in the last nine months. They are good projects for filling in the wait times on other more complex projects.
 Untitled by Bob, on Flickr
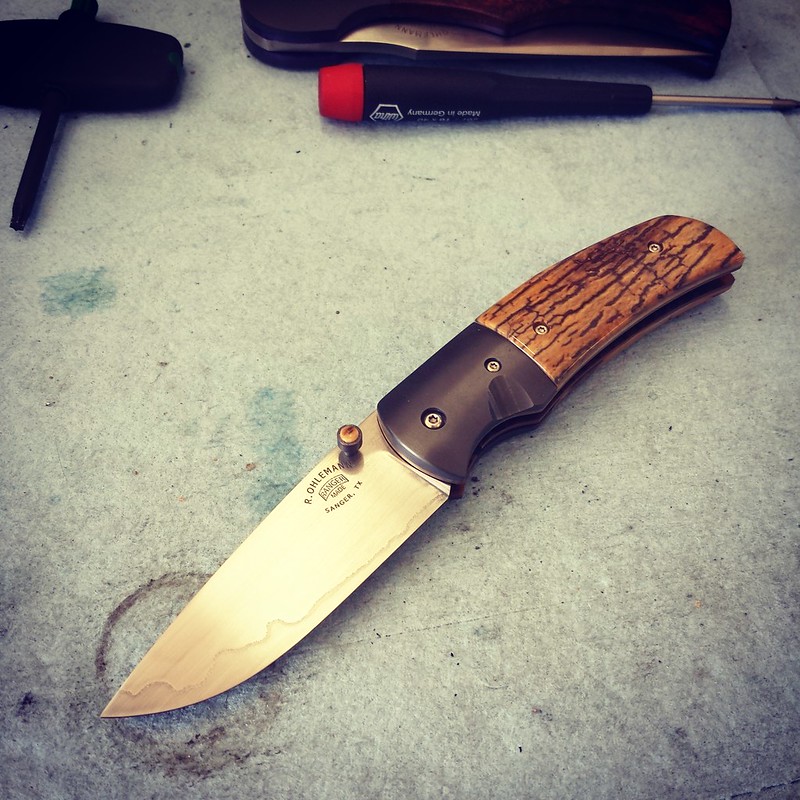
Also, if you're following me on instagram you've probably already seen this little folder but, I've not posted it up here. I finished this right before Blade so, I am getting other things done while I stumble through this frame handle build.
 Untitled by Bob, on Flickr
Untitled by Bob, on FlickrAlso, if you're following me on instagram you've probably already seen this little folder but, I've not posted it up here. I finished this right before Blade so, I am getting other things done while I stumble through this frame handle build.
Untitled by Bob, on Flickr- Joined
- Jan 14, 2014
- Messages
- 1,174
I've been following you from the beginning and I've loved seeing your progression. Your blades ooze of that Johnny Stout sexiness with your own twist to it. I can say undoubtedly you are going to be one of the next "big things" in the knife community. I need to order one soon before you get out of my price range
- Joined
- Dec 5, 2013
- Messages
- 1,180
Thanks everyone for the encouraging comments. This knife has been every bit the challenge I expected it would be (more really) and I'm glad for it.
Bob
Bob
- Joined
- Dec 5, 2013
- Messages
- 1,180
I've been following you from the beginning and I've loved seeing your progression. Your blades ooze of that Johnny Stout sexiness with your own twist to it. I can say undoubtedly you are going to be one of the next "big things" in the knife community. I need to order one soon before you get out of my price range
Thank you. This comment really means a lot to me. I absolutely love knifemaking but, it is not always easy. I have had the good fortune of getting mentorship from many excellent makers. Their time and encouragement are greatly appreciated.
Bob
- Joined
- Dec 5, 2013
- Messages
- 1,180
UPS brought my dowel pins and reamer today so I did some more work on the guard. First thing I did was drill and ream a test piece to check the fit of the dowel pins. They were a very snug slip fit with no side-to-side movement. I then super glued all the guard components together on the tang, being careful not to get glue on the tang itself.
 Untitled by Bob, on Flickr
I then pre-drilled with a #53 and reamed the holes with the 1/16" reamer. Deburred the front and back of all the holes and inserted the pins.
 Untitled by Bob, on Flickr
I created a basic oval shape using an ellipse template and shaped one of the bronze layers. I put the shaped part back on the stack and used it as a grind-to template for the rest of the stack.
 Untitled by Bob, on Flickr
Next I scribed the oval profile onto the back of the guard.
 Untitled by Bob, on Flickr
I then made a template for the guard shape. I first learned how to do this from one of Nick Wheelers WIP's.
 Untitled by Bob, on Flickr
So, I probably should have taken a couple pics between the last step and here. I profiled the guard and cleaned the edge op to 320 grit. I then turned the guard on it's side and carefully ground back the lower section of the face. Next, I set a pair of dividers to about 3/32" and scribed a line around the edge of the guard. I put a 1-1/4" small wheel on the grinder with a 50 grit belt and carefully roughed out the material between the edge scribe and the rear scribed line.
 Untitled by Bob, on Flickr
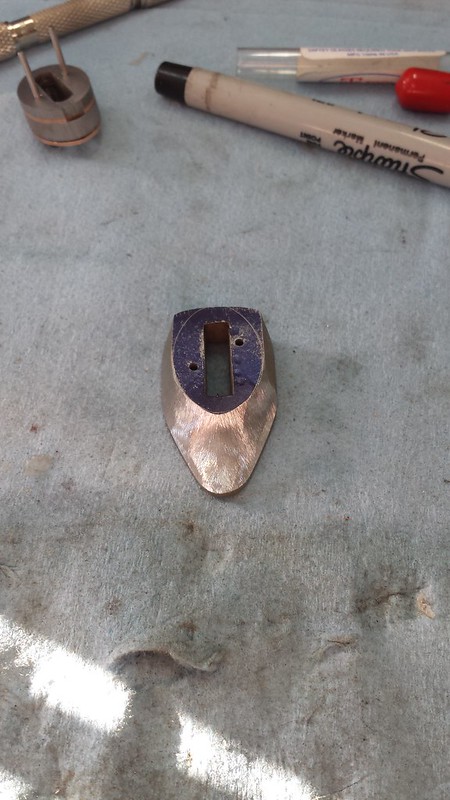
This is where I left off today. I still need to work the transition at the top of the guard where things flatten out. This is all still just rough shaping; I'm sure you can see that some of my pieces are too short in the stack but, everything will still come down enough that there will be a consistent fit. Actually, the more I look at these pictures, I'm starting to think the guard needs to be narrower; maybe as narrow as the stack. Here's a couple more pics of the shaped guard, what do you guys think?
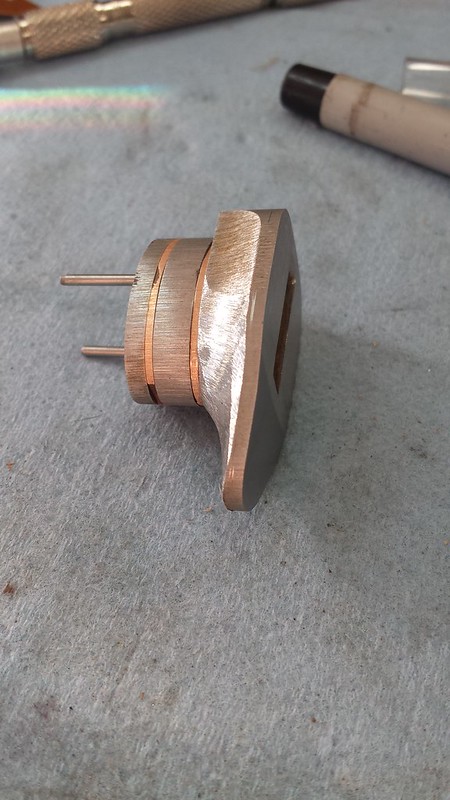 Untitled by Bob, on Flickr
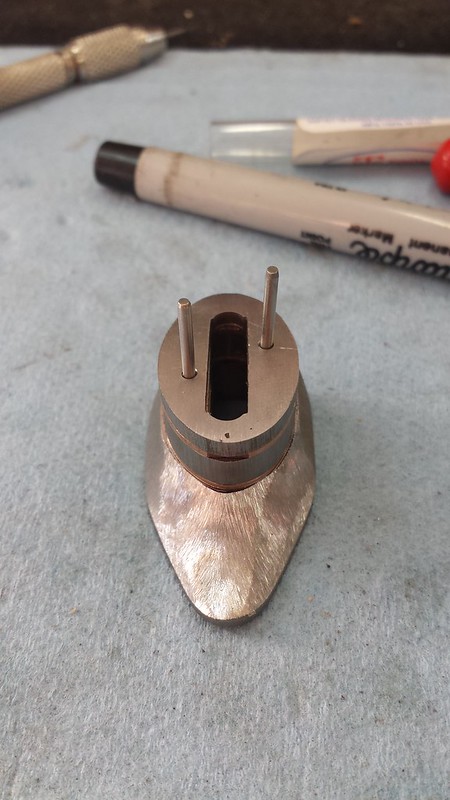 Untitled by Bob, on Flickr
Untitled by Bob, on FlickrI then pre-drilled with a #53 and reamed the holes with the 1/16" reamer. Deburred the front and back of all the holes and inserted the pins.
Untitled by Bob, on FlickrI created a basic oval shape using an ellipse template and shaped one of the bronze layers. I put the shaped part back on the stack and used it as a grind-to template for the rest of the stack.
Untitled by Bob, on FlickrNext I scribed the oval profile onto the back of the guard.
Untitled by Bob, on FlickrI then made a template for the guard shape. I first learned how to do this from one of Nick Wheelers WIP's.
Untitled by Bob, on FlickrSo, I probably should have taken a couple pics between the last step and here. I profiled the guard and cleaned the edge op to 320 grit. I then turned the guard on it's side and carefully ground back the lower section of the face. Next, I set a pair of dividers to about 3/32" and scribed a line around the edge of the guard. I put a 1-1/4" small wheel on the grinder with a 50 grit belt and carefully roughed out the material between the edge scribe and the rear scribed line.
Untitled by Bob, on FlickrThis is where I left off today. I still need to work the transition at the top of the guard where things flatten out. This is all still just rough shaping; I'm sure you can see that some of my pieces are too short in the stack but, everything will still come down enough that there will be a consistent fit. Actually, the more I look at these pictures, I'm starting to think the guard needs to be narrower; maybe as narrow as the stack. Here's a couple more pics of the shaped guard, what do you guys think?
Untitled by Bob, on FlickrUntitled by Bob, on Flickr- Joined
- Jan 14, 2015
- Messages
- 1,312
Wow great work, and I like how this is coming along.
- Joined
- Nov 14, 2006
- Messages
- 414
Great job man!
That's gonna be a great looking knife.
I'm very glad you learned something from my video
That's gonna be a great looking knife.
I'm very glad you learned something from my video