You are using an out of date browser. It may not display this or other websites correctly.
You should upgrade or use an alternative browser.
You should upgrade or use an alternative browser.
Frame handle hunter WIP...hope this isn't a disaster
- Thread starter Bob Ohlemann
- Start date
")
If you mean the width of the guard's face, i agree....it would be nice having the front wider than the stack, but not much.
As a rule of thumb i prefer not having more than the blade-at-ricasso thickness per side, better less with a blade this thick.
I like the way you are contouring it
As a rule of thumb i prefer not having more than the blade-at-ricasso thickness per side, better less with a blade this thick.
I like the way you are contouring it
- Joined
- Dec 5, 2013
- Messages
- 1,180
Ok, I have an update on this build. I have been working on another folder and this knife at the same time. It is nice to have something else when I get stuck and need to think for a while. I ended up making the guard narrower. It was a good call; looks much better. I sculpted it down close to the rest of the stack and called it good for now.
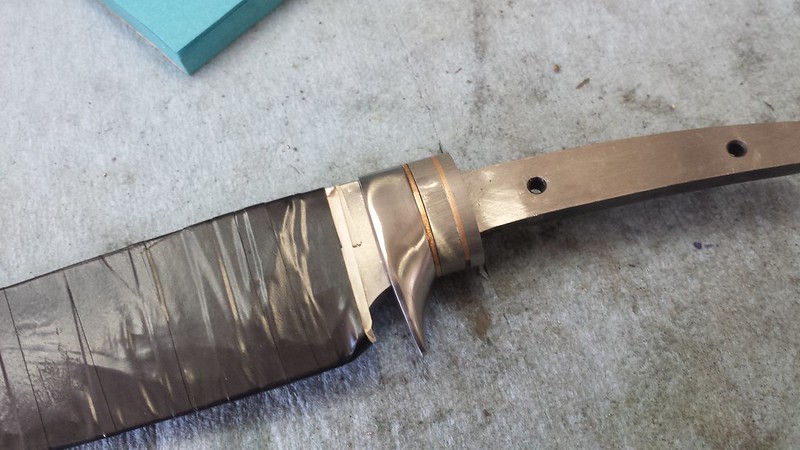 Untitled by Bob, on Flickr
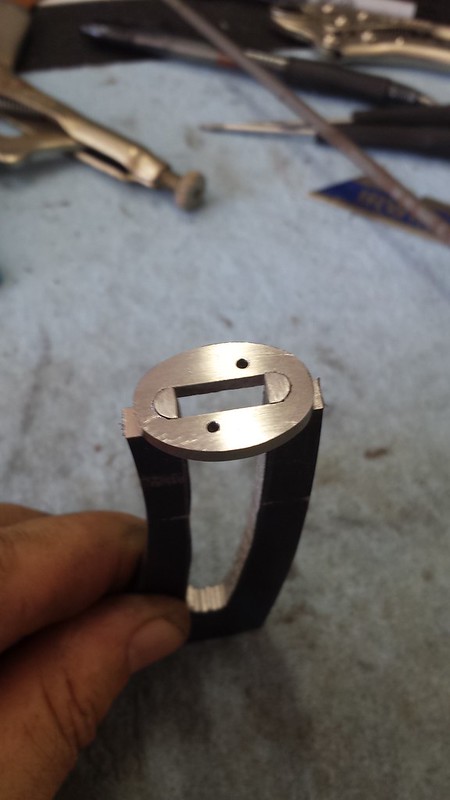
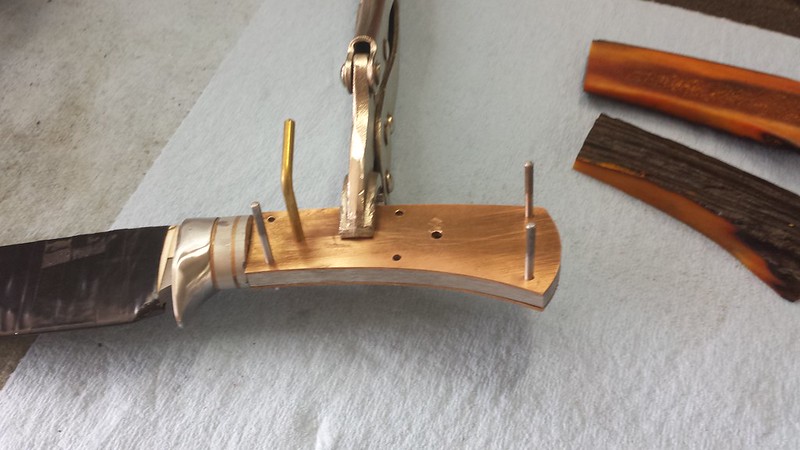
Next, I started on the frame. I made a template from garolite and scribed it onto a piece of 416 stainless. I left it oversize by about 1/16" all the way around so I could work down to the final size. In the picture below I was screwing this up. I needed to remove the first spacer in the guard stack before scribing around the tang. I did correct for that before moving on.
 Untitled by Bob, on Flickr
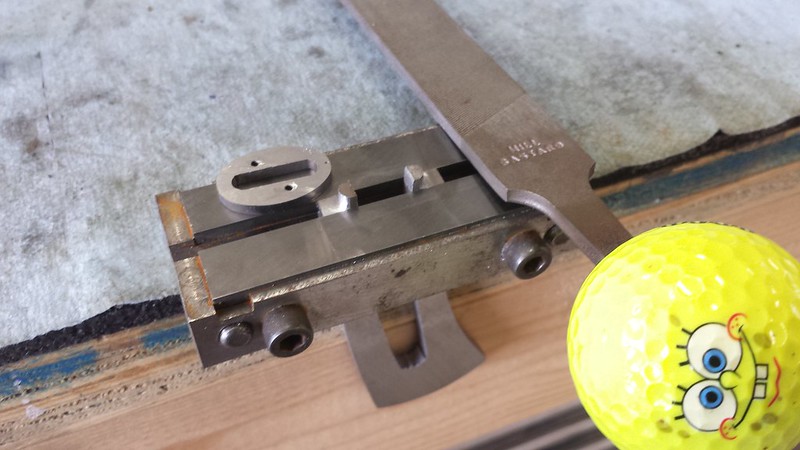
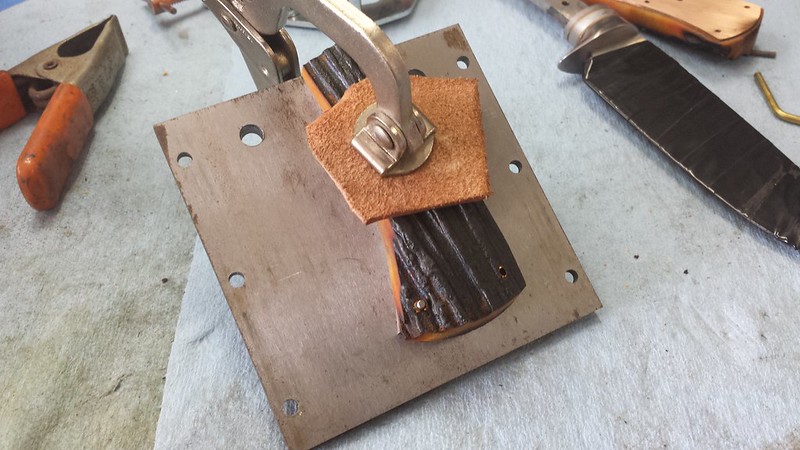
This next photo shows why I needed to remove that spacer before scribing. I learned this from one of Bruce Bump's threads. These little ears will tuck into the spacer above and below the tang.
 Untitled by Bob, on Flickr
 Untitled by Bob, on Flickr
Getting a tight fit for the full length of the tang is a long process. Next time I will cut very, very close to my line on the bandsaw. As it was, I cut within .030" but, that still meant I had to take a lot of material off and the most efficient way I found to do it was filing by hand.
 Untitled by Bob, on Flickr
Added: I missed mentioning that once I had a good fit with the tang, I brought the frame down to final shape.
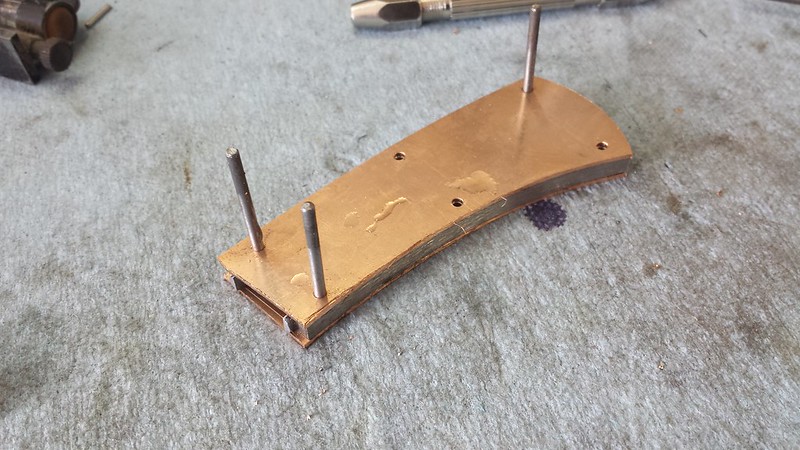
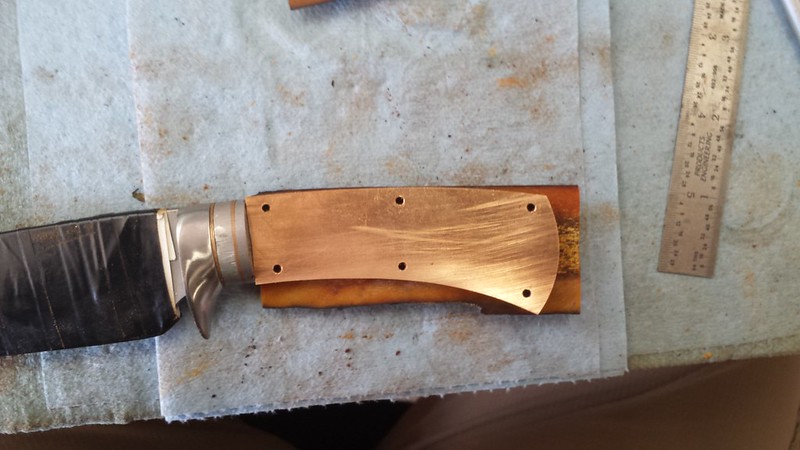
Next I fit the bronze liners. I thought I took a picture of laying out to drill the pin holes but, apparently I didn't. Anyway, again I cut the material a little oversize. I laid out for the holes on the frame and then center punched for the holes. I then clamped one side of the liner material to the frame and drilled for the 3/32" pins. Once I finished drilling the frame and first side, clamped the frame to the second liner and used it as a drill guide. Once both liners were attached to the frame with set-up pins, I shaped the liners to the frame.
 Untitled by Bob, on Flickr
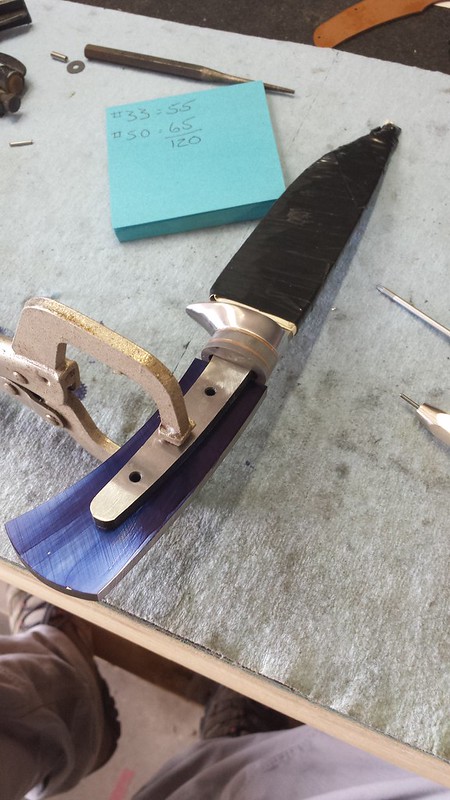
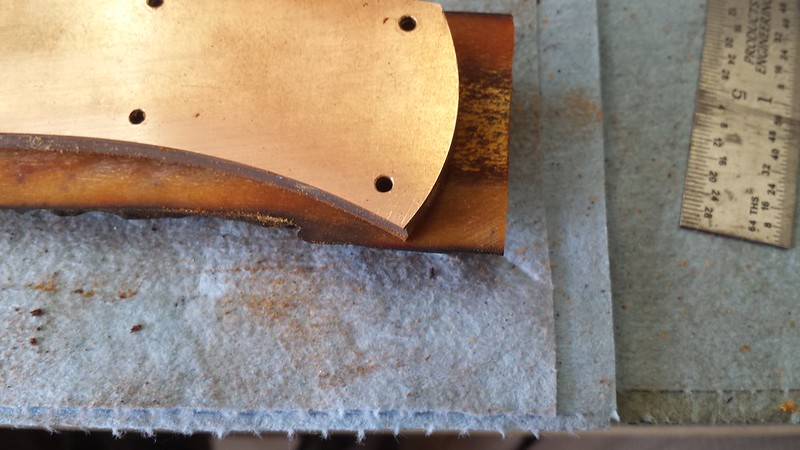
I then had a couple trys at fitting the liners at the front edge of the frame. The best technique for me turned out to be putting the assembly into the file guide and bringing the tops and bottoms down flush with the frame. I then removed the liners and ground away the material in between on a 6" wheel. This gives me some clearance in the center and the exposed edges will snug up tight against the guard...I hope.
 Untitled by Bob, on Flickr
And that is it for today.
Bob
Untitled by Bob, on FlickrNext, I started on the frame. I made a template from garolite and scribed it onto a piece of 416 stainless. I left it oversize by about 1/16" all the way around so I could work down to the final size. In the picture below I was screwing this up. I needed to remove the first spacer in the guard stack before scribing around the tang. I did correct for that before moving on.
Untitled by Bob, on FlickrThis next photo shows why I needed to remove that spacer before scribing. I learned this from one of Bruce Bump's threads. These little ears will tuck into the spacer above and below the tang.
Untitled by Bob, on FlickrUntitled by Bob, on FlickrGetting a tight fit for the full length of the tang is a long process. Next time I will cut very, very close to my line on the bandsaw. As it was, I cut within .030" but, that still meant I had to take a lot of material off and the most efficient way I found to do it was filing by hand.
Untitled by Bob, on FlickrAdded: I missed mentioning that once I had a good fit with the tang, I brought the frame down to final shape.
Next I fit the bronze liners. I thought I took a picture of laying out to drill the pin holes but, apparently I didn't. Anyway, again I cut the material a little oversize. I laid out for the holes on the frame and then center punched for the holes. I then clamped one side of the liner material to the frame and drilled for the 3/32" pins. Once I finished drilling the frame and first side, clamped the frame to the second liner and used it as a drill guide. Once both liners were attached to the frame with set-up pins, I shaped the liners to the frame.
Untitled by Bob, on FlickrI then had a couple trys at fitting the liners at the front edge of the frame. The best technique for me turned out to be putting the assembly into the file guide and bringing the tops and bottoms down flush with the frame. I then removed the liners and ground away the material in between on a 6" wheel. This gives me some clearance in the center and the exposed edges will snug up tight against the guard...I hope.
Untitled by Bob, on FlickrAnd that is it for today.
Bob
A.McPherson
Knifemaker / Craftsman / Service Provider
- Joined
- Jan 27, 2012
- Messages
- 2,741
Frickin' wicked Bob! Thanks for sharing!
- Joined
- Dec 5, 2013
- Messages
- 1,180
Frickin' wicked Bob! Thanks for sharing!
Thanks, it's been an adventure so far.
Bob
- Joined
- Dec 5, 2013
- Messages
- 1,180
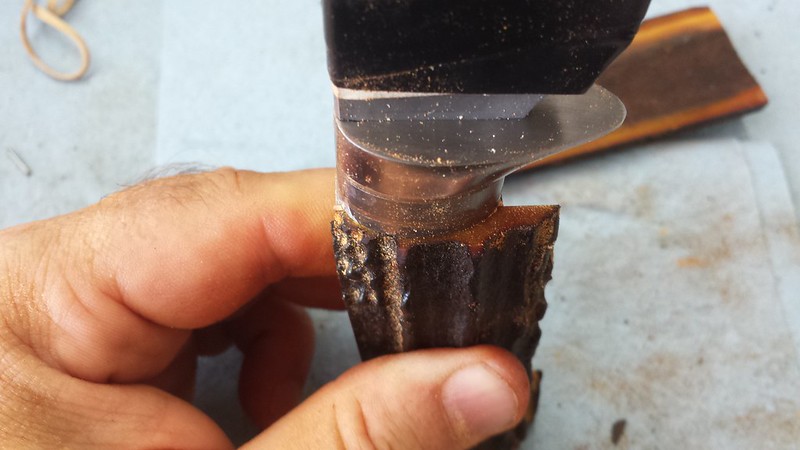
Today I started working the stag. When I took this project, stag was a requirement. When I did the design, I didn't realize how big the slabs would need to be. It took quite a bit of back and forth with Culpeppers to get a workable size and then I had to wait two months for them to be dyed. I would have really preferred to use a taper but there were not any available in a size/shape that would work. These slabs are 5" x 1-3/8".
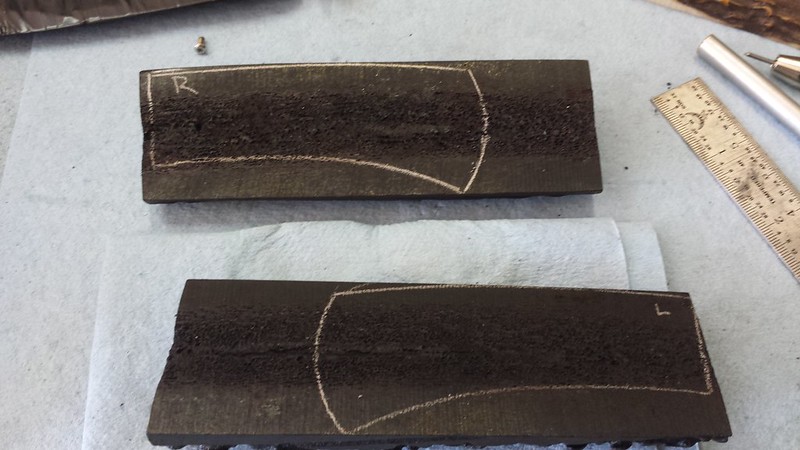
I've never worked with stag but, I have worked with Mammoth ivory on a few projects so I just approached it in the same way; work everything from the back. I started out using the liners to determine the best positioning. Once I was happy with how the stag fit and the way the grain laid on the knife, I marked the back of the slabs.
 Untitled by Bob, on Flickr
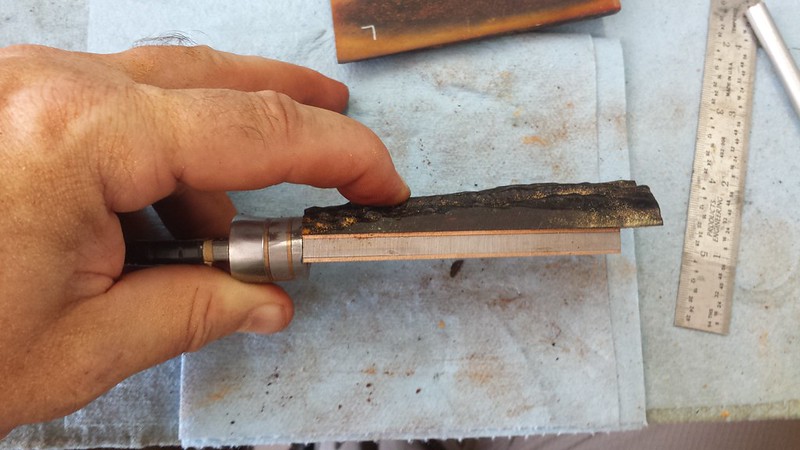
Next I need to thin the slabs. Thinning them evenly would not get the fit I wanted so I marked the ends and then ground down to my marks.
 Untitled by Bob, on Flickr
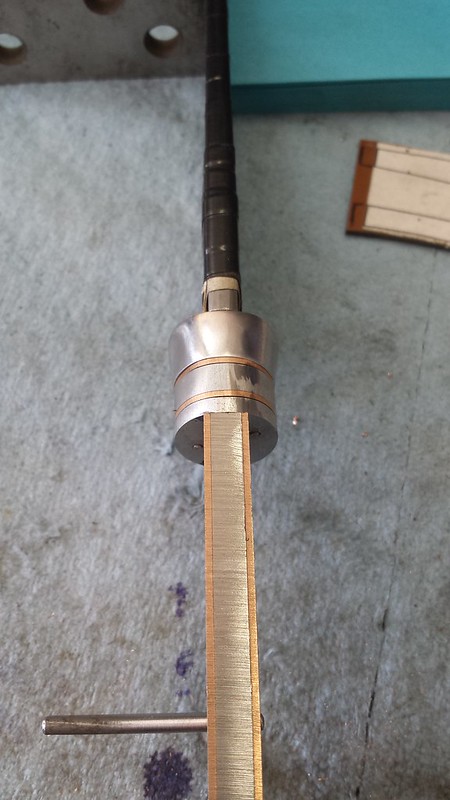
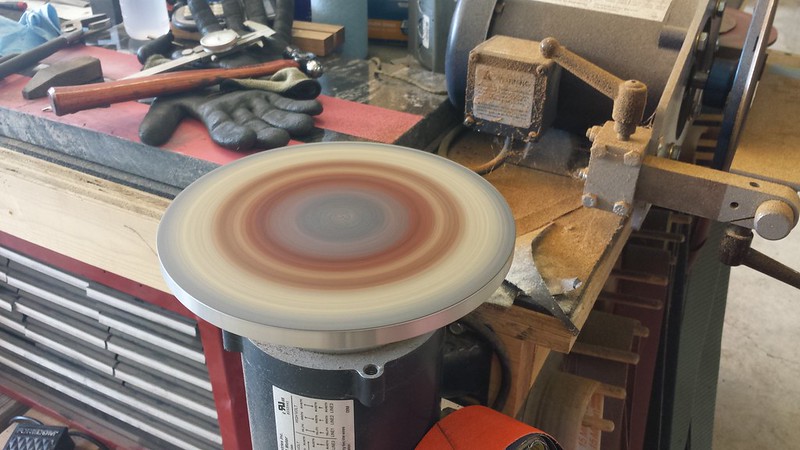
This is my weapon of choice for grinding the back sides of mammoth scales, it worked just as well on the stag. I put the slab down on the running disc and then control the material removal by putting downward pressure where I want the material to come off.
 Untitled by Bob, on Flickr
No blood on the disc. I actually manage to only burn my fingertips when the material gets hot, I'm very careful not to grind my fingers. The stag clogs the 80 grit paper pretty quickly; todays work took two sheets.
 Untitled by Bob, on Flickr
After several rounds of "check the fit then grind", I have the slabs thinned down overall and tapered to be thinner at the front. Not much margin for error here.
 Untitled by Bob, on Flickr
 Untitled by Bob, on Flickr
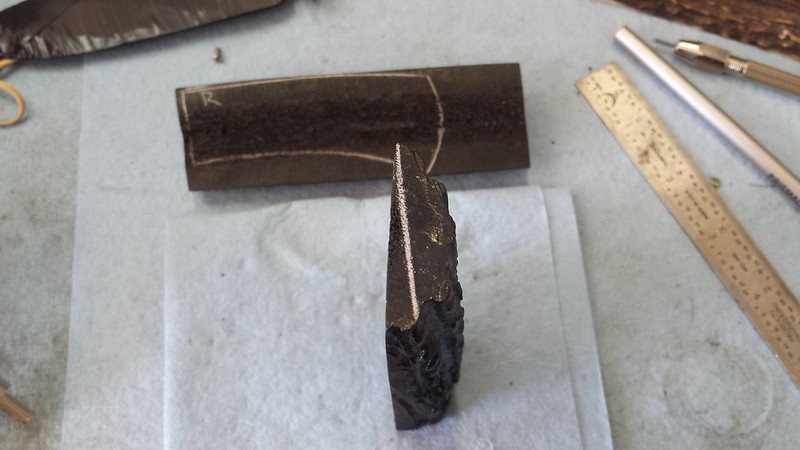
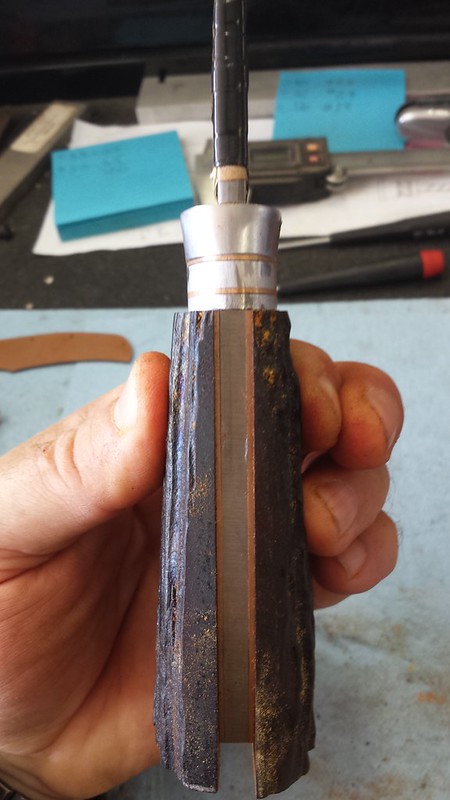
Here you can see the taper from front to back.
 Untitled by Bob, on Flickr
This is as far down as I'm planning to go at the front. If I thin any more, the valleys will drop below the guard fittings. I will bring everything else down to the guard.
 Untitled by Bob, on Flickr
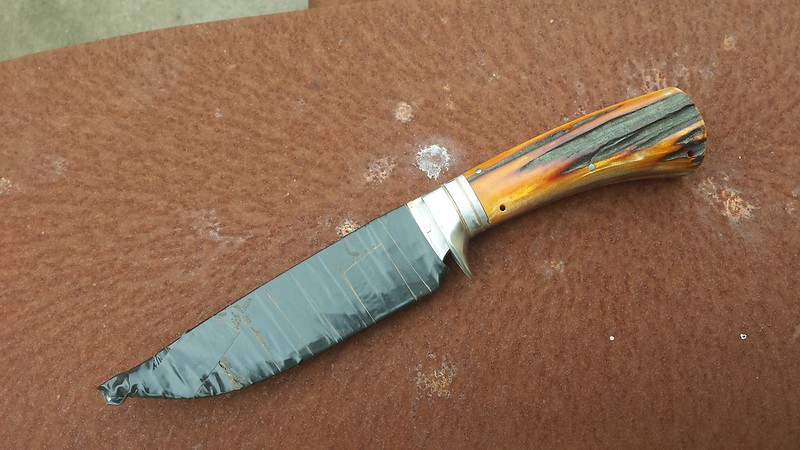
Both slabs fit to the frame assembly. That is it for today.
 Untitled by Bob, on Flickr
Oh...except I also made this zirc thumbstud and insert today. I'm waiting on the right size washers to finish this one up. Should wrap it up tomorrow.
 Untitled by Bob, on Flickr
Bob
I've never worked with stag but, I have worked with Mammoth ivory on a few projects so I just approached it in the same way; work everything from the back. I started out using the liners to determine the best positioning. Once I was happy with how the stag fit and the way the grain laid on the knife, I marked the back of the slabs.
Untitled by Bob, on FlickrNext I need to thin the slabs. Thinning them evenly would not get the fit I wanted so I marked the ends and then ground down to my marks.
Untitled by Bob, on FlickrThis is my weapon of choice for grinding the back sides of mammoth scales, it worked just as well on the stag. I put the slab down on the running disc and then control the material removal by putting downward pressure where I want the material to come off.
Untitled by Bob, on FlickrNo blood on the disc. I actually manage to only burn my fingertips when the material gets hot, I'm very careful not to grind my fingers. The stag clogs the 80 grit paper pretty quickly; todays work took two sheets.
Untitled by Bob, on FlickrAfter several rounds of "check the fit then grind", I have the slabs thinned down overall and tapered to be thinner at the front. Not much margin for error here.
Untitled by Bob, on FlickrUntitled by Bob, on FlickrHere you can see the taper from front to back.
Untitled by Bob, on FlickrThis is as far down as I'm planning to go at the front. If I thin any more, the valleys will drop below the guard fittings. I will bring everything else down to the guard.
Untitled by Bob, on FlickrBoth slabs fit to the frame assembly. That is it for today.
Untitled by Bob, on FlickrOh...except I also made this zirc thumbstud and insert today. I'm waiting on the right size washers to finish this one up. Should wrap it up tomorrow.
Untitled by Bob, on FlickrBob
- Joined
- Feb 15, 2010
- Messages
- 696
I might have to go this knife in person. Hahaha
Great job Bob, your work is motivational.
Great job Bob, your work is motivational.
- Joined
- Dec 2, 1999
- Messages
- 9,910
Bob,
I've been popping in and out here. Nice work.
You have about the best fit on the tang/frame possible.
I've been popping in and out here. Nice work.
You have about the best fit on the tang/frame possible.
- Joined
- Dec 5, 2013
- Messages
- 1,180
So this knife has been quite a challenge for me and I have to admit, there are days I don't even want to look at this thing. However, I learn something new every time I work on it so that in itself is reason enough to keep pushing through. Today I put some more time in on the stag. I started off by drilling the pin holes from the tang through the liners.
 Untitled by Bob, on Flickr
The next thing I wanted to do was temporarily glue the stag to the liners to aid in keeping everything together while I drilled all the pin holes in the stag. I did a little test with some scraps and super glue and felt it would work ok.
 Untitled by Bob, on Flickr
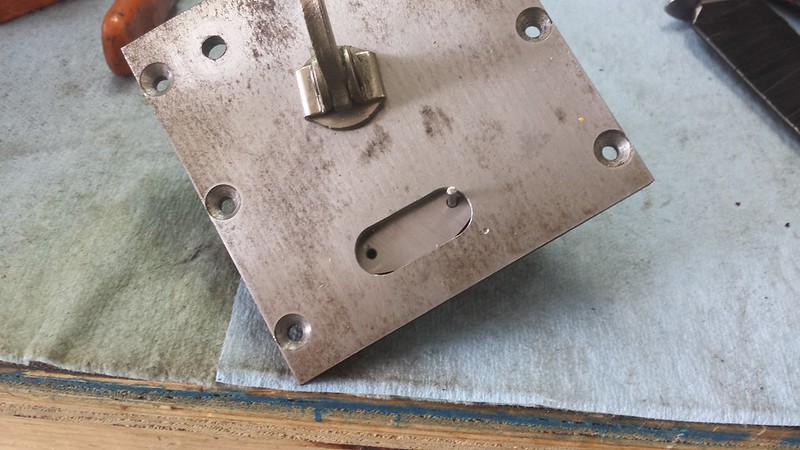
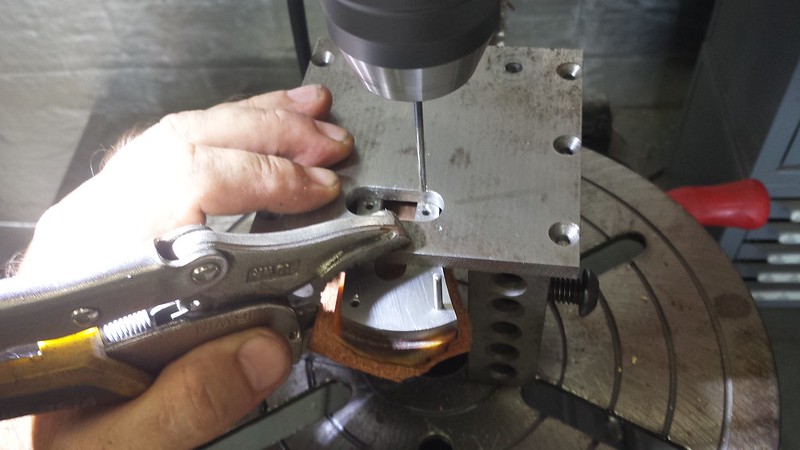
These next photos show how I drilled the holes in the uneven stag using the frame/liner assembly as a guide. The plate I have the scale clamped to usually has some rails attached to it but, the rails were not tall enough for the stag and frame together so I disassembled it and set the plate on 1-2-3 blocks to drill the holes.
 Untitled by Bob, on Flickr
 Untitled by Bob, on Flickr
 Untitled by Bob, on Flickr
Once all the pin holes were in, I made a couple small 1/8" brass mock-up pins to hold the liners to the tang and then put some pins through the entire assembly to keep it all together. Once it was pinned together, I refined the shape of the scales.
 Untitled by Bob, on Flickr
One thing I would definitely do differently next time is continue to thin the scales more at the front before moving ahead with pinning and shaping. I mentioned earlier that I wasn't going to go any thinner because I didn't want the valleys in the stag to drop below the level of the guard stack. I'm not going to say it was a bad call but, I could have kept more of the stags natural figure if I had gone thinner. Oh well, live and learn.
One other learning point I'll mention here is that I made the tang too wide. It forced me to put the pin holes pretty close to the edge. I wouldn't say dangerously close but, closer than I would have liked.
Bob
Untitled by Bob, on FlickrThe next thing I wanted to do was temporarily glue the stag to the liners to aid in keeping everything together while I drilled all the pin holes in the stag. I did a little test with some scraps and super glue and felt it would work ok.
Untitled by Bob, on FlickrThese next photos show how I drilled the holes in the uneven stag using the frame/liner assembly as a guide. The plate I have the scale clamped to usually has some rails attached to it but, the rails were not tall enough for the stag and frame together so I disassembled it and set the plate on 1-2-3 blocks to drill the holes.
Untitled by Bob, on FlickrUntitled by Bob, on FlickrUntitled by Bob, on FlickrOnce all the pin holes were in, I made a couple small 1/8" brass mock-up pins to hold the liners to the tang and then put some pins through the entire assembly to keep it all together. Once it was pinned together, I refined the shape of the scales.
Untitled by Bob, on FlickrOne thing I would definitely do differently next time is continue to thin the scales more at the front before moving ahead with pinning and shaping. I mentioned earlier that I wasn't going to go any thinner because I didn't want the valleys in the stag to drop below the level of the guard stack. I'm not going to say it was a bad call but, I could have kept more of the stags natural figure if I had gone thinner. Oh well, live and learn.
One other learning point I'll mention here is that I made the tang too wide. It forced me to put the pin holes pretty close to the edge. I wouldn't say dangerously close but, closer than I would have liked.
Bob
- Joined
- Mar 4, 2010
- Messages
- 661
Bob, This has progressed nicely. As you mentioned stag presents a set of challenges all its own. I think you have done well. Are you going to use bronze pins and peen /dome?
Thanks for sharing
Bing
Thanks for sharing
Bing
- Joined
- Jul 22, 2014
- Messages
- 1,045
With the stag you could always try and design the knife around the stag you have instead of the other way around. Regardless I think this looks absolutely AWESOME!!:thumbup:
Is this a take down frame handle?
Thank you very much for sharing!
DR....
Is this a take down frame handle?
Thank you very much for sharing!
DR....
- Joined
- Nov 13, 2013
- Messages
- 201
Yeah you lost a lot of the natural stag, but dang if it doesn't look great....the "grain" of the remaining outer portion really fits well with the overall shape.
I agree with the others-looks fantastic. I can understand wanting more of that natural outer portion of the stag, but I find myself really liking the transition between the colors/texture. Thanks very much for sharing all of this. Great job on it all :thumbup:.
Jeremy
Jeremy