Getting rid of the bubbles in epoxy

Joined
Apr 17, 2018
Messages
319
I use colored epoxy to fill in voids in some of my burl wood. I find tiny little air bubbles in it and I never get a smooth surface when I'm done. I know that you can use a quick shot of heat from a torch to get bubbles out of a por,,,,, but not sure if epoxy is the same stuff. Hep!!!
 
Heating epoxy makes it more fluid.
I use a paintstripper to heat my epoxy before I mix.
You might have your epoxy to cold if you have bubbles
 
If you are using a long cure epoxy (not 5 min) mix it carefully and don't whip air bubbles into it when mixing the 2 parts, also you can let it sit for a little while before using, and warmer epoxy will make it easier for bubbles to rise and pop. I check the epoxy frequently and check for air bubbles rising up and keep a pin or a thin piece of wire nearby to pierce the bubble.
 
You should only use a long cure (24 hrs) epoxy. Try to get it to 72* F, as that is usually where it gets it's best cure. When stirring it, keep the stir stick vertical instead of slanted, as that will draw the least amount of air into the epoxy. Use a good quality brush, rather than a cheap boar bristle brush, as that will leave the fewest bubbles and make the smoothest surface. After a few minutes, pass a propane torch over the epoxy which will pop the bubbles. You may have to repeat the torch more than once.
 
You should only use a long cure (24 hrs) epoxy. Try to get it to 72* F, as that is usually where it gets it's best cure. When stirring it, keep the stir stick vertical instead of slanted, as that will draw the least amount of air into the epoxy. Use a good quality brush, rather than a cheap boar bristle brush, as that will leave the fewest bubbles and make the smoothest surface. After a few minutes, pass a propane torch over the epoxy which will pop the bubbles. You may have to repeat the torch more than once.
What Tim Said! 24 hr epoxy only. The only knife I ever sold that had a problem with one scale separating was put on with a Five minute epoxy.i was on my first year of knife making back in 97.. the knifecame back about 2004.......It’s made to fail. I been using G/Flex 24 two part ever since and haven’t had any problems. They put together boats & Airplanes with it!
 
Good suggestions above. In many industrial settings a vacuum chamber is used to “degas” epoxies after they are mixed to remove the entrapped air. This is not needed for knife jobs, but if you have larger sections visible it will make a big difference. Not a very common home shop item though.
 
Last edited:
Hey Matthew,
Great idea !! I have a vac. pump so I will give that a try. As you said, it's unnecessary for making knives but it will be an interesting experiment.
Tim
 
I use colored epoxy to fill in voids in some of my burl wood. I find tiny little air bubbles in it and I never get a smooth surface when I'm done. I know that you can use a quick shot of heat from a torch to get bubbles out of a por,,,,, but not sure if epoxy is the same stuff. Hep!!!
As long as you are using longer cure epoxys, (24hr) passing a propane torch or heat gun over it for a second or so after you apply it will pop the bubbles near the surface. The slow cure time will also give time for bubbles deeper down to come up near the surface for you to pop.
Like others mention, how you stir help avoid bubbles too.
 
Be careful with vacuum. It can make bubbles expand and get worse. You may be better to get the bubbles out and heating before pouring and using pressure instead. These one video is casting resin but I doubt Epoxy would be any different.


Yeah pressure is the way to go. It will compress them till thy are gone (not actualy gone)
 
I mix epoxy in the corner of a zip lock bag. I use gflex and weigh it when I squirt it into the bag. Then knead it to mix. To apply, cut the corner off the bag and squeeze it out. I don't think that I have any bubbles at all.
I'm definitely going to try this thanks
 
Picking the right resin and hardener is also how to prevent issues. West system epoxy ( 105) is thin. The 207 extra clear hardener is also very thin. This should allow bubbles to rise easily.

In many industries, they use vibration to release bubbles and to get the resins to go deeper into cracks and voids. While a vibrator table ( used in casting) is great, a simple hand vibrator will do the job. Don't use your wife's, as they get very upset when you take their toys.
hehehehehehehe
 
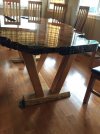
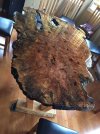
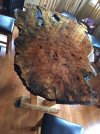
Seriously....slow cure and a propane torch lightly over the surface removes the bubbles really well. I've done a couple big slab tables and a number of smaller live edged coffee tables and used this method. Works like a charm. I usually put a seal coat of epoxy down first. Then pour epoxy flood coat, let sit 10 minutes, torch, check every 10 minutes for the next half hour. Let sit til cured. This table is 6 foot by 4 foot. Lots of epoxy and bubbles when i poured. Torch removed bubbles no sweat.IMG_0844.jpg
IMG_0846.jpg
 

Attachments

  • IMG_0843.jpg
    IMG_0843.jpg
    172.3 KB · Views: 1
Nice piece of wood. I've got a few similar pieces that are drying now, although not quite that big.
I can't help but think...how many knife handles are in that table?
 
Nice piece of wood. I've got a few similar pieces that are drying now, although not quite that big.
I can't help but think...how many knife handles are in that table?
I know!!!! When I brought that slab home I told my wife it was for flute blanks and knife handles...apparently I am "just stupid."

The pieces you have weo....are they maple?
 
Back
Top