- Joined
- Feb 16, 2010
- Messages
- 3,668
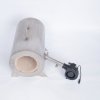
A long time ago, I started building forges with the help of several members of Bladeforums. I learned about the differences between blacksmithing and bladesmithing, and I built my forges for bladesmiths because it was a niche market that no one else, to this day, is properly addressing. Here is the latest version of my continuing progress, the Graham v5.
I don't want to use this subforum as a marketing platform, but I simply want to show how far I've progressed, much like any other 10 year member of shop talk.
I've spent a lot of time researching different refractory. Refractory is measured by it's insulating factor, "thermal conductivity, or TC" which measures how rapidly it transfers heat. Lower is better, and the king of TC is inswool/kaowool. At 1.9 (btu/cubic inch) it's a far cry from raw steel at over 600. Mizzou rates 6-7, Kastolite 4.5, IFB 2.9. I have gone with Plicast LWI 24 which comes in at 3.3, although I use it closer to the Plicast CG rating of 2.6. I dislike wool, because wool is very fragile and needs coated with Satanite, kastolite, Hymoor, etc., although I would prefer Tuffmix. Still, not very efficient, and very time consuming to apply these.
I like Plicast CG because it's fiber re-inforced, insulates as well as IFB, and allows me to use different, stronger shapes than I have in the past. I've built over 2500 forges based off of the shape of bricks (4.5" x 9" x 2.5-3"). Sure, they are better than wool, but I always knew in the back of my mind that they could be better. After all, NC Tool uses vacuum formed panels and they are the top of the line, in my opinion. A friend introduced me to Steve, at the Omaha Plibrico dealer, and everything changed. After a couple hours, and several weeks, I tested casting with Plicast LWI 24. A steep learning curve to be sure, but I'm getting better.
I now cast a fiber re-inforced refractory into a TIG welded stainless shell. This thing is sturdy! I messed up and had to remove the refractory on one, and it took quite about 20 minutes with a hammer and chisel to remove it. Wool could have been removed in about 30 seconds. The refractory takes 24 hours to cure, and about 6 hours in the oven to dry. This is offset by the time it used to take to cut the bricks, and is less than what it takes a customer to coat the wool with refractory.
Casting the entire shell at once also allows me to be more precise with the burner angle. It is cast, with a 1.10" foam insert, at an upward angle at a tangent to the chamber. It swirls perfectly, with a front to back inclination. This provides a complete combustion in the chamber, and very little dragon's breath. Not quite as even as a ribbon burner, but very close. Measuring showed less than 200°F front to rear difference!
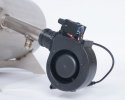
A little bit about the new blown burners: I love them, they're awesome. A cheap blower, 12VDC PWM speed controller, and I've created a blown burner with better control than the big Dayton powered systems out there. It's got smooth control from 0-100k BTU through variable fan speed and 20 PSI regulator. Introducing the propane through a perpendicular orifice mixes it very well, in a much shorter tube than previously recommended.
This is my most advanced forge yet:


