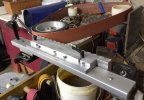
Home Built Surface Grinder

I found the same problem on mine, there is a lot of play. I wouldn’t advise this partfor this build.

I made a short video, the dial indicator is not mounted but just placed between the platform and end plate. It gives an idea that there is play, not by how much. But it is a visible play, which is really bad.

 
Last edited:
Happy with my work around. It wasn't too hard to make and seems to have taken the offending play out of the chuck. I'm not the best on the mill, I'm a rank beginner. It is made from 1/2" aluminum but would be better with 3/4". The bushing is 1/2" cpvc pipe which is a perfect fit.
BWsomSlb.jpg
4QoWu6Qb.jpg
 
If anyone needs 3x72 belts for this build, I just got some from Phoenix. S-20 ceramics. Good price and turnaround
That test run looks good - you gonna enjoy that attachment!

Do you have a link to the 3X72 belts? Did you find any 2-1/2"X72 belts? I only found 2-1/2x60" belts. I think those will work by moving the tooling arm all the way in.

I'm thinking about changing to a wider belt and contact wheel on my system. I thought 2" would be plenty, but a 2" belt and contact wheel isn't exactly the same as a 2" wide blade. I make some chef knives that are 2" wide and the 2" belt doesn't quite cover the whole thing. While I can side the blade side to side, it's not the same as being able to make it in a single pass.

Ken H>
I contacted Phoenix Abrasives directly. My guy is Sean Ryan- ryansmr@phoenixabrasives.com They made the belts for me, but the pricing was very good as well as the turnaround. ($7-$8 range each). I'm sure he can do 2.5" as well as 3"x 72 that I got. Let him know I sent you, and he will have a good understanding of what you need. I let him know how I would be using these belts, and that others may be interested. I used a 2" belt to set up my spacing and do a test run, and yes, a wider belt is much better for kitchen knives.
 
Thanks Kevin - did you change your drive and tracking wheels to 3"? OR - run the 2" wheels?
 
would it be worthwhile to try to "dress" a belt like you would dress a stone with a diamond on a surface grinder ?
 
would it be worthwhile to try to "dress" a belt like you would dress a stone with a diamond on a surface grinder ?
If you want to take it further, upgrade to a very high duro wheel and remove the abrasive grit at the spline.

That’ll give you a smidge more precision.
 
Kevin, I have to ask. Aren't you glad you built your grinder with an over center cam? How much easier is it to change belts in the horizontal mode than it would be without the cam?
 
Kevin, I have to ask. Aren't you glad you built your grinder with an over center cam? How much easier is it to change belts in the horizontal mode than it would be without the cam?
Yes, thanks for that. Way easier. It would be a real pain especially in horizontal mode without it.
 
IMG_20180305_211134077.jpg Well, I took some measurements. Varience over a 6" long piece was +-.002". I'm pretty happy with that. I really got it dialled in once I figured out how the GIB adjustment worked (not really gibs, but adjustment is possible to tighten it up). Here's the test piece at 120 grit.
IMG_20180306_210811877.jpg
 
Thanks for posting that last photo Kevin - I can see how the 3" belt rides on the 2" tracking and drive wheels. BTW, they are white - what type of material are they made from?

Aren't you glad you built your grinder with an over center cam?

What is that "over center cam" mentioned? Looking at the photo it looks like a standard grinder. Of course, I can't see the tracking arm and how it's setup.

.002" over 6"? Good enough for me -
 
Thanks for posting that last photo Kevin - I can see how the 3" belt rides on the 2" tracking and drive wheels. BTW, they are white - what type of material are they made from?


What is that "over center cam" mentioned? Looking at the photo it looks like a standard grinder. Of course, I can't see the tracking arm and how it's setup.

.002" over 6"? Good enough for me -
The wheels are Nylon perhaps? I ordered them on E-bay from a machinist in Poland "pulley-wheel" on ebay. his store is still there, but it has no items in it? The cam over is an idea I was gifted by mike-E when I was designing my grinder. It allows you to relieve the tension without having to hold the arm against the shock force. O One Armed would benefit from it if he builds another grinder, but even with 2 working arms, it's great when putting on twisted belts, or when your grinder is horizontal. basically, the handle you see in the video below has a pivot and tracking pin. the upright has a hole for the pivot and a semicircular slot for the tracking pin to ride in. there is a cam on the other side that matches the handle with the addition of an elongated piece where the shock is mounted. Hopefully this shows you how it works. Sorry about the video of my screen, I don't have any screen capture capability.


If anyone else gets the cross feed that I used, likely it will need adjustment. I took it apart last night and found it does NOT have a standard gib with screws that adjust it. Instead, the side rails that engage with the brass slide block are made with mounting holes that are slightly oversized. To get rid of the "wiggle" you can loosen the screws and move the bar in to make it tighter to the brass block. My mount is much more solid now.
 
Thanks Kevin - those two videos show exactly what the cam over design is all about. I'll have to do some thinking about how to adapt that to my grinder. I LIKE it.
 
Thanks Kevin - those two videos show exactly what the cam over design is all about. I'll have to do some thinking about how to adapt that to my grinder. I LIKE it.
If it will help, the drawings are on my FB page, pinned to the top
 
Back
Top