How to determine factory angle?

Joined
Jan 28, 2014
Messages
11
If I just want to touch up a knife, how do I know what angle to use to sharpen it? Every article/post I've found about this is just about how to choose the angle you want, but if I pick a new angle then don't I need to reprofile the edge to that angle? I don't want to start from scratch and change the angle of every knife I own, I just want to touch them up at whatever they are. How do you all handle this?
 
I have had a similar thought but I am less concerned with what angle they used and more with what type of grind. I find a change in angle can be less of a change in how it works for you than a change in grind.
 
Angle measuring device.

AG1_M.jpg
 
Literally what you're gonna wanna do it go ahead and reprofile that edge. Factory edges are applied by hand by someone under intense time pressure. It is rarely consistent or optimal. If you put the time investment in to set your own edge, it may take a long ass time depending on your tools, but it will permit you greater results in maintaining that edge.

I say this, and fail to answer your question, only because you will need to determine the edge angle along the entire blade as it will vary, sometimes embarrassingly greatly from the factory, which will be a project in itself, and following along that angle even more so.
 
If I just want to touch up a knife, how do I know what angle to use to sharpen it? Every article/post I've found about this is just about how to choose the angle you want, but if I pick a new angle then don't I need to reprofile the edge to that angle? I don't want to start from scratch and change the angle of every knife I own, I just want to touch them up at whatever they are. How do you all handle this?

Just darken the bevels with a Sharpie marker. Then make a few very light passes on whatever sharpening tool/hones you're using. It's best to do this on a fine/very fine hone to start, with a light touch, so you're not removing a lot of metal yet. Check with a magnifier, under bright light, to see where the ink is coming off the bevels after you've made a few 'test' passes on the hone. If the ink comes off near the edge (apex), but not at the shoulders of the bevels, that indicates your held angle is higher (more obtuse or wider) than the factory-set angle. On the other hand, if the ink is only coming off near the shoulders only, and not near the apex, that indicates your held angle is lower (more acute or narrower) than the factory-set angle.

Keep making adjustments in held angle, until you see the ink is being removed across the full width of the bevel, from the apex to the shoulder. When you see that, you know your held angle is matching the factory-set angle. You might re-check this a time or three, to make sure you're on target, and to get a feel for holding the target angle. Then you can commence with your sharpening.

Don't be shy about frequently re-marking the bevels with ink after each test pass, so you'll be sure the ink being removed is from the last passes attempted. And don't worry at all about the actual number value of the factory-set angle; it really doesn't matter much anyway. As has been mentioned, factory edges are seldom very consistent or accurate, as they're set by hand, by who-knows-how-many different employees, in a very quick operation. Whatever 'target angle' the factory may claim to shoot for, it's likely they'll miss it pretty often.
 
How to determine factory angle?
If it doesn't cut for beans and is different from one side to the other THAT is the factory angle.
It's easy to tell a factory angle.
Why a person would want to prolong the misery . . . . well that's another question.

I don't want to start from scratch and change the angle of every knife I own,

You might be in the wrong hobby. Re profiling knives is all part of the "Fun".
It must be fun because I find my self doing it ALL THE TIME . . . and I only live to have fun so . . . logic dictates that it's fun reprofiling knives.

OK . . . even I'm not buying that one.

My best advice is to forget the numbers and just adjust your what ever so that the stone is effecting the edge. Use the marker technique and check both sides of the knife (I did mention that they will be different on one side than the other from the factory; it's just how they do it . . . don't ask why.

When you are right on the edge on both sides THAT is the setting / angle / what ever you want to call it to use.

Or better yet :
Grind the area just behind the edge at least half as thin as it comes from the factory.
Lay the angle back by a good bit from the factory grind.
Fix the sharpening choil area of the plunge grind.
and
finally you are ready to take off that funny bur flap and toasted steel right at the edge not to mention all those unsightly "teeth".
Apex
Refine
Polish until the hair on your arm jumps off when you bring the edge within six inches of your arm and . . .
You now have an adequately sharpened knife.
Now wasn't that easier than apexing that mess they call an edge from the factory and then wishing it would actually cut something ?
yeah wishing doesn't work when it comes to physics.
 
Be concerned about both and not just the grind,for example a ZT0566 I was told by ZT to sharpen at between 18 to 22 degree's and if you tried to grind an edge on it down to 15 degree's the blade is way to thick to be taken down that far and you may get a very sharp edge from it but it's not really going to make cut any better cardboard doing a push because of the thickness of the blade the friction it will cause from being thicker.

I always suggest first to re-sharpen at the factory edge first and try different stones and grits and find what feels best for you and then change thing's up afterwards if your not getting the desired result's and not to go to any extreme when you do change it up.

I have had a similar thought but I am less concerned with what angle they used and more with what type of grind. I find a change in angle can be less of a change in how it works for you than a change in grind.
 
You've gotten some good replies so far. I would supplement this advice with:

1. If you really want to stay as close as you can to the factory angle, use Secret #1 to maintain the original bevel angles. Supplement that with secrets 2, 3, and 4 so you not only maintain that angle down the entire length of the bevel, but you are also able to check your work and make corrections as necessary. "The sharpie technique" is part of secret #4, though 4 is much bigger than "just paint the edge with a sharpie".

2. Or, if what you really want is a fast way to touch up most edges, use a fixed angle device set at a medium high angle and make a micro bevel. For example, if you use the 20 degree per side slots on a Spyderco SharpMaker, you will apply a (roughly) 20 degree microbevel on top of your existing factory angle. As long as that factory angle is less than 20 dps to start with, the microbevel will be applied very, very quickly and should allow you to do touchups for a long time before you need to do a real proper sharpening.

Good luck.

Brian.
 
Man that thing is just what the doctor ordered if it works right. I know that almost all people take their new knife and pull out the old Spyderco Sharpmaker and then worry about the angle for the next half hour. What a great device.
Hi,

There is no need to spend half hour to touch up a slightly dull blade,
There is no need to spend half hour to regrind if you dont want to
if 1 min doesn't do it at 15 degrees, increase angle to 20
if 1min doesn't do it at 20 degrees, increase the angle to 25
if 1min doesn't do it at 25 degrees .... well give it another minute until it works 25 is really high

Sure the catra goniometer thing works, but its extremely expensive
thing costs £116.40 Inc VAT that is $162.25USD
For that price you could by a belt sander and a bench grinder and ....

You can do the same thing with about $1 laser pointer from a dollar store
no cylinder required, 4min31sec, laser pointer in a vice (optional), knife flat on table, paper protractor back wall Measuring blade angle - Aaron Harris

It wouldn't take much to make it into catra style cylinder goniometer, a soda bottle and some binder clips and some tape/glue
 
Ballard_st,

I always suggest first to re-sharpen at the factory edge first and try different stones and grits and find what feels best for you and then change thing's up afterwards if your not getting the desired result's and not to go to any extreme when you do change it up.

Better to go extreme and then add a little bit of a steeper angle if there is some edge damage from intended use. To start factory stock and keep removing metal a little bit at a time is mind numbing and a waste of time.

Most factory / knife manufacturers are just freekin' nuts or they are erring so far on the safe side as to make the knife almost useless and more dangerous because of all the force required to actually cut something . . . I suppose so a moron doesn't damage the knife or . . . . hahahahha . . . get it sharp enough to actually cut them selves with it.

Here is a highly knowledgable custom knife maker who was trained in Japan (one of the few places one can buy a knife that actually is useful out of the box).
Listen to what he has to say. I don't agree with every thing in all his vids but this one is straight up CORRECT !

Here is a link to just tons of examples of the superiority of thin and shallow bevels for everyday pocket knife style cutting.
https://www.bladeforums.com/threads...ed-on-edge-retention-cutting-5-8-rope.793481/

Here you go; this is an example taken from the above link :
One knife with before and after edges.
the number after the steel type, 720 and 1120, are the number of cuts in good sized rope using a very controlled cutting force and parameters like that.

A factory stock Manix 2 in S110V
S110V - 720 - Manix 2 - 62 RC - .030" behind the edge

Same knife after some TLC grind grind.
S110V - 1120 - Manix 2 - 62 RC - Regrind to .005" behind the edge.
 
Here . . . I will give you two more EDC examples:
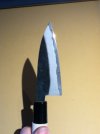
This knife that I call "My Little Monster" because of how just stunningly superior it is at cutting stuff . . . and out of the box from Japan (yes I have sharpened it but just to the stock angle or a touch shallower) I use it daily in the kitchen and it is near hair whittling (easily shave sharp) after more than a year of use (not super steel; it is basic high carbon).
IMG_3374.jpg
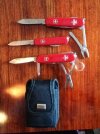
And second is the the small knife in my EDC at work tool pouch. It is a SAK Bantam. I reprofiled it MUCH thinner behind the edge and almost zero grind to the sides of the knife. I use it for critical cuts in stuff that shows on brand new retail products.
IMG_2671.jpg
AND
get this
It will cut through good size wire ties so well it will make everything else out there look ridiculous bar no one.
And zero
damage from cutting those hard wire ties.
Do you cut stuff with your pocket knife that takes more effort to cut than wire ties ?

Here's a challenge for you : Buy a SAK
Bantam, regrind it as I recommend (don't hurt the heat treat) and try it.
hahahaha . . . before you regrind it sharpen the stock factory edge just as crazy sharp as you can get it. Cut a few good size wire ties with it and then use it until it is dull (which should take about a day or two to get dull with that preposterous 60° inclusive geometry they put on it at the factory).

Then like I said above
grind it thin and sharp and try it again. It will cut night and day easier, not be damaged by the wire ties and stay sharp MUCH longer with the thin geometry.

PS: I forgot to mention the Japanese
Little Monster is all of $40 shipped.
 
Last edited:
I agree with everything Murray Carter said in the video but the point I was trying to make is I took my ZT0566 down to 15 degree's after sharpening it at 20 and it did not cut cardboard any better and I feel it was because the blade is thicker the a Spyderco for example and it was the friction of the none sharpen part of the blade as it dragging against the cardboard or whatever that did not allow it to act like a good slicer like a Spyderco.

Ballard_st,


Better to go extreme and then add a little bit of a steeper angle if there is some edge damage from intended use. To start factory stock and keep removing metal a little bit at a time is mind numbing and a waste of time.

Most factory / knife manufacturers are just freekin' nuts or they are erring so far on the safe side as to make the knife almost useless and more dangerous because of all the force required to actually cut something . . . I suppose so a moron doesn't damage the knife or . . . . hahahahha . . . get it sharp enough to actually cut them selves with it.

Here is a highly knowledgable custom knife maker who was trained in Japan (one of the few places one can buy a knife that actually is useful out of the box).
Listen to what he has to say. I don't agree with every thing in all his vids but this one is straight up CORRECT !

Here is a link to just tons of examples of the superiority of thin and shallow bevels for everyday pocket knife style cutting.
https://www.bladeforums.com/threads...ed-on-edge-retention-cutting-5-8-rope.793481/

Here you go; this is an example taken from the above link :
One knife with before and after edges.
the number after the steel type, 720 and 1120, are the number of cuts in good sized rope using a very controlled cutting force and parameters like that.

A factory stock Manix 2 in S110V
S110V - 720 - Manix 2 - 62 RC - .030" behind the edge

Same knife after some TLC grind grind.
S110V - 1120 - Manix 2 - 62 RC - Regrind to .005" behind the edge.
 
I agree with everything Murray Carter said in the video but the point I was trying to make is I took my ZT0566 down to 15 degree's after sharpening it at 20 and it did not cut cardboard any better and I feel it was because the blade is thicker the a Spyderco for example and it was the friction of the none sharpen part of the blade as it dragging against the cardboard or whatever that did not allow it to act like a good slicer like a Spyderco.
Yes that's true.
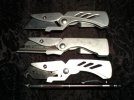
People who do edge testing cut stops off a wide hunk of cardboard and get away with it but to actually cut / open fresh boxes, especially double or triple wall I can only recommend the Ferrari of box cutting blades : The original Stanley fixed box knife blade. It is . . . are you ready ? 0.40mm thick. I mod it a touch to go into my folding box knives. That's the top knife in the photo.
For reference the "Heavy Duty" box knife blade that comes in about everything these days is 1mm.
Since I sharpen my box knife blades rather than replace them I also reprofile to take the corner off and polish them some. That and a bit of candle wax on the sides of the blade and you won't believe the difference.

So yeah unless you are down around 1mm or less for blade thickness you won't be having fun. I've bought a few other knives to cut boxes but always just fall back to the tool made for the job. Keeps the tape glue off my nice knives.

I know you don't want a box knife but . . . that's all I got on the subject.
IMG_3269.jpg
 
A polished convex works very well for cardboard cutting, with thicker blades. Convexing the shoulders of the bevels behind the edge removes the hard, crisp edge from the shoulder, which is responsible for most of the binding in the cardboard.

If you've ever looked at how a thicker blade binds in cardboard, you can often see where the cardboard forms itself into a 'V' around the crisp shoulders of the bevels, at the point where it binds up and stops the cut cold in it's tracks. Convexing the shoulders prevents that from happening; there's nothing for the cardboard to catch against. Then polishing that convex to a mirror-like finish makes it slick to a truly scary degree, eliminating most of the friction seen with a coarser finish on a blade 'pinched' in heavy cardboard. Keep your off-hand & fingers out of the way of the blade when holding the cardboard.
 
Factory edges are machine sharpened which is a high speed low accuracy way of getting knives out the door quickly. While this is great for a production environment it's not so great when you get the blade on a stone and try to hand sharpen.

The edge will have high and low sopts and possibly a slight recurve near the heel/choil of the blade. For these reasons I always recommend grinding a new edge from the start so you have something that is YOURS. It's much easier to follow your own bevel than one created by machine sharpening and will reduce sharpening frustration. You can follow close to the factory bevel or set a new one to your liking but either way it's easier when it's your bevel.
 
Back
Top