- Joined
- Aug 13, 2002
- Messages
- 5,703
I've been promising for a while now to do one but I was not sure how best to do it. I really don't have the in-depth knowledge of either the program or English language to do a detailed step by step tutorial, hence introduction in the thread title. That being said, for what we are doing here, that is concept 2D line drawings, you don't really need that much in-depth knowledge of the program. I personally use maybe a dozen of the features available. You might want to do more of course and I would be really glad if this simple introduction led to that. But for me, after the concept drawing, most of the designing happens in the shop.
Let's start. First here is a shot of the interface with the 3 most used tools:
A: Draw Bezier curves and straight lines (Shift+F6)
B: Edit paths by nodes (F2)
C: Select and transform objects (F1)
Don't be deceived, this is enough to get you started drawing knives or anything else your creative mind can come up with.

Now clicking on the Draw Bezier Tool (A) will let you create a path by laying nodes using the left mouse button. If you complete the path by clicking on the first node you placed, it will automatically convert to a path. If for some reason you don't want to complete the path, hitting enter anytime will also convert to a path.
Now clicking on the Edit paths Tool (B) and then on your newly created path. You will see the different nodes forming the path and now clicking with the left mouse button on a segment and holding it down will let you modify this particular segment. You can do the same by clicking on the handles connected to the nodes instead of the path. Both will transform the path in different ways. Like I said, there is no way I can explain how this works and there is really no need as you'll easily get the hang of it with a little practice.

You can also add other nodes by double-clicking anywhere on the path. There are tools to do this and all other sorts of node manipulations on the upper toolbar, like splitting the path between 2 nodes for example. But you don't need those to get started.

Now, using the File/Import menu you can import an image into your drawing. Like we did previously, you use the Draw Bezier Tool (A) to create a path around your object by placing nodes at different points around the perimeter. You then use the Edit paths Tool (B) to modify the path so that it conforms to the shape of the image. When you are done you simply delete your image and Voila! A nice line drawing you can now work off of.

One last tool is the Select and transform objects Tool (C). Click on it and then somewhere on your drawing. You will see a box around your drawing with arrows. By dragging these arrows you can modify the shape of the whole drawing. If you hold down the CTRL key while dragging an arrow, you will change the size of the drawing but keep the ratio. Very useful to size your drawing without distorting it. Clicking a second with one the drawing will change the arrows around the perimeter and these are now use to rotate your drawing.

And that's pretty much it. Save, print and bring your drawing into the shop to start building that awesome knife you envisioned.
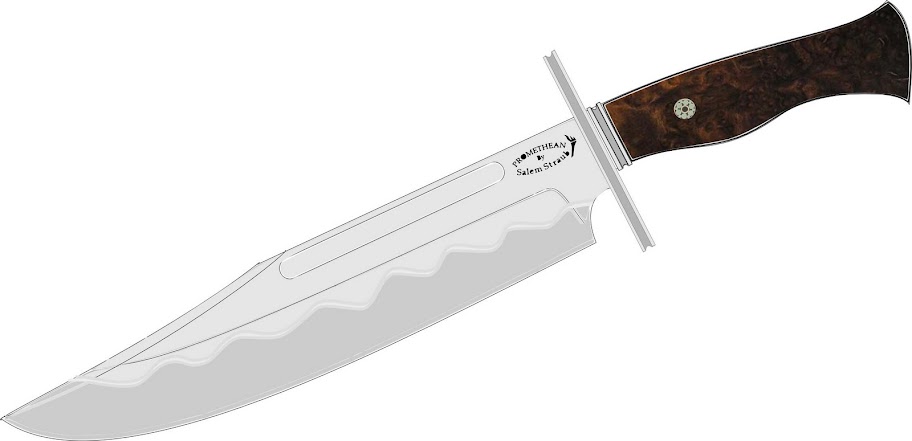
Here is the concept drawing I did for the Inquisitor, using the simple steps I just explained.

And the final resulting knife. Easy peasy!")

So start drawing and don't be afraid to push the boundaries. Inkscape will let you do that easily and I find that it is by pushing those boundaries that you stumble onto design ideas you might not have thought of otherwise.
I hope that this introduction does make a little bit of sense but if it doesn't, feel free to ask questions and I'll do my best to help.
Thanks for watching.
Let's start. First here is a shot of the interface with the 3 most used tools:
A: Draw Bezier curves and straight lines (Shift+F6)
B: Edit paths by nodes (F2)
C: Select and transform objects (F1)
Don't be deceived, this is enough to get you started drawing knives or anything else your creative mind can come up with.

Now clicking on the Draw Bezier Tool (A) will let you create a path by laying nodes using the left mouse button. If you complete the path by clicking on the first node you placed, it will automatically convert to a path. If for some reason you don't want to complete the path, hitting enter anytime will also convert to a path.
Now clicking on the Edit paths Tool (B) and then on your newly created path. You will see the different nodes forming the path and now clicking with the left mouse button on a segment and holding it down will let you modify this particular segment. You can do the same by clicking on the handles connected to the nodes instead of the path. Both will transform the path in different ways. Like I said, there is no way I can explain how this works and there is really no need as you'll easily get the hang of it with a little practice.

You can also add other nodes by double-clicking anywhere on the path. There are tools to do this and all other sorts of node manipulations on the upper toolbar, like splitting the path between 2 nodes for example. But you don't need those to get started.

Now, using the File/Import menu you can import an image into your drawing. Like we did previously, you use the Draw Bezier Tool (A) to create a path around your object by placing nodes at different points around the perimeter. You then use the Edit paths Tool (B) to modify the path so that it conforms to the shape of the image. When you are done you simply delete your image and Voila! A nice line drawing you can now work off of.

One last tool is the Select and transform objects Tool (C). Click on it and then somewhere on your drawing. You will see a box around your drawing with arrows. By dragging these arrows you can modify the shape of the whole drawing. If you hold down the CTRL key while dragging an arrow, you will change the size of the drawing but keep the ratio. Very useful to size your drawing without distorting it. Clicking a second with one the drawing will change the arrows around the perimeter and these are now use to rotate your drawing.

And that's pretty much it. Save, print and bring your drawing into the shop to start building that awesome knife you envisioned.
Here is the concept drawing I did for the Inquisitor, using the simple steps I just explained.

And the final resulting knife. Easy peasy!
So start drawing and don't be afraid to push the boundaries. Inkscape will let you do that easily and I find that it is by pushing those boundaries that you stumble onto design ideas you might not have thought of otherwise.
I hope that this introduction does make a little bit of sense but if it doesn't, feel free to ask questions and I'll do my best to help.
Thanks for watching.
") .
.