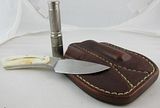
Making a pouch sheath - Apprentice Thread.

Very nice!

I've been carrying my Kephart as my only edc tool. Normally I'd be carrying a knife (folder) and my SOG multitool. I've been feeling rather Naked without the powerlock. I think it would be sweet to make a double sheath for the multi and Karda.

Great idea. :)


REALLY nice. I've been obsessed with these pocket sheaths lately. I've bought a couple of the sharpshooter ones but I'm probably going to try and make my own this weekend. I've got an EDC light, a fisher space pen, a match cylinder, and a little pill case (also a vertical tube) that I carry every day and they just tumble around in my pockets. So annoying. I tried a maxpedition micro pouch for a while and it was way too bulky. The sharpshooters are nice but don't hold everything I want.

I really want to make one that holds 4 small "cylinders", one for each of the tubes I carry. There's some amazing designs for these thing out there:

98616.270309.jpg
 
That's pretty dang sweet. I've got a Phoenix flash that I got to edc but never have because the nylon sheath sucks and because I haven't really had the belt space. Start feeling like Batman when I've got more than one sheath clipped to my belt.

Karda, Phoenix and SOG in one sheath. I probably won't do a pocket sheath, but this has certainly got me thinking. Time to break out the graph paper and pen. :)
 
David,

That dual pouch turned out nice. I see you have been working with the bone folder and wet forming as well.

Nice.

TF.
 
That is a slick little pocket sheath. I really like that you took the time to design something with some style other than just a plain rectangle. Pocket sheaths are pretty popular, I do quite a few of them.


A design video would be terrific :).

I'd like to share my latest sheath (#2) that I've been carrying a couple of weeks. My 10 yr. old daughter and I put it together over a weekend using the same tools and Tandy side as before, this time using medium brown dye and an "antiqued" finish.

It's a departure from the sheaths featured here, but is designed to accommodate a compact EDC set-up that I stow in the right fifth pocket of my Carhartt jeans.

All feedback welcome and thanks again for everyone's help!

Cheers,
David


Thanks for the kind words all. Tal, yes, I'm starting to get the hang of this wet-forming :). Trim those finger nails first!

Much appreciated Sky, although to be perfectly honest my 10 yr. old must be credited with some of the design inspiration (notice a hint of a peace sign).

Still struggling with freehand v-gouging, but I'm enjoying the practice and this little guy has been getting lots of carry time. One thing I've noticed is that in some jeans it's a little loose in the fifth pocket, so I'm considering covering one side with a thin layer of neoprene or similar for anti-slip properties and to avoid it sliding out of the pocket when inverted and such :).
 
I was fortunate enough to be able to take advantage of the offer Sky made earlier of purchasing one of his leather blanks and putting it together. I bought several. For the pocket sheath, one to mess up ;) one to get closer to right. I really had fun with this! Here is my first attempt, dyed black with artificial sinew stitching:


I lightly ran the edges on my belt sander with an old belt. This little sheath is full of mistakes, but turned out well enough. I really like it! I'm currently working on a few more sheaths from Skystorm.

Please accept my genuine thanks, for extending the option of a project sheath, Skystorm. Your generosity is appreciated.

And thanks again to the Professor for starting this thread. It is a continuing education that is hard to come by. :)
 
Last edited:
Awesome! I'm really happy to see others working on these. Your work looks great.

I really like these multi pocket sheaths. They seem to offer a lot of utility. I haven't carried my multi tool since starting to carry the belt knives, and honestly, I miss it. A multi pocket sheath would be great.

I agree, that was a fantastic offer from Skyler. :)
 
Sweet! That looks great so far. I'm not sure that I'll ever do double row stitching, but it sure does look good on certain sheaths. I'm making a new one today that I'll be trying vinegaroon on for the first time. It looks amazing on my test bits.
 
Well done guys! I think it came out great for a first one. I have a larger pocket sheath that will be available shortly, I have the dies but haven't had the time to run one out for pics yet.The offer is open to anyone who wants to take a go at it, with one slight change. All of our leather is now pre dyed for us, so that will save you alot of mess and less materials to track down.
 
Here is the small sheath all finished. Dyed black, double stitched with artificial sinew.


Things learned:

1- I went two stitch holes too far at the bottom of the sheath. It doesn't really affect function at all, but I think it would have looked better if I was short of the bend a little more.

2- I think my drill bit is too big overall. Next step is to use a smaller bit.

3- I didn't use the stitch groover on the back. BIG MISTAKE. It would have looked much better if I would have taken the time and followed through.

Despite these and other errors, I do believe this is my best sheath yet! My thanks to all who made this thread possible! This is a lot of fun!! :)
 
They sell a pack of Doll Making needles at walmart. I like the second from the largest in my drill press. Needles work quite well.

I'm not a fan of a circle stitch for the loop, but you did it nicely. :thumbup:

I know what you mean about not grooving the back. I did that on my second sheath and don't like it.

Btw, you inspired me to go ahead and do two rows on this latest one. :)
 
For those that want to groove the back stitch rows you will really want to practice that on scrap before doing a sheath. Using the drill press method will often result in getting the stitching holes at all different angles down the sheath and the needle/bit will be in and out of the groove line. Without a presser foot of some sort to hold it perfectly flat while you punch holes it's very difficult to do by eye.
If you run your overstitch wheel back down the stitching it will press it in more.
 
Sky, I use the groover on the back after drilling the holes. I've been fortunate enough to have straight holes, so grooving is a matter of connecting the dots. :)
 
Made a new one for the 4" knives. I did the tooling just as an exercise. Not sure it goes well with a bushcraft knife, but this sheath was all practice. Still working on burnishing.

XKDOpP5.jpg


b39Zgwj.jpg


3tvXYA3.jpg


sgq79uZ.jpg


iRA0Rg6.jpg
 
Here is the small sheath all finished. Dyed black, double stitched with artificial sinew.


Things learned:

1- I went two stitch holes too far at the bottom of the sheath. It doesn't really affect function at all, but I think it would have looked better if I was short of the bend a little more.

2- I think my drill bit is too big overall. Next step is to use a smaller bit.

3- I didn't use the stitch groover on the back. BIG MISTAKE. It would have looked much better if I would have taken the time and followed through.

Despite these and other errors, I do believe this is my best sheath yet! My thanks to all who made this thread possible! This is a lot of fun!! :)

Nice work schmittie! This and the pocket sheath both look great.

I need to get back on it.
 
Back
Top