Making a pouch sheath - Apprentice Thread.

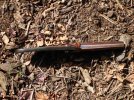
lavawood I ran with your blade cover idea and here's how it came out. Done for a Sneaky Pete and working on a Scorpion now. Those are glove snaps on the strap and cover with the inside protected by small pieces of leather. Fits nice and tight, but still easy to take off. Same thing would work for the KPH, just have to leave about 2" open at the spine to allow the wider part of the blade to move inside. Thanks for the brain boost!
DSC00611.JPG
DSC00610.JPG
DSC00612.JPG
 
Last edited:
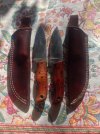
These are my first two sheaths. I learned so much from doing the first one. The second one turned out much better. I made a rookie mistake on the first one and it came out as a left handed sheath. Luckily my cousin that I was making it for is left handed!

These are also some of my first knives. They are D2 steel and have Cocobolo and Curley Maple handles. I took a lot of inspiration from Andy and Tal on the knives and sheaths! Thank you guys for doing what you do!

image.jpg
 
KH,

That is a damned good looking pair.

Do you know how many friggin' lefties I have cut in my time! Well done man!

TF
 
Here is a sheath I made for the axe I forged during David Tuthill's class. It was my first time trying to use snaps and rivets. After making this one I realized I need to go back and re watch the videos. There was a lot I forgot. I modeled it after the sheath that came with my Gransfors Bruk small forest axe. The piece of leather I used for the strap was not great as you can see in the picture. Overall it works pretty good. I couldn't have done without everything I learned in this thread. Thanks again Tal!


370CE4CB-72E5-4C77-A86E-E92F1D7B7473_zpsfafog3vo.jpg


AA3B8073-C4D6-4773-80F5-A88EDD1C0FB9_zpscf5wqfhn.jpg


47EB22E7-AEA2-4971-8244-D11ED75CAD4F_zpskmcgrn3w.jpg


F02AF985-397D-46B4-8B83-FDDB3962B161_zpsmipy99zk.jpg


HASCO,

Hey man - she works! Well done! I just made a hatchet mask tonight myself. Will post pics when it is dry. :)

TF
 
The last few evenings I worked on putting together a simple pancake pocket sheath for my EDK. Tonight I stitched it up.


I wanted to try something different to finish this one and so ordered some bees wax off amazon.


I melted it over the stove in a double boiler.


I used a cheap chip brush to paint it on. Then I realized what I forgot. If your leather isn't already warm, this happens almost instantly -


No worries. I know where my wife's hairdryer is. :)


And here is the finished product. I like how the wax darkens up the natural leather.


I really need to get a drill press. With a cordless drill I just can't seem to get my holes straight on the back side. :grumpy:


I really need to order some more leather.....
 
That looks awesome Schmittie! I really like the way the beeswax turned out. I just made my first pancake sheath too and even with a small drill press, the holes on one side are wacked.
 
Wow, some good lookin stuff being made. :)

Schmitte, I use beeswax quite a bit. I prefer it over Tan-Kote and other over the counter finishes, especially ones that make the leather shiny. If I may make a suggestion? Try using the double boiler with the wax, but add in some coconut oil. I can't remember the ratio I use because I made a large initial batch and haven't run out, but it's a mix that stays solid at room temperature, but melts with friction as you rub it into the leather. Much easier to work with and has additional qualities that the oil brings to the table. My first sheath is still very water resistant, although it may not match acrylic finishes. It even works well on shark skin and snake hides. Wax alone might be hard to work into the relatively delicate snake skin.

Keep up the good work!
 
Just some general thoughts from my experience.

Use the correct size needle. I err on the side of being too small. Makes stitching harder, but it is much better than holes that are too large.

Make sure the needle is short enough. This is really important. I like the needle 1" or so chucked up.

Use a wooden table. I like to have a section cut out to accommodate a belt loop/belt clip/etc.

Pe9zZLi.jpg


YGinl8z.jpg


Drill your holes before you bevel the edges. Watch the 90° angle to be certain that you are drilling square to the edge.

Hopefully you can get it perfect.

After drilling your holes, take your bone folder and press the puckered backside (if the leather is pushed out on the back). This makes grooving the stitch line (on the back) much easier.

Let me know if any of this doesn't make sense.

Edit- oh, I keep a little chunk of beeswax by the press. Every now and then I'll press the wax against the spinning needle to lubricate. The needle gets pretty hot and wax eases the process. Waxed holes make stitching slightly easier. Just make sure you dye the groove before drilling because the wax acts as a resist.
 
Last edited:
I'd like to start out by saying thank you to Tal for this thread! One of these days I'll actually watch the videos . . . probably would have helped me at different points in the process. Secondly I'd like to give a big thanks to Heber for helping me purchase and get all the tools and materials I needed, he's a stand up gentleman! And last but not least, I'd like to thank Andy for the awesome tools he makes!!!

So I purchased a Hiking Buddy back in January and it's been pant-less ever since. Just so I could carry it, I've using a sheath Heber made for my Runt :D I carry it everyday in my Timbuk2 bag, so the shortness of the sheath wasn't a huge problem. However, from the beginning I had decided that this was the first knife I wanted to make a sheath for.

I made my pattern and even labeled both sides so that I would cut out the correct side for right hand carry . . . first mistake!! I got so excited to actually be cutting out the pattern that I didn't read my own notes and I cut out the sheath for lefthand carry! Oh well, this sheath will be riding in the Timbuk2 so it will be alright. The second mistake I did was I cut both sides of the welt so when I finally glued, punched, and stitched it was a little small. That meant I had a bit of extra sanding after everything was all stitched together. And that brings me to my 3rd goof. I grooved and overstitched the backside of the sheath and punched (I don't have a drill press here so I used a #2 punch from Craft) from the back to the front which means my stitch line on the back of my sheath looks much nicer then on the front of my sheath. I honestly don't know how you sheath makers make your stitching so nice!! All in all it was a wonderful learning experience. Now that mine is made, my 2 oldest girls are waiting for me to help them make some sheaths for their little fixed blade knives. I'm looking forward to some quality daddy daughter time.

You can see the uneven stitching . . . oh well, next time! And I didn't want to ship dye overseas so the sheath is simply finished with Montana Pitch Blend. They are just cell phone pics, but I hope they tell the story.

0738BC5B-0E34-471E-B76F-28A31D3090C8_zpsp4isgind.jpg


I don't have any sort of 'mark', so as an afterthought last night I found a couple cotter pins and 'marked' my sheath.

EADA2F85-F037-455A-9A5C-95BCC7072A2E_zpseawzfufg.jpg


You can really see the unevenness of my stitch lines in this pic.

B2642485-4DED-4B9F-AEF8-DFE577D30414_zpse0fodxil.jpg


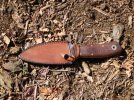
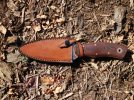
My Hiking Buddy fits nicely in the sheath with good retention . . . I'm still undecided about wet forming it.
5272193F-FDD1-45B6-9069-E78784D5575E_zpstg2dvp9k.jpg


5DE79630-2BD3-4AE1-AC6C-A09F7B6F88DE_zpsognmxjhm.jpg
 
Nice looking sheath Luke!!! That hiking buddy looks great too! I like your marking improvisation with the cotter pins.
 
By the way Luke, did Heber ever make that Raptor sheath for you? I have been away for so long I probably missed any pictures of it that you may have posted.
 
Really digging the makers mark. Can't wait to see what some cool ideas your daughters come up with for their sheaths. Nice job on your first one, even though you say the stitches are uneven, I'd carry it.
 
I came across this old thread from 2013. http://www.bladeforums.com/forums/s...hoosing-Needles-and-Thread-for-Hand-Stitching

Tal what did you think of the tiger thread? I am thinking about getting some and while researching I came across this. You said you would do a review on it but I could not find it.

I currently use the Tandy Nylon waxed thread and am tired of dealing with all the extra wax on the thread. I was hoping the Tiger Thread would be better.

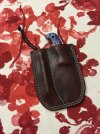
Here is a picture of a pocket sheath I recently made to help with some knife ideas. I love the back pocket sheath for places you would freak people out with a knife on your belt.

IMG_8144.jpg
 
Back
Top