- Joined
- Dec 17, 2004
- Messages
- 1,212
I think some of you have seen this knife before fairly recently, pretty sure I posted it in the what knife your carrying thread a while back.
This knife has a looong history of mods with me. I first got it in late 2005, or early 2006. I think in 2006.
It was the fist traditional pocket knife that I really carried a Lot and worked a Lot. We started building our garage that summer and among other things I remember the lighting fast cuts it made opening cement bags... A highly abrasive task that never seemed to phase it.
It was made by Bear MGC, who is now Bear and Sons. Its a Damascus steel 4.125" 2 blade trapper. It was built with brass liners, nickel silver bolsters, and thick swell center burnt stag bone handles.
Within a week, at the time(and still mostly) hating thecstag look, I'd ground the stag down to a smooth "normal" profile, and retoasted them a light caramel.
That might have actually been my first folder modification... I was making custom fixed blades part time then, but I'm not sure exactly when I started on folder work.
Within a couple years, I'd taken it apart to rehandle it in something else. And never got around to it...
About 10 years later, I had gotten back to it after purchasing another like it that I rehandled in moose stag.
At that point I'd picked out materials, etc along the way, knew what I wanted to do, had just never had the time or gumption to do it.
Finally in 2015, I decided what the heck, and did it. Who knows, it might be somewhere in thus thread...
The saga of that build can be seen here;
https://ak-adventurer.net/2015/12/02/slim-damascus-trapper-started/
https://ak-adventurer.net/2015/12/04/damascus-trapper-update-2/
https://ak-adventurer.net/2015/12/11/bear-damascus-trapper-part-3/
https://ak-adventurer.net/2015/12/11/bear-damascus-trapper-part-4/
https://ak-adventurer.net/2015/12/11/bear-damascus-trapper-part-5/
https://ak-adventurer.net/2015/12/13/bear-damascus-trapper-part-6/
The end product then;
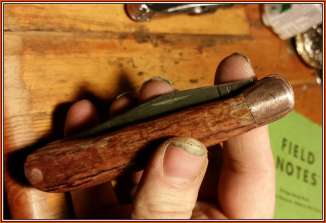
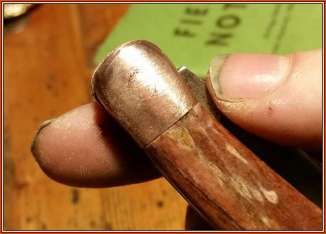

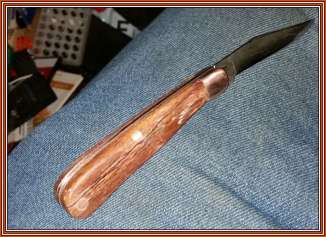
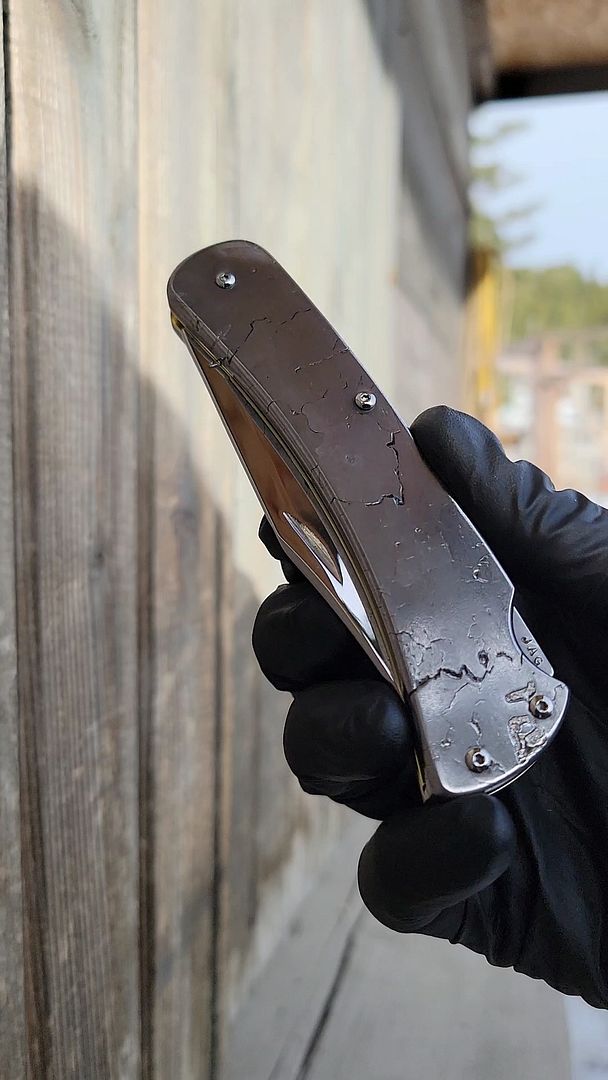
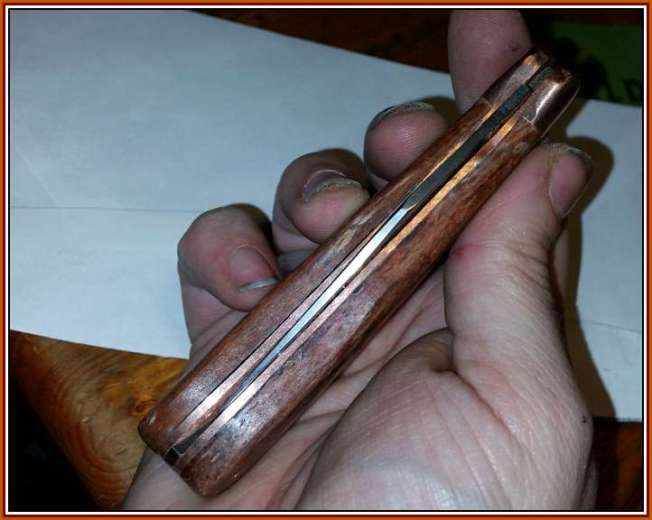
I think I've carried it five times since I built it like that. Used less. When I did it, I left it Really thick toward the back, for a tapered fatter grip, which I thought I'd like.
It was OK to grip, but not great, and turned out horrendous to pocket.
The best couple pics that show what I ended up not liking, are these I think.
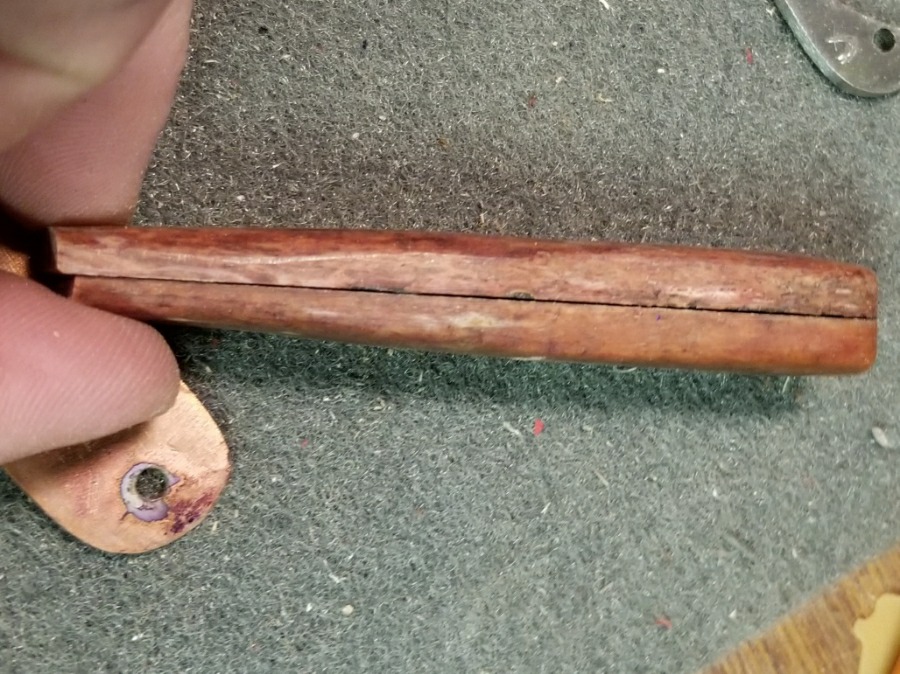
Aaaannnnddd... where I started this time;
I carefully sawed slots in the "pins"(corby bolts thankfully!), cranked them apart, and took the sucker apart. Thankfully I have a hatred for glueing knife scales on, so no trouble there.

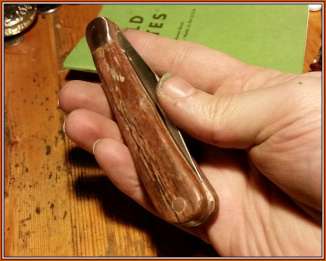
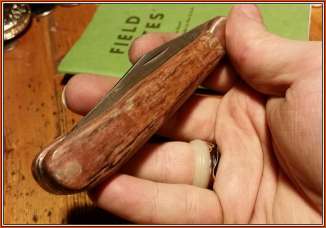
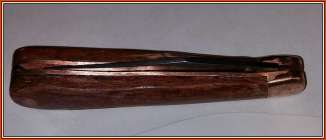
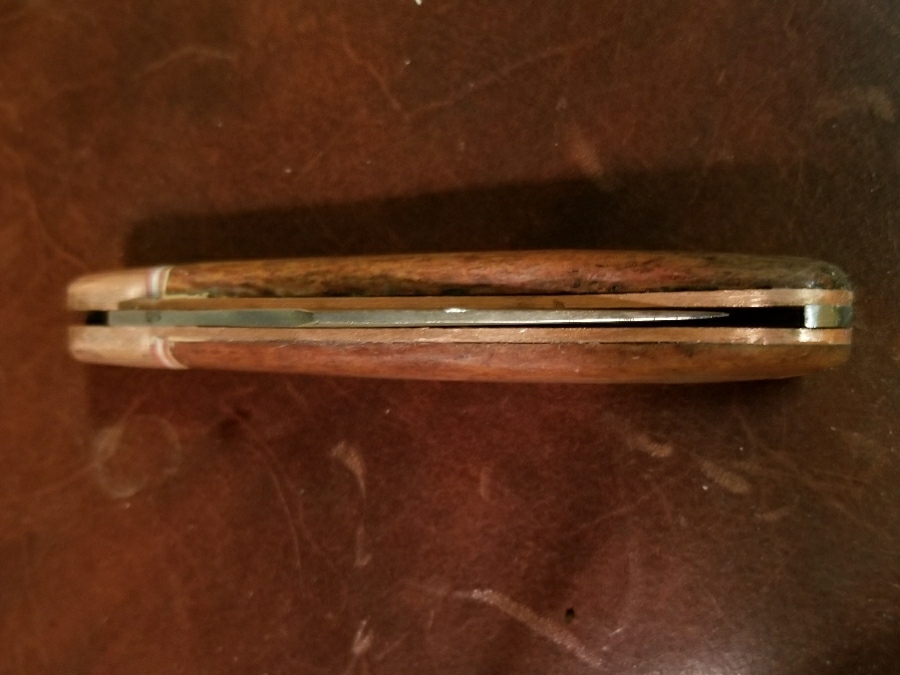
The main thing I changed was hat profile;
Before;
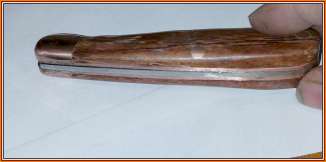
After;

There was a lot to this overall, but I'll save you the (semi)step by step pics, unless someone wants me to post them here...
I had to lathe modify new bolts/pins for it, and one old one, and a custom threaded pivot spacer for one that was too short.
Cut and filed the longer bolster to match its mate and fit scales back to also match.
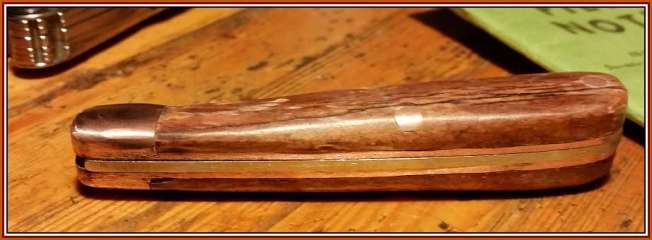
Built fiber spacers up to fill the gap left between scales and bolster... Was super careful but when I got to assembly found I still had a gap after fine sanding the fit... cheated and used a colored epoxy like filler(Minwax wood filler!). Re fit the bolts, cut and ground smooth, hand sanded everything to 220.

Need a clean buffing wheel, will set that up and buff the bolsters to high gloss... Maybe. Momeday.")
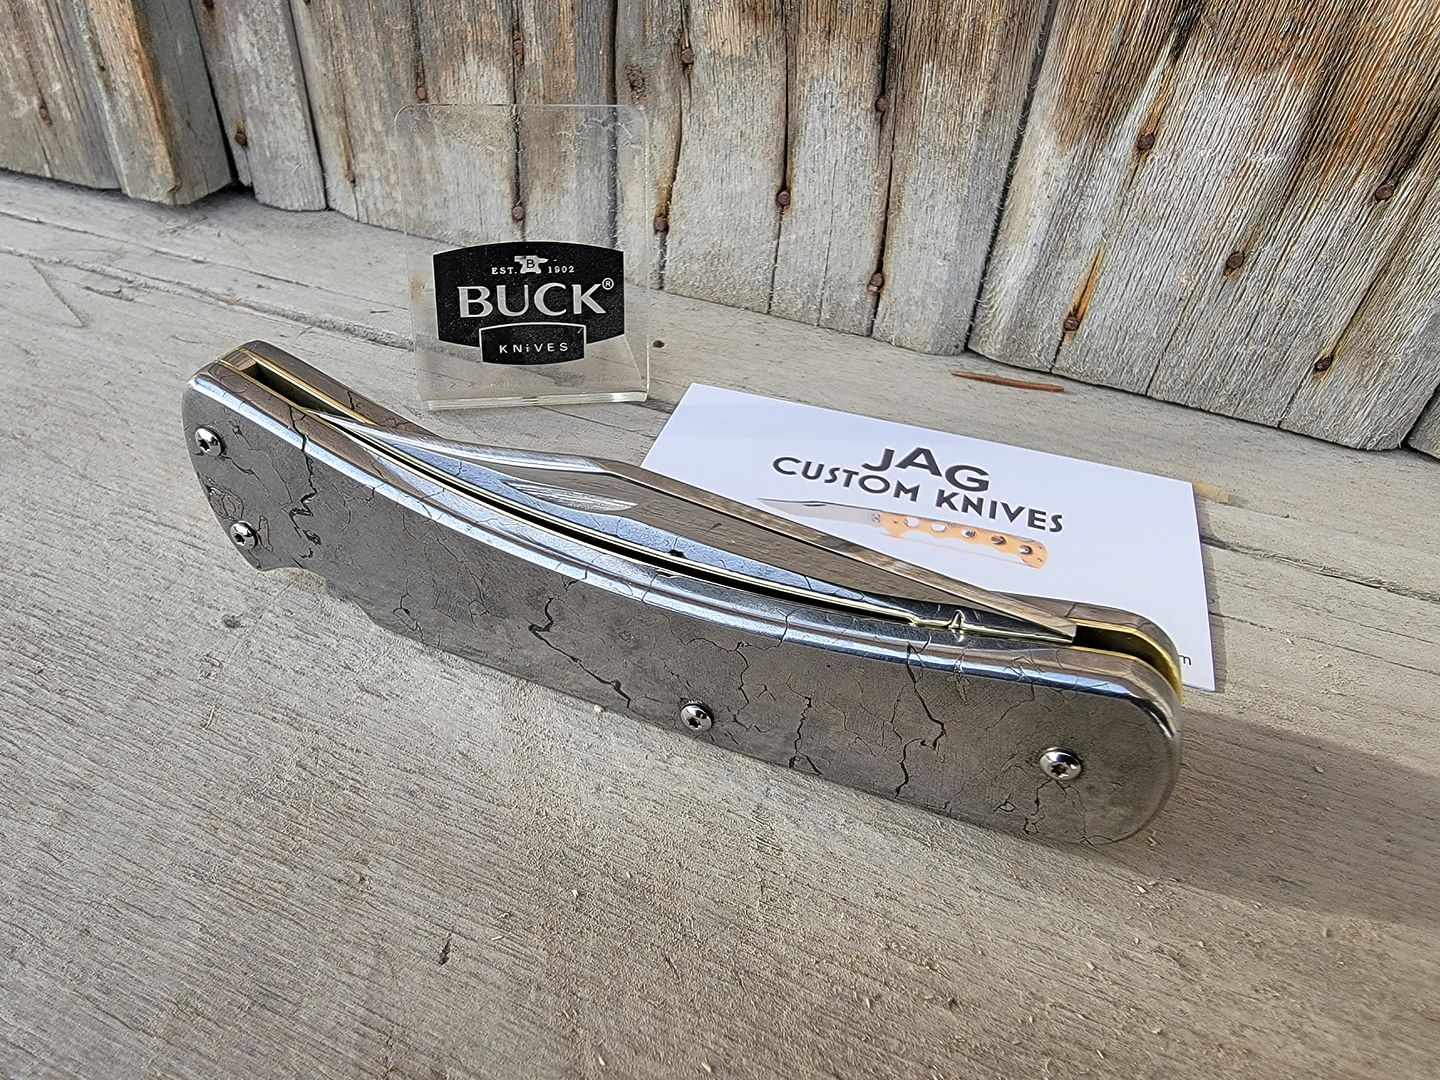
its a lot cleaner of a build now, friendlier in hand and pocket.
Its a much better grip, still thicker than a single blade trapper would be, it feels like a slightly thick two blade folder, or a thin fixed blade. And it basically disappears in pocket.
Maybe after about 15 years, I might get to carry it again.
More detail pics of the process and a little more information can be found here;
https://ak-adventurer.net/2021/02/23/damascus-and-copper-bear-mgc-trapper-part-7/
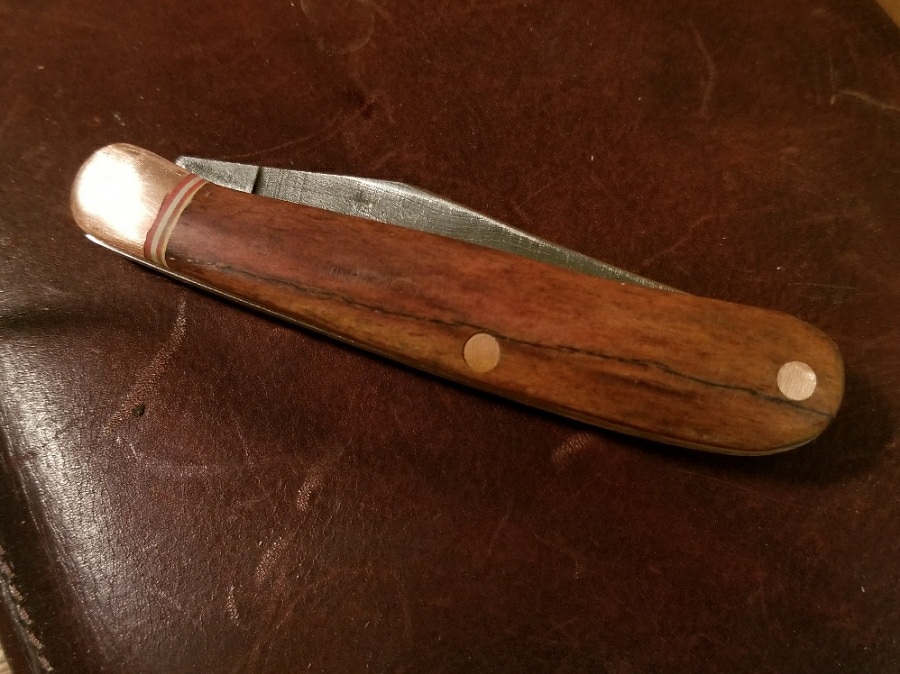

(Wood filler is the thin tan lines between the bone scales and the first red spacer-color works pretty good!)

This knife has a looong history of mods with me. I first got it in late 2005, or early 2006. I think in 2006.
It was the fist traditional pocket knife that I really carried a Lot and worked a Lot. We started building our garage that summer and among other things I remember the lighting fast cuts it made opening cement bags... A highly abrasive task that never seemed to phase it.
It was made by Bear MGC, who is now Bear and Sons. Its a Damascus steel 4.125" 2 blade trapper. It was built with brass liners, nickel silver bolsters, and thick swell center burnt stag bone handles.
Within a week, at the time(and still mostly) hating thecstag look, I'd ground the stag down to a smooth "normal" profile, and retoasted them a light caramel.
That might have actually been my first folder modification... I was making custom fixed blades part time then, but I'm not sure exactly when I started on folder work.
Within a couple years, I'd taken it apart to rehandle it in something else. And never got around to it...
About 10 years later, I had gotten back to it after purchasing another like it that I rehandled in moose stag.
At that point I'd picked out materials, etc along the way, knew what I wanted to do, had just never had the time or gumption to do it.
Finally in 2015, I decided what the heck, and did it. Who knows, it might be somewhere in thus thread...
The saga of that build can be seen here;
https://ak-adventurer.net/2015/12/02/slim-damascus-trapper-started/
https://ak-adventurer.net/2015/12/04/damascus-trapper-update-2/
https://ak-adventurer.net/2015/12/11/bear-damascus-trapper-part-3/
https://ak-adventurer.net/2015/12/11/bear-damascus-trapper-part-4/
https://ak-adventurer.net/2015/12/11/bear-damascus-trapper-part-5/
https://ak-adventurer.net/2015/12/13/bear-damascus-trapper-part-6/
The end product then;
I think I've carried it five times since I built it like that. Used less. When I did it, I left it Really thick toward the back, for a tapered fatter grip, which I thought I'd like.
It was OK to grip, but not great, and turned out horrendous to pocket.
The best couple pics that show what I ended up not liking, are these I think.
Aaaannnnddd... where I started this time;
I carefully sawed slots in the "pins"(corby bolts thankfully!), cranked them apart, and took the sucker apart. Thankfully I have a hatred for glueing knife scales on, so no trouble there.
The main thing I changed was hat profile;
Before;
After;
There was a lot to this overall, but I'll save you the (semi)step by step pics, unless someone wants me to post them here...
I had to lathe modify new bolts/pins for it, and one old one, and a custom threaded pivot spacer for one that was too short.
Cut and filed the longer bolster to match its mate and fit scales back to also match.
Built fiber spacers up to fill the gap left between scales and bolster... Was super careful but when I got to assembly found I still had a gap after fine sanding the fit... cheated and used a colored epoxy like filler(Minwax wood filler!). Re fit the bolts, cut and ground smooth, hand sanded everything to 220.
Need a clean buffing wheel, will set that up and buff the bolsters to high gloss... Maybe. Momeday.
its a lot cleaner of a build now, friendlier in hand and pocket.
Its a much better grip, still thicker than a single blade trapper would be, it feels like a slightly thick two blade folder, or a thin fixed blade. And it basically disappears in pocket.
Maybe after about 15 years, I might get to carry it again.
More detail pics of the process and a little more information can be found here;
https://ak-adventurer.net/2021/02/23/damascus-and-copper-bear-mgc-trapper-part-7/
(Wood filler is the thin tan lines between the bone scales and the first red spacer-color works pretty good!)