Gary W. Graley
“Imagination is more important than knowledge"
Knifemaker / Craftsman / Service Provider
- Joined
- Mar 2, 1999
- Messages
- 26,344
A fellow had a request for a sheath, but didn't want just a dyed type sheath, I thought of Dave Ferry's, aka Horsewright, tutorial he had on making pancake sheaths seen here via this link Thanks again Dave for taking the time to make that great thread.
The reason I thought of Dave's tutorial was the neatsfoot oil process he uses on his sheaths, I seem to recall ages ago that I gave neatsfoot oil a try but the leather was just blah looking, like raw leather. The step I was missing was the oven time that Dave spells out, again this is his method and he does warn others to use that with caution, but, I wanted to make something that would not be a dyed sheath and this was the only thing I could think of. Trying something new, especially AFTER you have done all the hard work of making the sheath, is a little unnerving to say the least! But it turned out pretty good, the oil is still settling and Dave does warn about that stating he had one that took almost a months time before it all settled out evenly. Right now this sheath has the top half still darker than the lower half but it is slowly blending/settling.
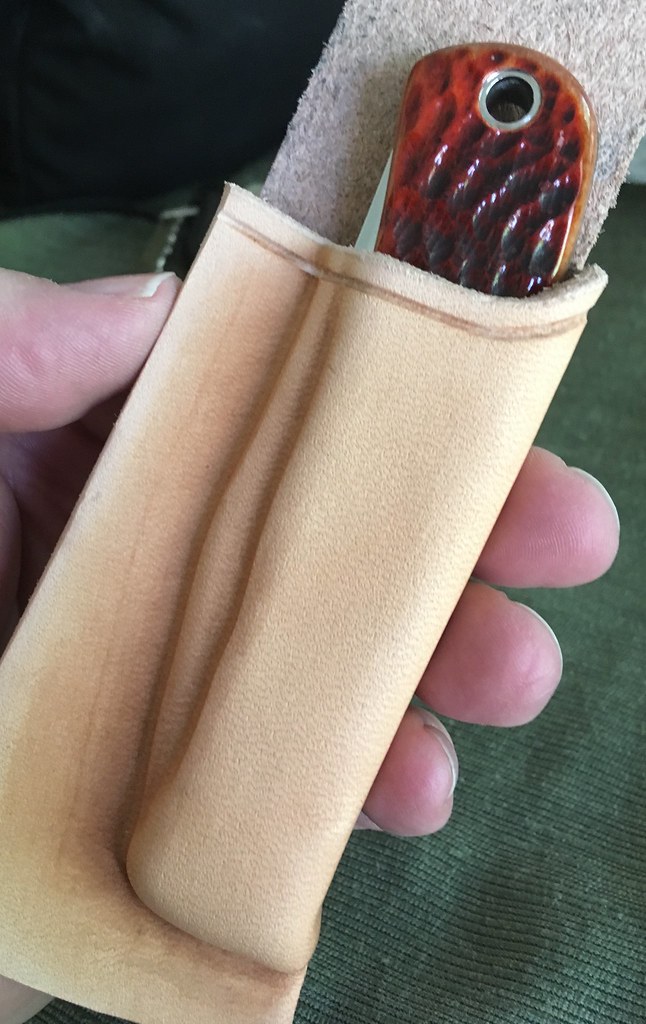
This is a form fitted sheath, so what you are seeing the brunt of the work was already done, when forming around the knife I do wrap the knife in plastic wrap to prevent moisture from weeping from the leather onto the knife, once the leather has reached a certain dryness I will not need to keep it wrapped, as you see here, a nice Case Backpocket folder;
 Untitled by GaryWGraley, on Flickr
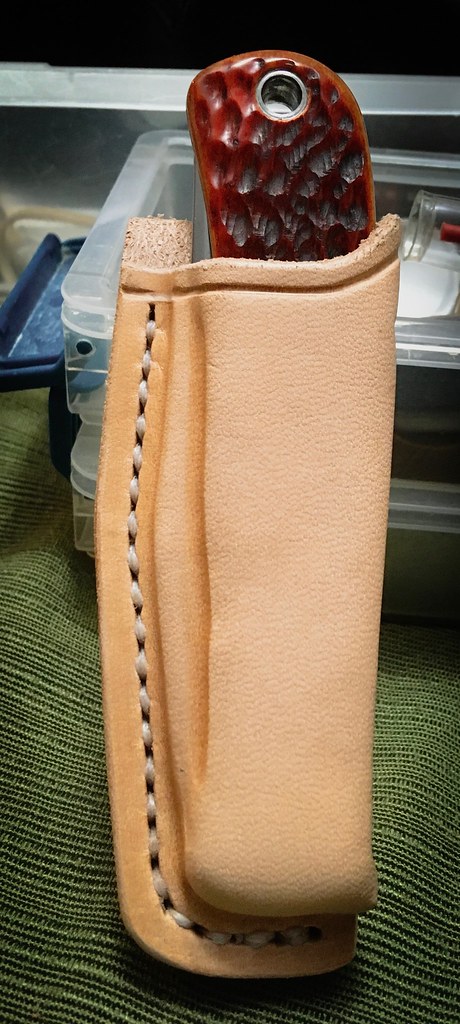
and the sheath now sewn up and waiting to be popped into the oven, Dave's tutorial spells that out pretty good, my stove was able to be set to 170 degrees and as he warns, do NOT put the sheath in while the stove is preheating! As during the preheat stages the oven can ramp up much higher to get to the temp you are setting and you can destroy your project !
I sat the sheath on a layer of card stock so the grill wouldn't leave marks on the sheath.
 Untitled by GaryWGraley, on Flickr
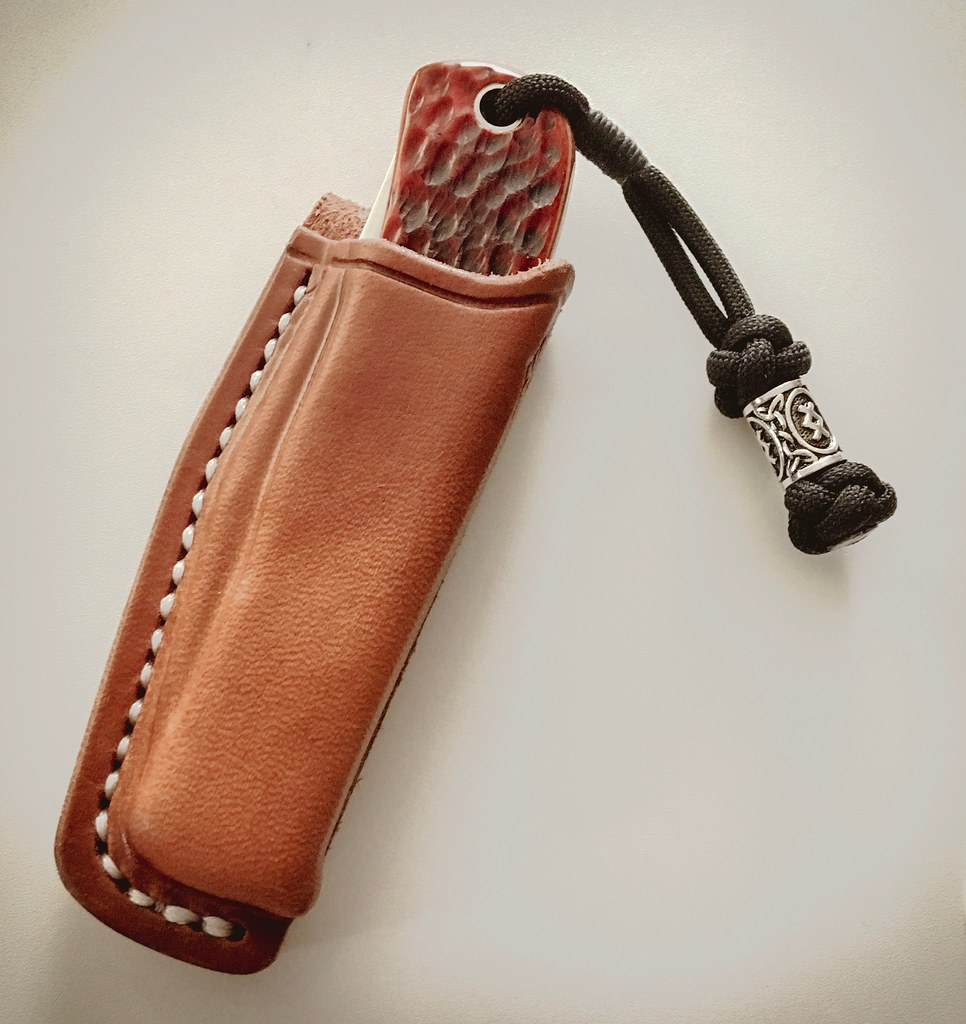
Here you can see the top section is a tad darker than the lower area, as during forming there was more stress in that area so I think the fibers were tighter and the oil didn't soak in as much as the top half did.
 Untitled by GaryWGraley, on Flickr
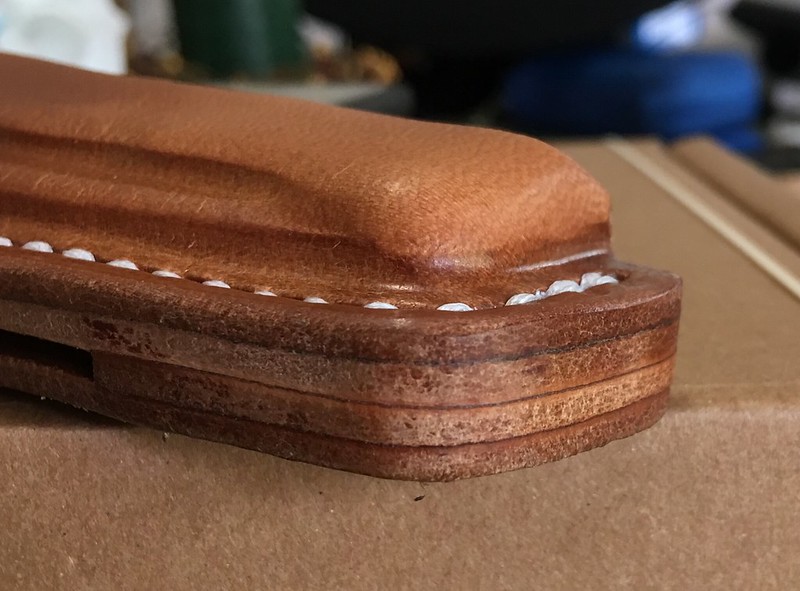
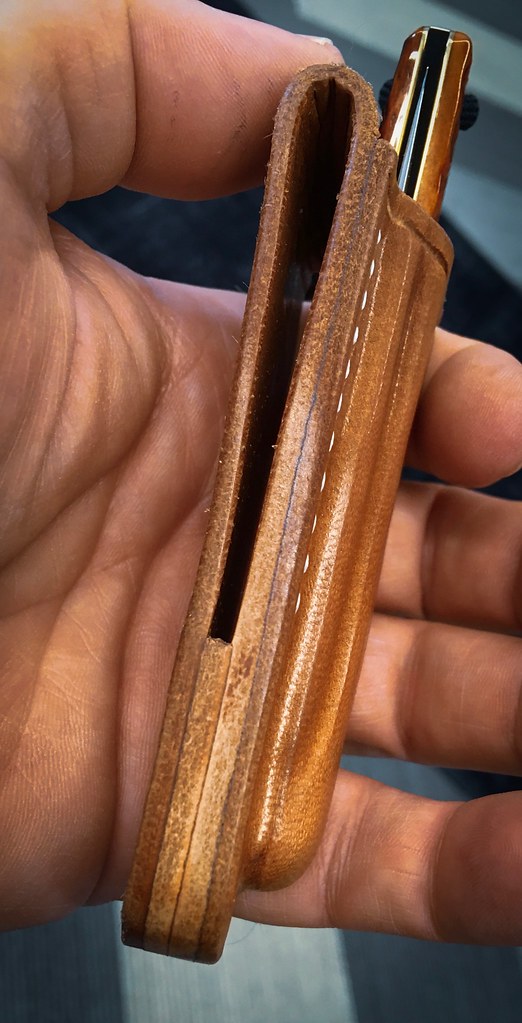
I have been putting an extra layer in lately on my vertical sheaths, here you can see the 4 layers of leather that I hand sew through
 Untitled by GaryWGraley, on Flickr
It's blending in a little more, by tomorrow it probably will be all evened out
 Untitled by GaryWGraley, on Flickr
The one thing with using the neatsfoot oil is my usual snap into place isn't so 'snappy' due to the oil that is also inside as well, but, with the shape of the blade's spine and handle shape, the knife has very good retention and would not be coming out on it's own.
I had worried about the sheath shrinking from being in the oven, as my sheaths are formed quite tight to the knife, but that didn't seem to affect it, but then, as I am forming the leather, I am pulling/stretching the leather to take the give out of the leather.
So, again just a thanks to Dave, as I did bug him via private message for any tips when making just one sheath and as usual he was kind enough to respond back right away.
G2
The reason I thought of Dave's tutorial was the neatsfoot oil process he uses on his sheaths, I seem to recall ages ago that I gave neatsfoot oil a try but the leather was just blah looking, like raw leather. The step I was missing was the oven time that Dave spells out, again this is his method and he does warn others to use that with caution, but, I wanted to make something that would not be a dyed sheath and this was the only thing I could think of. Trying something new, especially AFTER you have done all the hard work of making the sheath, is a little unnerving to say the least! But it turned out pretty good, the oil is still settling and Dave does warn about that stating he had one that took almost a months time before it all settled out evenly. Right now this sheath has the top half still darker than the lower half but it is slowly blending/settling.
This is a form fitted sheath, so what you are seeing the brunt of the work was already done, when forming around the knife I do wrap the knife in plastic wrap to prevent moisture from weeping from the leather onto the knife, once the leather has reached a certain dryness I will not need to keep it wrapped, as you see here, a nice Case Backpocket folder;
Untitled by GaryWGraley, on Flickrand the sheath now sewn up and waiting to be popped into the oven, Dave's tutorial spells that out pretty good, my stove was able to be set to 170 degrees and as he warns, do NOT put the sheath in while the stove is preheating! As during the preheat stages the oven can ramp up much higher to get to the temp you are setting and you can destroy your project !
I sat the sheath on a layer of card stock so the grill wouldn't leave marks on the sheath.
Untitled by GaryWGraley, on FlickrHere you can see the top section is a tad darker than the lower area, as during forming there was more stress in that area so I think the fibers were tighter and the oil didn't soak in as much as the top half did.
Untitled by GaryWGraley, on FlickrI have been putting an extra layer in lately on my vertical sheaths, here you can see the 4 layers of leather that I hand sew through
Untitled by GaryWGraley, on FlickrIt's blending in a little more, by tomorrow it probably will be all evened out
Untitled by GaryWGraley, on FlickrThe one thing with using the neatsfoot oil is my usual snap into place isn't so 'snappy' due to the oil that is also inside as well, but, with the shape of the blade's spine and handle shape, the knife has very good retention and would not be coming out on it's own.
I had worried about the sheath shrinking from being in the oven, as my sheaths are formed quite tight to the knife, but that didn't seem to affect it, but then, as I am forming the leather, I am pulling/stretching the leather to take the give out of the leather.
So, again just a thanks to Dave, as I did bug him via private message for any tips when making just one sheath and as usual he was kind enough to respond back right away.
G2
Last edited:
 And that sheath looks really really good !!
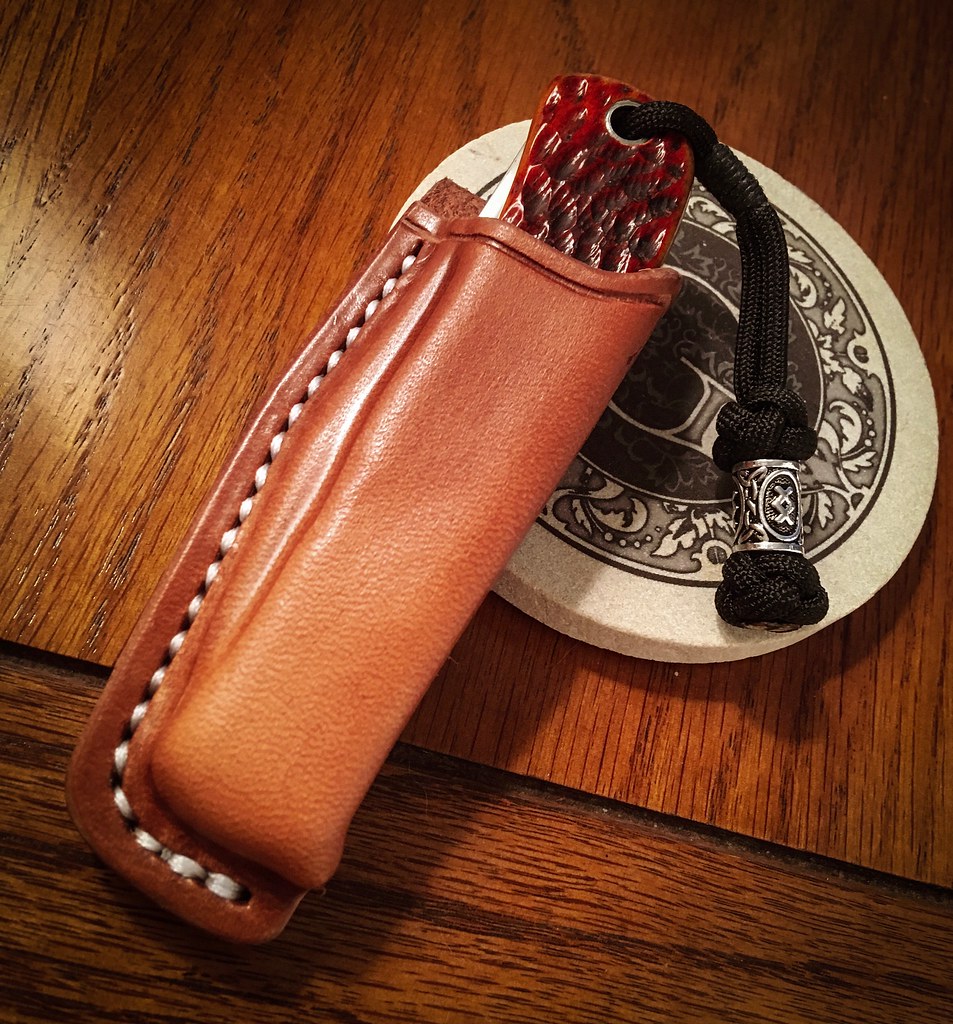 Untitled
")
 Untitled
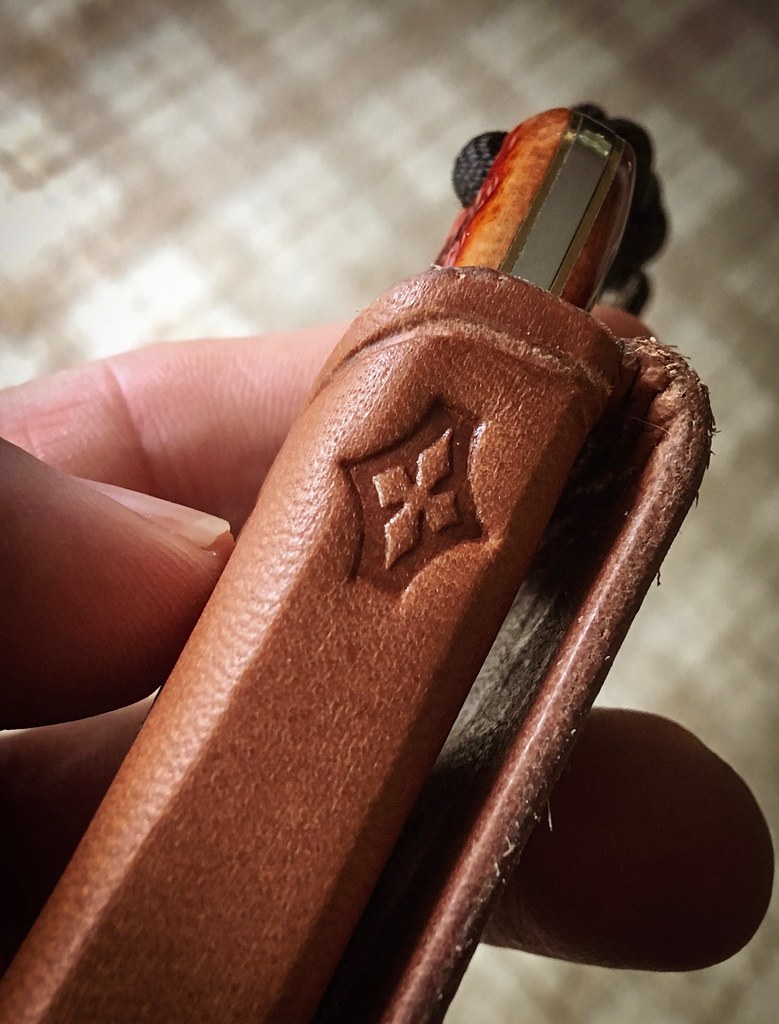 Untitled