I build guns but I like to tinker with some other crafts as well. I posted this on some gun boards but figured I'd post it here for anyone who's curious. This was my first ever knife reconstruction. I have no previous experience working with leather.
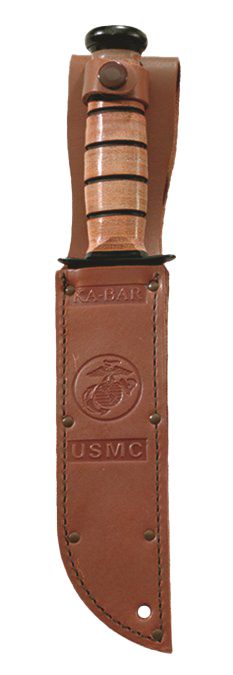
When my daughter graduated from boot camp, I bought a new Ka-Bar and had her name laser-engraved on it. This was done for me as a favor by engineers in my company. I donated my Ka-Bar so they could test the process before running the final part on my daughter's knife.

I had it bead blasted and parkerized. I also ordered a rebuild kit from Ka-Bar.


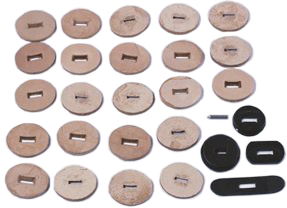
so I numbered all the old handle sections and traced the new leather pieces so I can pre-sand the leather pieces before stacking them. Once I stack them, they'll have the rough contour and all I should have to do is sand them all to form.


I used the Barge rubber/leather cement and got it all stacked. I mounted and pinned the pommel.


I finished contouring the handle. I sanded it with 600 grit sandpaper and cleaned the dust off with denatured alcohol.


I decided to stain it with Fiebings pro mahogany stain.


A couple of files and a sharpie, followed by another sanding and staining, and voila!

I put three coats of Resolene sealer on the leather, then spent about 2 hours removing three decades of bad sharpening to create a proper edge. I went with about 25˚ on the edge. It's not shaving sharp, but it cuts paper and grabs a fingernail just fine. Worked it with 220, 400, 600 and 1,000 grit stones until I had a good edge and a mirror finish on the blade.
I finished off with a wipe-down of CLP on all the park'd areas.


Thanks for looking!
Tony.
When my daughter graduated from boot camp, I bought a new Ka-Bar and had her name laser-engraved on it. This was done for me as a favor by engineers in my company. I donated my Ka-Bar so they could test the process before running the final part on my daughter's knife.
I had it bead blasted and parkerized. I also ordered a rebuild kit from Ka-Bar.
so I numbered all the old handle sections and traced the new leather pieces so I can pre-sand the leather pieces before stacking them. Once I stack them, they'll have the rough contour and all I should have to do is sand them all to form.
I used the Barge rubber/leather cement and got it all stacked. I mounted and pinned the pommel.
I finished contouring the handle. I sanded it with 600 grit sandpaper and cleaned the dust off with denatured alcohol.
I decided to stain it with Fiebings pro mahogany stain.
A couple of files and a sharpie, followed by another sanding and staining, and voila!
I put three coats of Resolene sealer on the leather, then spent about 2 hours removing three decades of bad sharpening to create a proper edge. I went with about 25˚ on the edge. It's not shaving sharp, but it cuts paper and grabs a fingernail just fine. Worked it with 220, 400, 600 and 1,000 grit stones until I had a good edge and a mirror finish on the blade.
I finished off with a wipe-down of CLP on all the park'd areas.
Thanks for looking!
Tony.


")