- Joined
- Apr 20, 2013
- Messages
- 7,203
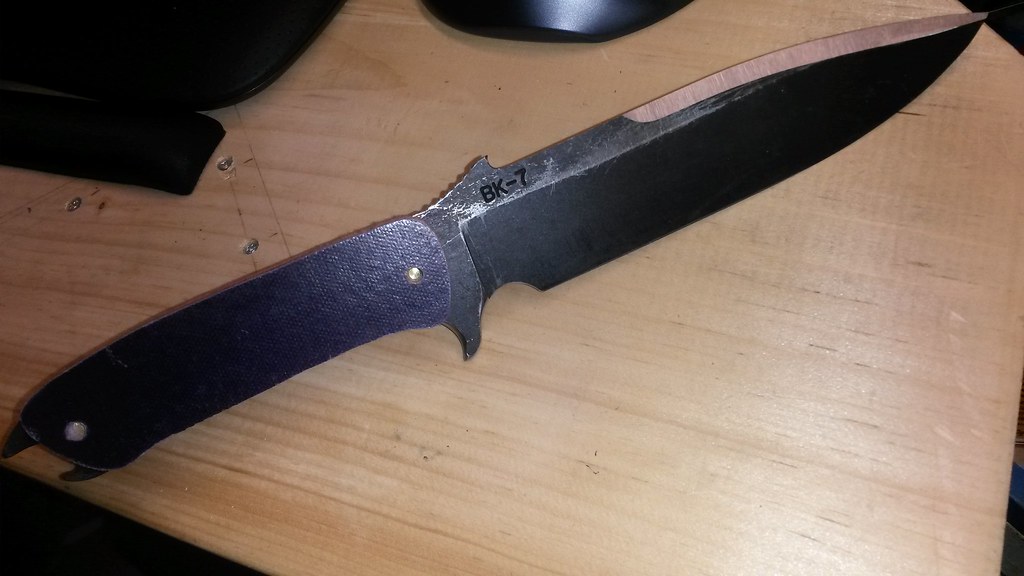
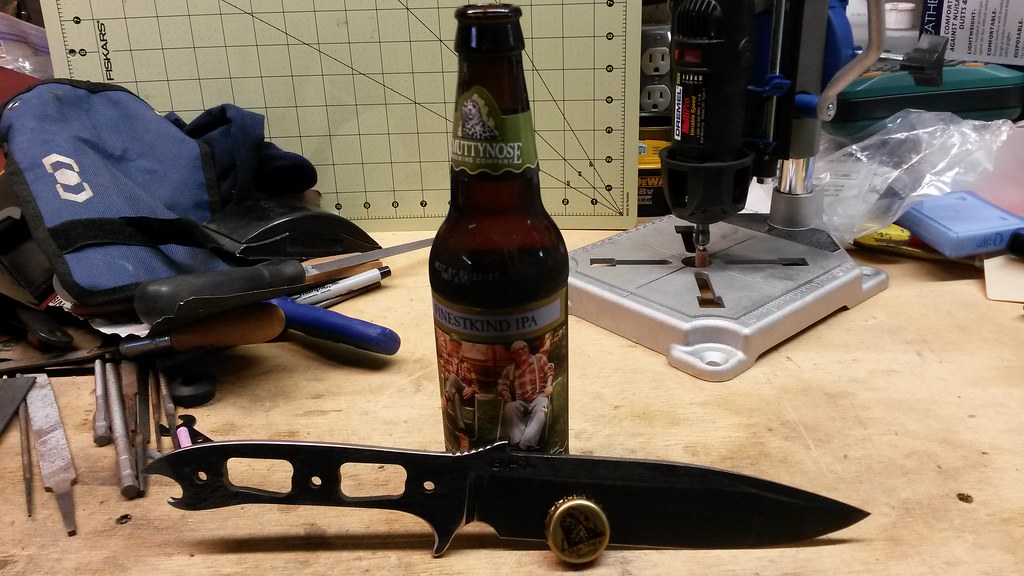
Some of you may know that I've been modding my 7. I bought it in the first throes of Beckerizing myself....but since I bought the 9 first, the 7 sat, unused. Then came the beater Camillus 2, pushing the new and unused 7 further down the list. I started doing some minor mods with the 9 & 2, then took the scale off the 7, taped up the edge and traced the outline. Not big enough to chop like the 9, not so utilitarian as the 2, I really couldn't see where it fit, so I started drawing. Drawing helps me to see where I wanna go (even if I change my mind when I finally get started ") ), and it gave me an excuse not to put the 7 up for adoption. I drew....I left it alone for months, I started up and drew some more....and collected more Beckers (and some other knives as well) and more and more came to the conclusion that since I had quite a few knives with plenty of utility, the 7 would have to go in the other direction. Fighter, tactical, whatever you wanna call it....so I finalized what I wanted to try and do, gave myself permission to grind up a perfectly good (and new!) knife, and started grinding away the parts I thought I wanted gone. In one nod to functionality I incorporated a bottle opener into the "skull crusher" pommel using the existing lanyard hole. Probably the most leverage of any bottle opener I own. Much more testing will be needed, though.
), and it gave me an excuse not to put the 7 up for adoption. I drew....I left it alone for months, I started up and drew some more....and collected more Beckers (and some other knives as well) and more and more came to the conclusion that since I had quite a few knives with plenty of utility, the 7 would have to go in the other direction. Fighter, tactical, whatever you wanna call it....so I finalized what I wanted to try and do, gave myself permission to grind up a perfectly good (and new!) knife, and started grinding away the parts I thought I wanted gone. In one nod to functionality I incorporated a bottle opener into the "skull crusher" pommel using the existing lanyard hole. Probably the most leverage of any bottle opener I own. Much more testing will be needed, though.
OK, enough of the blah, blah, blah. POIDH!
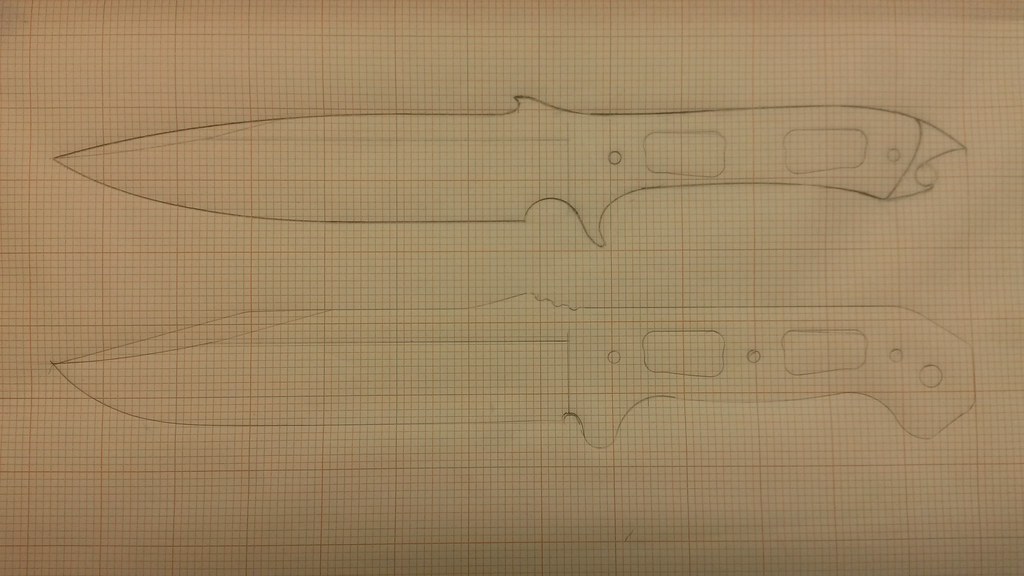
Started off here:
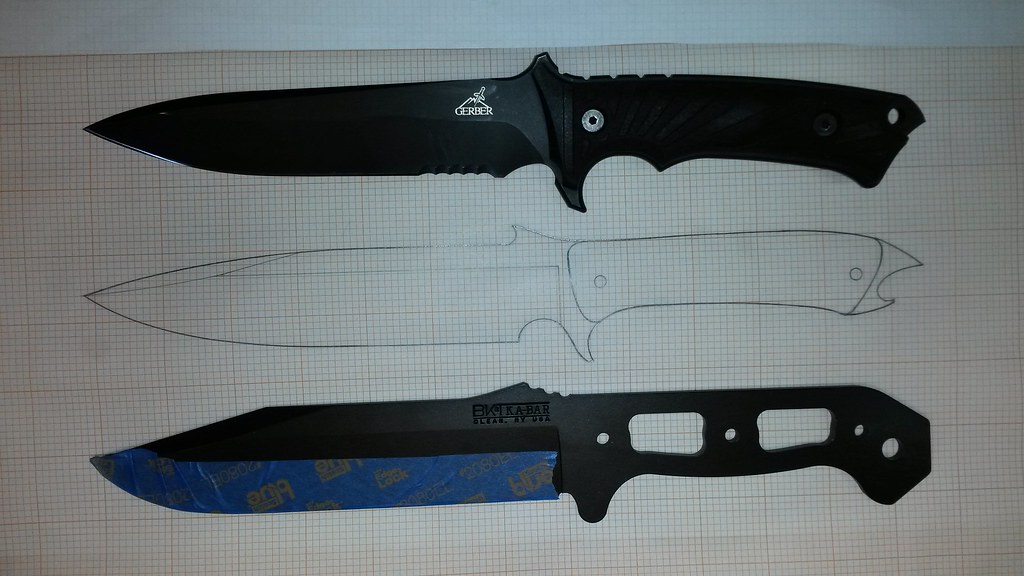
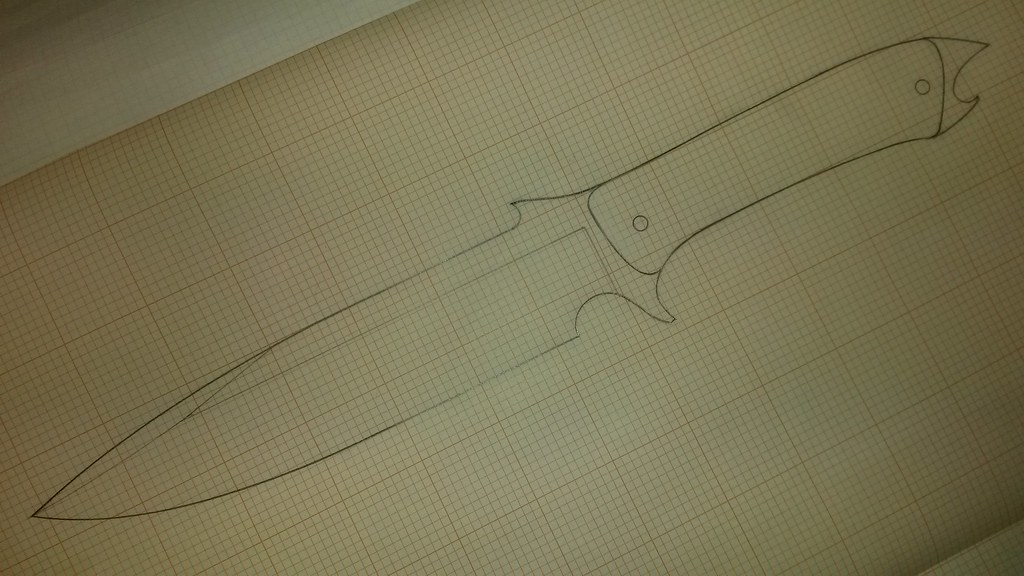
But redrew it a few times and, with some cues from my Gerber LHR, ended up with this:
You can see the influence of the LHR:
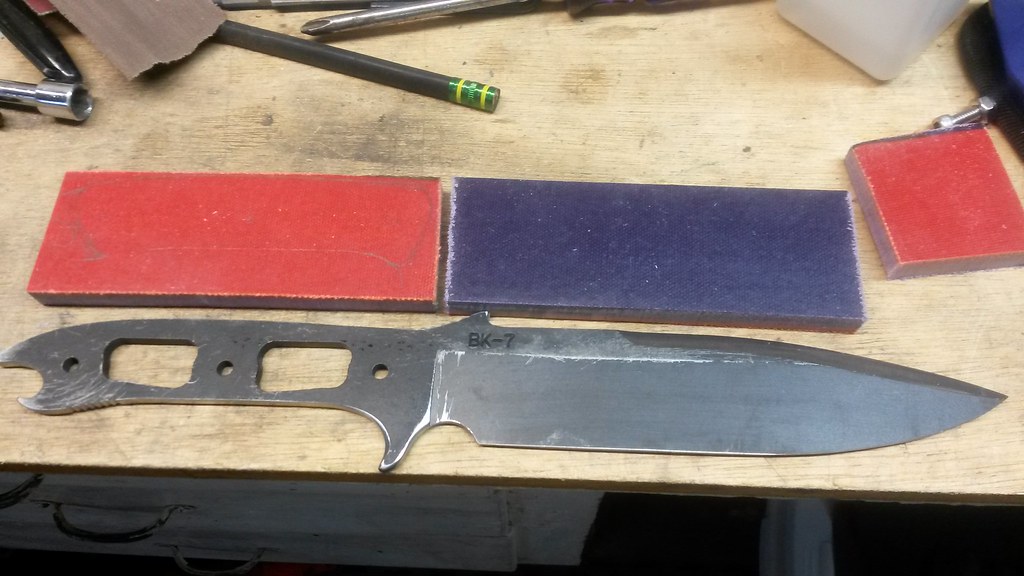
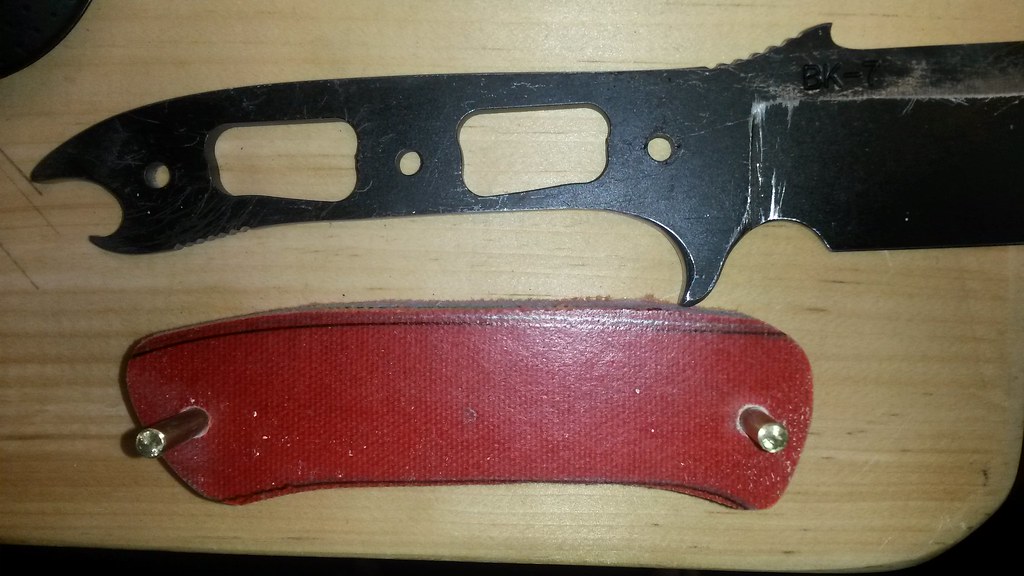
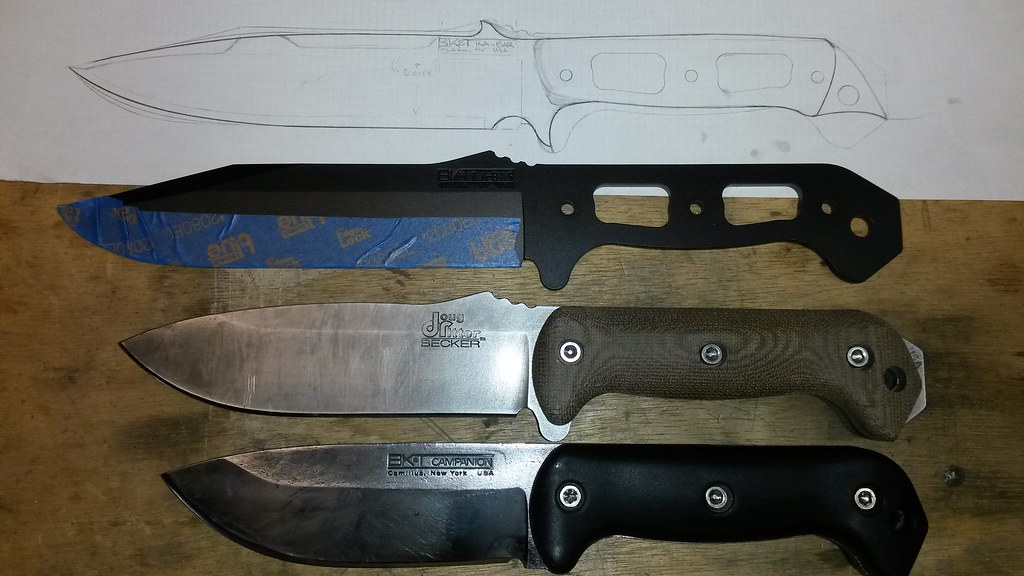
And the finalized drawing I cut and traced onto the 7:
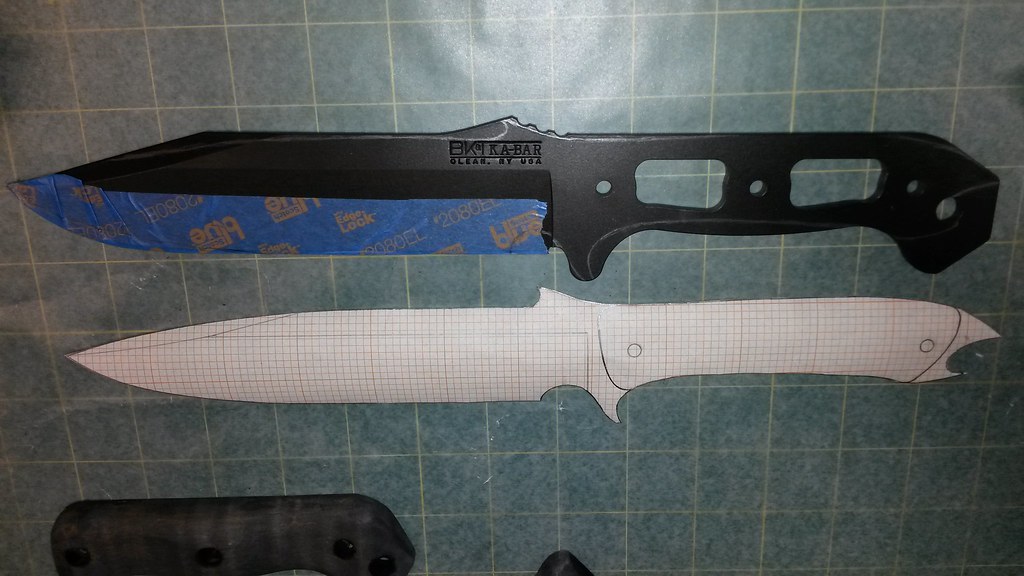
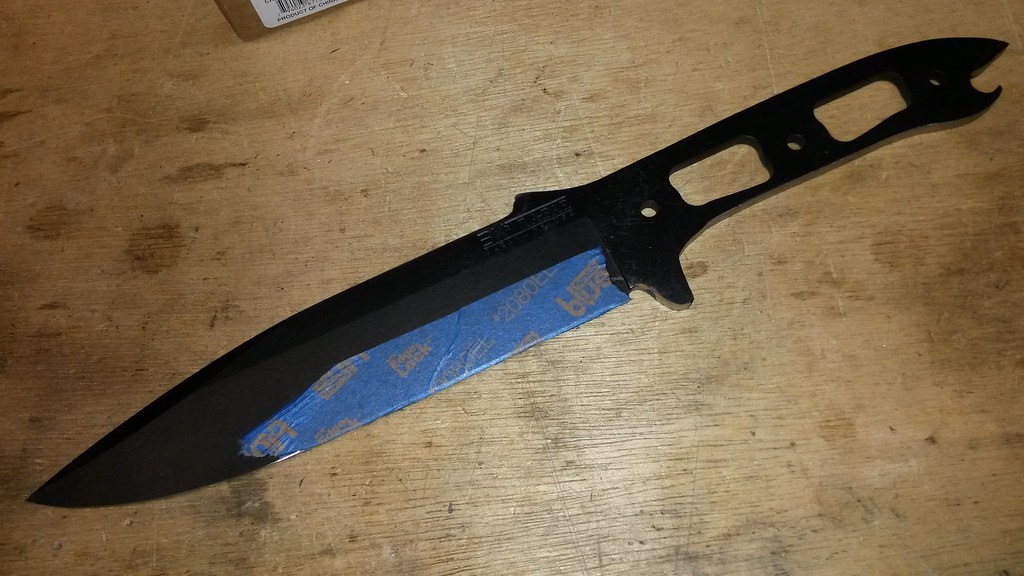
I drew onto it in pencil as I wasn't sure how my vision would play with the roll stamping, and I didn't want to grind it too close (I had measured it, but you learn that paper designs are just that. Designs. "In theory, practice and theory are the same. In practice, they usually aren't" - words to live by.
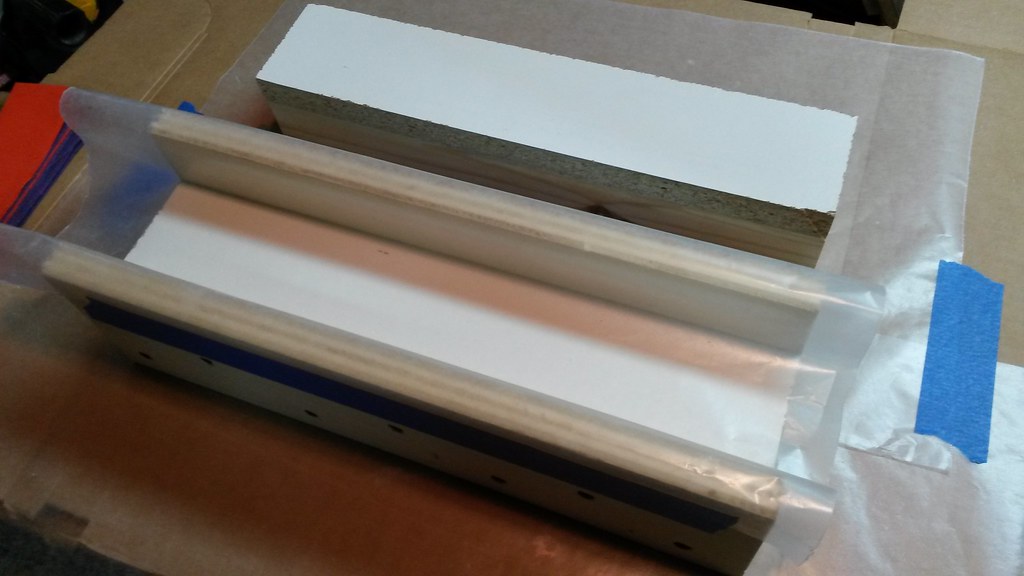
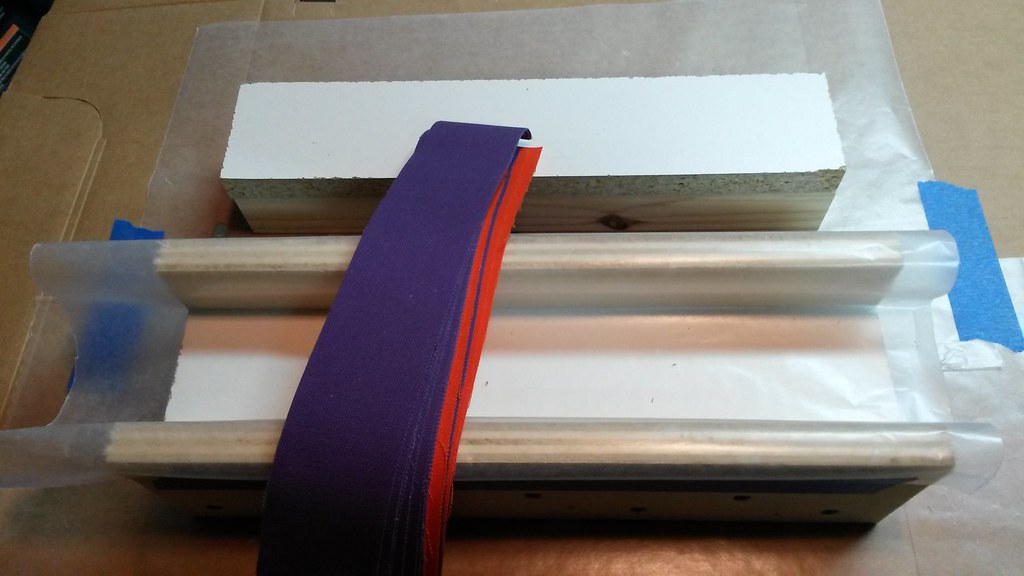
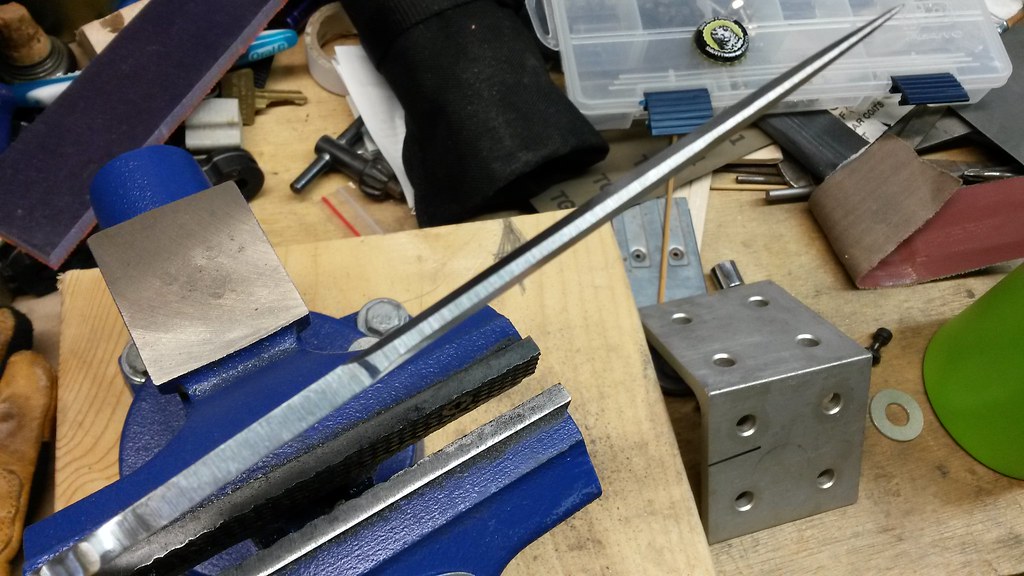
I had epoxied a ceramic tile to the platen of my 2x42, and this was my first time using it. Started grinding with an 80 grit. Deep breath. Turned on the power.
https://farm4.staticflickr.com/3921/15215573269_d07e23343b_b.jpg[/img]
For me there's usually a long pause (sometimes months - or years) between deciding that I want to do something and starting. But once I start, it just seems natural, and I wonder what the hell took me so long to just do it. Once the 7 touched the belt, I went to town.

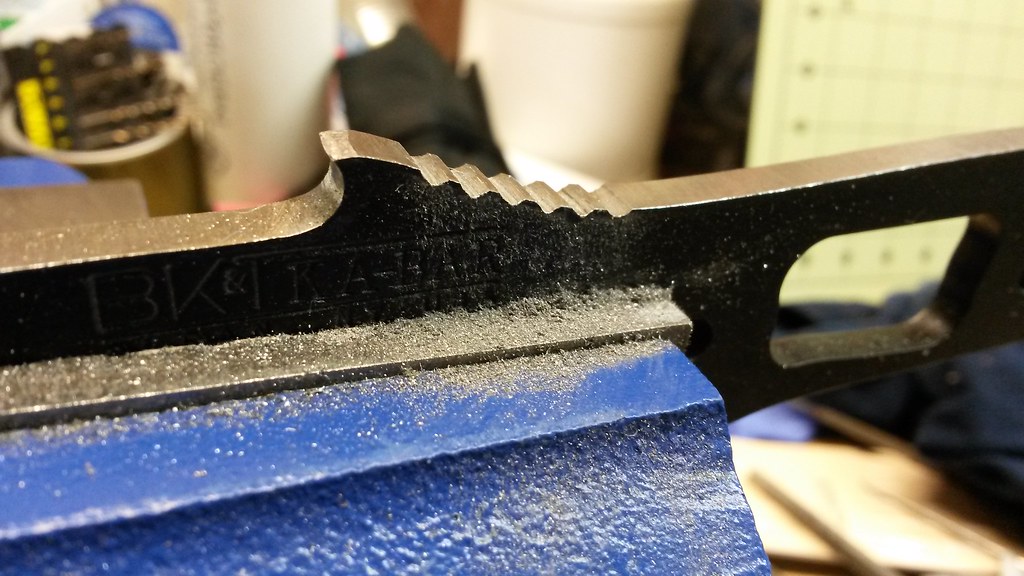
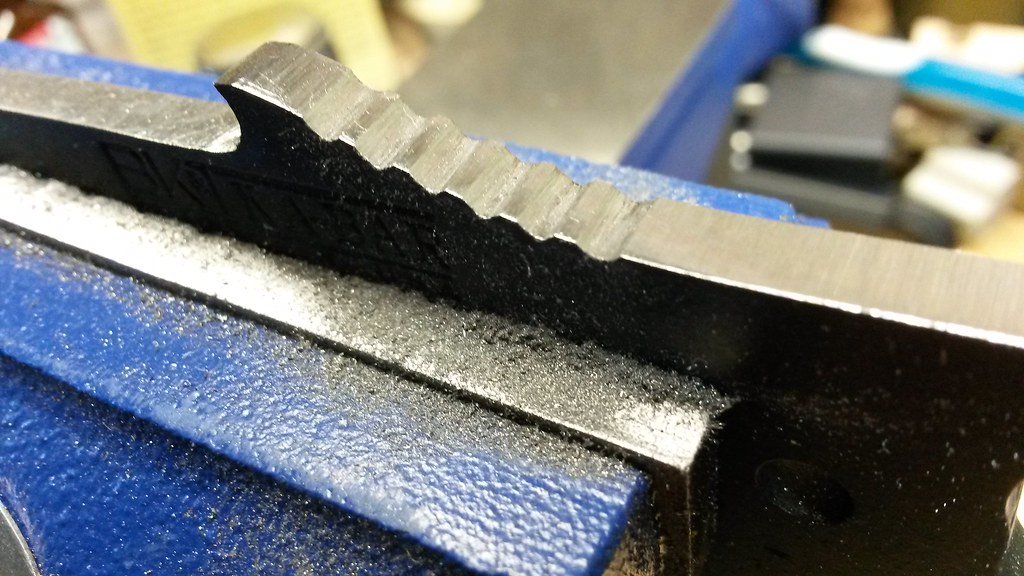
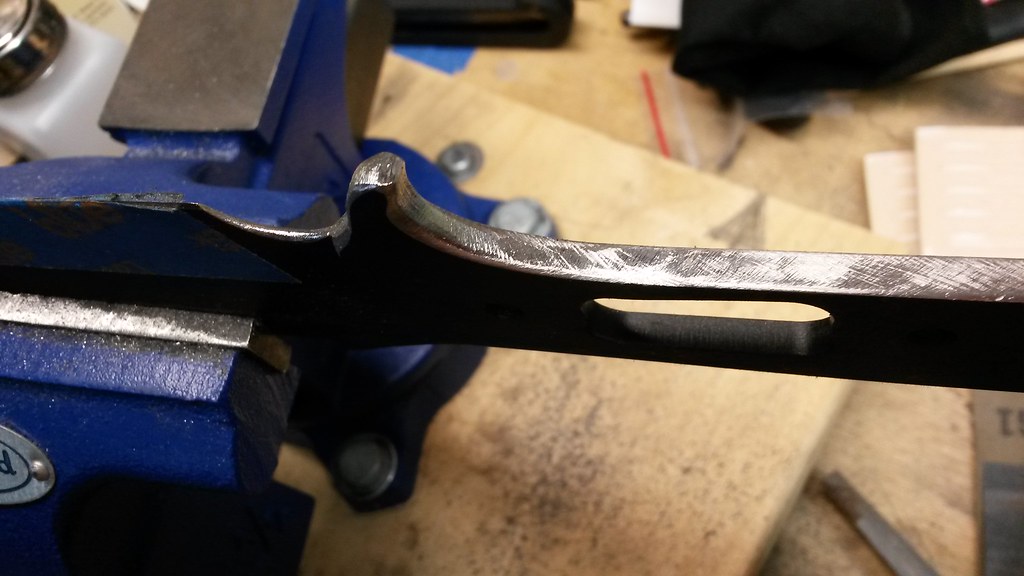
Now I had to figure out how to do the tight inside curves I'd drawn. I could've filed them, but I'd still be working on it. Ka-Bar does a great job heat treating Ethan's designs, and it makes filing tough. Went with a stand mounted dremel and a grinding wheel, after working the belt and the disc to get as much possible out of the way. The idea was to reshape the ramp, but I felt that to keep some flow I was gonna lower the spine and the top of the handle as well. This was where I thought I might grind too close to the stamping.
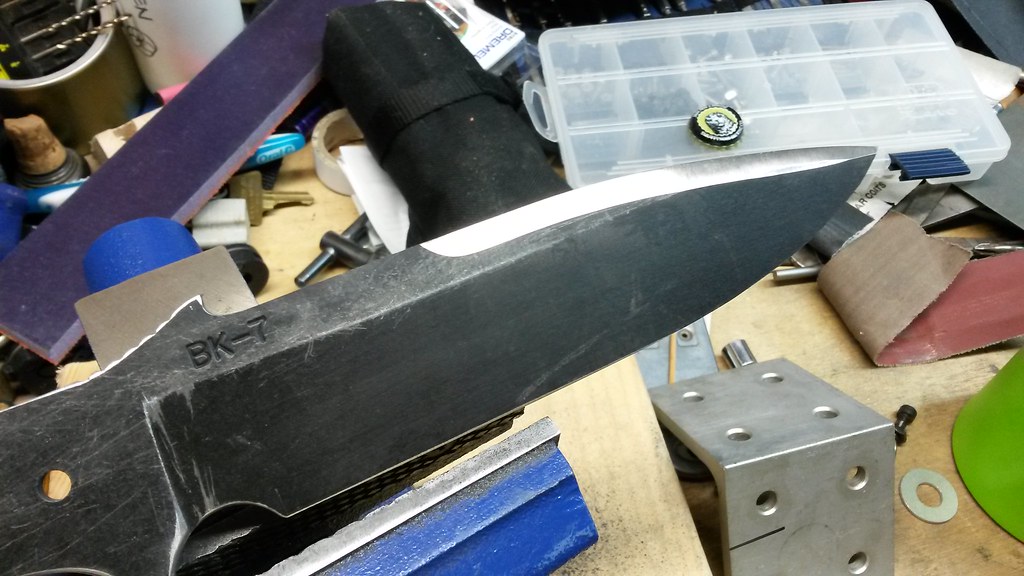
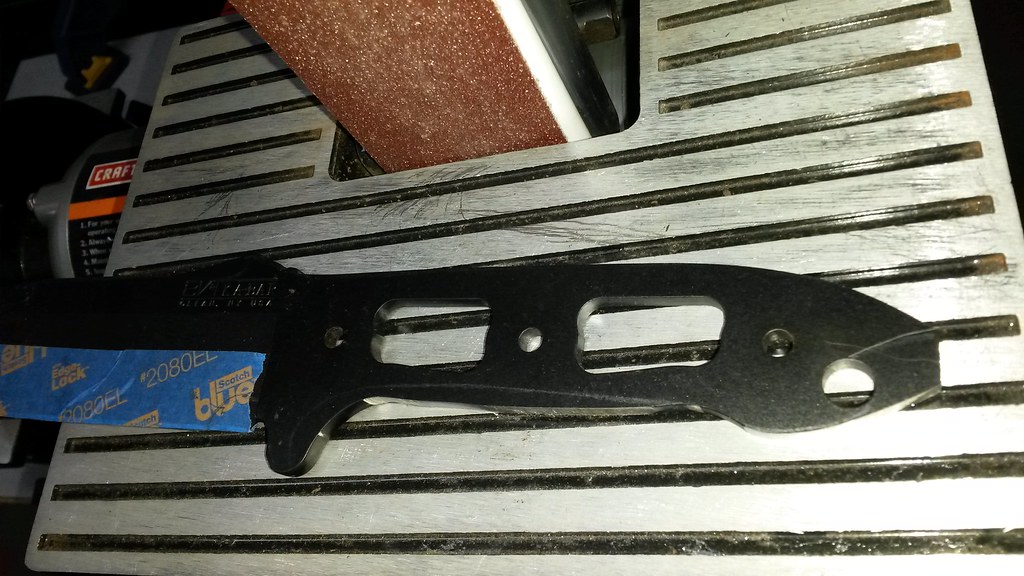
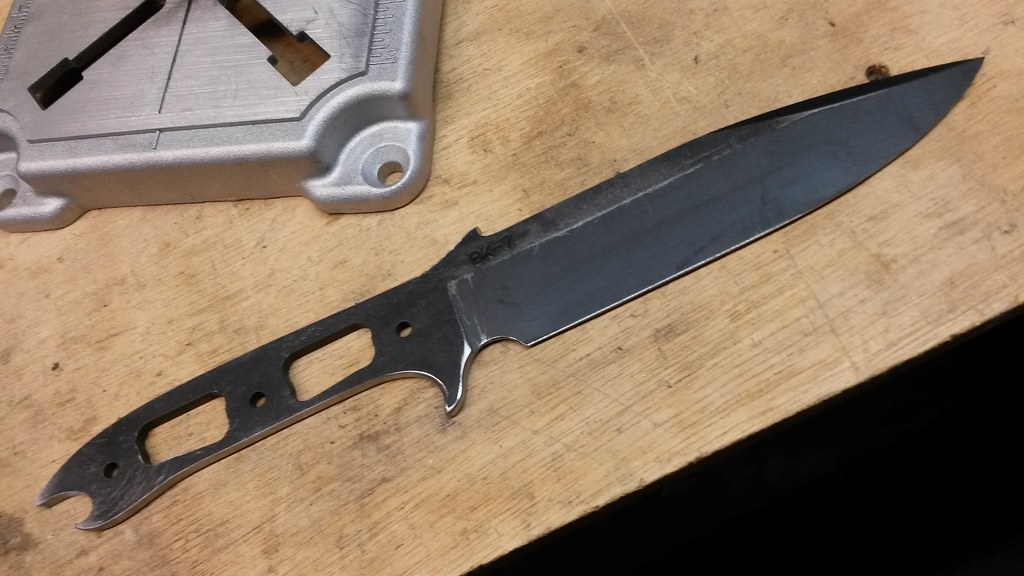
Turned out fine (at least so far). After the dremel:
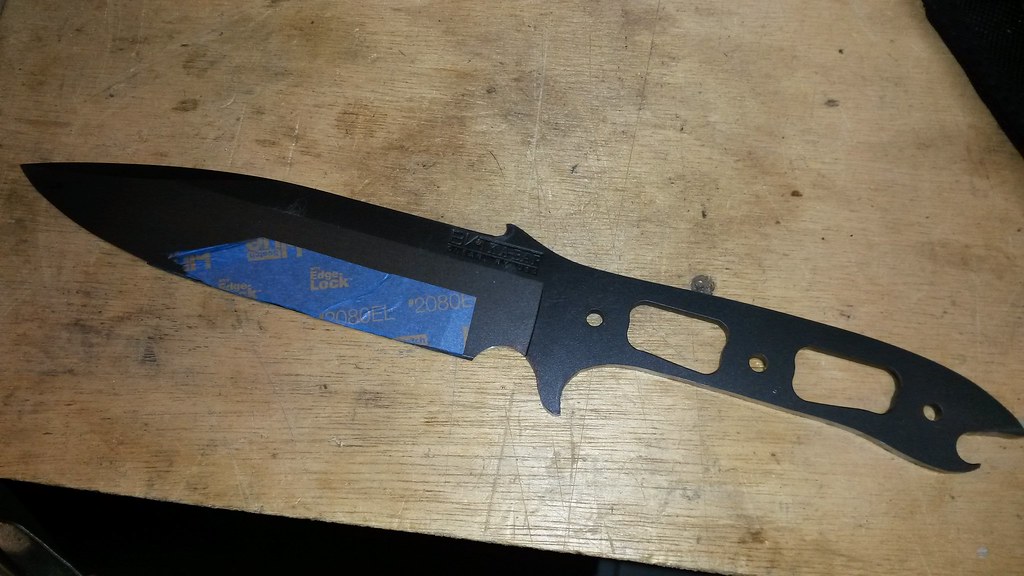
Ended up grinding away a little more of the handle than I had planned, I decided to STOP trying to smooth out the line before I made it too small for even my slightly undersize mitts.
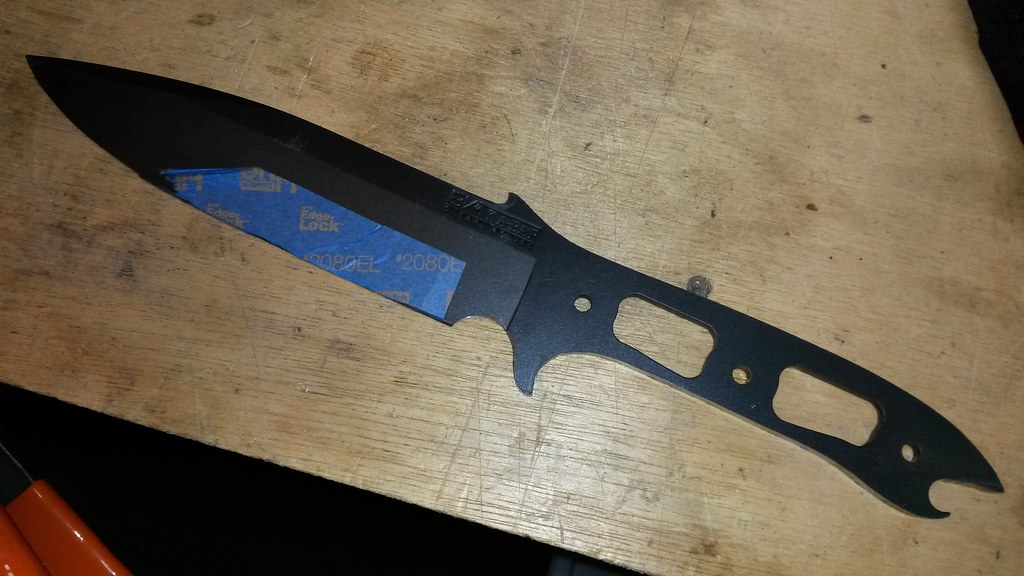
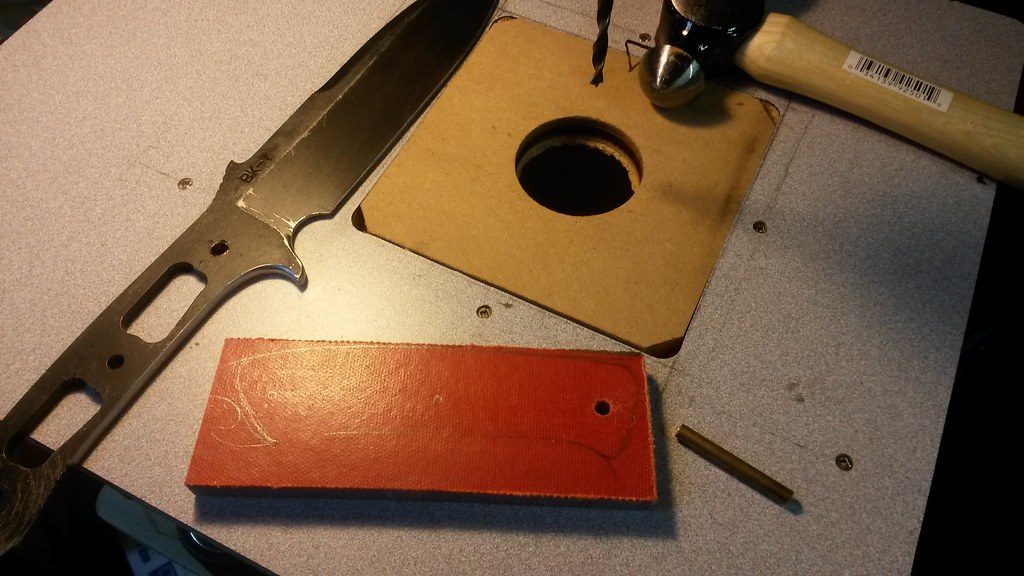
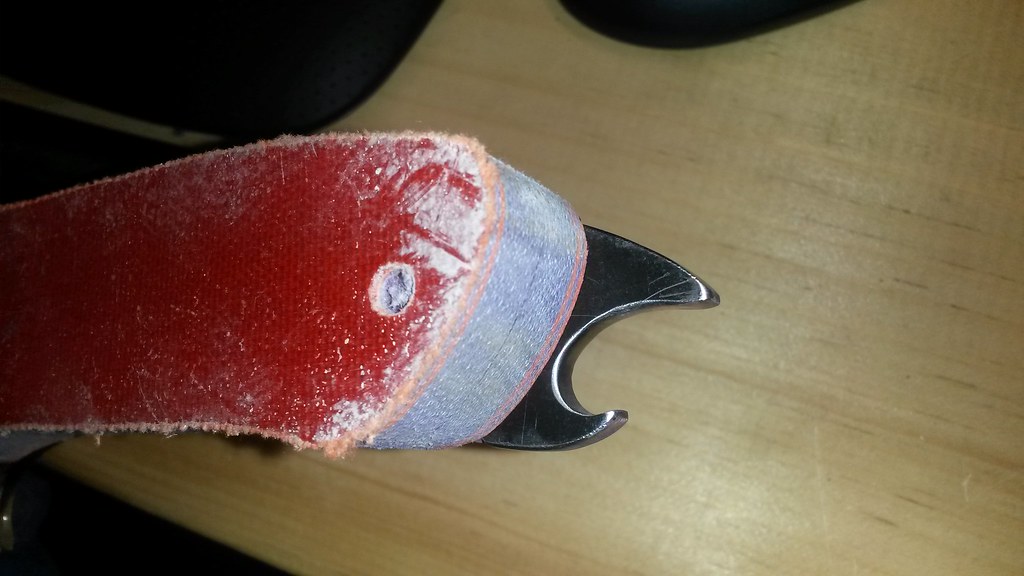
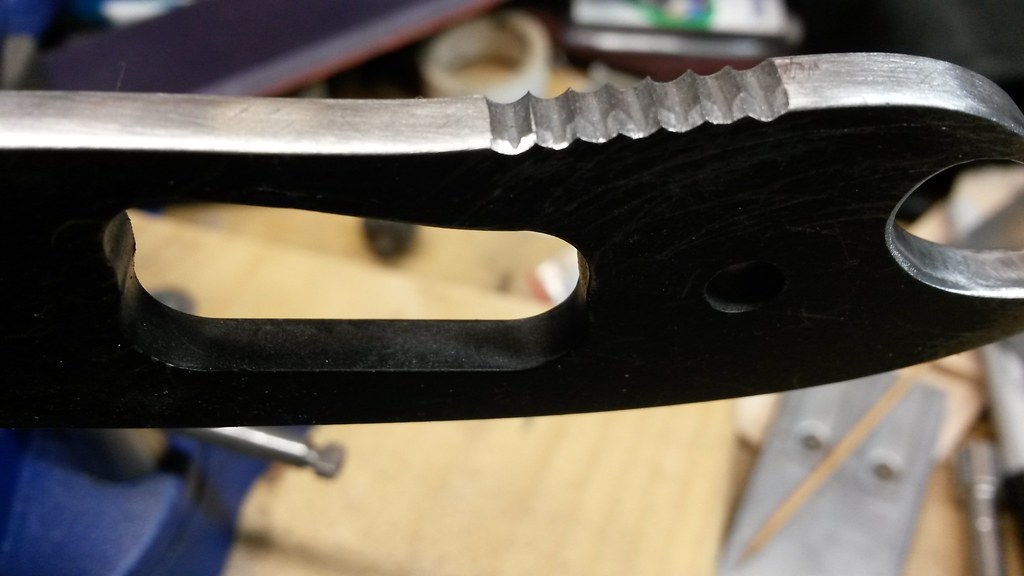
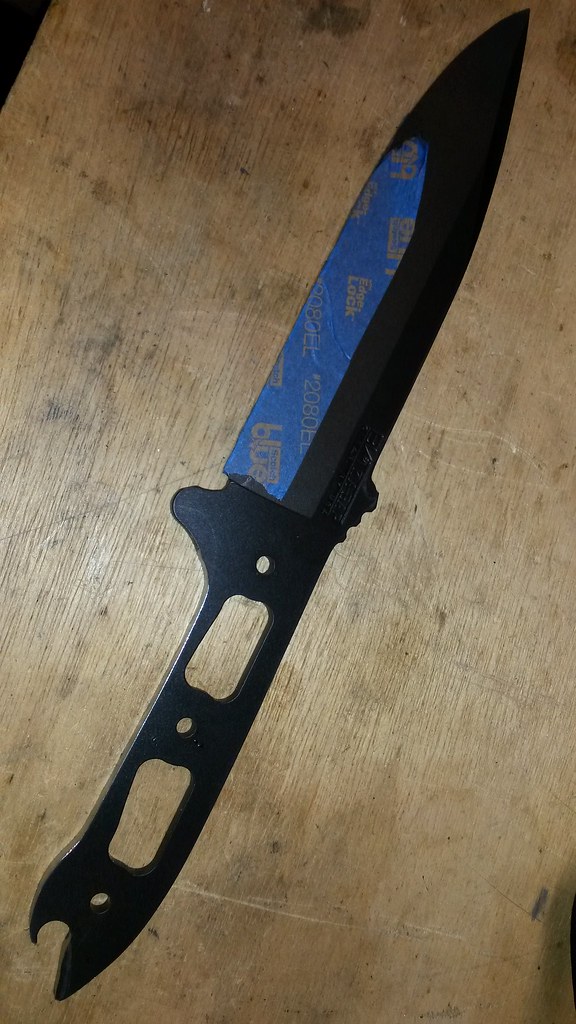
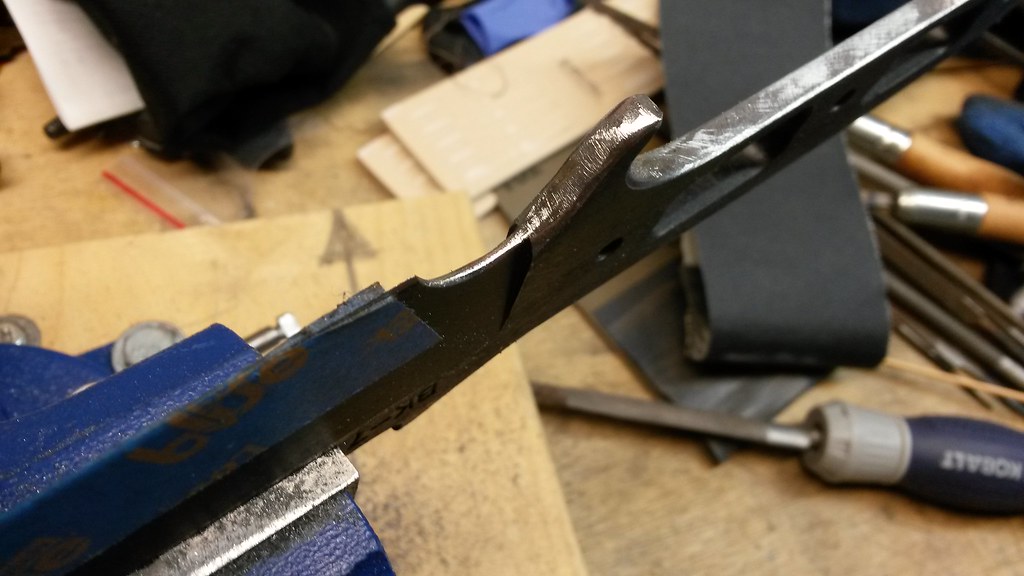
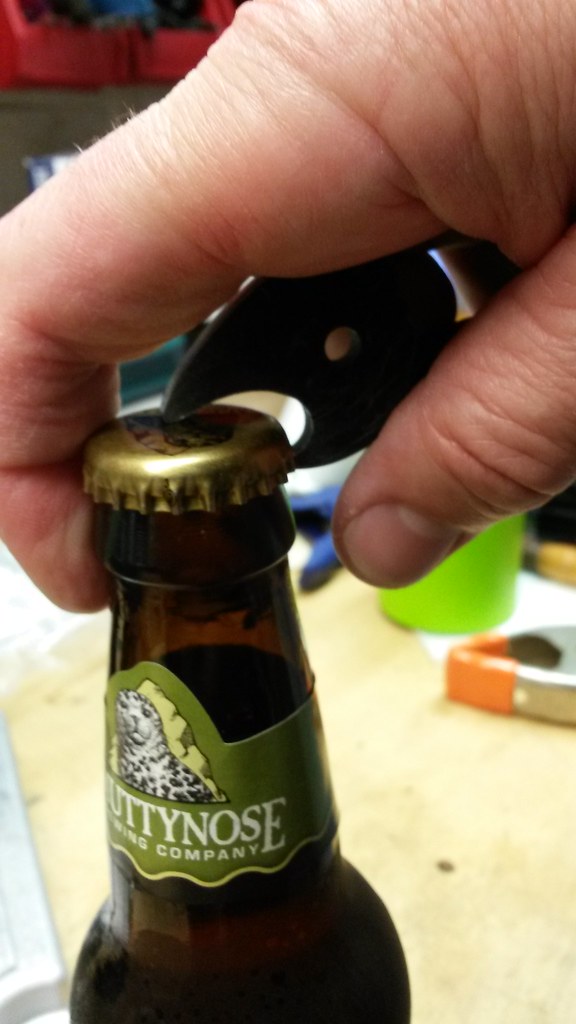
While still trying to figure out how I'm going to do the swedge, I started some jimping (!) and sanding out some of the grind marks on the handle. But first I had to make sure the bottle opener was functional.

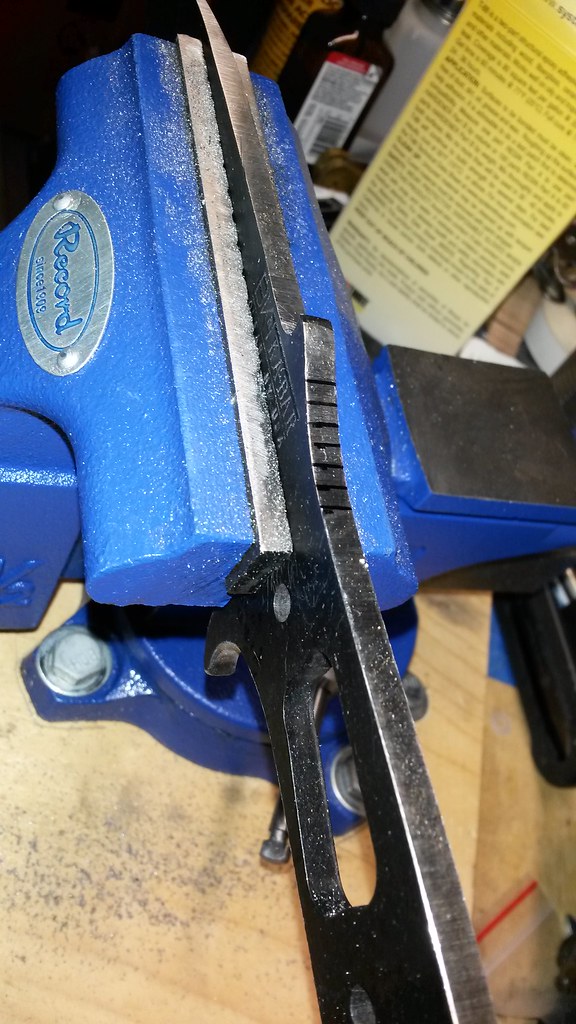

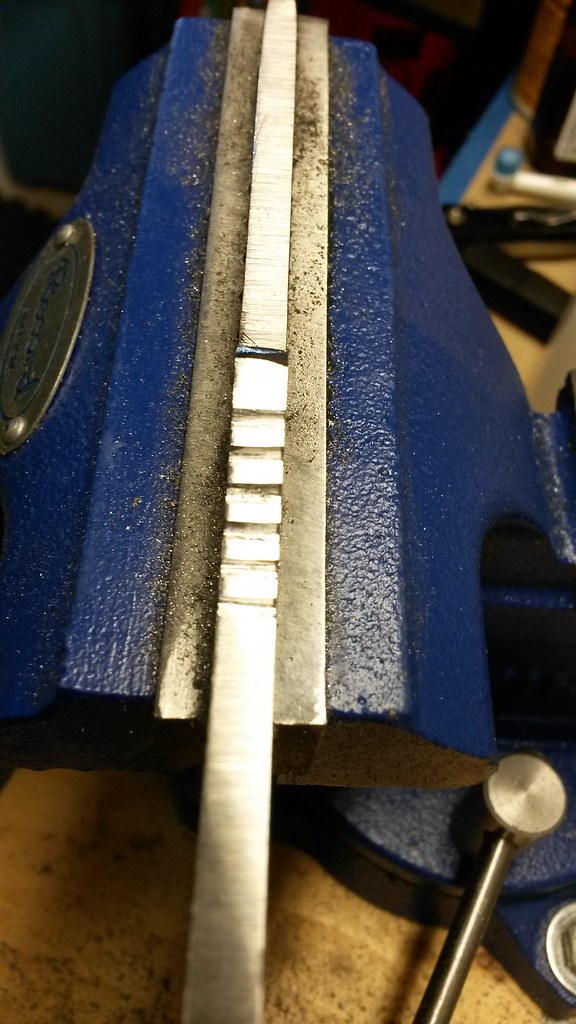
Started the jimping with a triangular file, was a little unevenly spaced, so I used pressure towards the front or the back as needed and then switched to a round diamond file.
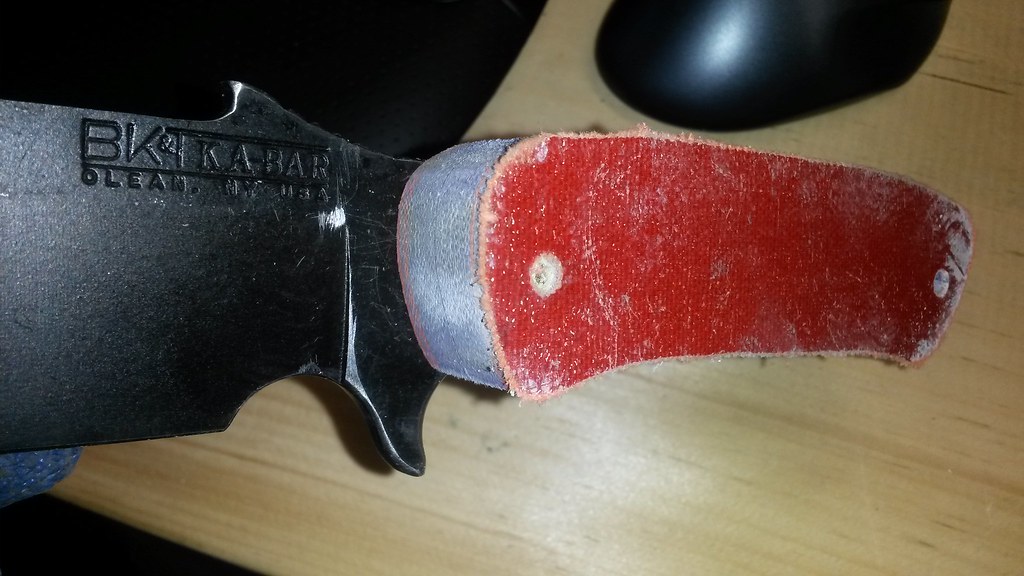
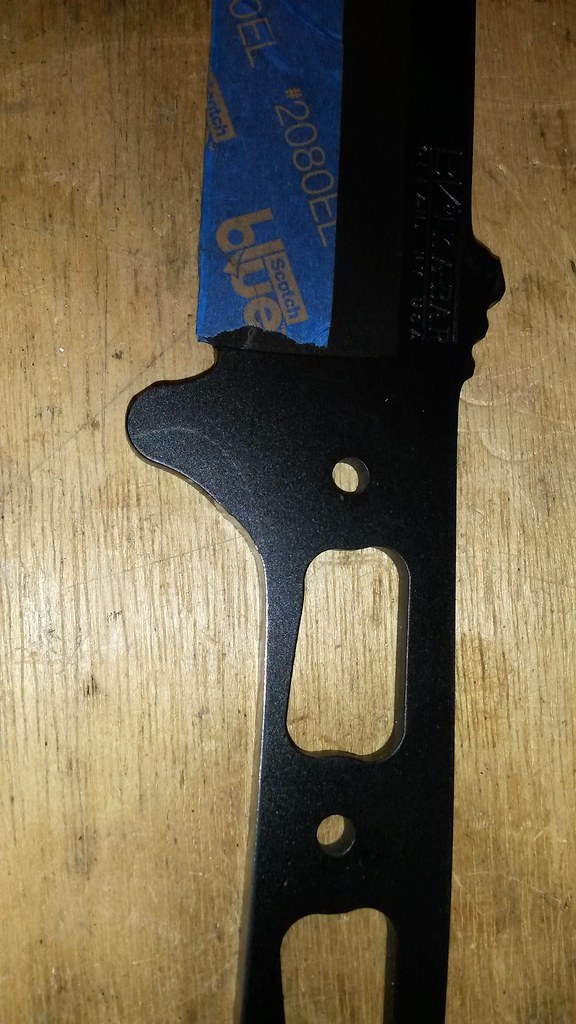
Shaping the finger guard:
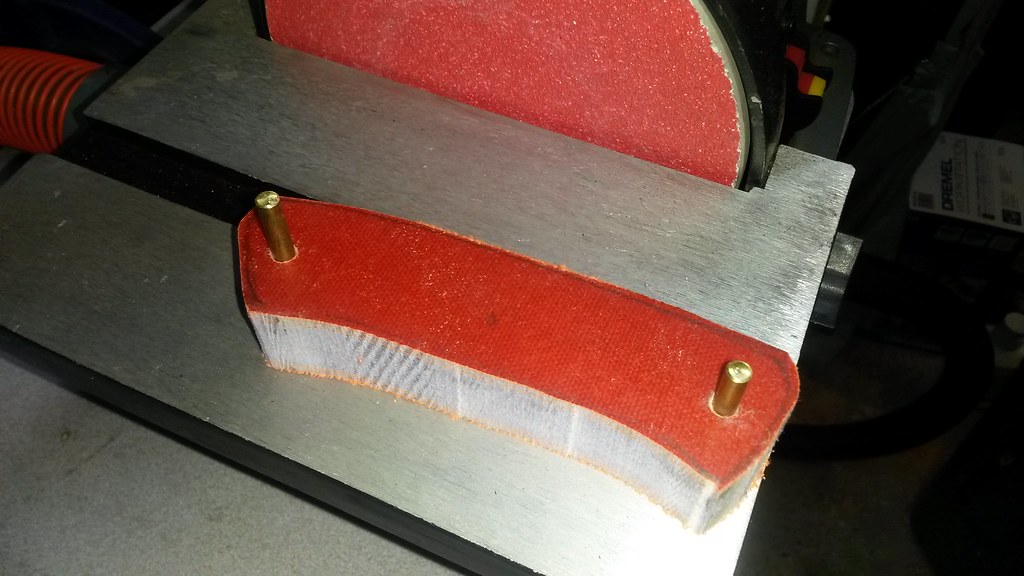
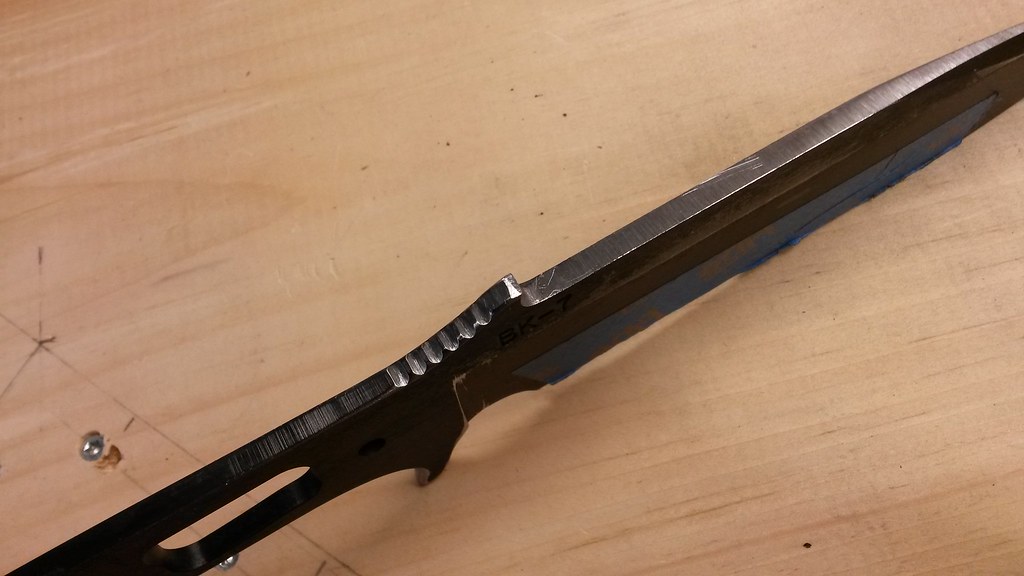
I used a file to contour and ease all the handle edges, then started sanding with 180 grit w/d and some profile sanding blocks (not really blocks, more like hard but somewhat flexible rubber).
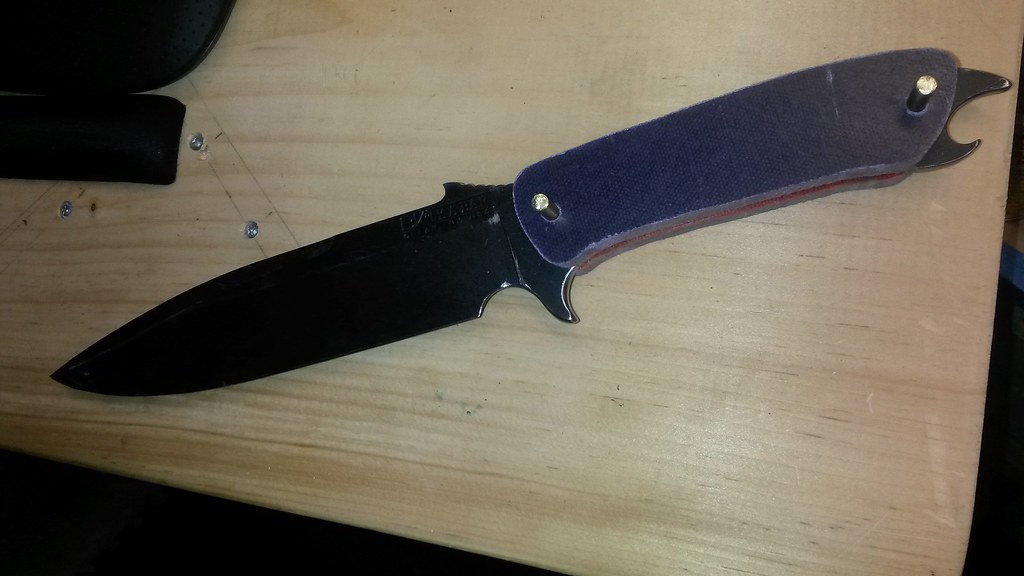
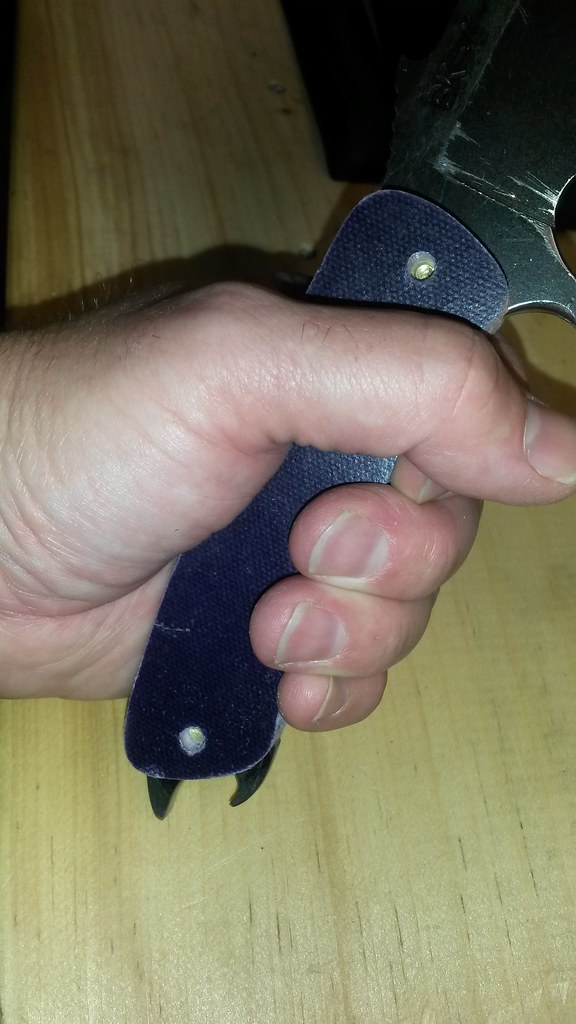
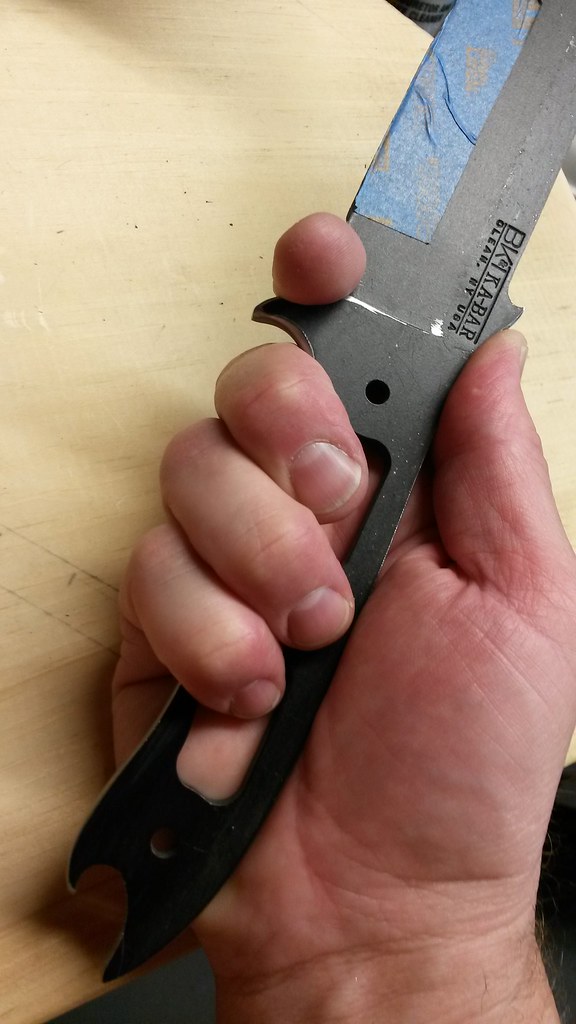
Fits good in my hand, though when I get to the scales they're gonna hafta be fairly thick to give a little more girth to the grip.
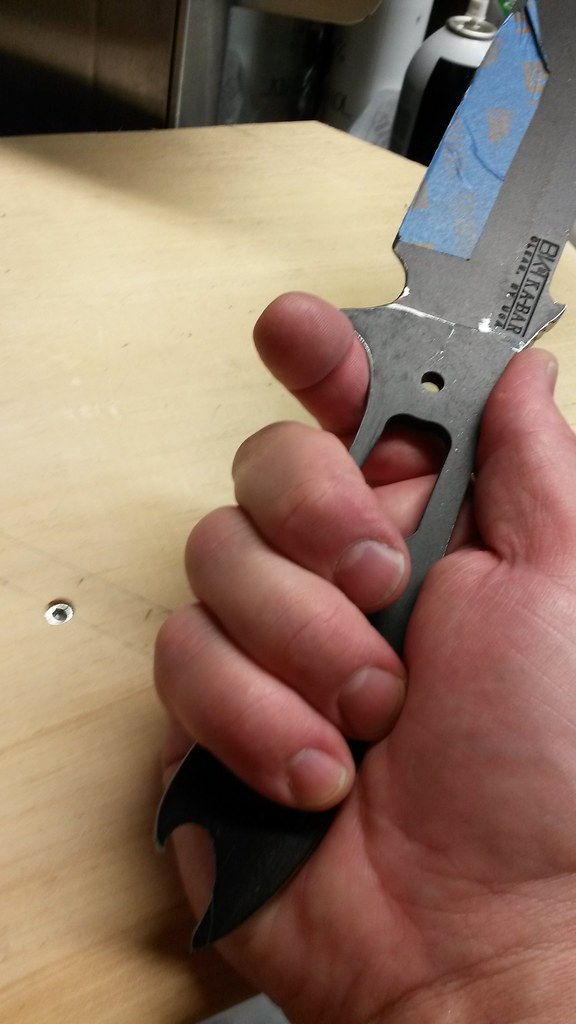
Feels like I got the finger choil right as well. Pretty psyched about that.
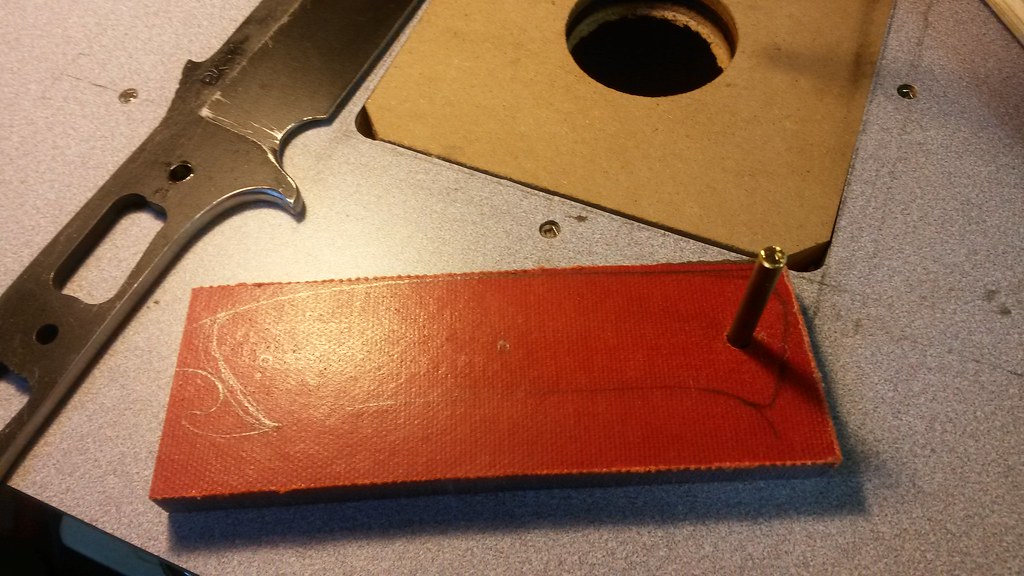
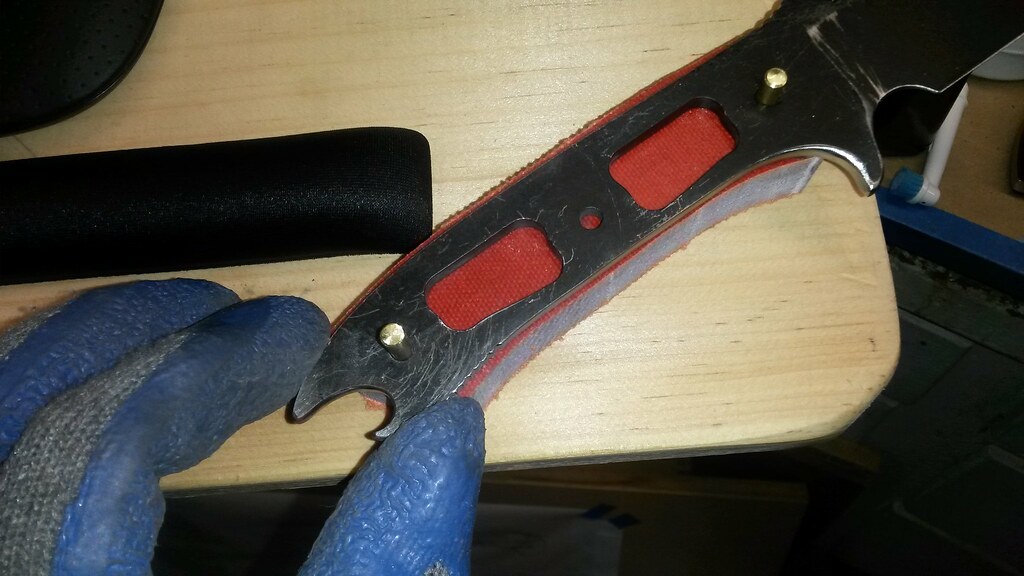
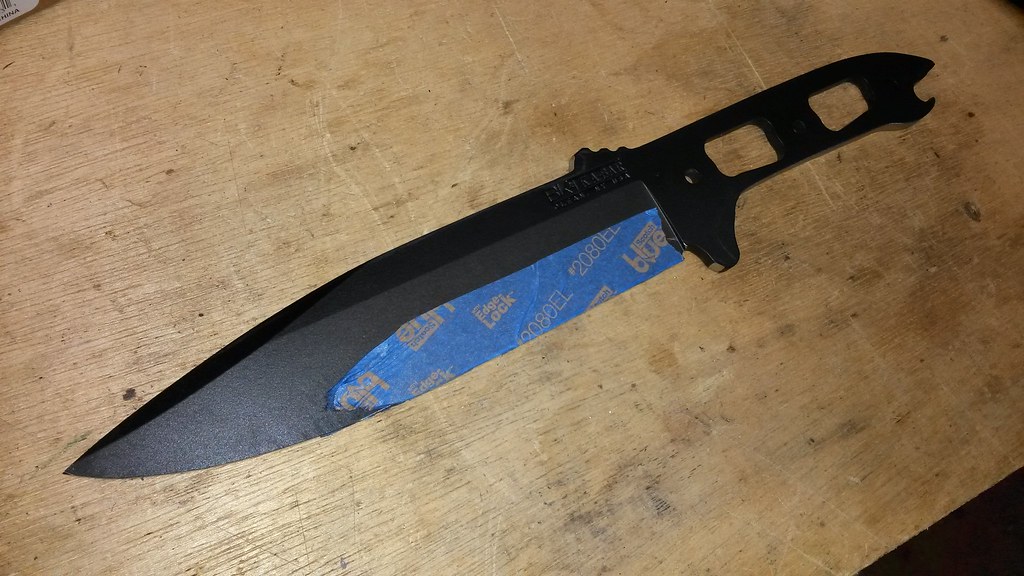
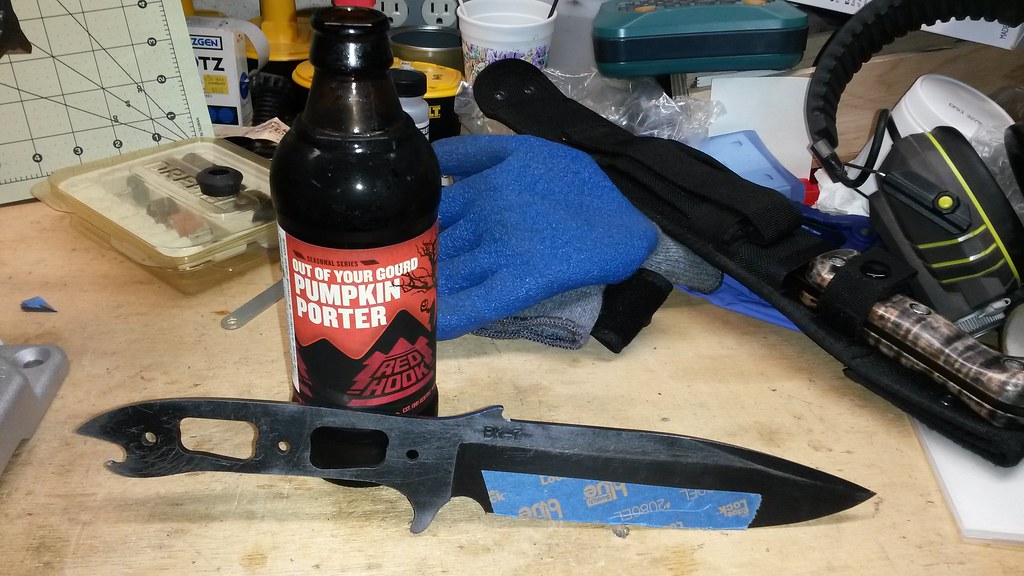
Tonight I ground down the rest of the sharp left on the edge, smoothed out the inside of the bottle opener/beer theft defender with the dremel, then tested the opener function a couple times.
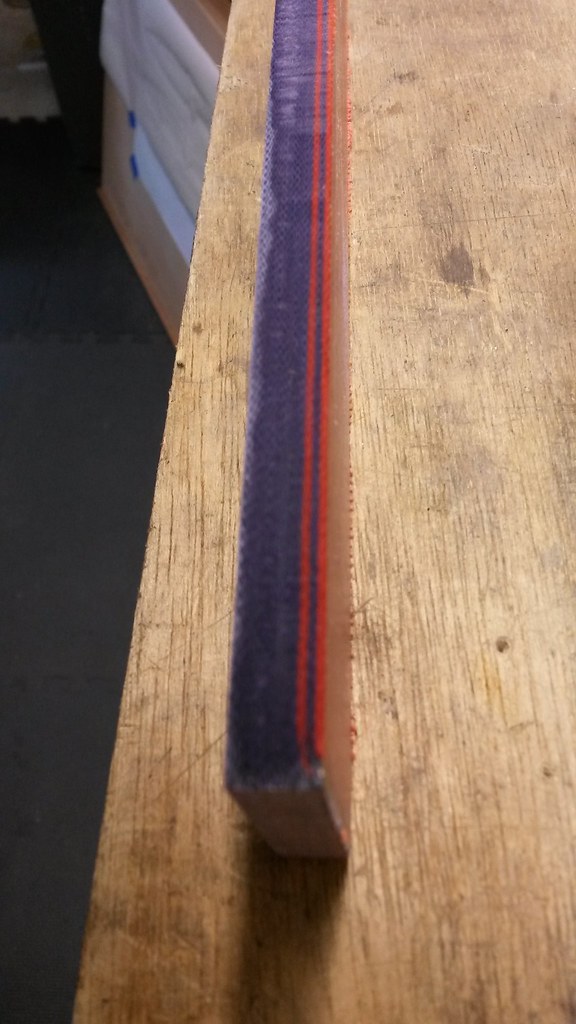
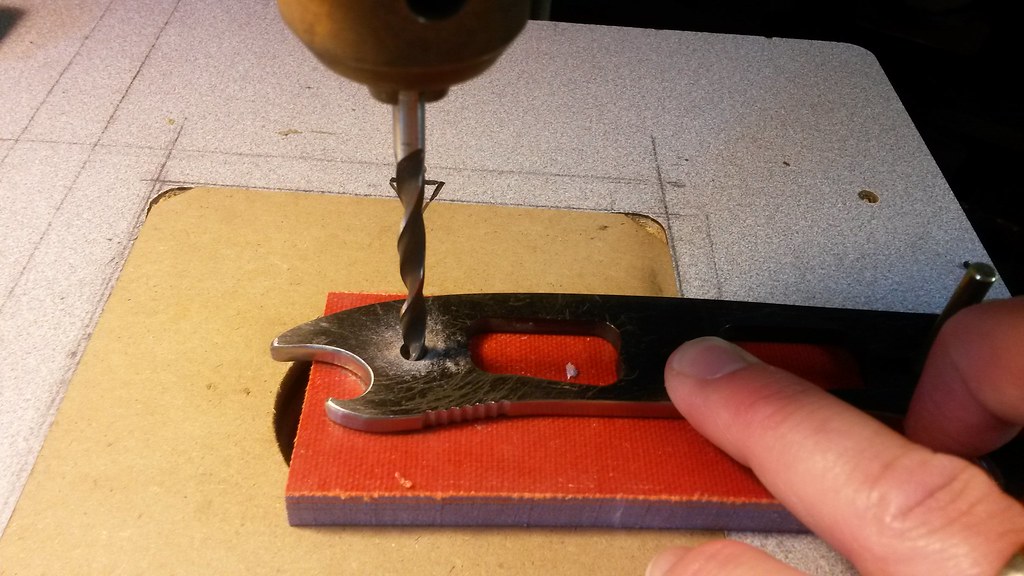
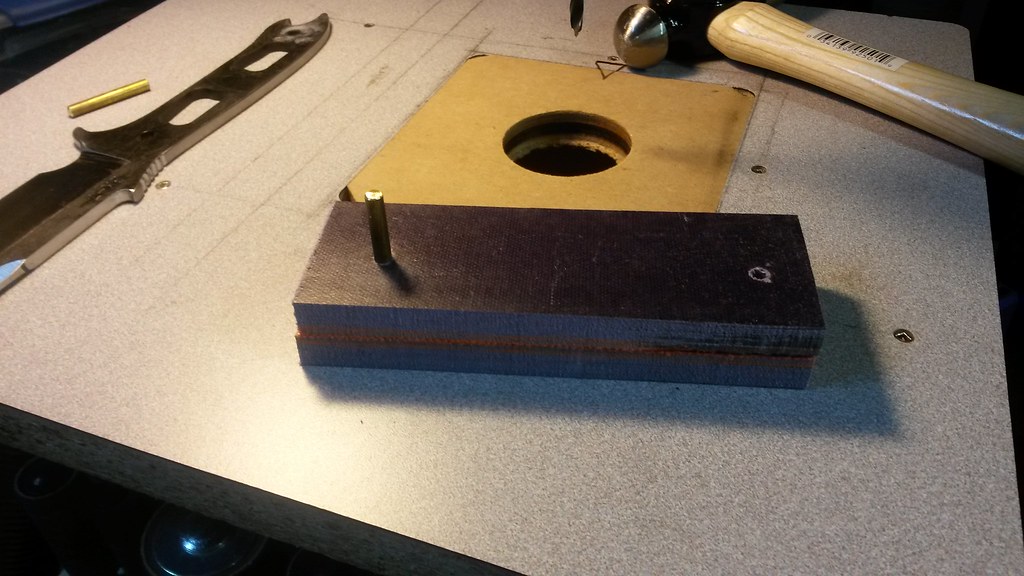
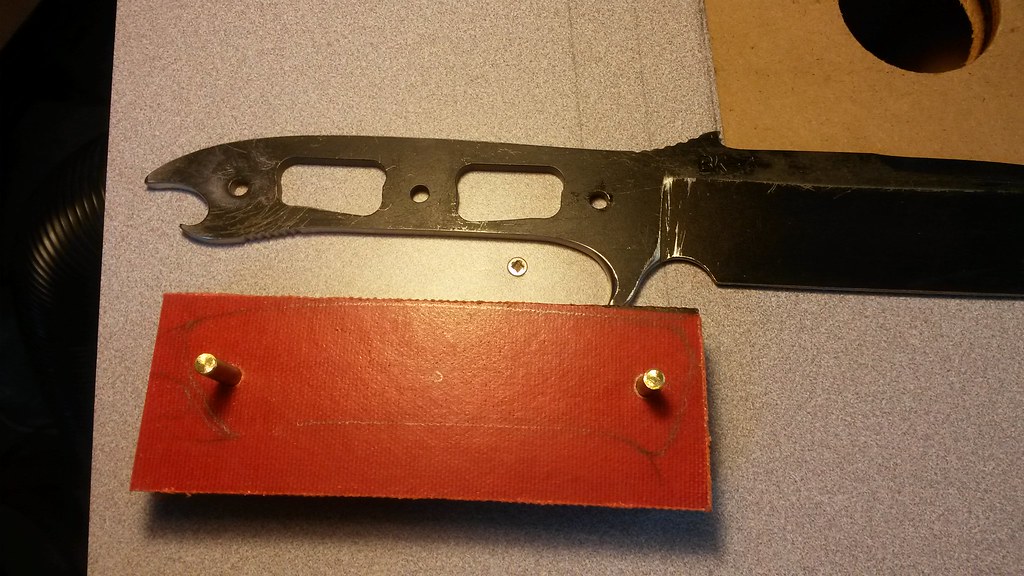
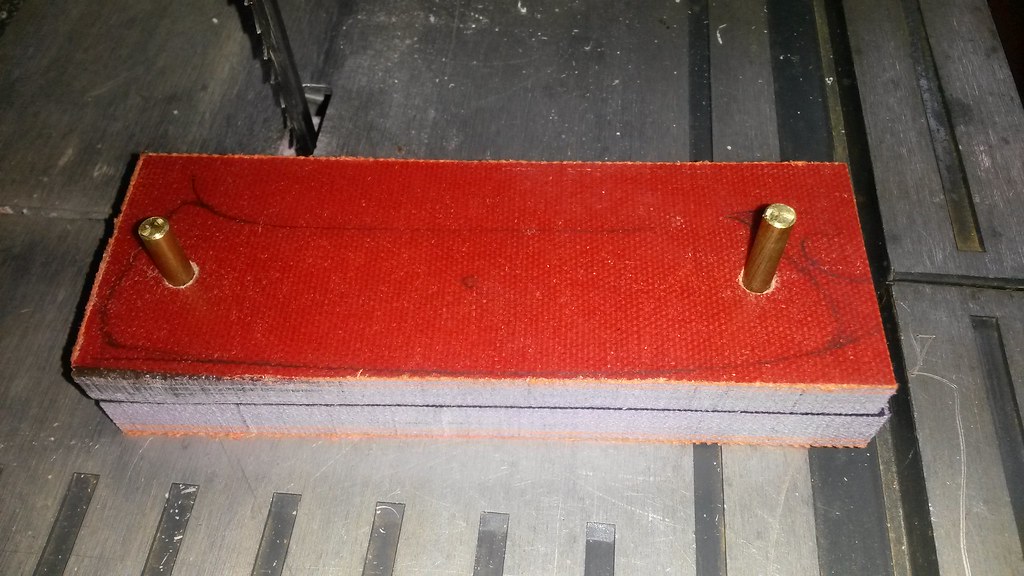
That's all for now. Gotta figure out the swedge(s?) and scales then try and put an edge back on. For the scales I'm kind of waffling between what I want to do (make my own MikeKarta®) or use wood which I have....wood might get this knife finished before the Gathering next weekend. Or not. It'll be going with me, regardless of whether it's done or not, and I'm trying not to put too much pressure on myself....after all, it only took me a year to get it started.....
I'll post up some more pics as I make them.
), and it gave me an excuse not to put the 7 up for adoption. I drew....I left it alone for months, I started up and drew some more....and collected more Beckers (and some other knives as well) and more and more came to the conclusion that since I had quite a few knives with plenty of utility, the 7 would have to go in the other direction. Fighter, tactical, whatever you wanna call it....so I finalized what I wanted to try and do, gave myself permission to grind up a perfectly good (and new!) knife, and started grinding away the parts I thought I wanted gone. In one nod to functionality I incorporated a bottle opener into the "skull crusher" pommel using the existing lanyard hole. Probably the most leverage of any bottle opener I own. Much more testing will be needed, though. OK, enough of the blah, blah, blah. POIDH!
Started off here:
But redrew it a few times and, with some cues from my Gerber LHR, ended up with this:
You can see the influence of the LHR:
And the finalized drawing I cut and traced onto the 7:
I drew onto it in pencil as I wasn't sure how my vision would play with the roll stamping, and I didn't want to grind it too close (I had measured it, but you learn that paper designs are just that. Designs. "In theory, practice and theory are the same. In practice, they usually aren't" - words to live by.
I had epoxied a ceramic tile to the platen of my 2x42, and this was my first time using it. Started grinding with an 80 grit. Deep breath. Turned on the power.
https://farm4.staticflickr.com/3921/15215573269_d07e23343b_b.jpg[/img]
For me there's usually a long pause (sometimes months - or years) between deciding that I want to do something and starting. But once I start, it just seems natural, and I wonder what the hell took me so long to just do it. Once the 7 touched the belt, I went to town.
Now I had to figure out how to do the tight inside curves I'd drawn. I could've filed them, but I'd still be working on it. Ka-Bar does a great job heat treating Ethan's designs, and it makes filing tough. Went with a stand mounted dremel and a grinding wheel, after working the belt and the disc to get as much possible out of the way. The idea was to reshape the ramp, but I felt that to keep some flow I was gonna lower the spine and the top of the handle as well. This was where I thought I might grind too close to the stamping.
Turned out fine (at least so far). After the dremel:
Ended up grinding away a little more of the handle than I had planned, I decided to STOP trying to smooth out the line before I made it too small for even my slightly undersize mitts.
While still trying to figure out how I'm going to do the swedge, I started some jimping (!) and sanding out some of the grind marks on the handle. But first I had to make sure the bottle opener was functional.
Started the jimping with a triangular file, was a little unevenly spaced, so I used pressure towards the front or the back as needed and then switched to a round diamond file.
Shaping the finger guard:
I used a file to contour and ease all the handle edges, then started sanding with 180 grit w/d and some profile sanding blocks (not really blocks, more like hard but somewhat flexible rubber).
Fits good in my hand, though when I get to the scales they're gonna hafta be fairly thick to give a little more girth to the grip.
Feels like I got the finger choil right as well. Pretty psyched about that.
Tonight I ground down the rest of the sharp left on the edge, smoothed out the inside of the bottle opener/beer theft defender with the dremel, then tested the opener function a couple times.
That's all for now. Gotta figure out the swedge(s?) and scales then try and put an edge back on. For the scales I'm kind of waffling between what I want to do (make my own MikeKarta®) or use wood which I have....wood might get this knife finished before the Gathering next weekend. Or not. It'll be going with me, regardless of whether it's done or not, and I'm trying not to put too much pressure on myself....after all, it only took me a year to get it started.....
I'll post up some more pics as I make them.
Last edited: