Horsewright
Knifemaker / Craftsman / Service Provider
- Joined
- Oct 4, 2011
- Messages
- 11,657
Often see questions here about different aspects of processing antler into scales for handle use. This is something I do a lot of, so I thought I'd take some pics and show you how i go about it. Here in California a craftsman must use sheds in his work and thats all I use. I'll let the pics do most of the talking:
Ya think of California and ya think of palm trees and bikinis. Not so much around here. Around here we have big elk, (Stacy I expect ya to know who's on the beer fridge in the background).

I'm a rancher as well as a knife maker and leather craftsman and as a cowboy we trade. Its genetic, a DNA thing. I traded for these elk sheds with a local ranch manger. What did he want... a pair of chaps for his little boy. I made him take a knife too.

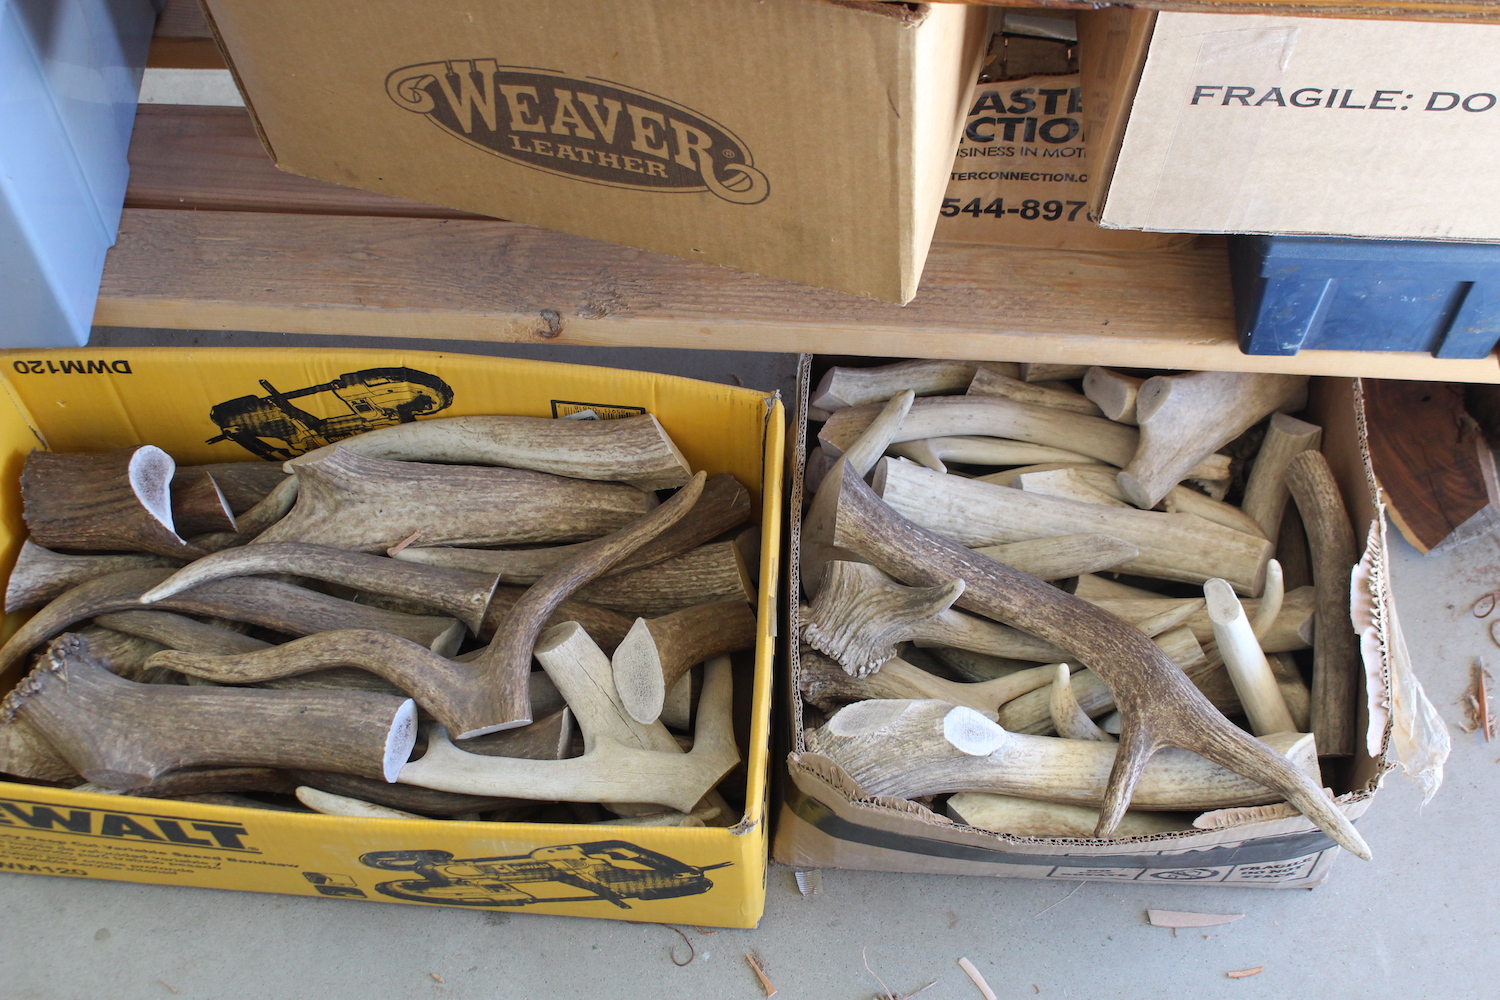
So we got this stack of sheds:

This whole WIP assumes you are comfortable with a bandsaw and have the knowledge and skill to use one. If not this process is not for you. First step is to cut em up into box sized pieces. I don't have anyplace to store them as they are and I need my leather workbench back.

I have a 14inch bandsaw that I use to do this work. I wheel it outside to cut up this stuff. If ya don't ya probably wish ya did. Its messy and wear all PPE. This part is pretty simple. Be careful and go slow. Sometimes the shape of the shed will dictate where ya cut.

So Now I have it all boxed up. I have boxes on shelves there and under workbenches here:
So we need to process some scales. I'll grab some chunks from one of the boxes and cut em up. Heres a few chunks with a few scales already cut in the background.

I'll cut these two chunks into four scale size pieces:


OK HERE IS THE MOST ABSOLUTE IMPORTANT PART!!! You must have a flat side to work with. In this pic ya see that due to the shape of the piece there is a flat and it won't roll. I use the table to check first and find the flat side that won't roll. If I don't have one, its a roundish piece, I will go over to the grinder. I will find the most uninteresting side and I will grind a flat. HAVE YOUR FLAT SIDE DOWN when cutting this is how you keep your fingers on your hands. AND USE A PUSH STICK.

After cutting off the first scale:

Cutting off the second scale. See how the piece has been rotated. You will also see that elk has a lot of pith. So I'm keeping my cut as much as possible towards the outside to minimize the pith.

OK we're gonna go all the way around all four sides. This will yield four scales and a square core of pith which I toss.


On smaller pieces you may only get three and sometimes only two scales. Thats ok always err on the side of safety vs waste. If its too small and wobbly toss it. So now ya have a pile of scales. its time to sand them. I use a 6x 48 with a 9" disc. I'll use a 36 grit zirc disc and I do 98 percent of the sanding on the disc. Seldom will I use the belt.

One thing I've learned sanding antler scales of any type. Is once you've think you got em sanded enough....sand em some more. So the scales on the left have been sanded and the scales on the right still need to be. I'll stop usually half way through like this and get the first half soaking in the PP while I'm sanding the second half.

The two things we'll be using. Thats the potassium permanganate (PP) on the left and a clear spray on the right.

I get the PP off of Amazon its cheap. Ya mix it up into a solution with water. I keep it mixed in a Tupperware container with a good tight fitting lid and just keep it off to the side when not using it. I will use a solution of PP till it stops giving good color. This is the last batch that this solution will do. I will mix up a fresh batch next time. When your PP is fresh your antler will come out a purple color. Don't freak it will dry a dark brown. As the PP ages you will see less purple and more brownish color. Here's our PP solution with some use:

All normal safety precautions of course. Where gloves and be well ventilated. Pieces in the solution. I want them submerged So I had more pieces then space. Tin foil is for dying after soaking. I'll leave them in the solution for thirty minutes or so.
Pulling them out> If the color is not as dark as you would like I give them a second soaking. I will let them dry first though. While they are drying the second batch is in for the first soak.

First batch drying second batch soaking:

While the second batch is in, I have some ironwood to cut up and process into scale size pieces.

Got that done:

After both sets have been soaked twice and after they have dried I will hit them with that Deft spray. I have used other brands but like the Deft best. I give em two coats and pay particular attention to get all sides and edges.

Sprayed with second coat:

I spray the back sides too. I move them off the tin foil as the solution will not dry for some time so your scales are sitting in a puddle.

I leave em overnight to dry well and go work horses.

Come back the next morning and have this:

So lets go make knives:


But thats another story. Thanks for looking. Hope you find this helpful. BE CAREFUL! Questions and comments are welcome.

Ya think of California and ya think of palm trees and bikinis. Not so much around here. Around here we have big elk, (Stacy I expect ya to know who's on the beer fridge in the background).
I'm a rancher as well as a knife maker and leather craftsman and as a cowboy we trade. Its genetic, a DNA thing. I traded for these elk sheds with a local ranch manger. What did he want... a pair of chaps for his little boy. I made him take a knife too.
So we got this stack of sheds:
This whole WIP assumes you are comfortable with a bandsaw and have the knowledge and skill to use one. If not this process is not for you. First step is to cut em up into box sized pieces. I don't have anyplace to store them as they are and I need my leather workbench back.
I have a 14inch bandsaw that I use to do this work. I wheel it outside to cut up this stuff. If ya don't ya probably wish ya did. Its messy and wear all PPE. This part is pretty simple. Be careful and go slow. Sometimes the shape of the shed will dictate where ya cut.
So Now I have it all boxed up. I have boxes on shelves there and under workbenches here:
So we need to process some scales. I'll grab some chunks from one of the boxes and cut em up. Heres a few chunks with a few scales already cut in the background.
I'll cut these two chunks into four scale size pieces:
OK HERE IS THE MOST ABSOLUTE IMPORTANT PART!!! You must have a flat side to work with. In this pic ya see that due to the shape of the piece there is a flat and it won't roll. I use the table to check first and find the flat side that won't roll. If I don't have one, its a roundish piece, I will go over to the grinder. I will find the most uninteresting side and I will grind a flat. HAVE YOUR FLAT SIDE DOWN when cutting this is how you keep your fingers on your hands. AND USE A PUSH STICK.
After cutting off the first scale:
Cutting off the second scale. See how the piece has been rotated. You will also see that elk has a lot of pith. So I'm keeping my cut as much as possible towards the outside to minimize the pith.
OK we're gonna go all the way around all four sides. This will yield four scales and a square core of pith which I toss.
On smaller pieces you may only get three and sometimes only two scales. Thats ok always err on the side of safety vs waste. If its too small and wobbly toss it. So now ya have a pile of scales. its time to sand them. I use a 6x 48 with a 9" disc. I'll use a 36 grit zirc disc and I do 98 percent of the sanding on the disc. Seldom will I use the belt.
One thing I've learned sanding antler scales of any type. Is once you've think you got em sanded enough....sand em some more. So the scales on the left have been sanded and the scales on the right still need to be. I'll stop usually half way through like this and get the first half soaking in the PP while I'm sanding the second half.
The two things we'll be using. Thats the potassium permanganate (PP) on the left and a clear spray on the right.
I get the PP off of Amazon its cheap. Ya mix it up into a solution with water. I keep it mixed in a Tupperware container with a good tight fitting lid and just keep it off to the side when not using it. I will use a solution of PP till it stops giving good color. This is the last batch that this solution will do. I will mix up a fresh batch next time. When your PP is fresh your antler will come out a purple color. Don't freak it will dry a dark brown. As the PP ages you will see less purple and more brownish color. Here's our PP solution with some use:
All normal safety precautions of course. Where gloves and be well ventilated. Pieces in the solution. I want them submerged So I had more pieces then space. Tin foil is for dying after soaking. I'll leave them in the solution for thirty minutes or so.
Pulling them out> If the color is not as dark as you would like I give them a second soaking. I will let them dry first though. While they are drying the second batch is in for the first soak.
First batch drying second batch soaking:
While the second batch is in, I have some ironwood to cut up and process into scale size pieces.
Got that done:
After both sets have been soaked twice and after they have dried I will hit them with that Deft spray. I have used other brands but like the Deft best. I give em two coats and pay particular attention to get all sides and edges.
Sprayed with second coat:
I spray the back sides too. I move them off the tin foil as the solution will not dry for some time so your scales are sitting in a puddle.
I leave em overnight to dry well and go work horses.
Come back the next morning and have this:
So lets go make knives:
But thats another story. Thanks for looking. Hope you find this helpful. BE CAREFUL! Questions and comments are welcome.
Last edited:
")