The Stacked Leather Zone

Ideally the leather is vinegarooned, neutralized and dried before the pieces are cut. If the pieces are already cut it can still be done it's just easier if it's in strips. You won't be able to neutralize it after it's in a block. The most important step is neutralizing it thoroughly because it's corrosive until then.
 
... and under pressure the processed leather squares will fuse into a block??? I'm guessing yes as this is how - as I understand it - you do it BUT just want to be certain. Thanks for your help.
 
After you vinegaroon the leather, then you would begin the block process if you wanted to go that route. You can start the block process after neutralizing and rinsing the leather if you can commit that much time.

Ine thing to note is that Vinegarooned leather is harder to make blocks out of as it hardens up a bit from the vinegar. You've gotta really roughen up each side to release some fibers, especially the grain side.
 
I know I seem random but these are the four areas I'm focused on.

• Cowbells
• Creative Pieces (Faros, Bowies)
• Leather work (Belts etc..)
• Stacked Leather Knives

I've had the Faros on the back burner lately, time management hasn't been my strong point this summer, that's for sure! Have no fear.....
tumblr_inline_nwu06rrDsW1qzztl4_400.gifv
 
I'll be doing stacked leather consistently from now on. They'll be designed based on the requests/suggestions that happen in this thread but these won't be available for Dibs. No two runs will be alike.

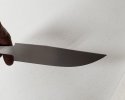
The first run will be 3 of the profile below. 3/16" 52100 in a six inch blade.

20210918_195709-01.jpeg

This first run is spoken for.
 
Going to try out the Bill Behnke radiused platen on these. That will give them a very slight hollow grind. It mimics the curve of a 6 foot wheel. I haven't used one before, wish me luck!

Edit: Hollow grind went well, we're good to go.
 
Last edited:
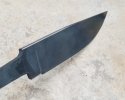
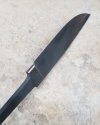
6" from guard to tip. Hollow ground with a rounded at the spine and below the ricasso.
View attachment 1668120

View attachment 1668119


There's a lot to like about that blade shape and grind. I appreciate a high hollow grind is very appropriate and practical on this style knife. I like the shape of the top section of the blade being straight on the back half before taking a slight angled downward turn to the tip. Sorta clip looking without being an exaggerated clip point. That is a good thing in my eye. Nice job rounding the spine and bottom of the ricasso. I especially like the fact that the cutting edge extends below the bottom of the ricasso. That keeps the whole sharpened blade accessible for Job #1 and helps with edge maintenance. I will sum up these comments by saying nice job all around. I wouldn't change a thing.

I look forward to seeing how this one turns out when it's done. I will certainly be a little envious of the lucky owner. ;)

Phil
 
You have a very observant eye Phil:thumbsup:

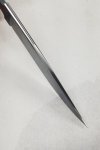
The steel on this is close to .20" at it's thickest with an aggressive distal taper to the tip. Instead of a low grind with a swedge I took the slight hollow all the way to the spine and then rounded the area up to the "clip", which is flat. The transition from the rounded portion to the flat clip really makes for a clean effect that I'm really liking.
20211027_091932-01.jpeg
 
These first three stacked leather knives are spoken for and I've been communicating with their owners by recording and posting unlisted videos on YouTube. I record a brief message and send a link through email. I'm not sure if it's the best way to communicate but for me it's quicker and more effective than trying to explain things in an email with photos.

With the link you can review unlisted videos any time you want they just don't show up in my channel. It's not that I mind them being public, it just keeps from having videos on the channel that seem random or out of context.

Here's an example of what I mean. In this instance, I ground out the knife that I had in mind and asked for their feedback on it. I got quick replies and everything's moving forward. I wanted to post this one so you have an idea of what I mean and how annoying it can be to deal with me😁

Here's four minutes of your life you'll never get back.
 
Here's one, too. This kid is a bit obnoxious but he made a fantastic instructional video and the knife looks great, too.

 
For those butt caps that are not radially symmetrical, the ones that drop forward, how do you guys make those? Do you start with a cylinder, attach to the handle, and then grind to shape?

And if so, does anyone have a patter, jig, or some technique they could share with me before I make a disaster-on-a-stick?

For example: https://agrussell.com/files/products/large/ka1236.jpg?1474587053

Thanks heaps, folks.
 
I grind mine to shape with the handle. There's a lot of different ways to do it though. If you know for sure the shape you want, cut it out beforehand. I shape it as I go. You just have to make sure not to get it too hot.

 
Back
Top