What's going on in your shop? Show us whats going on, and talk a bit about your work!

Some organic things I've been working on.

A Study In Moose...

A hunter with moose scales.

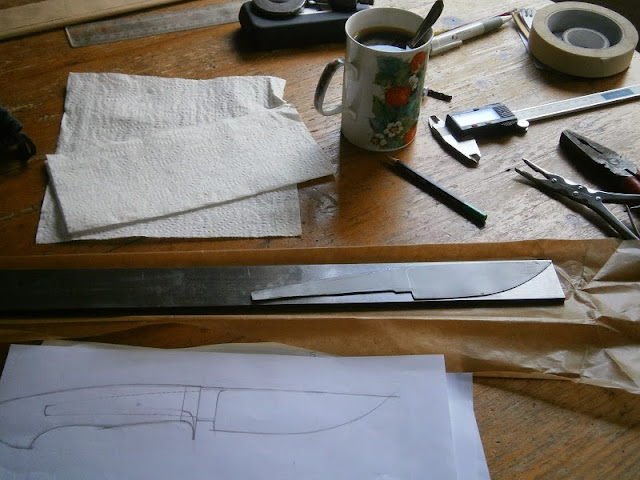
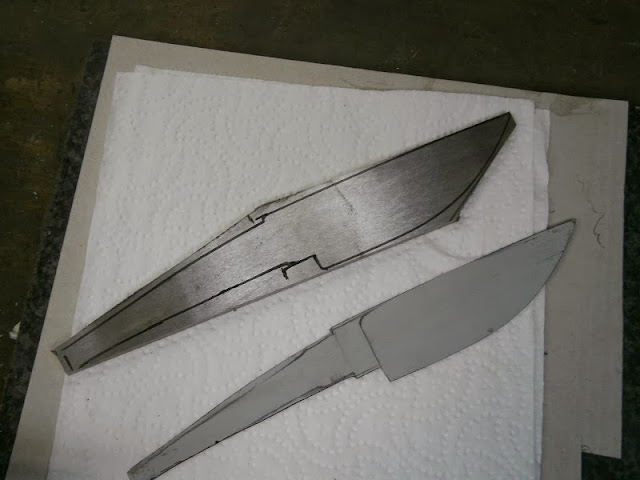
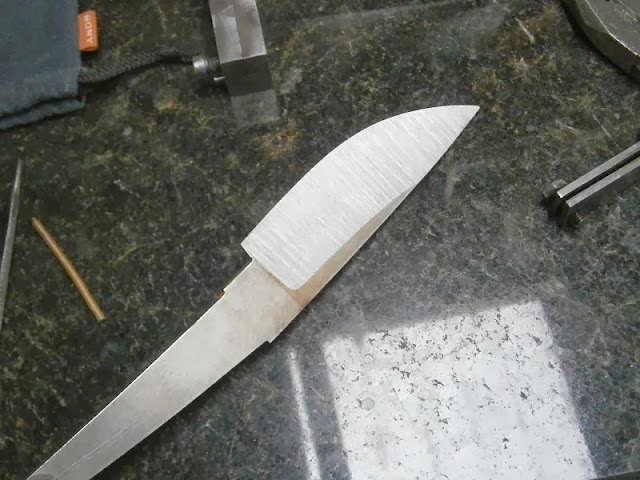
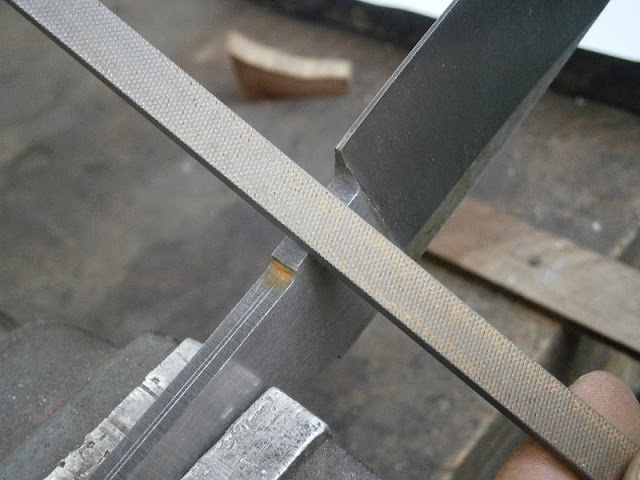
A little folder I made tonight from a moose tine and a snapped HT 1084 blade.

A moose tine, waiting for another knife.

A couple of beams which I think will be going on a couple of vintage meat cleavers I am waiting for to come in the mail.

Lastly, a rescue, a knife my boss got from an estate, it says "Geneva Tempered Stainless USA" and has a glyph of two guys working on an anvil. It had a 1/8" chip that I ground out so it is kind of a recurve now but it takes and holds a good edge so I thought it worthy of replacing the badly damaged handle.

20131016_224214_zps7eafc86c.jpg
 
A little over two years ago I bought this mill from a scrap heap for $175. I was able to get my hands on a VFD for free (helps working in the HVAC industry) and wired it up and ran the mill for the first time this past weekend. Next step is to get a keyless chuck, some bits, saws, and start making some folders. :D

IMGP1388.jpg


IMGP1392.jpg
 
I finished this one a few days ago. It's my fifth if you include a couple of marking knives I made for myself to use in the wood shop:


Now I've started making a pouch sheath:
 
Thanks, Aaron.

I should have listed a few specs, its 1/8" thick 1095 that I HT'd myself using a rather crude fish cooker forge, a digital high temp thermometer and a muffle pipe. It has brass bolsters and pins but I'm not positive what sort of wood the scales are. A retired preacher friend of mine who's since passed on gave my dad and I that piece of wood some years ago and he said it's "Ironwood". I've asked around and done a little research but I'm not convinced of what the wood really is.

My dad asked me to use some of this wood for knife scales one day so here it is.

Nice! It looks very clean mate, great attention to detail for sure! I guess that part translates well from woodworking!
 
A little over two years ago I bought this mill from a scrap heap for $175. I was able to get my hands on a VFD for free (helps working in the HVAC industry) and wired it up and ran the mill for the first time this past weekend. Next step is to get a keyless chuck, some bits, saws, and start making some folders. :D

IMGP1388.jpg

That's a deal of a lifetime.
 
Mason- It's top secret. Sorry.

;) It's for sanding the guard/handle transition on my knives with stainless steel guards--- the doughnut hole lets you roll a dropped handle around without hitting the center of the disc. I've been using a bastardized gizmo for that for years, but just finally decided to try making a real one.


Mike- that is the most insane deal on a mill I've ever heard of. Is that a 9X49? So are you going to use it as a manual mill? Very cool!


Here's a bench work update- :)

1.) One of the prototypes for the concealed carry combat bowie. 2.) Planning the guard/spacer details for the big bowie with wood mock-ups.
bench work 7.JPG bench work 8.jpg
 
...;) It's for sanding the guard/handle transition on my knives with stainless steel guards--- the doughnut hole lets you roll a dropped handle around without hitting the center of the disc. I've been using a bastardized gizmo for that for years, but just finally decided to try making a real one...

:eek:
Brilliant.
 
Mason- It's top secret. Sorry.

;) It's for sanding the guard/handle transition on my knives with stainless steel guards--- the doughnut hole lets you roll a dropped handle around without hitting the center of the disc. I've been using a bastardized gizmo for that for years, but just finally decided to try making a real one.


Mike- that is the most insane deal on a mill I've ever heard of. Is that a 9X49? So are you going to use it as a manual mill? Very cool!


Here's a bench work update- :)u

1.) One of the prototypes for the concealed carry combat bowie. 2.) Planning the guard/spacer details for the big bowie with wood mock-ups.
View attachment 385852 View attachment 385853

That's funny, I was just watching your video on YouTube where you are sanding a handle on a disc and explain that, then go to the rotary platen to finish up.:) That disc is a good idea. I hope you get it figured out.
 
Last edited:
edited to add*** Yes, there's a steel hub on the back of the disc. I didn't just drill a hole in the wood and shove it on the motor shaft. ;)

medium800.jpg

Try drilling and tapping 3 sets of two holes (for set screws) in hubs receiver and true it up with the set screws. If it is trued up and and the hub is not wobbling on the motor shaft, it should run smooth.
 
Nick - It is a 9x48. I am going to use it as a manual; I took all of the CNC scraps off. It is missing a few things but is tight and the drivetrain is in good shape.
 
I wish these threads didn't die off so quick... It seems to me that no matter what type of knives a guy makes, or the processes used, just about all knife makers love seeing shop pics. So keep 'em coming guys!!! :)


I figured instead of just complaining, I should contribute with some more pics of what's been going on at my workbench. ;) :)

medium800.jpg


medium800.jpg


Angi helped me make up my mind on the handle material--- a crazy, killer piece of stabilized Walnut from Mark Farley at BurlSource. You can also see the little giz-wiz (upper right) I use for drilling indexing pin holes in the handle spacers.
medium800.jpg


Walnut is awfully light weight, even when stabilized. If I relied on just the wood to counter a nearly 11"X2"X 0.300" thick blade, it would balance like a teeter-totter with a boat anchor on one side.:eek: So I used a boring head to put a precise and clean hole in the butt end of the handle. Note there is just a touch of tear-out right at the top of the hole.
medium800.jpg


Another plug for a rotating head bench vise ;) Especially with some type of friendlier jaws added. Here I have the damascus spacer and the ss spacer (pinned together) held at a comfortable angle for hand sanding.
medium800.jpg


Getting somewhere! :) That little gap showing between the two spacers is just there because I don't have the block shoved up completely tight.
medium800.jpg


Damascus counter-weight turned and test fit-
medium800.jpg


Guard shaping progress-
medium800.jpg


Refining guard details. And proof that I get my bench messy just like everybody else! :)
medium800.jpg


Closer look of what was going on in the last shot-
medium800.jpg
 
Last edited:
Hand sanding the scallops I added to the guard-
medium800.jpg


Closer look-
medium800.jpg


I had an epiphany for a new knife handle design that will revolutionize the world of knives---- Stick a table leg in the ass of your knife!!! :eek: :thumbup: :cool:
medium800.jpg


Okay, maybe not. With a softer wood like Walnut that tends to have tear-out issues, just shaping the butt end of the handle will cause tear-out around the hole I bored if left unsupported. But I don't want the damascus insert I made to be simply ground flush with the handle... so a simple solution is to make a temporary plug.

The plug is birch or beach (whatever that stool leg was made from) and it tends to tear-out like Walnut does. You can clearly see in this shot how the little bit of tear-out in the Walnut has been ground away, and the temporary plug is now taking the brunt of it.
medium800.jpg


That's all I got- :)
 
Last edited:
Oh, and 69--- Thanks for the advice, but that isn't an issue with the disc. The steel hub was bored with a single point boring bar to be a light press fit onto the shaft.

But just to be safe, I also put four set screws in the hub to tighten down on the shaft similar to how a 4 jaw chuck tightens on a part.
 
Last edited:
Good stuff Nick! :thumbup: And you are right, can't get enough of shop/build pics!
Only thing I can contribute is the latest knife I am trying to finish.

laminated_bowie_2.JPG


And of course my new shop glasses. :8


:D
 
Looking great, Nick and Patrice. I've gotta get me some of those goggles!

Nick, I'm intrigued by that pin hole drilling giz-wiz. Do you just clamp the fittings between the two pieces and drill the holes through the slot? I bet it works better than my 'superglue and hope' method

Here are some photos of a knife I just started.

004.JPG


008.JPG


011.JPG


022.JPG


031.JPG


035.JPG


This is what my workshop looks like after a day of 'work'. It was clean when I started, I promise.
049.JPG


Keep the photos coming, guys. I learn a lot from these kinds of threads.
 

Untitled by bruce culberson, on Flickr

First Friction folder is in the works....

69-knives - I like the moose antler handles!

Patrice - those goggles are rock'n!
 
Last edited:
Back
Top