Wilson 1PR Hardness Tester

Joined
Aug 5, 2014
Messages
378
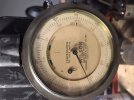
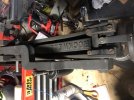
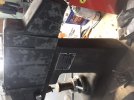
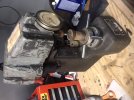
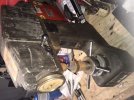
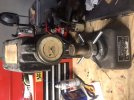
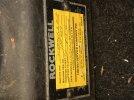
F1AA907F-36AF-4D95-B4DB-E2EDBAC9358A.jpeg 87ACB105-E805-481C-8442-6375F9F1E7F1.jpeg B95DCE93-A18D-4371-AFB6-823E9613F4E1.jpeg 9CC56936-C8DA-4151-AD66-26DFF39750DE.jpeg E2FA8235-000E-44D1-BC4C-605938899FFC.jpeg 2F8D44FA-C78D-4BE2-A6DF-9A71927958A6.jpeg 0DDFF566-0F4E-4A63-9464-891A957F7802.jpeg View attachment 1464015 0DDFF566-0F4E-4A63-9464-891A957F7802.jpeg I picked up an old Wilson 1PR according to the serial number. There’s very little on the internet about this model. It does have a diamond indenter and looks in decent shape. It is missing the weights this is the biggest issue. Based on an old thread I’m planning on using a PVC segment filled with lead shot until 6kg is reached then using a reference block, which I’ll need to buy, to fine tune the weight up or down. I’ll probably also clean and lube everything and lightly lap the anvil on my surface plate to remove the surface rust. Anyone know anything about the 1PR model or have any tips on the putting back into service and making weights? Thanks! I’ll get some better pictures but for now here’s some of it in my girlfriends car trunk propped up by luggage so it doesn’t fall over (picked it up on a road trip back home).
 
Last edited:
They were work horses made for daily shop use. Since it has been maintained and serviced yearly, and was only due for re-servicing two years ago, it should be in pretty good shape.
 
Only advise I can provide is look at the brale under at least a 10x loop. You would be suprized how small the damage can be. The angle is 120° and the point has a .2mm radius. I quick and dirty test is drag the point on your fingernail. If it scratches you nail that it’s damaged. I have on that won’t scratch a nail but under Magnification it is clearly damaged. It should be perfectly smooth, polished and zero marks or chips. I would make sure it’s good first before you start messing with weights.
 
Thanks for the replies guys. I’ll try the nail test on the penetrator and look at it under a loupe. I was also encouraged by the service sticker. I have some lead shot on the way and a test block in the 60-65hrc range.
 
Bumping this again to ask questions. I got a weight made and did some tests on my test block. I removed weight until it read correctly three times in a row (initially was reading low). I tested some knives I was heat treating and it seemed low so I tested the block again and it was 4pts low. Any idea what could be going wrong? This model just has the preload and one lever to throw I don’t think there’s a trip lever so I was moving the weight with the one lever. I’m a little confused at that since the dash pot appears to have a knurled adjustment knob but if you’re moving the weight not sure what purpose the knob would serve. To summarize my process is raise the elevation screw until preload is reached, zero the dial, then move the lever from towards me to away from me in about 4-5sec then return it to forward position and take the reading. Thanks!
 
Seems to be back to hitting target on the test block even though I did nothing other than push a reset button on the bottom of the dial that appears to reset the dial long arm to zero which I think is part of the “zerominder” system to speed up readings which shouldn’t have affected anything.
 
I have a 3PR made in World War II. With a full set of weights and many accessories. And full instructions. And test specimens.

The same as yours except taller.

Was using it today testing blades that I made years ago.

Anyway, ask questions and I will try to help.
.
2qxU499.jpg


oxPf9GX.jpg


ONgu1rr.jpg


1W3oM0z.jpg
 
Last edited:
Hey man thanks for the response. So I actually found out the issue. I calibrated my weight to the test block without the top cover on and when I put the top cover back on it rested on the load arm and changed the weight essentially so I left the cover off and it works great. Not sure if this is the incorrect cover or something because that seems like a design flaw but no big deal to leave it off.
 
Cool. A little paint, elbow grease, cleaning and oiling and it will be ready for another 50 years.

Several things to pay attention to:

Dashpot needs correct oil and should be full. There is an adjustment on the dashpot, the knurled knob on top of the dashpot.

As the gents say above, penetrator must be in good condition.

All three of the weights for the C scale.

Clean and lubricate the elevating screw, and the bottom surface of the capstan nut.

A clean and smooth surface on the test specimen. Scale and gunk mess with the preload.

57 on the C scale:

oBZmN9u.jpg
I didn’t paint it just cleaned and oiled. I did oil all those and will continue to. I used 10W hydraulic oil (fork oil for motorcycle) for the dash pot. I see the adjustment knob but I’m not sure what to adjust it to since you’re controlling the weight movement with the one lever, any input on that? The newer ones have the trip lever and it says adjust that knob until the weight loads in 4 seconds but that doesn’t seem applicable.
 
I didn’t paint it just cleaned and oiled. I did oil all those and will continue to. I used 10W hydraulic oil (fork oil for motorcycle) for the dash pot. I see the adjustment knob but I’m not sure what to adjust it to since you’re controlling the weight movement with the one lever, any input on that? The newer ones have the trip lever and it says adjust that knob until the weight loads in 4 seconds but that doesn’t seem applicable.


10 weight oil is good, about the same weight as industrial AW32 hydraulic fluid. I have a 5 gallon can, this is why I used it.

The adjustment screw on the dashpot controls speed of weight application. Timed mine today, takes 12 seconds from the time you hit the release until the big needle stops moving. If too fast, you do not have an accurate application of the major load. I have 11 varied hardness test specimens, my 3PR is dead on with all of them.

About that top cover, it can be tricky to position correctly. The cross pin on the back of the tester supports the rear, the front is supported such that it just clears the movable dial rim.

This vintage tester was designed to outlive us, it will be a good machine for years to come.
 
A Altamaha Yeah I don’t see a release or “trip lever” where is the release on your machine? I have just the lever on the upper right front side as far as I can tell which is where my confusion stems on the dash pot control. I’ve been getting consistent results applying the load using the one lever I see at roughly the same speed every time. Thanks for the help on this, not many of these out there and definitely have not seen a manual.
 
Last edited:
Our testers are different from most: The trip lever is just to the right of the dial. Most have the trip lever in the base. I like having the trip lever up high, easier to keep your eyes on the dial and the specimen when tripping.

oBZmN9u.jpg
 
When tripping I just bump the lever and keep my fingers away, let the weights free fall on their own.

I will take a photo of the dashpot and post. All the instructions I have found are for the testers with the trip lever in the base, but ours operates just the same.

With hard specimens like knife blades we are using the diamond penetrator and all three weights, reading is on the black C scale.

How To Operate The Rockwell Hardness Tester

1. Move the crank handle to the forward position.

2. Select the proper indenter/penetrator and insert it in the plunger rod receiver.

3. Place the proper anvil into the elevating screw.

4. Select the proper major load by adding or removing weights.

5. Place specimen on the anvil.

6. Raise specimen into contact with the penetrator by turning the capstan handwheel clockwise. Continue turning until the small pointer is near the black dot. Continue until the long pointer is in a vertical position . The minor load is now fully applied.

7. Set the dial to zero. Adjust the dial gage until the zero set line is aligned behind the long pointer.

8. Push back on the load release handle to apply the major load.

9. When the long pointer comes to rest, within 2-3 seconds, return the release handle to itsw forward position. This removes the major load.

10. In this step you will obtain your reading. Record the Rockwell number that the long pointer is pointing to. The C scale is black and the B scale is red.

11. Remove the minor load by turning the capstan handwheel counter-clockwise. Lower the elevation screw so the specimen clears the penetrator.

12. Remove the specimen.
 
Back
Top