WIP - Build a programmable PID controller for a kiln

Joined
Feb 12, 2011
Messages
2,520
I've just ordered parts to build a PID controller for a small kiln for heat treating. If people are interested I'll take some pictures and document the build and use.

Disclaimer - this is the first time I've done something like this. It is simply a work in progress thread. Auber Instruments provides the parts and schematics for a similar build to mine. If you attempt to build something similar to this you do so at your own risk.
 
Last edited:
I'm in the process of building a kiln also. It has gotten put on the back burner with hunting season and the holidays but I am going to be finishing it real soon. I started taking pictures along the way but still have a good bit of assembling to go. I think everybody likes to see work in progress, and how to threads. So I say go for it! I plan to do the same once everything is complete.
 
Yes do it please I am finally going to start putting my forge together in a couple of weeks and could use the direction. If possible would you be able to list the parts and why you chose them?
 
I got a small 110 V electric kiln from a friend. It is in very good condition and it is set up with a Kiln Sitter controller. The controller is used for glass or ceramics but inadequate for heat treatment. Fortunately, few modifications are necessary to the kiln for heat treatment. Except for some holes in the lid for hanging knives and a ceramic mount for the thermocouple, it will stay the same.

The Kiln Sitter can be set ON HIGH with the PID connected to the power cord. The PID will control the power to the kiln through a solid state relay (SSR) using feedback from a K type thermocouple. For my purposes I’ll build a modular system. Kiln/thermocouple to PID control unit to extension cord.

I have on order the following parts; programmable PID with SSR output (I think the gas control valve requires a different output), a 25A SSR (my kiln draws less than 15A), a 25A heat sink for the SSR, a project box for enclosing the PID control unit, a small 110 V fan with temperature control, a 2300 degree F K type thermocouple with ceramic mounting block and 3’ of wire, and an appropriate connector to plug the thermocouple into the project box (the connector has to be made out of the same materials as the thermocouple). So far, with shipping, I’ve spent a little over $200.

Additionally, I’ll need grounded 110 V male and female connectors, a double pole single throw on/off switch, maybe a 15A fuse, and an ON light.

I’ll post pictures when everything arrives.
 
Perfect!

It sounds like your kiln is exactly like mine. This instructional is exactly what I needed.

Thanks for posting!


Chad
 
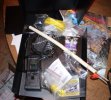
I just received the parts.

PID pieces.JPG

Almost everything looks good, but I won't know until I get everything hooked up. The project box is heavily built but it came with 10 undersized screws, 1 nut and no washers for assembly. I needed to pick some up for the fan and heat sink so I'll pick up some good ones for the box. The PID controller came with 2 sets of instructions, one for wiring and one for programming. Auber electronics also has instrucions on line for the controller and the controller also has the contacts labeled on the controller. The only other instructions were for the thermocouple male and female connectors. The heat sink came with contact grease and screws for mounting the SSR.
Oops, found another nut and found out the sides of the project box are threaded for the small screws so everything is there.
 
Last edited:
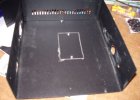
I've tracked down the miscellaneous parts and tools that I needed. The hardest part to find was a double pole single throw 15 amp switch.

pbox1.JPG

I spent my free time up to this point cutting holes. On the right back to front; power cord, rocker switch, and LED light. On the left; plug for the kiln and plug for the thermocouple.
 
Last edited:
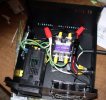
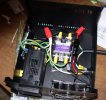
I've got everything in the box hooked up.

PID3.JPG

I powered it up and everything is working at this point. Next, I'll hook up the thermocouple to the kiln and test the PID controller.
I tried using solid copper wire and it does not work well when attaching connectors. I suggest only using stranded wire.
 
I've got everything in the box hooked up.

View attachment 253729

I powered it up and everything is working at this point. Next, I'll hook up the thermocouple to the kiln and test the PID controller.
I tried using solid copper wire and it does not work well when attaching connectors. I suggest only using stranded wire.

Can you give us an explanation in layman's terms as too what we are seeing in the photo. I know you can buy ready-made PIDs. And if I am understanding correctly that may be what you did. So what is the rest of the parts in the box and what are there purpose in this controller unit. I am interested as too how this works!
 
I'll give it a try.

PID3.JPG

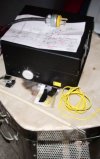
We are looking at the unit from front to rear. On the left the yellow plug below the PID controller is the connector for the thermocouple. In front of that is a 5-15P single 120 V household plug. The red wire caps are for the neutral (white) and the live (red and black) lines. The 25A SSR is near center and it is mounted on top a 25A heat sink. The two green wires connected to the front of the SSR is the DC control from the PID. Mounted on the front of the unit is a 120 V ac temperature controlled fan. The bi metallic temperature control switch is placed between fins on the heat sink. The black fuse holder is placed to the right of the SSR. On the right side on the front of the unit is a green LED, followed by a DPST switch, and finally the external power plug. Both the male and female 5-15P are grounded to the box and each other.

PIDleft2.JPG

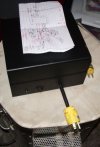
This shows the left side of the unit with the 5-15P plug and the thermocouple plug.

PIDright.JPG

This shows the right side of the unit with the LED, on/off switch and plug.

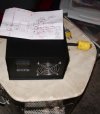
PIDfront.JPG

This shows the front of the box with the PID controller to the left and the fan to the right.

Oh and note my disclaimer in the first post of this thread. I just want everyone to know that I am a beginner at this electronics work and you need to consult resources much more knowledgable than myself before attempting something like this yourself. This is simply a work in progress thread. A mistake in wiring a unit like this or similar to this could result in injury or death.
 
Last edited:
Nice, clean looking build. Have you tried it yet?

Thanks. I pluged it in to test the switch, LED, temperature control and fan, and make sure the PID controller came on. I haven't tested the SSR, thermocouple, or their hookup to the controller.
 
When you are ready to test it out, boil a pot of water on the stove and stick the TC in it. Turn the PID on and set the target for 200F. Plug a table lamp ( or any light) into the controlled socket ( make sure it is turned on).
The temp reading should be about 210-212F ( it may vary, thats OK, as long as it is above 200F). The lamp should be off. You should have an "over-target" or "alarm" light. If all is well, turn off the stove burner, and slowly pour cool water in the pot while stirring. The temp should drop, and at 195-200F the lamp should come on. The actual readings may vary, but as long as you are within the area, all is well. Now, turn the burner back on and stir the pot. As the temp comes back across 200F, the lamp should go off. Again, it may be higher or lower, but it should turn the lamp off at some point near 200F. Do this several times, so the PID can "learn" to control the process.

If those tests gave you reasonably close readings, and the unit turned the power on and off, the PID control is ready to install on the kiln. Try some test settings at moderate temps first, like 1000F, and see how the unit cycles.
Let it run for a while, as the PID will need to "learn" the time it take to return the oven to temp. Each cycle tels it how long to run the coils to boost the temp back up. In the first cycles, it will overshoot and undershoot. then it will start to fine tune the timing and get so it stays +/- a few degrees. This is an important thing to understand, as sticking the blade in the oven too soon may expose it to the larger swings while the PID is learning.

Compare the PID to a teenager learning to drive. At first they over correct their steering, and swing back and forth from left to right as they go down the road. But, soon their brain will figure out just how long to turn the wheel before bringing it back....and the car goes straight down the road. The reason they use rubber cones and not other cars on the driving course for beginners, is that at first they will run over a lot of cones until they learn to steer. ( Yes, I used to teach Drivers Ed)

You can use things like Templi-stix or even salt to try and check your PID accuracy at the 1500F range, but unless you think the TC is way off in its readings, just find the readings that work for your unit and use them. On your PID, 1500F may read 1470 or 1520. That isn't really such a problem, as long as you know that the temp being read will deliver a certain result. Keep good records on firing cycles, and you will soon know the temperature to set your oven at to get the desired HT result. One reason you see people post things like " I set my PID at 1473F and...." is that they have found that 1473F works exactly right for their setup. It may be 1485F, or 1465F...doesn't really matter - on their oven it reads 1473F.
 
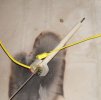
I attached my thermocouple to the ceramic block as well as the K type wire and hooked up the male connector. The red wire is the (-) and the yellow wire is the (+) and they are both in the yellow sheath you see in the picture. Auber has their connectors labeled with a + or -. The (-) lead on the thermocouple has a red strip marked on it. Some of the parts are a little small so some smaller screwdrivers and a pair of tweezers come in handy. My kiln has two observation holes (one high and one low) and the thermocouple fits in either one. My ceramic block is attached so the thermocouple extends about 4" into the kiln. I am not sure if I should place it high or low and how far into the kiln it needs to go?

K thermistor.JPG

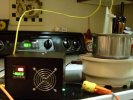
I went ahead and checked to see if it would turn a heating element off and on and it does. I wasn't able to get the water up to boiling with the setup I had, so I checked it for cycling at 175 F. It worked well and heated and held at 175 for a half hour. The thermocouple read within 2 degrees of a pair of food thermometers that I have. I'll test it again when I have a better set up for boiling water. I'll also run a freezing point of distilled water for fun but it doesn't appear to need much of an offset (calibration) or with the non-linear response even benefit from it. Now-back to learning how to program it. You can teach an old dog new tricks but it seems to take longer and longer.

PID test.JPG
 
Last edited:
Back
Top