Battleship Texas WIP

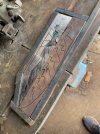
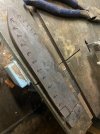
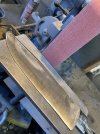
Another welding session done. Drew out the sr and sky, and finished the re-stacks of the can and the fittings billet. Will restack the fittings one more time.

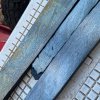
I leveled out the billets with a kiss block that was about .7. Then I put them on the SH attachment and ground the flats clean enough to lay them out. Quick etch to check the patterns. Next I’ll anneal then start the final weld prep. All the “easy” parts are done, all difficult from here.
9779BD69-ECC3-43B6-8811-549E15D8EBFA.jpeg
 

Attachments

  • 148FC03C-8BE4-4D8D-8311-A0E10F68C9AC.jpeg
    148FC03C-8BE4-4D8D-8311-A0E10F68C9AC.jpeg
    797.2 KB · Views: 9
Well £#*+. Worked today on the final fitup. My dull bandsaw blade wasn’t playing nice with the sky billet, lots of angle grinder cutoff wheel work. Got the mountains cut to shape and the sun roughed in.

899CF7CC-D711-4418-B07E-6FA910FA153E.jpeg

Once I started cutting the mountain profile out of me sky, it went badly. Major delam down the middle of the sky billet. I am thinking maybe the 52100 didn’t play nice with the 1984/15n20. Whatever happened, that billet is trash.


C6694E85-BA86-498D-B485-C89710B1B77A.jpeg
 
Still pondering on what to do. Don’t think I have enough material to get it apart and weld it back together. Best idea so far is to cut it up into chunks and put it in a can and shoot for “clouds”.
 
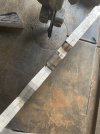
More progress. Got all the parts fit within a couple thousandths. Built a frame of 1/2” mild around the whole thing. That way any distortion will be mostly in the mild that’ll get cut or ground off. 96F84E22-35DB-449D-B35D-C95035A8E5F3.jpeg
Next I’ll cut burnt foil for all the outside joints, do a final cleaning of all the parts, then attach the bottom plate. Once the bottom plate and mild frame are welded, I’ll surface grind everything to the same thickness, then attach the top plate. I figure three more hours at least. Probably won’t weld today, have honey-dos for the evening.
 
That'll be interesting if it turns out. Lotta tricky welds. How wide (tall) is the blade now from top frame to bottom frame? And how much reduction do you plan to do in that direction?
 
Right now it's about 3" tall by 8" or so long. Right at 1/2" thick all around. I plan to draw it out lengthwise a bit, probably 2" more length, and down to roughly 2" tall. Plan to pretty well just hammer on the narrow dimension, not the flats. Will try to keep the 1/2" thickness in the final product. It'll have 2 pieces of 1/8 plate on it, so after all the length drawing I'll finish it out with a 3/4" kiss block.

Interesting thing happened. I got this idea for a multipiece layout from Owen Wood at a hammer in. I've been sending him pictures of the build as we went along. After the last pic, he called me. We talked through and he said the sun corners would be a problem. So, I redid the sun itself and lightly forge welded it in by itself with the nickel in between for the outline. Ground it all back down flat and then re-fit the rest of the parts. Got the foil in, the bottom plate, and the frame tacked. Next will be surface grinding, another piece of foil, and the top plate. It'll be a few weeks before I get another good shop day.
 
Amazing project! Looking forward to seeing how it comes along.
 
Alright, this one gets some more shop time this weekend. I have the can built, now I just need to do a bunch of welding to close it up. I'll be honest, I am nervous. ALOT of work into this one already, and this is a major point for pass/fail.


Seriously, your project is amazing. I’d love to have something made from a piece of Naval history.

Back when I lived in Norfolk, I visited the Wisconsin. In the gift shop they had mantle clocks set in the wood deck panels they had pulled at an overhaul. I had my kids in tow, so decided I’d come back another day and grab one. By the time I made it back…Gone. Forever.

Best of luck with your next step, and all those that follow!
 
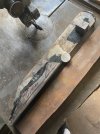
Got it, best I can tell. In for anneal now. Probably forge down the edge a little, and forge down the tang. Will grind to profile to prevent distortion.

F2BCC79A-D087-4056-8C53-D84F3CC71330.jpeg
 
Annealed and a little more prep before the next forging session. Arrows in this pic indicate where I’ll draw and what direction. It’s a narrow balance between forging to shape and distorting the scenery. The sky damascus is only 3/32 or so on top of the core, so I’ll have to be careful there. Tang is cut funny so I can forge that material back into a normal tang shape.

A68BD62E-1225-4E46-9DA4-A80BAABBEAAE.jpeg
 
Last edited:
Got the tang forged out and the minor beveling indicated by the arrows, plus a wee bit of distal taper. The weld lines showing in the FRY block on the SG pic are going to be a problem. Started separating a little when I was messing with the tang. I've got a few options in mind to deal with it, won't be that big of deal in the end.
 
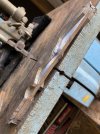
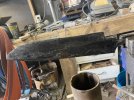
Ok, got it rough ground and hardened this weekend. Safely quenched with no pings!AA4F0E0D-39A3-4B5D-A448-09BE0E63BB16.jpeg

The other big project this weekend was fabricating a forge extension and normalizing a bunch of swords. Did 11 of them. Here’s a video of one.

Hot sword!
 
Have you had any time to work on this beauty? I really have enjoyed the pictures and store.
 
Have you had any time to work on this beauty? I really have enjoyed the pictures and store.
I've been hustling building regular stuff post-Christmas, and hardening the swords. Sword project is due April 1, and I want the Battleship done for Blade Texas. Gonna be a tight squeeze!

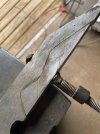
The battleship blade is hardened and ready for finish grinding etc. I figure most of a day to get it ground and polished, then 3-4 days on the fittings and handle. Just a "simple" frame handle lol.
 
Back
Top