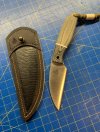
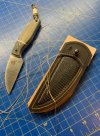
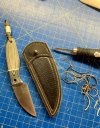
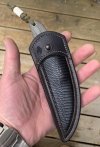
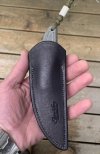
Leather WIP - Sheath for DM Wharnificent

Sharp & Fiery

Leatherworks, Kydex/Holstex/Boltaron, Mods -Canada
Moderator
Knifemaker / Craftsman / Service Provider
Joined
May 14, 2012
Messages
9,446
I was chatting with David this morning and told him that I was gonna make a quick sheath for the Wharnificent because I didn’t have enough time this weekend to make a canted sheath, and I wanted to carry it this week.

Well, my “quick” sheath has morphed into, “Let’s try a new style and make it look fabulous!”

I generally shy away from WIP threads as I really would hate the world to know that I mess things up! 🤣😂 But because you all have asked and keep me pumped to keep working leather through your kind words…here it is…another WIP thread!

An “in belt” sheath for a DM Wharnificent.

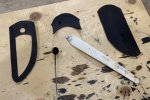
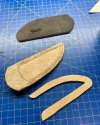
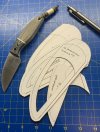
Step one…always with the templates. Always. They do take up some time, but the more I make, the faster I get. This is my final render after a few trys and tweeks.
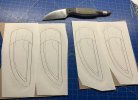
4771CEFC-11C7-4104-96B7-FB2E719CB122.jpeg
F73FF0EC-DC3F-4F02-913B-18E6D8E908EF.jpeg

I always keep the knife very close by through the whole process for inspiration.

Now to figure out how I want the sheath to look as a finished product.
Inlays could be lizard, ostrich or stingray…hmmm…

More to come…
 
Today I have cut out all my pieces, save the inlay, and prepped where I needed to before dying select pieces. :)

52B69C63-3154-4F67-A6A2-6DBA2459B86D.jpeg

Then I applied the dye and smoothed over some of the areas I will not be able to get to when the sheath is glued up.

E60EA330-3E8C-4264-A83F-EFA0CAC929D4.jpeg

While I wait for the dye to dry, I’ll go ahead and glue up some of the other parts. :)

I do have my color scheme decided now. I’m going to go with black and chocolate dyes. The inlay will be subdued black. :) That is a surprise for later on. :)

Thanks for watching!
 
It’s been a long day.

The next steps were to glue up a number of pieces. I like my inlay to sit proud (or appear to) of the border, so I trim my “blade” cutout and glue it to the front leather piece.

B67C1550-26BF-4DD1-BEF4-E3A1D714CACB.jpegCF12FC08-564F-47D2-BED0-FC10D9D54E89.jpeg

After the glue up is pressed and stuck, I’ll go ahead and rough up the rest of the main leather piece and glue it up. It is very important to scuff up any surfaces that will be glued together. I always do two thin coats of glue.

2732E06B-935E-40B9-B0C9-9398461A1116.jpeg

Here is the inlay all stuck on with the other couple pieces making a cameo in the shot as well.
For this sheath I have chosen black lizard skin!!

2DD30D29-3A65-47B4-88E9-97D0B7AA468A.jpeg

More photos incoming…

Thanks for watching!
 
After my dye had dried enough that it isn’t transfering, I went ahead and glued up all my front pieces. I also trimmed the front edges and sanded it close to the shape I want. I also installed the button stud at this point. The base of the stud is now in between the leather and will not be touching the knife in any way.

1C16C7FB-7C0F-4C03-85D4-C71D270F1B97.jpeg

Once those pieces are firmly pressed and set, I’ll go ahead and cut my stitch relief grooves.
At this point I also marked my thread hole outline or punched the holes for the stitching I will do before joining the front and back leather pieces.

2396A88E-72B5-4ECF-B20A-F1424BF14757.jpeg
EBF07876-9941-4F9E-9ECD-B7BC5CD29578.jpeg

I’ll now flip over the all glued up front pieces and glue up my welt. I mark out exactly where I want the welt to be so that no glue gets into the inside of the sheath by accident.

AD7ED8FE-A7FC-444D-87FF-CB20BFF51E1D.jpeg

I will now go ahead and glue up the backside of the sheath…which I forgot to take photos of!! I’m sorry folks. :( I also trim the back piece to match and hit the belt sander to make all of the pieces match, using my previously sanded front piece as a guide.

I’ll now punch out all the rest of the thread holes.
At this point I also bevel all the edges and inside the opening of the sheath.

2ED1CA0B-5777-4376-A514-A1FA85A9564C.jpeg

More to come!! It’s starting to look like something!!
 
Last edited:
Next I’ll dye the stitch grooves where I cut away the leather for the thread to lay in and wait for it to dry. After it’s dry, I’ll go ahead and stitch it up.
This photo shows that, as well as the edges still being natural at this point.

DC607081-3133-4CF4-9BA8-B26795408F63.jpeg

At this point I have to decide if I will leave the edges natural or dye them. I’ve found that if I don’t deviate from my original plan, then the project usually turns out to my liking. 🤣 I went with dying the edges black.
While the dye is still wet I will do my pre-edge slick, being very careful not to get black dye on any parts of the rest of the sheath.

After the edges have dried, I’ll do the rest of my slicking with a bone folder. Once I have the edge smoothed out, I seal with edge sealer. The sealer I use is a three day cure time and is flexible. So we waited. Haha.
After dye is dry, I will buff to my liking. :)

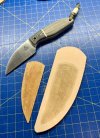
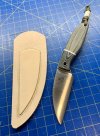
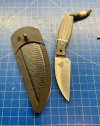
This sheath is not wet formed as it will break in over time and I think it works well this way. The knife is secure and I’m super happy with the fit.

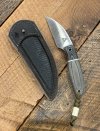
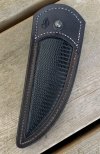
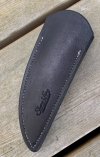
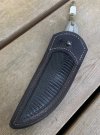
Here is the finished project…a new, black & chocolate, lizard inlay, “in belt/waistband” sheath for a DM Wharnificent.

C4FFF18D-5E87-4E40-8CC9-F8F53440180D.jpegE0C237D6-F666-4BC0-B925-95C06661BD02.jpeg0048866D-02E4-4B30-9229-C3439270E650.jpeg
43668AA2-28B4-4DEE-9228-463D23C5C238.jpegB649F6FD-7A9A-44EC-87ED-7B00BA93F8F7.jpeg8B823791-B1F9-45BD-B722-A80411BBC1B4.jpeg

I hope you all enjoyed this thread as much as I enjoyed making this sheath. This was my first time trying out the “in belt/wasteband” sheath and I’m happy with the result.

Thanks for following along!! I appreciate you all!

Until next time…
Keep ‘em Sharp
 
Back
Top