Thought about doing any rough-out sheaths? Would cut down on some laminating work.
Absolutely. It would cut material usage in half as well. Just haven't gotten around to trying it yet. I've seen some guys do some outstanding rough-out work. Saw a stamped rough-out saddle a while back that was incredible. Dave (Horsewright) has posted some extremely well done rough-out work here too. So many things to try, so little time for leather work

Damn, sweet work, how do you get your edges like that?
Gesendet von meinem SM-A310F mit Tapatalk
Thank you sir! I've really been experimenting with different techniques for edges these past 3-4 months or so. Edges are one thing I'm not sure if I'll ever be fully satisfied with.
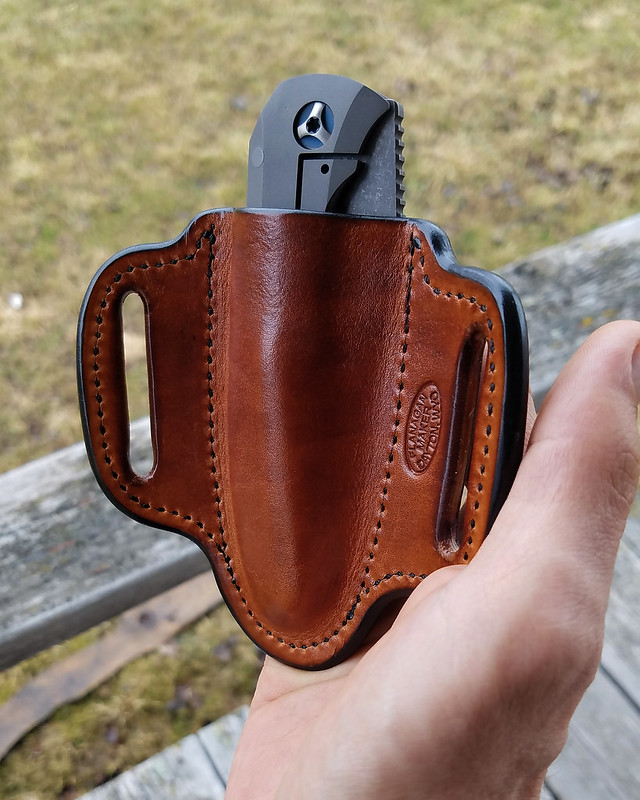
Typically, I'll take one of two routes. Similar to the Bob Park method seen here:
http://leatherworker.net/edging.htm which involves dying and finishing the edge. It works very well but I hate the messiness of using dye on edges. Really depends on the leather used, color, etc. as to which route I take.
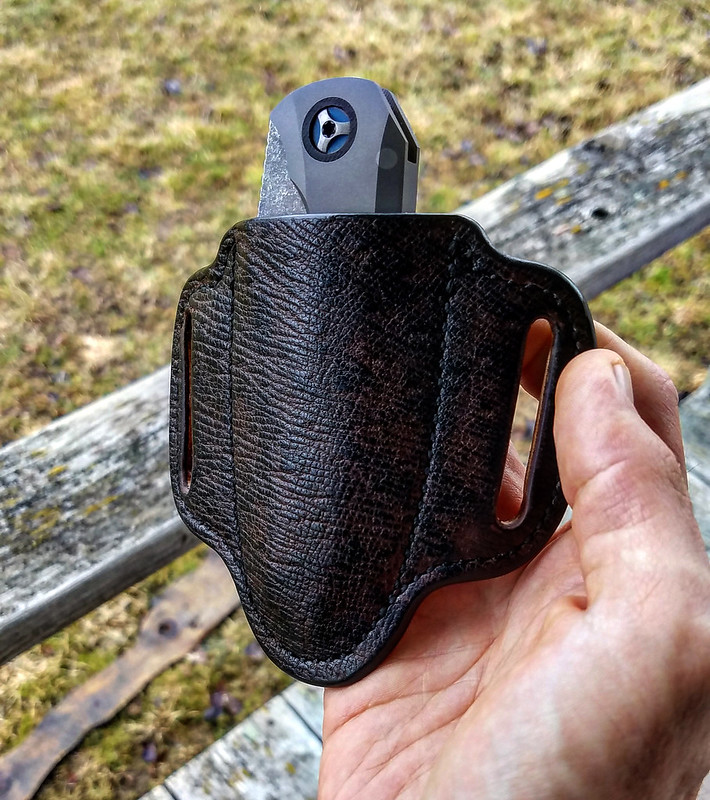
or... like on this sheath, the dastardly edge coat (acrylic edge paint) method. Now, before anyone fans the "throw that junk away" flames (I used to be in the same camp), I've come up with something that works exceptionally well is exceptionally durable with edge paint. It took me two years to stumble on a method that works, looks good, and most importantly lasts like dyed or straight veg tan burnished edges.
First, yeah, throw any actual Edge Kote from Tandy away. That stuff is junk and cracks, chips, and flakes off just by looking at it. Some time back, before I gave up on edge coat completely, I ordered some stuff from Zach White called Manuel Edge Ink. It is light years better. There are a couple other brands people speak highly of from Fenice and an Italian company that starts with a v I think, supposedly the stuff used by Hermes, Louis Vuitton, etc but I have no personal experience with it.
I sand my raw edges down on the belt sander to where they are perfectly smooth and level, no gaps, no determinable spaces between layers, etc. Gluing things together correctly in the first place has a lot to do with it too. After mechanical sanding, I will bevel the edges with an appropriate sized beveler. I then refine them more by hand using 320 and 500 grit papers.
Once I'm satisfied with that, I slick my edges by hand using water (not too little, not too much) with a well used piece of canvas. New canvas doesn't seem to work as well as the pieces you've been using forever and are well impregnated with saddle soap and whatever else they pick up; a smoother surface too. If I'm not getting the glass smooth edges I want at this point, I may add some saddle soap to my hand burnishing or even go back and do a little sanding. Dave likes Wyo QuickSlick and I feel it's a good product too in lieu of Saddle Soap. Once you have those glass smooth edges you're after, I let them dry.
At this point, I go back with my 320 by hand and rough them back up to give the edge coat something to sink into and grab onto. I think this was one of the key discoveries in the process. You may be thinking, yeah but your edges will be rough again. We'll get back to that in a minute. At this point I lightly impregnate a q-tip head with the manuel edge ink and start applying it to my edges with strokes making an extremely light and thin coat. I'll actually keep working it into the edge and it dries as I'm working it in if that makes sense. If it's a shiny, wet surface after you've taken your strokes, you're putting too much on at once. That part is really hard to explain in words.
Anyway, after I've achieved complete satisfactory coverage and the edge coat is dry, I will take that same slick piece of canvas and burnish it again just like I did with water the first time. What that does is makes your edge glassy smooth again but with the edge coat applied. Sounds crazy but it works extremely well and little to no edge coat comes off. If you end up removing a little while burnishing, you go back and lightly touch it up with an extremely thin layer again. Once you have satisfactory results with coverage and smoothness, I leave it to set for at least an hour or two.
The final step of this is to add some additional toughness by sealing with a light coat of WyoSheen (what used to be NeatLac) once sold by Sheridan Leather and now available from Barry King Tools. I keep the WyoSheen outer coat very thin as well and I don't push hard when applying it with a q-tip. You don't want the edge coat coming off while sealing the outside. Just smooth and very light strokes to cover it, barely touching it with the head of your q-tip. Leave the WyoSheen and Edge Coat to further dry at least overnight before flexing any of the covered surfaces. Anyway, that in a nutshell is how I ended up making edge coat work extremely well for me. I have a wallet and keychain sheath that kick around in my pocket with keys, coins, pocket knives, etc. every day whose edges are as nice as they day they were done using the aforementioned method.
Very nice Chad, I like that warthog a lot. Great work. Zipping ya an email with an article ya might like.
Thanks Dave! Always appreciate the kind words! Right on, looking forward to reading it, thanks!