Grinding urasuki and a DIY wood radius platen

Another idea I read somewhere is to take an old stainless steel pot and cut a piece of the wall, you could epoxy it or ca it on your hardwood platen to achieve the radius. Shouldn't take long. Two bolts through your steel platen and some metal thread inserts in the hardwood and grind away. I bet it would also last for more then one urasuki.
good idea!
 
all right - lets see how this goes:

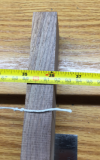
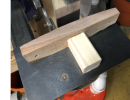
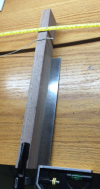
2" wide piece of black walnut, fixtured perpendicular to the edge of the bench, and positioned 36" from the left side of the bench.
upload_2021-1-18_16-50-14.png

the string is clamped right at the left side of the table .... and when stretched, the rightmost knot tied in the string is at the right side of the wood:
upload_2021-1-18_16-51-40.png
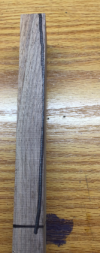
put pencil at location of that right knot, and trace out the arc (if you look closely you will see a finer centerline on that black marker which is the pencil mark itself:
upload_2021-1-18_16-53-27.png

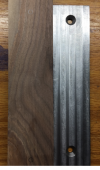
locate the holes using the existing platen as a template:
upload_2021-1-18_16-54-22.png
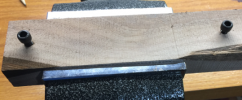
drill and tap to 1/4" - 20 threads (this side will be the back of the platen):
upload_2021-1-18_16-55-18.png

there is a trick (I think mentioned here before) of taking a tapped hole in wood, and soaking the threads with thin CA that I learned while making radio controlled model airplanes. makes those wood threads *really* hard. not done yet .... but will do so before I finish up.
Thats all for today .... gotta get evening chores around the house done and dinner cooked....
 
all right - lets see how this goes:

2" wide piece of black walnut, fixtured perpendicular to the edge of the bench, and positioned 36" from the left side of the bench.
View attachment 1493584

the string is clamped right at the left side of the table .... and when stretched, the rightmost knot tied in the string is at the right side of the wood:
View attachment 1493586
put pencil at location of that right knot, and trace out the arc (if you look closely you will see a finer centerline on that black marker which is the pencil mark itself:
View attachment 1493588

locate the holes using the existing platen as a template:
View attachment 1493589
drill and tap to 1/4" - 20 threads (this side will be the back of the platen):
View attachment 1493591

there is a trick (I think mentioned here before) of taking a tapped hole in wood, and soaking the threads with thin CA that I learned while making radio controlled model airplanes. makes those wood threads *really* hard. not done yet .... but will do so before I finish up.
Thats all for today .... gotta get evening chores around the house done and dinner cooked....
My second idea was the one of gluing the threads as well, but I would prefer metal inserts in this case. While doing the dinner make that pot that nobody uses disappear :)
 
My second idea was the one of gluing the threads as well, but I would prefer metal inserts in this case. While doing the dinner make that pot that nobody uses disappear :)
Freddy... thanks, but LOL, I am the ONLY one that cooks around here ... and the problem is that I will scream that I use all the pots I got!!. (And seriously, I do). . Still the idea of accessing some kind of cheap metal pot is always doable? Target/kohl’s/ fleet farm/menards are full of them. I honestly don’t expect to try to make more than two yanagabi (this first experimental one, and a later, longer, “real” one) ... but one never knows what life will bring.... :)
 
put pencil at location of that right knot, and trace out the arc (if you look closely you will see a finer centerline on that black marker which is the pencil mark itself:
This is exactly what I did with a thick piece of O1 I had for my radiused platen.
 
got a little more shop time today.

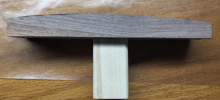
got the piece cut to lengh. glued a piece of 2x2 on the back to enforce a vertical face while sanding .... and sanded to the marked profile:
upload_2021-1-19_16-53-41.png
ultimately took it to 120 grit. the first pass at the profile clearly produced something a little off .... one side being "flatter" than the other. eyeballed it from there to make it a litttle more uniform and to eliminate the possibility of any flat spots (not sure just what happened....) you can see the left side has a somewhat better curve than the right side .... but it IS continuously curved....
upload_2021-1-19_16-56-19.png

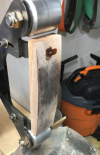
knocked off the 2x2 and mounted:
upload_2021-1-19_16-57-12.png

the darkened spot is from a "trial run" i did on some annealed cutoffs I had lying around waiting to be made into file guides.... Surprisingly, even though the wood darkened, it was not really hot....

The below is an attempt to show the result of that trial run on the scrap piece:
upload_2021-1-19_16-59-18.png

definitely subtle, but also definitely there :) Actually, aside from some chatter (I was not using a work rest at all), it was surprisingly easy to keep the piece more or less centered where I wanted it. I will probably give a couple more practice runs before I work on the actual Yanagiba (I need to finish grinding the edge anyway) ..... but I would call this tentatively promising.....
 
Platten looks good. How does the belt feel on wood, any noticeable friction, how about grinding pressure? Maybe you could just smear CA on top to “surface harden“ it and call it a day? Any pics of yanagiba?
 
Platten looks good. How does the belt feel on wood, any noticeable friction, how about grinding pressure? Maybe you could just smear CA on top to “surface harden“ it and call it a day? Any pics of yanagiba?
The belt had a different sound while running, but no really noticeable increased friction... like I said, I was surprised that the wood was not hot at the location I was applying pressure.

will post photos of the yanagiba in a little while..
 
Looks good, Cush.
The darkness is most likely due to ink, dirt, dust and grit from the back of the belt rubbing into the platen. I've noticed that I get a buildup of, for lack of a better term, crud on my glass platen, mostly at the top where the belt first contacts the platen, but also in streaks running down the length of the platen that I occasionally/regularly scrape off the glass.
Yeah - that is a "duh" moment for me. I was so pre-conditioning myself to look for burnishing/burning/heating that the crud on the back of the belt did not occur to me.... :-(
 
Platten looks good. How does the belt feel on wood, any noticeable friction, how about grinding pressure? Maybe you could just smear CA on top to “surface harden“ it and call it a day? Any pics of yanagiba?
Fredy - here are some photos - still in process of course. the stock is ~3.5mm thick (taken from specs from posted commercial knives) the bevel was pre-ground (one sided) down to 0.02" per agreement with JT prior to HT. the steel is "Spicy White " (26C3), tempered to 64 rockwell (hence the partial grinding prior to HT).
upload_2021-1-20_12-42-18.png

I need to finish the grind on that side down to 0.007 or so (still dont have the courage to go below that for fear of burning the edge), and try to clean up the shinogi, (oh, and correct the overall profile of the spine, which is off a little) then turn to the other side for the ura:
upload_2021-1-20_12-45-40.png

I have long wanted a Yanagiba, and this is kind of a trial-run for me - shorter than I would really want - but a chance for me to try out the steel, and the grinding techniques particular to this style. If I feel comfortable after completing this knife, I will start in on a longer one - I really want one as much as 300mm - as I do somewhat often make rice rolls, nigiri, and sashimi (though my wife only likes the veggie or pre-cooked meat rice rolls):
upload_2021-1-20_12-53-33.png

upload_2021-1-20_12-54-6.png


I've only now begun to feel like I have **barely** gotten the knack of slicing the sashimi correctly and of assembling the nagiri .... and the longer blades definitely make a difference in slicing the sashimi and in slicing the rice rolls.....
 
I promised some photos of this. Now that I got that glass platen done, I could return to finishing the bevels on that Yanagiba, and giving a try at grinding the urasuki.

Bevels went ok .... reasonably good shinogi (but not perfect) .... a few imperfections that dont show up in this photo .... but overall I am pleased (edge is down to 0.006-0.007). I am, however, now faced with the question of whether to give it a go at vertical grinding to establish lengthwise grind marks, or to go to hand sanding to both clean things up and establish a lengthwise finish. prior attempts at vertical grinding has resulted in two burned edges .... so not sure if I have the courage for that.... (btw - that weird edge shape will be cleaned up during final profile/sharpening. This has been taken to A65 gator belt:
upload_2021-1-31_11-12-1.png

I was pleasantly surprised at how straightforward grinding the urasuki was. pretty easy to establish the grind down the middle of the back of the blade, pretty much like "feeling" the bevel in settling the curved belt back into the established curved urasuki .... and also not bad at all in working the grind upwards to the spine or downwards to the edge until the entire back side is ground. It helps that you are not really grinding at the very edge ... so heat is not as much of a problem....
upload_2021-1-31_11-15-54.png
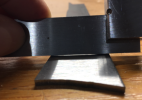
here you should be able to see the curved gap produced....
upload_2021-1-31_11-16-39.png

This is really kind of cool! If I do go to hand sanding, I will need to make one of Stacy's curved blocks to get down into the curvature. Not sure at all though how to follow Nick Wheeler's recommendation of sanding at alternating angles until you get to the final pull strokes.....
 
A block of hard foam will work fine for sanding the urasuki. Balsa wood sanded to match the curve also works well.
 
I did opt to hand sand ... I think I will leave it at 420, as this will be a working knife. I do like the lengthwise pulled finish .... and it holds up better during use than the spine-to-edge finish.

I'll wait for stacy to respond re. the type of foam to use (dont have a lot of that kicking around.....) then do the back side. should be a *little* easier .... as that side never saw anything below 120 grit while grinding (it was the leftover 60 grit marks on the flat bevel that gave me the most work....)
 
If the Styrofoam is firm, yes that will work. I was referring to a close cell foam, like a dense piece of memory foam or similar upholstery foam.
 
I missed the pic updates somehow, looking good! I would be tempted to do a satin finish on the flat part and high polish on the bevel. Or etch the flats and satin the bevel. What are your plans for the handle?
 
If the Styrofoam is firm, yes that will work. I was referring to a close cell foam, like a dense piece of memory foam or similar upholstery foam.

I missed the pic updates somehow, looking good! I would be tempted to do a satin finish on the flat part and high polish on the bevel. Or etch the flats and satin the bevel. What are your plans for the handle?
Stacy - turns out that a package that recently came had some small pieces of rather stiff foam (not closed .... but nice and stiff) - it worked really well! thanks :) I did need to do some focused "thumb pressure" work ... but not too bad. Here is what the result came out as:
upload_2021-1-31_15-43-26.png

Freddy - I am actually thinking of keeping everything as the 400 grit satin. with a polished finish on the bevel, I would be concerned about sliced food not releasing easily with a polish.... Besides, I have nasty habit of occasionally wiping a blade lengthwise with a 3M green scrubby when I wash them (please dont yell at me .... the green scrubbies just happen to be what we have at the sink to get grunge off of plates before they go into the dishwasher......). That is part of the incentive for the lengthwise scratch pattern .... with that my abuse at the sink should just kind of blend in :)

Handle - Wa, D shaped. right now am thinking African Blackwood bolster with a figured dark tropical, and a copper spacer between. then again ... I do have some Kingwood I have been looking for an excuse to use.... I could do something more extravagant, but dont really feel like it.... Do you have thoughts / preferences??? :)
 
Back
Top