Homemade heat treat oven

Thanks for posting the list! :thumbup:

If anyone has that file for the plans I would love too have a link to it, if they would care to post it!
 
Great job on that Brad. I'd really like to see it some time. I see you used the rope around the opening too.
 

Thanks for the pdf! I haven't had time to look over all of it but do have one question.

Something that caught my eye, is the staples that you used to hold the coils in the brick. I assume that them touching the coils doesn't cause a problem???? Are they home made and if so what from?

I now sometimes something like that can cause a problem with deterioration of the coil at that point!
 
Thanks for the pdf! I haven't had time to look over all of it but do have one question.

Something that caught my eye, is the staples that you used to hold the coils in the brick.
I assume that them touching the coils doesn't cause a problem????
Are they home made and if so what from?

I now sometimes something like that can cause a problem with deterioration of the coil at that point!

You use the same wire as the coils are wound from.
 
Thanks for the pdf! I haven't had time to look over all of it but do have one question.

Something that caught my eye, is the staples that you used to hold the coils in the brick. I assume that them touching the coils doesn't cause a problem???? Are they home made and if so what from?

I now sometimes something like that can cause a problem with deterioration of the coil at that point!

The staples don't touch the element. I put them in there just in case the element came out of the groove.

They sent some extra wire with the elements to make the staples.
 
Great looking oven !! One safety item to note, It looks like your coils are almost flush with the bricks. Usually the channels are cut like a J so that the coils sit down in them. This keeps you from getting shocked by keeping your blade from touching a coil.
 
Here's a picture of the SSR's. I havent powered up yet. I don't think my illuminated DC switch is going illuminate. Anybody got a suggestion? I havent connected the element wires yet.

af295ca7.jpg
 
I think I figured it out. I think the negative from the 12v dc SSR output will make it work. Sound right?
 
Great thread, cheers for sharing. Quick question, are you planning on having an interlock switch on the door so it cuts power to the coil when you open the door? That way you cant zap yourself if you touch the coil accidentally.

Matt
 
This thread makes me wish I can weld. Id love to build my own!

I didnt let it stop me :D
Here is a picture of how I made my door latches. I used 2 short pieces of angle iron, an old eye bolt I had, 2 washers, a spring, a small bolt and small nuts.
 

Attachments

  • 015.jpg
    015.jpg
    49.8 KB · Views: 166
  • 016.jpg
    016.jpg
    44.6 KB · Views: 158
  • 026.jpg
    026.jpg
    44 KB · Views: 160
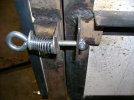
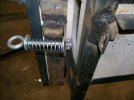
In off-forum conversations with JB, I explained the microswitch and its importance. It is just a N.O. switch that is in the 12VDC control voltage line to the SSRs. The door closes the switch when closed, and opens it when open. This can be added at any time.

I must say that this is the nicest home built HT oven I have seen. Super well built, and well researched.

Tip:
When making controller circuits, and you want to test them, use a light bulb connected to the power output of the SSRs and you will be able to see the off-on cycling as you test things out. Use a small torch to or heat gun to heat the TC for cycling the unit. If all works right in the lamp test, connect the coils and test the heating functions and readings. (If there is an interlock switch, make sure you hold it closed while heating the TC)
 
Thanks Bladsmth you have been a great help. And everyone else as well. I finally figured out the PID with some help from this forum. Thanks to everyone that has commented.

How slow should I take it to say 1800 degrees?
 
Back
Top