Horsewright
Knifemaker / Craftsman / Service Provider
- Joined
- Oct 4, 2011
- Messages
- 13,037
So a short while ago I did a little post on a belt sheath design for a folder: http://www.bladeforums.com/threads/grandpas-design.1488433/
Jason asked for a little how to, next time I made one, so here we go.... lets make one of these:

We were getting ready for a show. Little weekend ranch roping deal. We were only going to be there part of the time as it was Mother's Day weekend and so we were gonna be there Fri afternoon and Saturday. We were gonna miss Sunday. I'd made a small batch of knives for the show so when it came time to start the sheaths I thought I'd do another one of these little folder sheaths. Follow along and see how I build one. They are very quick and easy, 15-20 minutes max, hands on time. That doesn't count drying of course.

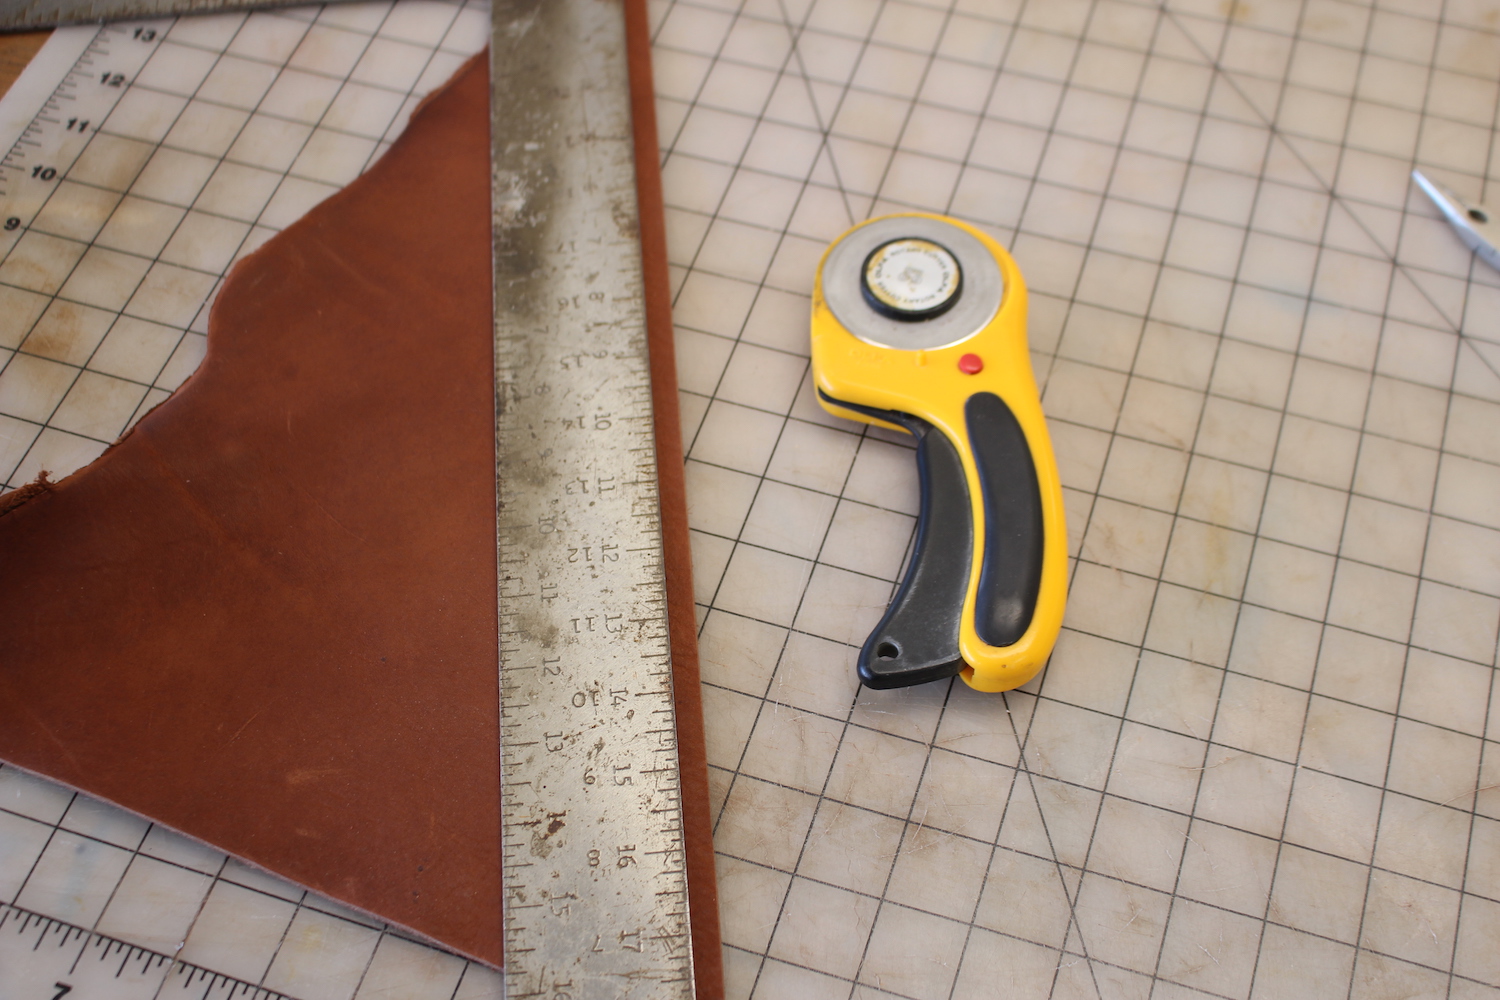
The pattern laid out on the leather. I use a medium weight veg tan for these. This is 7/8 oz Herman Oak. This is one of those great patterns ya can use up some of that less than premium spots on your side. Couple scars, range marks, etc, work well on this. Only 1/4th of your pattern actually shows when finished. Ya wouldn't use anything where the leather is weak but surface imperfections don't seem to matter. Just orientate your pattern so the front part (with the slot) is clean.

Trace around with pencil and mark the slot.

I like to use a straight edge and a roller knife to cut the long sides. Years ago I gave that old straight edge a couple of coats of a clear (Deft Wood) finish. That way the metal does not leave any marks on the leather. Even if the leather has been cased.

I go ahead and punch the slot. This is a 1" punch and about 1 1/4" is about right. I just move the punch over a hair and punch again. If ya don't have a slot punch, punch two holes and cut out between them to form the slot.

I use my round knife to cut the short sides to shape.

Get er wet and fold along the long axis.

Make your stitching groove. This can be done later after glueing and sanding but if ya cut accurately it doesn't really matter. I also make a groove about a 1/4" above and parallel to the slot.

Stamp your makers mark, fold along the short axis too, folding it in half and set in the sun to dry a little.
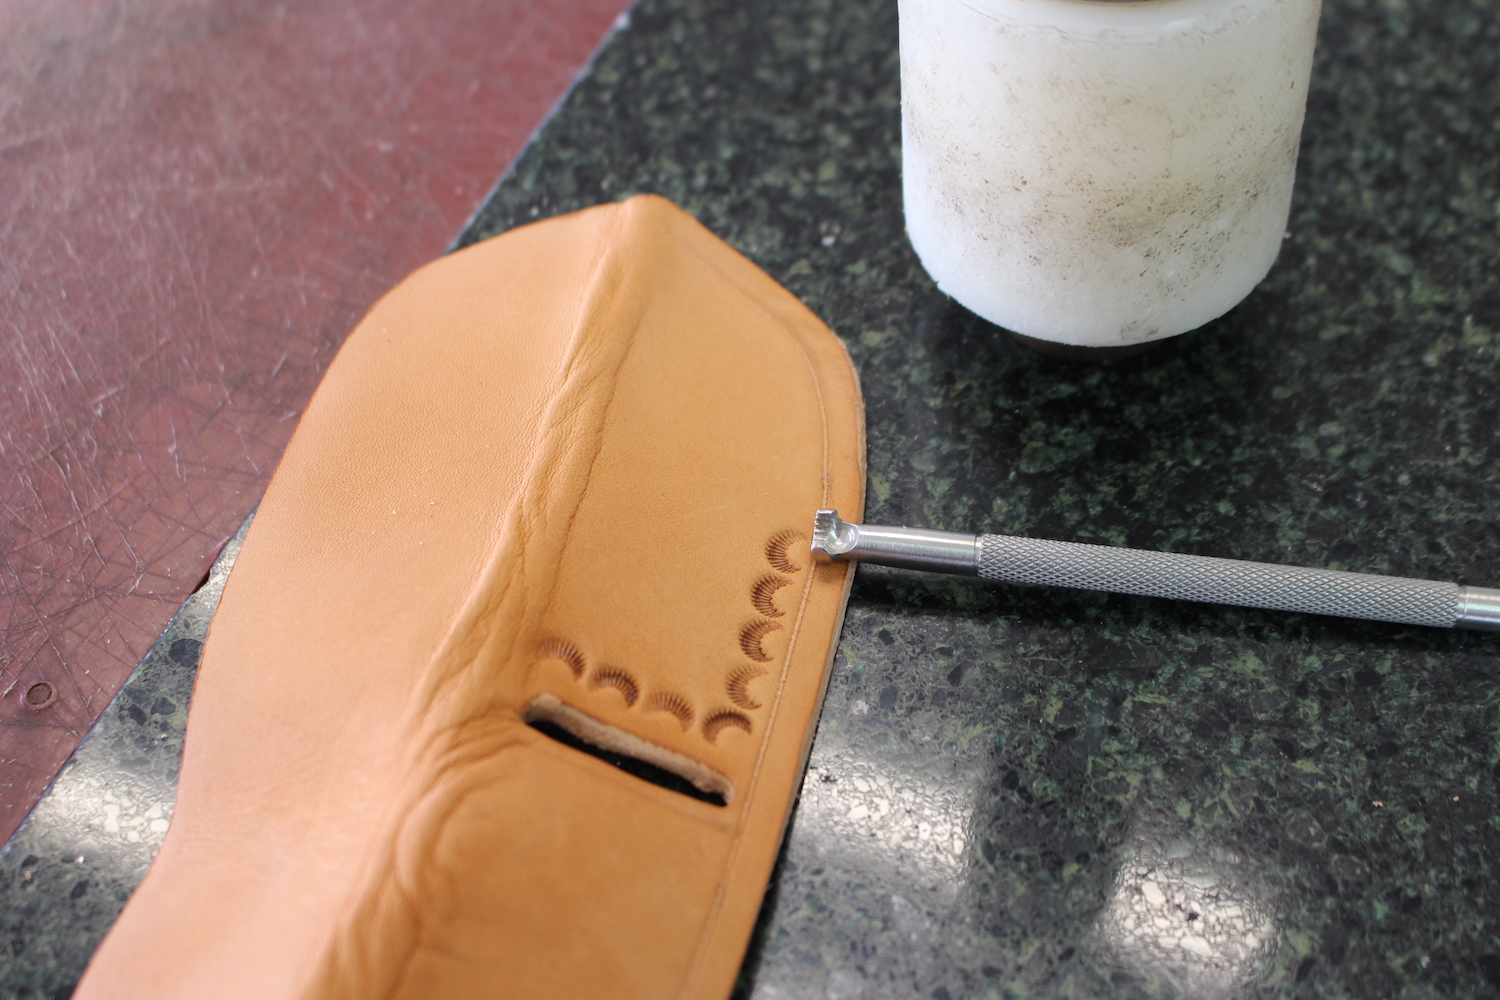
After some of the moisture is out, I brought it back in to the shop and decided to do a little border stamping. I had two others already built for stock and they were both plain so I thought I'd stamp this one a bit.


Lets glue er up. I also glue the all of the inside of the backside together. Helps it lay flatter. After the glue is dry and the sheath edges aligned, I tap with a smooth faced hammer.


I'd set the sheath aside and let it dry completely. After it is dry I sew it up. I've found that I just prefer to sew completely dry. Less presser foot marks that way.


Let er go swimming in the pool. I keep the sheaths in the water till they sink. Then pull em out and put em on a towel. There were a total of 16 sheaths I believe in this batch.


While wet I'll sand the edge to make it smooth and even. I keep a dedicated 120 grit belt for this. Less chance of burning and less dust when wet. Then I edge with a #2. This is an Osborne Western Edger. After edging I rub it while still damp to get the edges more round.

Then we punch our holes for the blood knot that holds everything together.
So our new system here won't let ya post more than 20 pics in post which makes WIPS a little tough. Stay tuned for more.
Jason asked for a little how to, next time I made one, so here we go.... lets make one of these:
We were getting ready for a show. Little weekend ranch roping deal. We were only going to be there part of the time as it was Mother's Day weekend and so we were gonna be there Fri afternoon and Saturday. We were gonna miss Sunday. I'd made a small batch of knives for the show so when it came time to start the sheaths I thought I'd do another one of these little folder sheaths. Follow along and see how I build one. They are very quick and easy, 15-20 minutes max, hands on time. That doesn't count drying of course.
The pattern laid out on the leather. I use a medium weight veg tan for these. This is 7/8 oz Herman Oak. This is one of those great patterns ya can use up some of that less than premium spots on your side. Couple scars, range marks, etc, work well on this. Only 1/4th of your pattern actually shows when finished. Ya wouldn't use anything where the leather is weak but surface imperfections don't seem to matter. Just orientate your pattern so the front part (with the slot) is clean.
Trace around with pencil and mark the slot.
I like to use a straight edge and a roller knife to cut the long sides. Years ago I gave that old straight edge a couple of coats of a clear (Deft Wood) finish. That way the metal does not leave any marks on the leather. Even if the leather has been cased.
I go ahead and punch the slot. This is a 1" punch and about 1 1/4" is about right. I just move the punch over a hair and punch again. If ya don't have a slot punch, punch two holes and cut out between them to form the slot.
I use my round knife to cut the short sides to shape.
Get er wet and fold along the long axis.
Make your stitching groove. This can be done later after glueing and sanding but if ya cut accurately it doesn't really matter. I also make a groove about a 1/4" above and parallel to the slot.
Stamp your makers mark, fold along the short axis too, folding it in half and set in the sun to dry a little.
After some of the moisture is out, I brought it back in to the shop and decided to do a little border stamping. I had two others already built for stock and they were both plain so I thought I'd stamp this one a bit.
Lets glue er up. I also glue the all of the inside of the backside together. Helps it lay flatter. After the glue is dry and the sheath edges aligned, I tap with a smooth faced hammer.
I'd set the sheath aside and let it dry completely. After it is dry I sew it up. I've found that I just prefer to sew completely dry. Less presser foot marks that way.
Let er go swimming in the pool. I keep the sheaths in the water till they sink. Then pull em out and put em on a towel. There were a total of 16 sheaths I believe in this batch.
While wet I'll sand the edge to make it smooth and even. I keep a dedicated 120 grit belt for this. Less chance of burning and less dust when wet. Then I edge with a #2. This is an Osborne Western Edger. After edging I rub it while still damp to get the edges more round.
Then we punch our holes for the blood knot that holds everything together.
So our new system here won't let ya post more than 20 pics in post which makes WIPS a little tough. Stay tuned for more.
Last edited:


") )
)