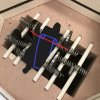
One more Jen-Ken stainless visit...

The folded end of a foil packet will hang perfectly fine Natlek. No need for a special cage.

Try to be a bit more optimistic and less contrary. A few less, "Why do you do that?" posts would help.
I'm sorry, but I was raised to say what I think and know, not what someone wants to hear from me .
You never tried that my friend .I mean on your * U * idea . You just offered a solution without thinking a little deeper about it . Do you know how I know? Because I tried it! I have that foil and I try in my tube furnace many ways to hang envelope with blade inside .I did not like any of them ! Just think what will happen if it accidentally falls and Damacore of 500 euros is inside ........No way !
My vacuum/argon oven is almost finished, I'm just waiting for some electronics. I thought for a long time how to make it . I decided on a vertical one. So when I open the door, the argon will not leak out . So for my argon oven I build two *racks* from 3.2mm Kanthal wire .One for 4 stainless steel blade in envelope and one for 10 carbon steel which I will quench all at once .
Now back to topic , I have some words to say about math /not physics / this time .If this is oven in question seems that that ceramic rods are about 12mm Dia ? let say that wrapping foil 4-5 times around rod work perfect . That would be how much ? About six inch extra length of foil ? After 100 knives you spent 15 meters foil extra ? Rest of math do for your self ,how much that will cost .With rack you will do *clean* and *safe* job every time without wondering if Damacore is *hanging* inside or has fallen and rest on wall and HT elements .
Have a good day !
I am done with this topic , we are all adults and free to do as we like .

eWSrkg6.jpg

And make sure that this long ceramic rod does not burn your hands when you handling it with wrapped foil .
 
Last edited:
No need to make a rack and have a blade resting on its tip when they can hang like normal by incorporating a hanging rod into a foil pack fold. It’s really a non-issue, no need to engineer a solution to a problem that doesn’t exist!

ETA: Rephrased to be more neutral 😇
What you mean with this ? What is problem if blade is *resting on its tip * inside envelope ? What is that *can hang like normal * ? What is *like normal* ? Can you please explain to me ?
 
Wile I am here , how you pull out of oven envelope wrapped on ceramic rod ? What kind of pliers you use ? Ceramic rod is pretty fragile thing ? If you are holding the foil , you need special pliers ? And how do you place envelope between the aluminum plate? You swing the envelope like a yo-yo or use the other hand for support ?
 
Last edited:
I've done it and others have too. I'll drop out of this tread and let you folks have fun.
 
I do very little stainless but the last couple Aeb-l double quenched blades I did I just poked a hole just below the crimped end then I re-crimped . They came out clean. To be safe a hole through the crimped part. By the way for cycling I used the springs and they deformed I wouldn't risk using them. Edit 21 inch Jen Ken
 
Last edited:
What you mean with this ? What is problem if blade is *resting on its tip * inside envelope ? What is that *can hang like normal * ? What is *like normal* ? Can you please explain to me ?
One of the key advantages, or at least selling points of the vertical kilns is that your work is able to hang freely with out any contact that could "possibly" introduce stress, localized temperature differentials, or other voodoo into your blade via physical contact. Whether or not that's a thing or not I think is debatable, but eliminating any possibility can't hurt anything. That would be why resting on the tip of your knife in a basket like yours would at best negate the benefits of using this type of oven, and at worst put the entire weight of the blade focused on the tip at temperatures that may allow stress or material deformation. So "normal" in a JenKen is freely hanging without contacting anything other than the hanging connection. Doing stainless in an envelope and hanging it as I described is "like normal" for these kilns. See my silly drawing below and hopefully that makes more sense:

kilnenvelope.jpg

The blue is the stainless envelope with your knife in it. The red is a steel pin or rod, not the ceramic ones that come with the kiln., that is captive within the folds at the top of your envelope. No additional SS needed, since you have to make that crimp anyway and the pin/rod diameter doesn't need to be anything super thick. Just crimp your SS as normal, incorporating the pin & hang the works perpendicular the the "normal" orientation. You may have to remove one or more of the ceramic rods to get the space to do this, as shown in the pic above. Hopefully this clears up any confusion. This is just one easy way to do it and as always your mileage may vary.
 
One of the key advantages, or at least selling points of the vertical kilns is that your work is able to hang freely with out any contact that could "possibly" introduce stress, localized temperature differentials, or other voodoo into your blade via physical contact. Whether or not that's a thing or not I think is debatable, but eliminating any possibility can't hurt anything. That would be why resting on the tip of your knife in a basket like yours would at best negate the benefits of using this type of oven, and at worst put the entire weight of the blade focused on the tip at temperatures that may allow stress or material deformation. So "normal" in a JenKen is freely hanging without contacting anything other than the hanging connection. Doing stainless in an envelope and hanging it as I described is "like normal" for these kilns. See my silly drawing below and hopefully that makes more sense:

View attachment 2146262

The blue is the stainless envelope with your knife in it. The red is a steel pin or rod, not the ceramic ones that come with the kiln., that is captive within the folds at the top of your envelope. No additional SS needed, since you have to make that crimp anyway and the pin/rod diameter doesn't need to be anything super thick. Just crimp your SS as normal, incorporating the pin & hang the works perpendicular the the "normal" orientation. You may have to remove one or more of the ceramic rods to get the space to do this, as shown in the pic above. Hopefully this clears up any confusion. This is just one easy way to do it and as always your mileage may vary.
Thanks for explanation .Did you try all that ? How you would remove that steel rod before you put blade between Al plates ?
 
Thanks for explanation .Did you try all that ? How you would remove that steel rod before you put blade between Al plates ?
No have not. Like I mentioned above, I've had success using NoScale 2000 so I haven't had to mess with foil. If I were, this is how I'd do it, though. I worked through problems like this before I committed to purchasing a JenKen kiln because they are legitimate questions that require simple solutions in order to not be a purchase I later regretted. As far as the steel pin used to span the ceramic rods, there would be no need for the diameter of that pin to be greater than the thickness of your blade in order to support the weight on all but longest blades. If you did see a need for more support, crimping two pins in tandem in your crimp so they lay in orientation with the blade should provide the additional stiffness and remain captive by the crimp. ----------00, not -----------8. Another option would be to bend the pin ends to hook the ceramic rods to limit sagging. If the pin is < or = to the diameter of the blade then it will not interfere in the plates and would not require removal prior to quench.

This is how these problems are addressed in my mind, but I have not attempted them in practice because I've not had any negative issues with the NoScale. I encourage anyone to prove me wrong so we can all learn, though.
 
One thing that may be a difference with Natlek's experience and ours is the foil thickness. Perhaps he uses thinner foil?

I use 309 HT foil that is .002" thick. After double crimping it is pretty stiff along the crimped side. I placed a 1/4" stainless rod about 2" from the end and rolled the foil over the rod. Then I taped that down firmly to make it strong. Adding a third roll and crimp around the hanger rod made the folded side very stiff. If you wanted it super strong, you could fold and crimp both sides of the packet.

One thing that makes the crimp stronger and more effective is how tight you make them. This is how I make the crimped folds for all foil packets:
I hammer the folds with a plastic mallet. (a rubber mallet works, too)
Bend the sheet of foil in half lengthwise.

Fold a 1.5" wide fold at the open edge and tap down until tight and flat.
Place the center of the folded part on the edge of an aluminum plate (I use my quench plates) and bend over at 90°. Then flatten that 90° bend and hammer tight once more. At that point the folded/crimped layers are .016" thick (two layers @ .002" folded twice).
Do the end folds the same way to close the packet. Make the first end fold about 2" long. When done, the end folds are 1/16" thick.

Using this method, a piece of foil 12"X18" makes about a 4"X12" packet. If hanging on a rod with a 2" foldover, it would make a 4"X10" packet. As a rule of thumb, you want your blade to be at least 1" shorter than the packet.


You asked when I did this. I started with a vertical HT oven made from a converted pottery kiln. All blades were hung in the kiln, including stainless blades in foil packets.
 
Back
Top