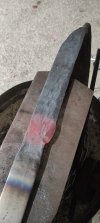
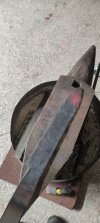
Road to journeyman

Tony Mont

Knifemaker / Craftsman / Service Provider
Joined
Apr 15, 2018
Messages
1,478
Hello everybody!

Enough years have passed and I'm eligible to test for my journeyman stamp with the American Bladesmith Society (also known as ABS). This thread is meant to be educational for everybody, also, it will be a fun experience to keep a record of the whole process.

Now, without further adieu, this is how everything began. My forging experience is limited and I'm still learning as I go along. I've forged knives in the past but that doesn't make me an expert.
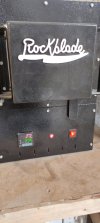
Since my workshop cannot accommodate a propane forge, I had to find an alternative. My solution to the problem was an induction forge.
It's a lovely and really efficient tool (with the proper coils). Obviously, it has its drawbacks but I will have to make do with the tools I have to my disposal.
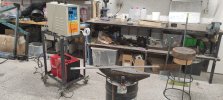
1.jpg

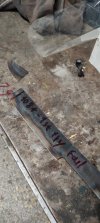
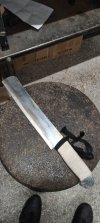
It's been a while since the last time I forged a knife, hence this atrocity of a blade. As a first step, I want forge a blade, do a mock up test and see where I have to improve. My plan for this blade was to keep it simple and do a competition style chopper. The steel of choice is 1084 at 5mm thick.
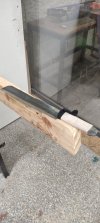
I forged a rough profile, some distal taper and the bevels and moved forward with the heat treatment.
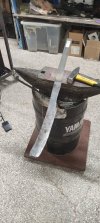
2.jpg

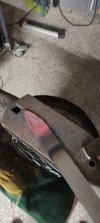
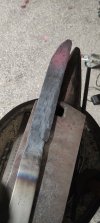
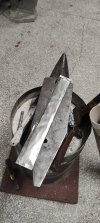
I wrapped the blade into stainless steel foil while doing my thermo cycles to avoid extreme oxidation.
3.jpg
4.jpg5.jpg

I followed this heat treatment protocol:
1) 1600F-870C for 15 minutes and air cool
2) 1450F-787C for 15 minutes and air cool
3) 1380F-748C for 30 minutes and let it cool overnight in the oven
4) Aus temp 1500F-815C for 10 minutes and quenched in parks 50 oil
5) 2x2hours temper at 400F-200C

I've had a warp in the blade which I corrected with an old masonry bit. A carbide hammer would have been a better option but I haven't made one yet.
7.jpg

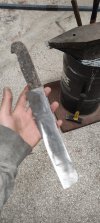
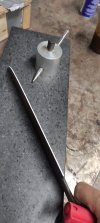
With the warp corrected, I cleaned the edge to fresh steel and started the final grind. This is when I decided to grind in a tip, I had a small cold shut near the edge which I ground off.
8.jpg
9.jpg
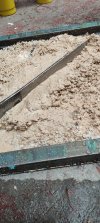
With a tray full of wet sand, I tempered the spine to a higher temperature.
10.jpg

To be continued...
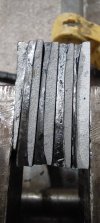
 
As everyone can see, I've had a couple of spots hotter than they should be. Instead of scrapping the blade, I decided to keep going anyway.
The ABS test is the following:
1) Cut a free hanging 1" rope with one swing
2) Chop two 2x4s
3) Shave some hair
4) Bend to 90 degrees without breaking

My blade was ground to 20 thou and sharpened with a convex edge.
11.jpg

With a lanyard ready to go, I began the mock up test.
12.jpg

The 1" rope hasn't arrived yet, therefore in the meantime I used two pieces of 0.787" rope. In hindsight, I think I should have used more pieces to simulate the proper 1" rope. I will be conducting more tests once the rope arrives to make sure my edge geometry is proper.
With a successful one swing cut, it was time to chop two 2x4s.
13.jpg

Note to self, next test knives must have some kind of handle, bare steel was not fun to swing.
14.jpg15.jpg

To be continued...
 
With both 2x4s chopped, it was time to shave some hair and inspect the edge for any damage (no damage is allowed for the test).

16.jpg17.jpg

I checked the whole edge with my magnifying glasses and everything was perfect.
Quick tip: most cellphones nowadays can shoot macro pictures which can be used instead of magnifying glasses.

18.jpg

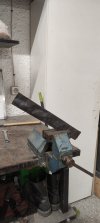
I marked 1/3 of the blade, clamped the blade on the vise and got myself ready for the final test.
19.jpg


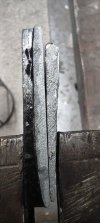
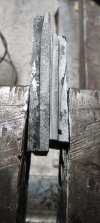
Aaand it failed. What worries me the most is the grain structure of the steel. The heat treatment protocol I followed should have yielded a better grain structure even if it failed the test.

Before I continue on the next blade, I'm going to take a step back and heat treat some coupons. I'm attaching D DevinT Larrin Larrin for your advicement.
20.jpg

21.jpg

And on that terrible disappointment, this is the end of the first part of the journey.
 
With both 2x4s chopped, it was time to shave some hair and inspect the edge for any damage (no damage is allowed for the test).

View attachment 2717388View attachment 2717389

I checked the whole edge with my magnifying glasses and everything was perfect.
Quick tip: most cellphones nowadays can shoot macro pictures which can be used instead of magnifying glasses.

View attachment 2717390

I marked 1/3 of the blade, clamped the blade on the vise and got myself ready for the final test.
View attachment 2717391


Aaand it failed. What worries me the most is the grain structure of the steel. The heat treatment protocol I followed should have yielded a better grain structure even if it failed the test.

Before I continue on the next blade, I'm going to take a step back and heat treat some coupons. I'm attaching D DevinT Larrin Larrin for your advicement.
View attachment 2717392

View attachment 2717393

And on that terrible disappointment, this is the end of the first part of the journey.
We're all rooting for you!!
 
Thank you guys for the encouragement, I really appreciate it!

Today was the time to unravel the mystery and so far, I've not made a conclusion.

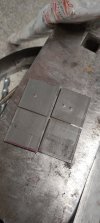
I made 5 coupons and began testing different protocols. I will explain my thought process on each test. All the coupons were marked with the corresponding number to avoid any mix ups. All pictures were taken using the macro setting on my phone.
29.jpg
22.jpg23.jpg

I usually put my knives in the oven while it heats up, that's why I decided the first two coupons would have the same treatment but one of them heated up along with the kiln and the second one was put inside after the kiln was up to temperature. I did this to check whether the kiln had a hot spot while it heats up or not.

On the left it's coupon #1 and on the right it's my test knife. The grain is similar in both which made me curious, I've never had steel to have such a bad grain structure from the "as received" status.
24.jpg


From left to right: coupon #1, knife from the test and coupon #2. This coupon was again heated to 1500F-815C from the as received condition but put in the kiln once it was up to temp. Even though it looks better in the picture, it's the same exact grain structure as the first. When the coupons were freshly broken, they had a lighter colour which makes it look like a finer grain. A few minutes later when all of them had the same darker colour, their true nature revealed.
25.jpg

Coupon #2 on the left and coupon #3 on the right. Coupon #3 was cycled 3 times from the as received condition:
1650F for 10 minutes and cool to black
1550F for 10 minutes and cool to black
1450F for 10 minutes and cool to black
The idea behind this protocol was to add another lower cycle compared to my test knife. Once again, nothing changed. I know it looks better in the picture but it was not.
26.jpg

Here are all the coupons so far, from left to right coupon #1, coupon #2, coupon #3.
27.jpg

Finally, coupon #4. On this one, I did the same three cycles as coupon #3 and then added another one at 1365F and let it cool in the oven (is this slow enough for a DET anneal?)
On this coupon there might have been the slightest improvement. However, I would not call it acceptable. The grain structure was still visible with the naked eye.
28.jpg

And this is where I called it a day. I was expecting a better response in today's experiment and got a bit frustrated. However, this is the nature of the game and sooner or later will figure out why this 1084 is playing hardball.

I'm going to post this in the shop talk as well to get some advice from more experienced makers. However, I'm always open to criticism and ideas so feel free to chime in.
 
After some advice from people much smarter than me, I concluded that something is wrong with the 1084 steel. No matter the cycles, the grain structure would stay huge.

With that being said, I ordered some new steel (1075 and 80CrV2) to try out and see which one I like more.
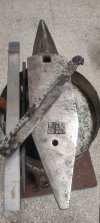
Once it arrived, I forged a new test blade. This time I did a much better job at forging and with a little clean up on the grinder, I was pretty much spot on with the design.
30.jpg

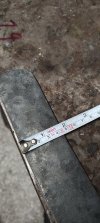
A couple of quick measurements to make sure I'm within the parameters and straight into the kiln for thermal cycling.
31.jpg32.jpg
33.jpg

I did a rough grind and quenched the blade. This time I was smarter than before and heat treated a coupon along with the blade. This way I can check the grain structure and make sure than everything went as planned.
35.jpg

And voila! The grain structure is nice and fine.
1084 coupon from the last batch on the left and 1075 on the right.
36.jpg

Tomorrow I'm going to finish the blade and hopefully retry the test.
 
I got in the shop early this morning and began the final grind.
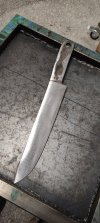
Nothing fancy going on here, took the blade to a 120grit finish and kept the edge 25 thousands thick.
IMG_20241204_140104.jpg

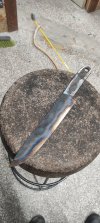
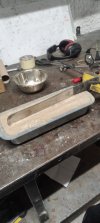
With the final grind out of the way, I filled up a cake tray with wet sand and blue backed the whole knife. I did this 4 times to make sure everything was nice and soft.
IMG_20241204_143520.jpg
IMG_20241204_144427.jpg

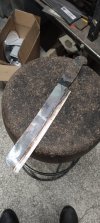
Made a crude wrap and I was ready to take the test.
IMG_20241204_155941.jpg

I need to work my rope cutting technique for sure. I was able to cut the rope with one swing but every now and then I failed.
Chopped a couple of 2x4s and the edge was still shaving sharp.
IMG_20241204_160935.jpg
IMG_20241204_162206.jpg

So far so good, now the bend test...
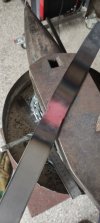
It passed! Since I couldn't see clearly, I went past 90 degrees to make sure the blade was tested properly.

Since the blade passed, I did the bending test until the blade broke.


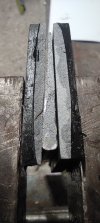
It cracked less than 1/3 of the width (it's allowed to crack less than 1/3) and broke on the third bend. It may have made it, if I didn't go past 90 degrees.
Nonetheless, I'm really pleased with the outcome and the grain structure was perfect.
IMG_20241204_163915.jpg

IMG_20241204_164007.jpg

Now that I have a recipe that works, I must forge two more knives following the same process. One will be tested again in my shop and if everything goes as planned, the second will do the real thing.
 
Wow! This was really informative and seeing the two steels compared at the end side by side really helped me understand what you were looking for.
So if I may..
Pardon me, do you have any Grey Coupon?
Couldnt resist. Why are they called coupons?
 
Great work and perseverance 👏:cool:❤️
Thank you my friend!

Wow! This was really informative and seeing the two steels compared at the end side by side really helped me understand what you were looking for.
So if I may..
Pardon me, do you have any Grey Coupon?
Couldnt resist. Why are they called coupons?
I'm glad this thread has been somewhat educational so far!

To be honest, I don't get the grey coupon reference, however, I understand it's in good faith therefore there is nothing to pardon.
Being from Greece, my English is lacking.

As for why they are called coupons, I don't know how it came to be. I suppose the term came because the shape resembles coupons.
 
Grey Poupon is a mustard in the US.....and the commercials always had rich snobs pulling up alongside each others Bentleys and Rolls Royce and asking pardon moi. Would you have any grey poupon..........😉
 
Great job Tony. Way to hang in there until you get the results you are looking for!
 
Thank you guys for your kind words!
Grey Poupon is a mustard in the US.....and the commercials always had rich snobs pulling up alongside each others Bentleys and Rolls Royce and asking pardon moi. Would you have any grey poupon..........😉
Ooooh now I get it! Thank you for explaing it to me.

Another update is upon us! This is the part 1 of today's update.

As I previously said, since I've got a recipe that works, I must make another two knives. Both knives will be made with the exact same protocol. One of them will be tested in my shop, if everything goes as planned, the second will do the real thing.

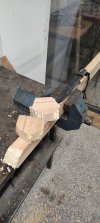
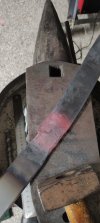
This time I took some pictures between heats while forging. Most pictures are awful because I was too focused on the knives to take proper pictures.
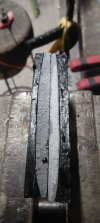
The first step was to form a tip on the square bar.
37.jpg

With the tip refined, I marked the beginning of the edge (this was a mistake will bite me later on) and made my preform prior forging the bevels.
38.jpg39.jpg

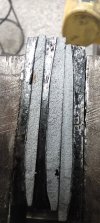
I forge the bevels in by doing a pass to the middle of the blade width wise.
40.jpg41.jpg

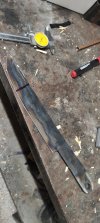
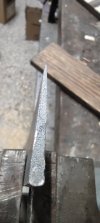
And on the second pass, I strike closer to the edge to make it wider and thin out the edge. As you can see, slowly but surely, the blade is straighting out while forging the bevels in. This is the reason I do the preform like a recurve, this way I will not end up with a banana while forging the bevels.
42.jpg43.jpg

end of part 1.
 
Back
Top