-
The BladeForums.com 2024 Traditional Knife is ready to order! See this thread for details: https://www.bladeforums.com/threads/bladeforums-2024-traditional-knife.2003187/
Price is$300$250 ea (shipped within CONUS). If you live outside the US, I will contact you after your order for extra shipping charges.
Order here: https://www.bladeforums.com/help/2024-traditional/ - Order as many as you like, we have plenty.
You are using an out of date browser. It may not display this or other websites correctly.
You should upgrade or use an alternative browser.
You should upgrade or use an alternative browser.
Road to journeyman
- Thread starter Tony Mont
- Start date
Tony Mont
Knifemaker / Craftsman / Service Provider
- Joined
- Apr 15, 2018
- Messages
- 1,478
Good morning everybody! As always, thank you for your kind words!
Today's update will be in 3 parts because I have a lot to show.
The first part will be mostly pictures of techniques I've spoken about but I managed to take better pictures.
First and foremost, the grid of symmetry to check my plunge lines. Paul taught me this technique and ever since I use it on everything. If you can put a grid on it, you will see the slightest of asymmetry present.
The following picture is with 8x magnification, the two center lines are a few thou apart.

The two following pictures are the scribe lines regarding the distal taper. On the left picture you can clearly see that I've removed more material from the left side of the blade while it's still fully centered on the tip.
A little more grinding and it has the same taper on both sides. I finish my tapers with 120grit and after that it's all about removing deep scratches.
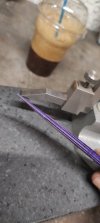
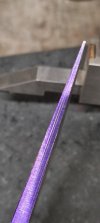
As previously stated, I grind the plunges and the blade with a waterfall platen and then it's time for hand sanding.
I take everything to a dirty 600grit, by dirty I mean the scratches are at 600grit but going all over the place. There is a lot of work yet to be done and there is no point to do the final finish right now. If I do it now, I will mess it up by the time I'm done with the rest of the knife.
Changing direction with each grit makes it easy to see previous scratches.

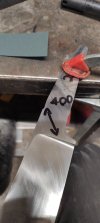
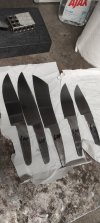
End of part 1.
Today's update will be in 3 parts because I have a lot to show.
The first part will be mostly pictures of techniques I've spoken about but I managed to take better pictures.
First and foremost, the grid of symmetry to check my plunge lines. Paul taught me this technique and ever since I use it on everything. If you can put a grid on it, you will see the slightest of asymmetry present.
The following picture is with 8x magnification, the two center lines are a few thou apart.

The two following pictures are the scribe lines regarding the distal taper. On the left picture you can clearly see that I've removed more material from the left side of the blade while it's still fully centered on the tip.
A little more grinding and it has the same taper on both sides. I finish my tapers with 120grit and after that it's all about removing deep scratches.


As previously stated, I grind the plunges and the blade with a waterfall platen and then it's time for hand sanding.
I take everything to a dirty 600grit, by dirty I mean the scratches are at 600grit but going all over the place. There is a lot of work yet to be done and there is no point to do the final finish right now. If I do it now, I will mess it up by the time I'm done with the rest of the knife.
Changing direction with each grit makes it easy to see previous scratches.


End of part 1.
Tony Mont
Knifemaker / Craftsman / Service Provider
- Joined
- Apr 15, 2018
- Messages
- 1,478
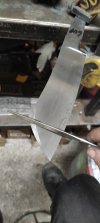
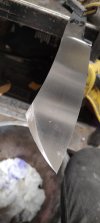
My next step is to prepare the knives for their guards. To do that, I need to finish the ricassos dimensionally. If I fit the guards now and finish the ricassos later, there will be gaps around the guards.
I began with the two knives that have straight spines. The grinder makes it really easy for achieve a lovely satin finish on them without any effort.
The only requirement is for the table to be perfectly square to the platen. My sideways table on the grinder is not adjustable and spent more time than I'm willing to admit with shims to make it square.

Quite awful picture but it's beasutiful from up close.
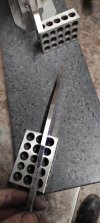
With the spine completed on these two, I can scribe now the bottom of the ricasso using my surface plate and height gauge.

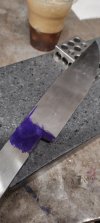
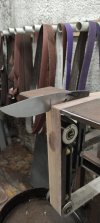
I remove the bulk of the material and with my waterfall platen I sand the little corner which is a pain to sand.
In this step I turn the belt by hand, I only want to remove scratches, not change the shape of anything.
With these two ricassos ready to go, it's time to complete the swedges on the rest of the knives and then their spines and ricassos.
Swedges are the bane of my existence, it's really easy for me to mess up a knife on this stage.
Now you may ask, if you are not that good on swedges, why take the risk of restarting a knife or failing the test with an assymetrical swedge? It's a twofold answer, if I do not push myself to do them, I will never learn. Also, the knives are critiqued by design as well and half of these knives would look wrong without a swedge.
Since I know my shortcomings with grinding swedges, I played it safe. I ground the very rough shape of the swedges and then fixed everything with files.
Ground with a 120grit belt and refined with a diamond file.
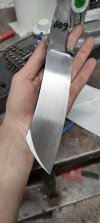
End of part 2
I began with the two knives that have straight spines. The grinder makes it really easy for achieve a lovely satin finish on them without any effort.
The only requirement is for the table to be perfectly square to the platen. My sideways table on the grinder is not adjustable and spent more time than I'm willing to admit with shims to make it square.

Quite awful picture but it's beasutiful from up close.

With the spine completed on these two, I can scribe now the bottom of the ricasso using my surface plate and height gauge.


I remove the bulk of the material and with my waterfall platen I sand the little corner which is a pain to sand.
In this step I turn the belt by hand, I only want to remove scratches, not change the shape of anything.

With these two ricassos ready to go, it's time to complete the swedges on the rest of the knives and then their spines and ricassos.
Swedges are the bane of my existence, it's really easy for me to mess up a knife on this stage.
Now you may ask, if you are not that good on swedges, why take the risk of restarting a knife or failing the test with an assymetrical swedge? It's a twofold answer, if I do not push myself to do them, I will never learn. Also, the knives are critiqued by design as well and half of these knives would look wrong without a swedge.
Since I know my shortcomings with grinding swedges, I played it safe. I ground the very rough shape of the swedges and then fixed everything with files.
Ground with a 120grit belt and refined with a diamond file.


End of part 2
Tony Mont
Knifemaker / Craftsman / Service Provider
- Joined
- Apr 15, 2018
- Messages
- 1,478
Part 3 will be only about making symmetrical the swedges.
Once everything is roughed with a diamond file and made it symmetrical by eye, it's time to employ the grid of symmetry again and begin the painful process.
I will try to explain the process as good as possible.
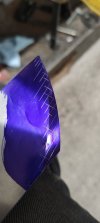
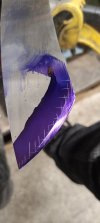
First step is to identify which side has a wider bevel on the swedge. This side will be our point of reference. The goal is to create a grid on the transition of the swedge.
Firstly, I scribe a few horizontal lines (in the picture I had already scribed both directions but let's imagine the following picture has only horizontal scribe lines).
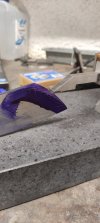
With the help of a 123 block, I scribe the second set of lines. The importance of identifying the wider bevel previously comes into to play now, the height gauge must be adjusted to match the wider side.
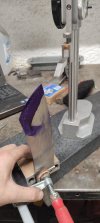
If everything done correctly, the wider bevel will have all the Xs passing through the transition of the bevel and the swedge (left picture). The second side side will show where more material must be removed to make it identical. In the case of the right picture, you can see near the spine the swedge does not reach the Xs, which means I need to file the swedge wider until it does.
Once filed symmetrical, I rinse and repeat the process on each grit until I reach a high enough grit. It's important to scribe lightly, otherwise it will take forever to remove the scribe lines on higher grits.
I'm not going to sugar coat it, it takes forever, specially if you are bad at grinding swedges like me. This small swedge took me 6 hours to make it symmetrical on a 600grit.
Same grid on the long clip.
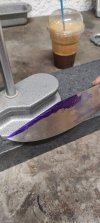
And finished to a 600grit.
Since it took me a day to do two swedges, I decided to change my pace a little bit and try a new finishing technique.
That's a practice knife and has some mistakes from other steps, the finish came out beautiful tho
That's it for today, hopefully will have more soon.
Once everything is roughed with a diamond file and made it symmetrical by eye, it's time to employ the grid of symmetry again and begin the painful process.
I will try to explain the process as good as possible.
First step is to identify which side has a wider bevel on the swedge. This side will be our point of reference. The goal is to create a grid on the transition of the swedge.
Firstly, I scribe a few horizontal lines (in the picture I had already scribed both directions but let's imagine the following picture has only horizontal scribe lines).

With the help of a 123 block, I scribe the second set of lines. The importance of identifying the wider bevel previously comes into to play now, the height gauge must be adjusted to match the wider side.

If everything done correctly, the wider bevel will have all the Xs passing through the transition of the bevel and the swedge (left picture). The second side side will show where more material must be removed to make it identical. In the case of the right picture, you can see near the spine the swedge does not reach the Xs, which means I need to file the swedge wider until it does.


Once filed symmetrical, I rinse and repeat the process on each grit until I reach a high enough grit. It's important to scribe lightly, otherwise it will take forever to remove the scribe lines on higher grits.
I'm not going to sugar coat it, it takes forever, specially if you are bad at grinding swedges like me. This small swedge took me 6 hours to make it symmetrical on a 600grit.
Same grid on the long clip.

And finished to a 600grit.
Since it took me a day to do two swedges, I decided to change my pace a little bit and try a new finishing technique.
That's a practice knife and has some mistakes from other steps, the finish came out beautiful tho
That's it for today, hopefully will have more soon.
Peter James
Knifemaker / Craftsman / Service Provider
- Joined
- Aug 2, 2022
- Messages
- 156
Incredible!
Thanks for sharing the process, it's a huge inspiration.
Thanks for sharing the process, it's a huge inspiration.
Tony Mont
Knifemaker / Craftsman / Service Provider
- Joined
- Apr 15, 2018
- Messages
- 1,478
Thank you guys for the encouragement, it really helps!
The swedges took me more than I anticipated but they are done for now.
Yesterday was not my day, I don't know why but I woke up with a bad mood. However, even tho I didn't want to, I went in the workshop. That's an aspect of knife making that it's not talked about a lot. Like everybody else, some days we don't want to go to work but we have to.
Days like these are usualy the beginning of a mistake and a trashed knife. I went in the shop with caution and a simple thought "it's just a bunch of steps, just do the next one".
And so I did as I thought, I confirmed that everything was good with the swedges.
As a rule, on many steps I like to use more than one way to confirm that everything went as planned. This way even if I measured wrong or something, there is a second chance to reveal my mistake.
In the case of the swedges, I use a sharpie to do some horizontal line on both sides and use my calipers on the line to confirm both sides are the same.
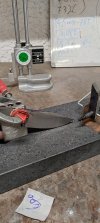

Everything was good to go and I began working on the spines.
Since the spines on these three knives are not straight, I must use a contact wheel. It's important to do a nice uninterrupted motion otherwise there will be divots.
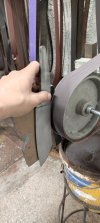
I mark the spines and sand a little bit to confirm they are divot free.
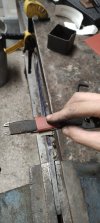
Marking and grinding beneath the ricasso.
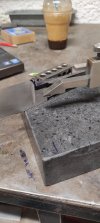
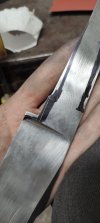
And grinding to my scribe line.

And that's about it for today, it was getting late and my wife hungry so I called it a day.
Hopefully will be back for more later today.
The swedges took me more than I anticipated but they are done for now.
Yesterday was not my day, I don't know why but I woke up with a bad mood. However, even tho I didn't want to, I went in the workshop. That's an aspect of knife making that it's not talked about a lot. Like everybody else, some days we don't want to go to work but we have to.
Days like these are usualy the beginning of a mistake and a trashed knife. I went in the shop with caution and a simple thought "it's just a bunch of steps, just do the next one".
And so I did as I thought, I confirmed that everything was good with the swedges.
As a rule, on many steps I like to use more than one way to confirm that everything went as planned. This way even if I measured wrong or something, there is a second chance to reveal my mistake.
In the case of the swedges, I use a sharpie to do some horizontal line on both sides and use my calipers on the line to confirm both sides are the same.


Everything was good to go and I began working on the spines.
Since the spines on these three knives are not straight, I must use a contact wheel. It's important to do a nice uninterrupted motion otherwise there will be divots.

I mark the spines and sand a little bit to confirm they are divot free.

Marking and grinding beneath the ricasso.


And grinding to my scribe line.

And that's about it for today, it was getting late and my wife hungry so I called it a day.
Hopefully will be back for more later today.
Tony Mont
Knifemaker / Craftsman / Service Provider
- Joined
- Apr 15, 2018
- Messages
- 1,478
Everytime I'm about to post an update, I look on my previous updates and I always underestimate how long the next step/update will take me.
Today's update is a big one so buckle up!
With the spines and choils ready to go, I anneal the tangs and grind of the excess material.
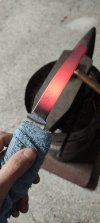
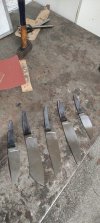
I mark the shoulders with a square and then I go ahead and place my file guide at an angle. That's on purpose, I use the line as a guide. If the guard is completely square to the spine, sometimes it looks off. If angled eeeever so slightly forward, it makes the whole thing look right (if it's canted backwards, it will look awful).
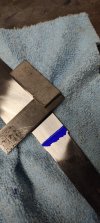

Took most of the material on the grinder and refined the shoulders with a round file. The file will remove material from the softened shoulders but it will get damaged.
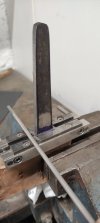
Ricasso taken to 800grit, the shoulders are rounded and the tang is tapered on both directions. Repeat that 4 more times and it will be time to begin fitting the guards.

Marked my slot and punched for drilling.
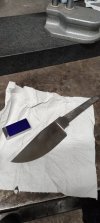
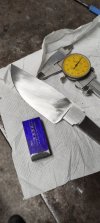
And now the fun parts begins...
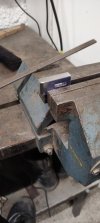
Today's update is a big one so buckle up!
With the spines and choils ready to go, I anneal the tangs and grind of the excess material.


I mark the shoulders with a square and then I go ahead and place my file guide at an angle. That's on purpose, I use the line as a guide. If the guard is completely square to the spine, sometimes it looks off. If angled eeeever so slightly forward, it makes the whole thing look right (if it's canted backwards, it will look awful).


Took most of the material on the grinder and refined the shoulders with a round file. The file will remove material from the softened shoulders but it will get damaged.

Ricasso taken to 800grit, the shoulders are rounded and the tang is tapered on both directions. Repeat that 4 more times and it will be time to begin fitting the guards.

Marked my slot and punched for drilling.


And now the fun parts begins...

Tony Mont
Knifemaker / Craftsman / Service Provider
- Joined
- Apr 15, 2018
- Messages
- 1,478
An easy way to avoid filling more than needed is to use the file guide.
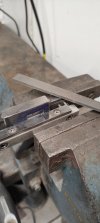
The process is composed of two steps, file and check the fit. It's quite repetitive but that's pretty much it.
Hammering the guard in will reveal the spots that require more filing. If you notice closely in the following picture, there are some shiny spots near the face.

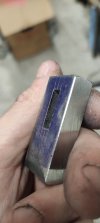
Once the guard is flush with the shoulders, it's time to close up any gaps. As you can see, I didn't do a really good job filling on this one.
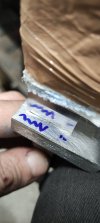
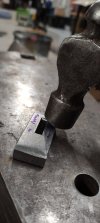
Light tapping with a round hammer will move the material and close the gaps. Key word here is light, any heavy blows will move the material faster but create big divots which will take a lot of time to sand off. It's better to repeat this process a few times and have easier time removing the divots.
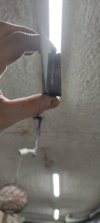
Watching against the light will reveal the tiniest of gaps. Carefull when doing that, if you drop the knife it will stab you in the face.
Before
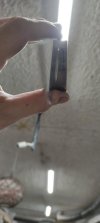
After

The process is composed of two steps, file and check the fit. It's quite repetitive but that's pretty much it.
Hammering the guard in will reveal the spots that require more filing. If you notice closely in the following picture, there are some shiny spots near the face.


Once the guard is flush with the shoulders, it's time to close up any gaps. As you can see, I didn't do a really good job filling on this one.

Light tapping with a round hammer will move the material and close the gaps. Key word here is light, any heavy blows will move the material faster but create big divots which will take a lot of time to sand off. It's better to repeat this process a few times and have easier time removing the divots.

Watching against the light will reveal the tiniest of gaps. Carefull when doing that, if you drop the knife it will stab you in the face.
Before

After

Tony Mont
Knifemaker / Craftsman / Service Provider
- Joined
- Apr 15, 2018
- Messages
- 1,478
A mirror behing the guard will show whether it's square to the blade. A square guard should have a perfect reflection, this one was not square and took some fiddling to make it square.

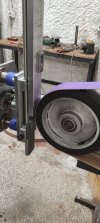
Since this guard was magnetic, instead of sanding, I used my surface grinding attachment to sand the divots out from the previous step.
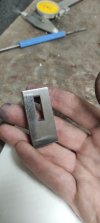
And voala! A perfect fit!
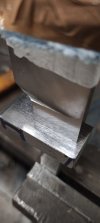
And just like that, all five guards are fit.
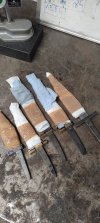
With the guards fit, I decided to make my life more miserable.
A problem I had with my practice knife was the guard placement. I can fit a guard perfectly by driving it with a hammer. Even tho it makes it easier to fit a guard like this, if removed, it's really hard to drive it on the exact same place again. That's why I decide to make them easily removable.
I had to fiddle with the taper on the tang, file very carefully, hammer out tiny gaps and repeat the process at least 20 times
It took me an ungodly amount of time to achieve this fit but it will pay me back down the line. I can now remove the guard, work on it separately and place it back on the exact place without risking marring the blade while hammering the guard.

Since this guard was magnetic, instead of sanding, I used my surface grinding attachment to sand the divots out from the previous step.


And voala! A perfect fit!

And just like that, all five guards are fit.

With the guards fit, I decided to make my life more miserable.
A problem I had with my practice knife was the guard placement. I can fit a guard perfectly by driving it with a hammer. Even tho it makes it easier to fit a guard like this, if removed, it's really hard to drive it on the exact same place again. That's why I decide to make them easily removable.
I had to fiddle with the taper on the tang, file very carefully, hammer out tiny gaps and repeat the process at least 20 times
It took me an ungodly amount of time to achieve this fit but it will pay me back down the line. I can now remove the guard, work on it separately and place it back on the exact place without risking marring the blade while hammering the guard.
Peter James
Knifemaker / Craftsman / Service Provider
- Joined
- Aug 2, 2022
- Messages
- 156
Awesome! Your attention to detail is inspiring
Tony Mont
Knifemaker / Craftsman / Service Provider
- Joined
- Apr 15, 2018
- Messages
- 1,478
As always, thank you guys for the encouragement!
Today's update is going to be three parts due to the attachment limit per post.
Since my last update, I've ordered the required handle materials. I ordered 8 blocks of wood in case I mess up some of them.
These knives are going to travel around the world one day and the difference in temperatures/humidity makes the use of stabilised woods the only way. Even though the blocks have been professionally stablised, I let them aclimate in my shop for a couple of weeks anyway.
I laid everything on my bench to match each knife to a block.
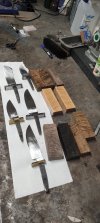
This is where I messed up and took no pictures at all. I've shown in the past how I fit a handle therefore the loss is minimal.
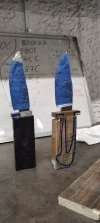
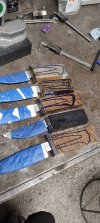
Once I bedded the tangs, I rough shaped them to get an idea of the final result. The reason I bed the tangs is to make the handle go back exactly to same place every time. This allows to work the guard and the handle separately.
I didn't take any pictures of bedding the tangs but it's a simple process.
1) cover everything that shouldn't stick with vaseline
2) fill up the handle with epoxy
3) clamp and let it cure
When the epoxy has cured, there will be a perfect cast of the tang in the handle. So perfect in fact that it might need some broaching again.
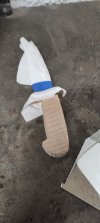
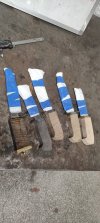
Other than bedding the tang, I use line up pins as well. It is a bit of an overkill to do both but each technique provides something different to the table which might be useful down the line.
I decided to start with the hardest knife of the lot, if I can do it here, the rest of the knives are going to be a breeze.
This knife has a pommel and pommel nut. I began by adding another spacer between the pommel and the wood as a template.

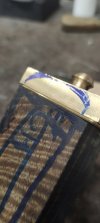
A few drops of superglue to glue it on the pommel only.
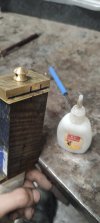
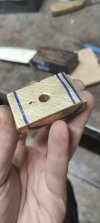
end of part one.
Today's update is going to be three parts due to the attachment limit per post.
Since my last update, I've ordered the required handle materials. I ordered 8 blocks of wood in case I mess up some of them.
These knives are going to travel around the world one day and the difference in temperatures/humidity makes the use of stabilised woods the only way. Even though the blocks have been professionally stablised, I let them aclimate in my shop for a couple of weeks anyway.
I laid everything on my bench to match each knife to a block.

This is where I messed up and took no pictures at all. I've shown in the past how I fit a handle therefore the loss is minimal.


Once I bedded the tangs, I rough shaped them to get an idea of the final result. The reason I bed the tangs is to make the handle go back exactly to same place every time. This allows to work the guard and the handle separately.
I didn't take any pictures of bedding the tangs but it's a simple process.
1) cover everything that shouldn't stick with vaseline
2) fill up the handle with epoxy
3) clamp and let it cure
When the epoxy has cured, there will be a perfect cast of the tang in the handle. So perfect in fact that it might need some broaching again.


Other than bedding the tang, I use line up pins as well. It is a bit of an overkill to do both but each technique provides something different to the table which might be useful down the line.
I decided to start with the hardest knife of the lot, if I can do it here, the rest of the knives are going to be a breeze.
This knife has a pommel and pommel nut. I began by adding another spacer between the pommel and the wood as a template.


A few drops of superglue to glue it on the pommel only.


end of part one.
Tony Mont
Knifemaker / Craftsman / Service Provider
- Joined
- Apr 15, 2018
- Messages
- 1,478
With the template glued, I drill the first two holes.

A couple of light taps with a hammer breaks the bond.
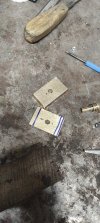
I assembled the whole thing again and this time I glued the spacer to the wood. I used a a level to make sure I had the same angle on the drill press.
Since the template could spin around, I had some marks on the side to line it up again on the same place.
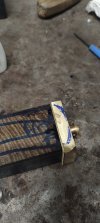
I repeat the same process for the guard to handle side of things. The only difference is that I decided to add some spacers between the two.
I forgot to take a picture of it but once I begin adding line up pins, I recheck my fit up against light to make sure nothing has shifted after each step.
Having a laser in the shop makes it super easy to create half templates for the guards.
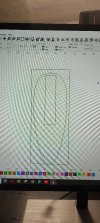
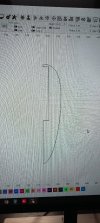
Some lay out fluid and I scribe with the half template, that insures symmetry.

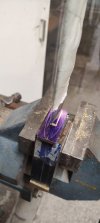
I made a quick sled for the guard assembly because I didn't want to cut the pins.

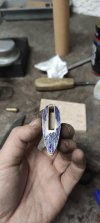
And here it is rough shaped. This is with 60grit, I will hit my scribe line with a higher grit.
End of part 2.

A couple of light taps with a hammer breaks the bond.

I assembled the whole thing again and this time I glued the spacer to the wood. I used a a level to make sure I had the same angle on the drill press.
Since the template could spin around, I had some marks on the side to line it up again on the same place.

I repeat the same process for the guard to handle side of things. The only difference is that I decided to add some spacers between the two.
I forgot to take a picture of it but once I begin adding line up pins, I recheck my fit up against light to make sure nothing has shifted after each step.
Having a laser in the shop makes it super easy to create half templates for the guards.


Some lay out fluid and I scribe with the half template, that insures symmetry.


I made a quick sled for the guard assembly because I didn't want to cut the pins.

And here it is rough shaped. This is with 60grit, I will hit my scribe line with a higher grit.

End of part 2.
Tony Mont
Knifemaker / Craftsman / Service Provider
- Joined
- Apr 15, 2018
- Messages
- 1,478
With the guard rough shaped, I marked the center of the handle and pommel.
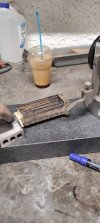
On the left picture the center line is visible. I made another template with the laser for the pommel. Since I do not have a ricasso to base my template off, I made the template whole and engraved a center line.
This way I can allign the scribed center line with the engaved one to make sure my pommel is symmetrical.
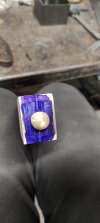
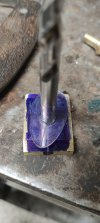
Using a 123 block, I scribe a few horizontal lines to mark where the guard should end.
With a round file I began shaping the guard and that's when I decided to call it a day.
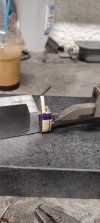
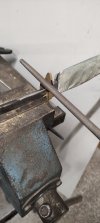
However, I couldn't help myself and removed the bulk of the wood to get a glimpse of the future.


On the left picture the center line is visible. I made another template with the laser for the pommel. Since I do not have a ricasso to base my template off, I made the template whole and engraved a center line.
This way I can allign the scribed center line with the engaved one to make sure my pommel is symmetrical.


Using a 123 block, I scribe a few horizontal lines to mark where the guard should end.
With a round file I began shaping the guard and that's when I decided to call it a day.


However, I couldn't help myself and removed the bulk of the wood to get a glimpse of the future.

With the guard rough shaped, I marked the center of the handle and pommel.
View attachment 2898287
On the left picture the center line is visible. I made another template with the laser for the pommel. Since I do not have a ricasso to base my template off, I made the template whole and engraved a center line.
This way I can allign the scribed center line with the engaved one to make sure my pommel is symmetrical.
View attachment 2898288View attachment 2898289
Using a 123 block, I scribe a few horizontal lines to mark where the guard should end.
With a round file I began shaping the guard and that's when I decided to call it a day.
View attachment 2898290View attachment 2898291
However, I couldn't help myself and removed the bulk of the wood to get a glimpse of the future.
View attachment 2898294
LOOKING GOOD......
Tony Mont
Knifemaker / Craftsman / Service Provider
- Joined
- Apr 15, 2018
- Messages
- 1,478
Since I completed successfully the line up pins on the hardest knife (due to the number of parts), it was time to do the rest.
First step in the process is to add a relatively thin (this one was 1.5mm/0.059") spacer between the guard and the handle. It's important for the spacer to have a snug fit, if it's loose, it will make the whole process unnecessarily hard.

Same as before, a few drops of superglue between the guard and the spacer will allow me to use the spacer as a template.
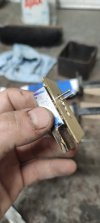
I attach the guard on the knife with the spacer and the line up pins in place, I remove the pins right before I fit up the handle. This ensures the spacer will stay in the correct place while I glue it to the handle. The spacer was snug enough to be safe but I don't mind extra safe when I can.
Since I've bedded the handle, it cannot move at all. That means, if I do not align the spacer properly, the holes in the guard will not line up with the handle.
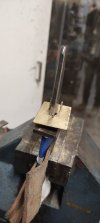
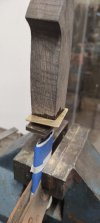
It'd be smarter, if I had kept the bottom of the handles flat.
However, the sides are square and parallel to the ricasso which makes it easy to clamp on my vise.
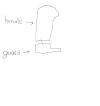
It important for the handle to have the correct angle compared to the guard holes.
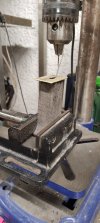
I don't know how explain it properly in English, but the gist of it is that I eyeball it. Hopefully my picture bellow shows it better.
The red line is the line up pins. Even though the angle is exaggerated, if the angle goes that way in the guard, the handle should have a matching angle (since it can only go one way into the tang since it's bedded).
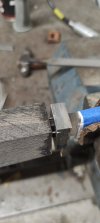
With both sides done, I check again against a light to ensure therre are no gaps.

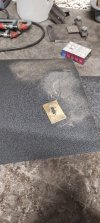
Instead of making a new spacer for each knife, I began working on the knife with the narrower/thinnest tang. This way I can reuse the same spacer with just a little bit of clean up and filling to fit it on the next bigger tang.
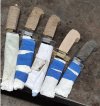
Following the same process, I did all the knives.
Now all of them are ready to be worked on the handle!
First step in the process is to add a relatively thin (this one was 1.5mm/0.059") spacer between the guard and the handle. It's important for the spacer to have a snug fit, if it's loose, it will make the whole process unnecessarily hard.

Same as before, a few drops of superglue between the guard and the spacer will allow me to use the spacer as a template.

I attach the guard on the knife with the spacer and the line up pins in place, I remove the pins right before I fit up the handle. This ensures the spacer will stay in the correct place while I glue it to the handle. The spacer was snug enough to be safe but I don't mind extra safe when I can.
Since I've bedded the handle, it cannot move at all. That means, if I do not align the spacer properly, the holes in the guard will not line up with the handle.


It'd be smarter, if I had kept the bottom of the handles flat.
However, the sides are square and parallel to the ricasso which makes it easy to clamp on my vise.
It important for the handle to have the correct angle compared to the guard holes.

I don't know how explain it properly in English, but the gist of it is that I eyeball it. Hopefully my picture bellow shows it better.
The red line is the line up pins. Even though the angle is exaggerated, if the angle goes that way in the guard, the handle should have a matching angle (since it can only go one way into the tang since it's bedded).

With both sides done, I check again against a light to ensure therre are no gaps.


Instead of making a new spacer for each knife, I began working on the knife with the narrower/thinnest tang. This way I can reuse the same spacer with just a little bit of clean up and filling to fit it on the next bigger tang.

Following the same process, I did all the knives.
Now all of them are ready to be worked on the handle!

