One look's worth a thousand words, Ideas Worth Spreading:
Summary
The pen-style retractable ruby is an inexpensive high-feedback sharpener most suitable for macro-/micro-deburring and because of its wondrous efficiency a powerful must-have item in anyone's sharpening arsenal, not only in one's portable kit. Hand-held white or gray cylindrical (or conical) ceramic rods/sticks/files, or pen-style sharpeners, exist on the market for ages, they have been acknowledged and successful, e.g. the popular pen-style Victorinox Dual-Knife Sharpener (43323). What makes this diy variant —let's code-name it "RRS"— special is the fineness, effectiveness, tactile feedback, and cost of replacement (if drop'n cracked).
Pro's:
TL;DR — Suitable for:
+ readers who have experience with ceramic rods, croc sticks, portable sharpening, pen-style sharpeners, Spyderco Sharpmaker, or similar
+ readers who own blades with recurved parts (concave blade sections)
+ readers who have problems with deburring
+ readers who are sharpening beginners and/or on a tight budget
+ readers who are curious to experience the power of a high quality sintered ruby ceramic whetstone (in comparison to other ceramics)
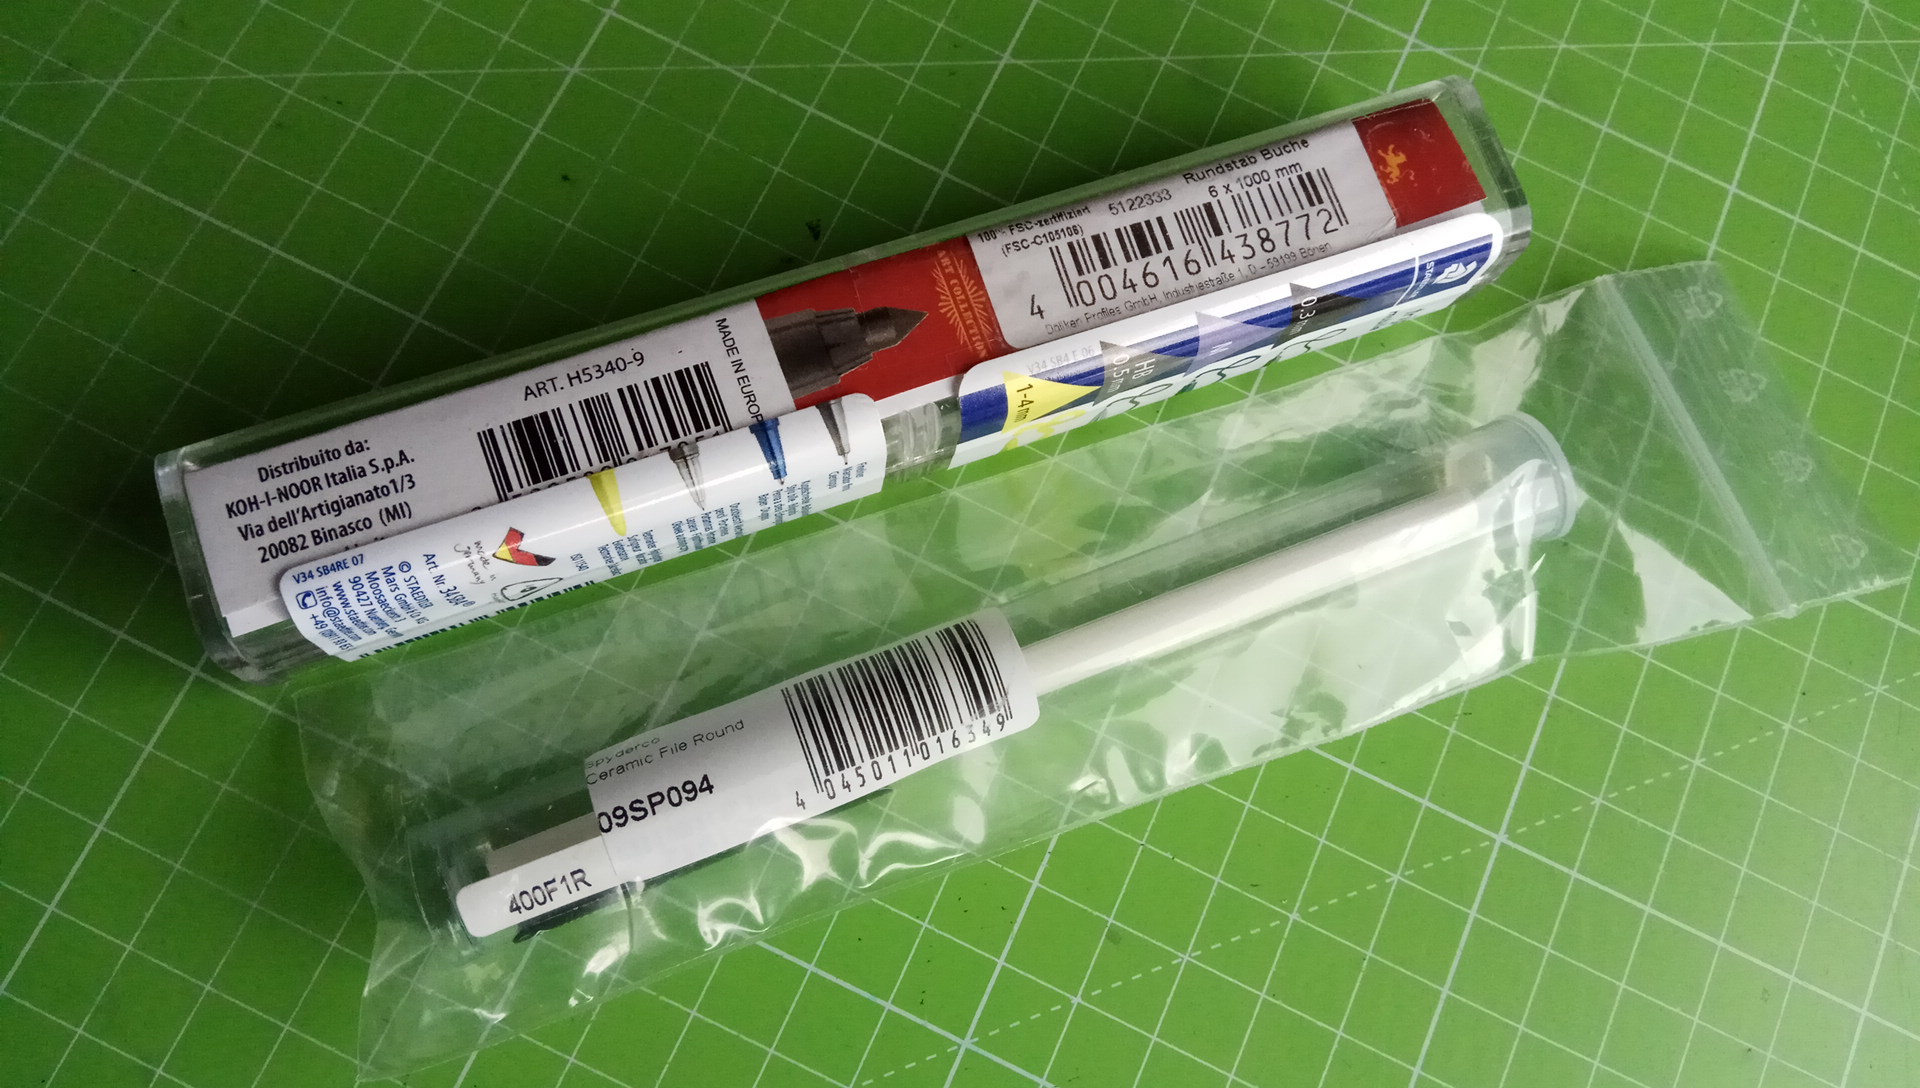
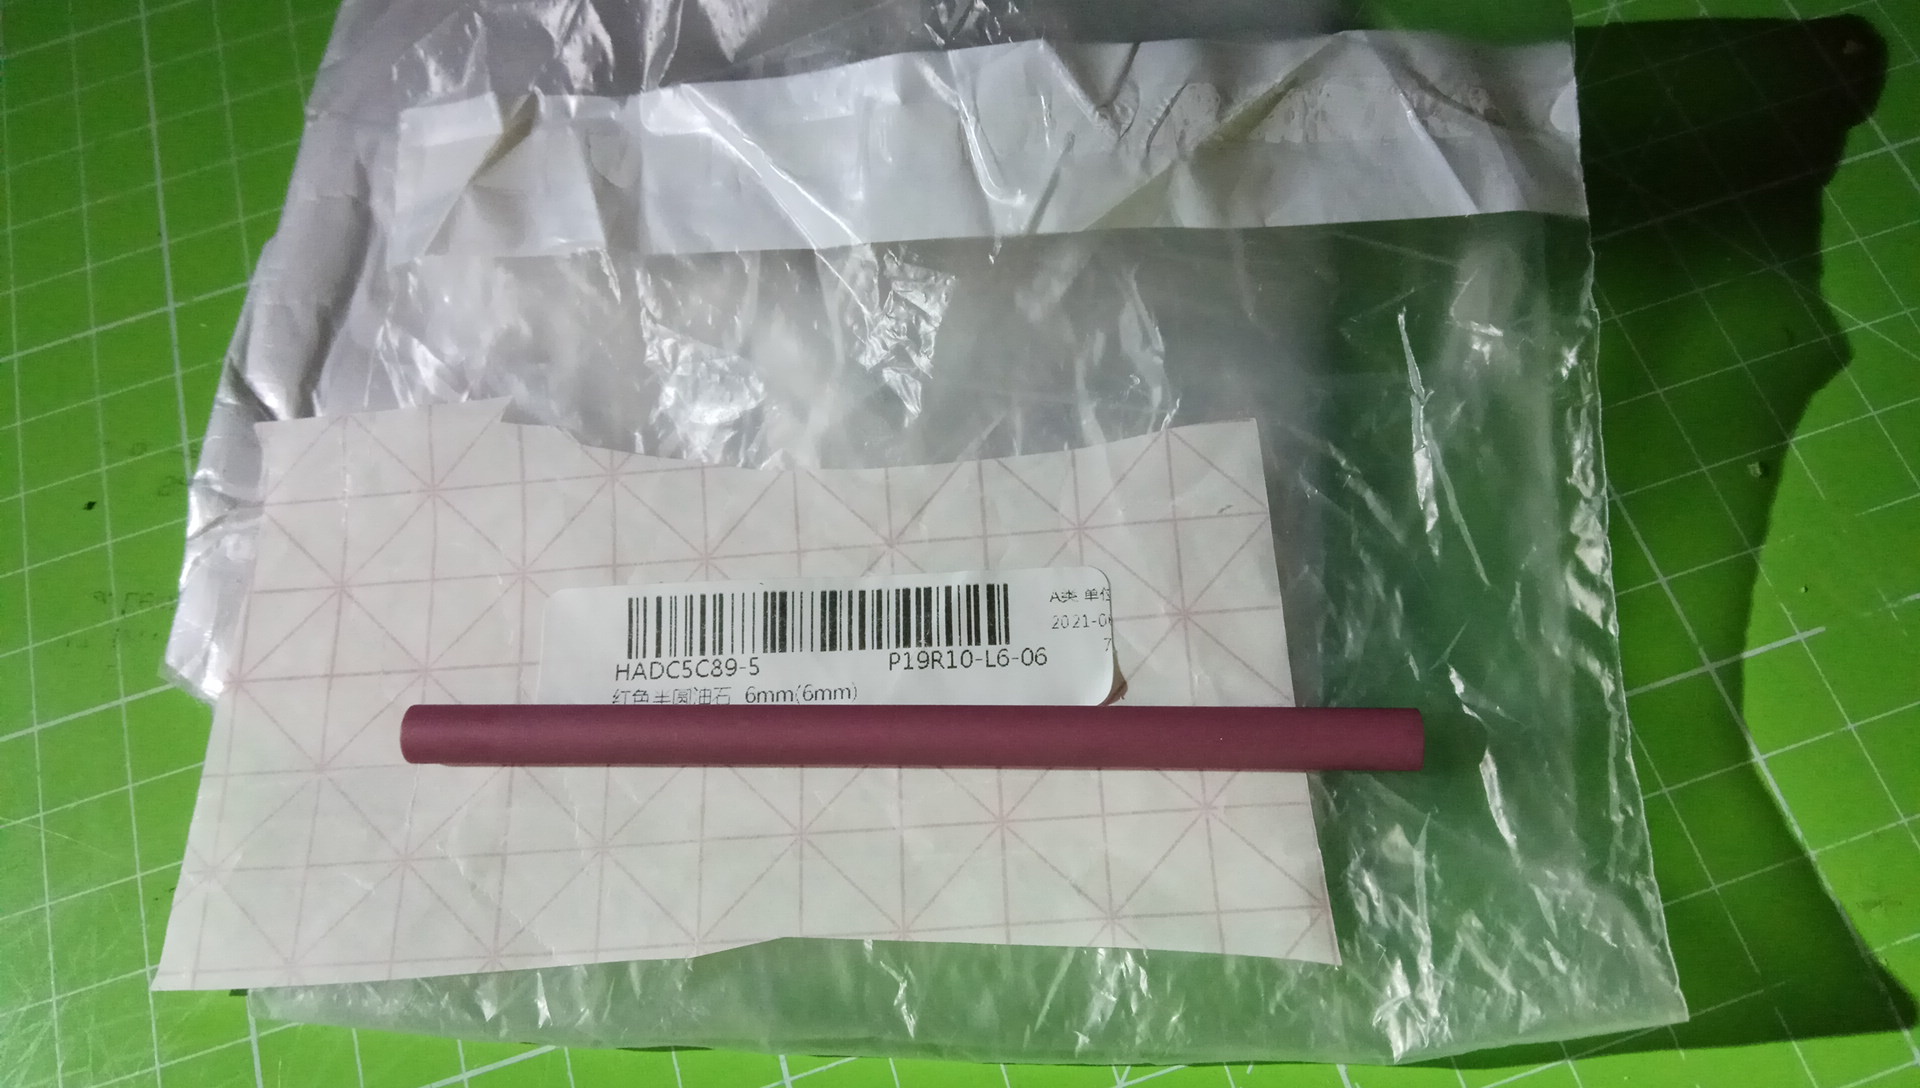
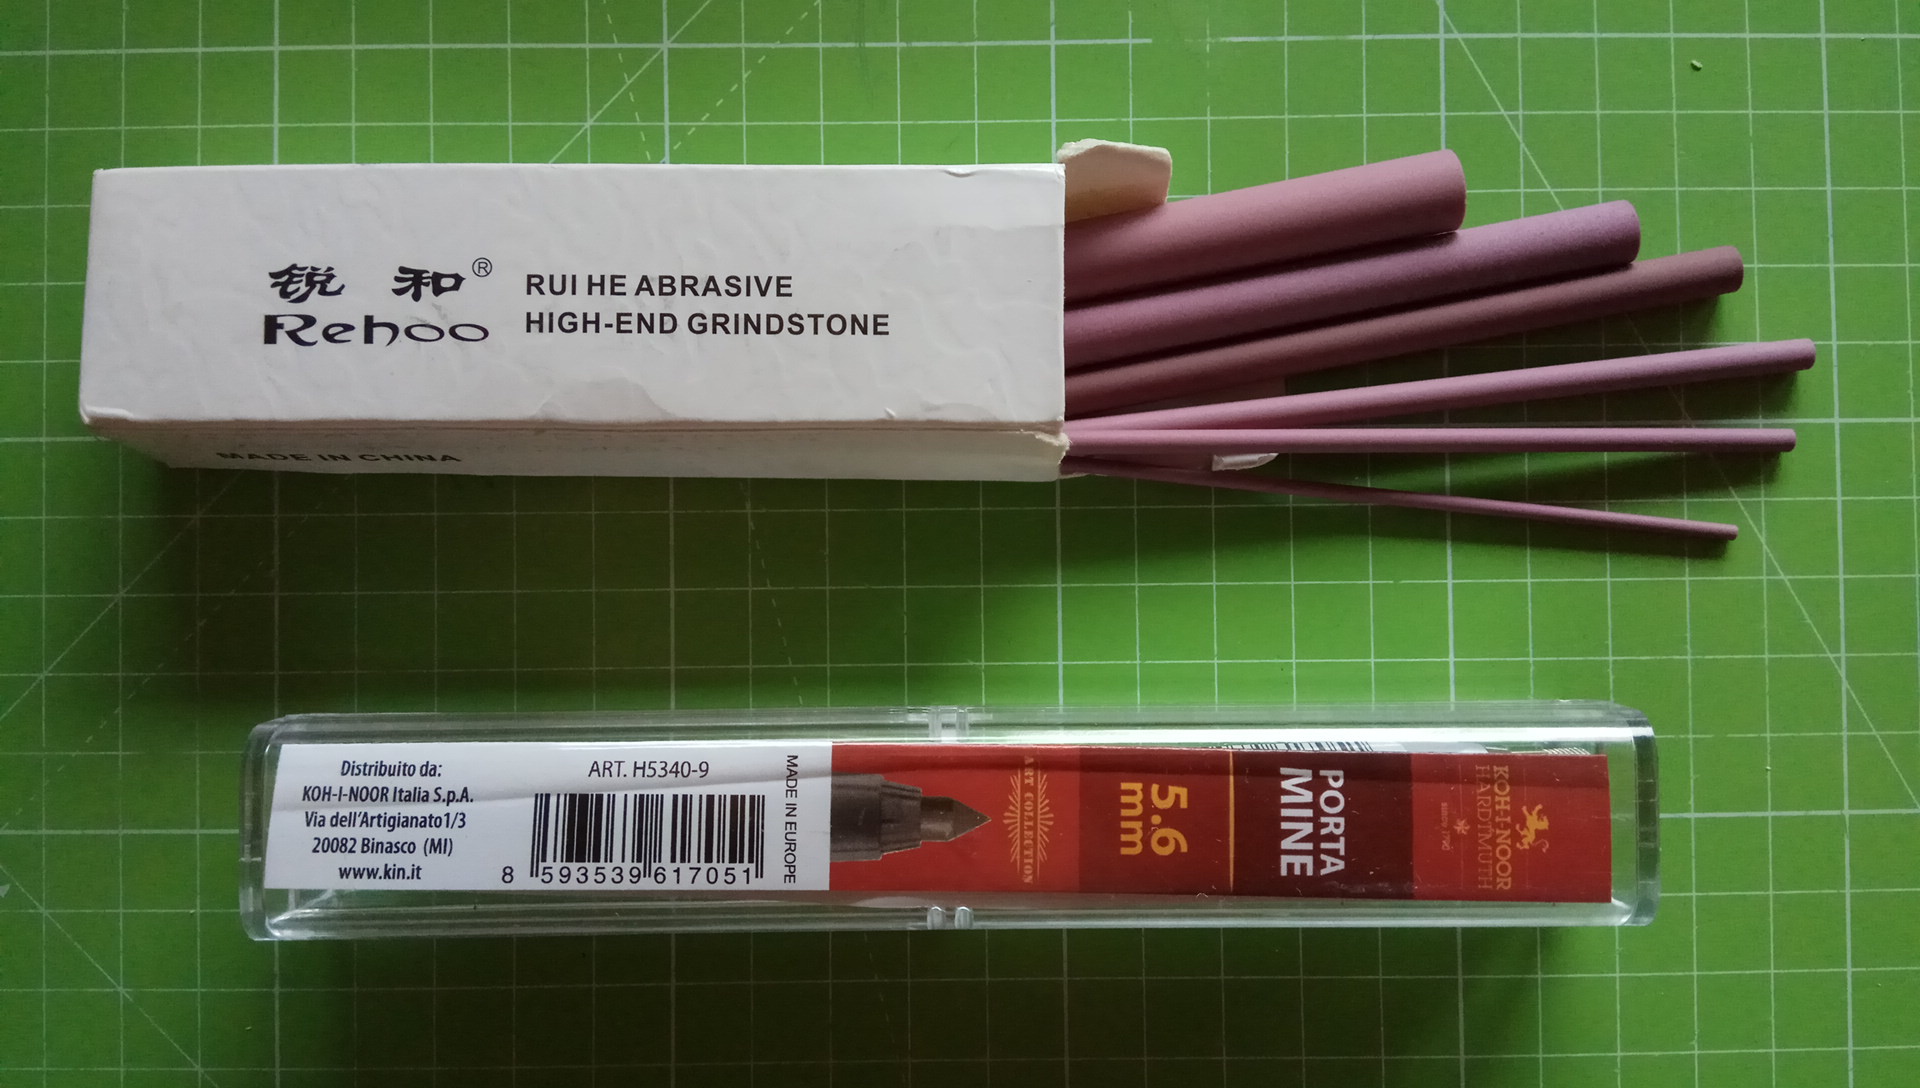
The made-in-chinas sintered(?) ruby cylindrical stick came unharmed in a bubble-padded shipping envelope with no further protection like cardboard, styrofoam or whatever. Maybe it is fortunate that i had ordered just 1 unit because 2 units would have banged against each other inside the envelope and could have caused chips and cracks. Furthermore i had reason to fear that the package wouldn't contain the correct diameter. After some 3.5 weeks between order day and delivery day i was fully relieved: the package didn't get lost during transit, the item arrived unbroken, the item had the correct diameter of Ø6.0mm, and the item was in better-than-expected quality:
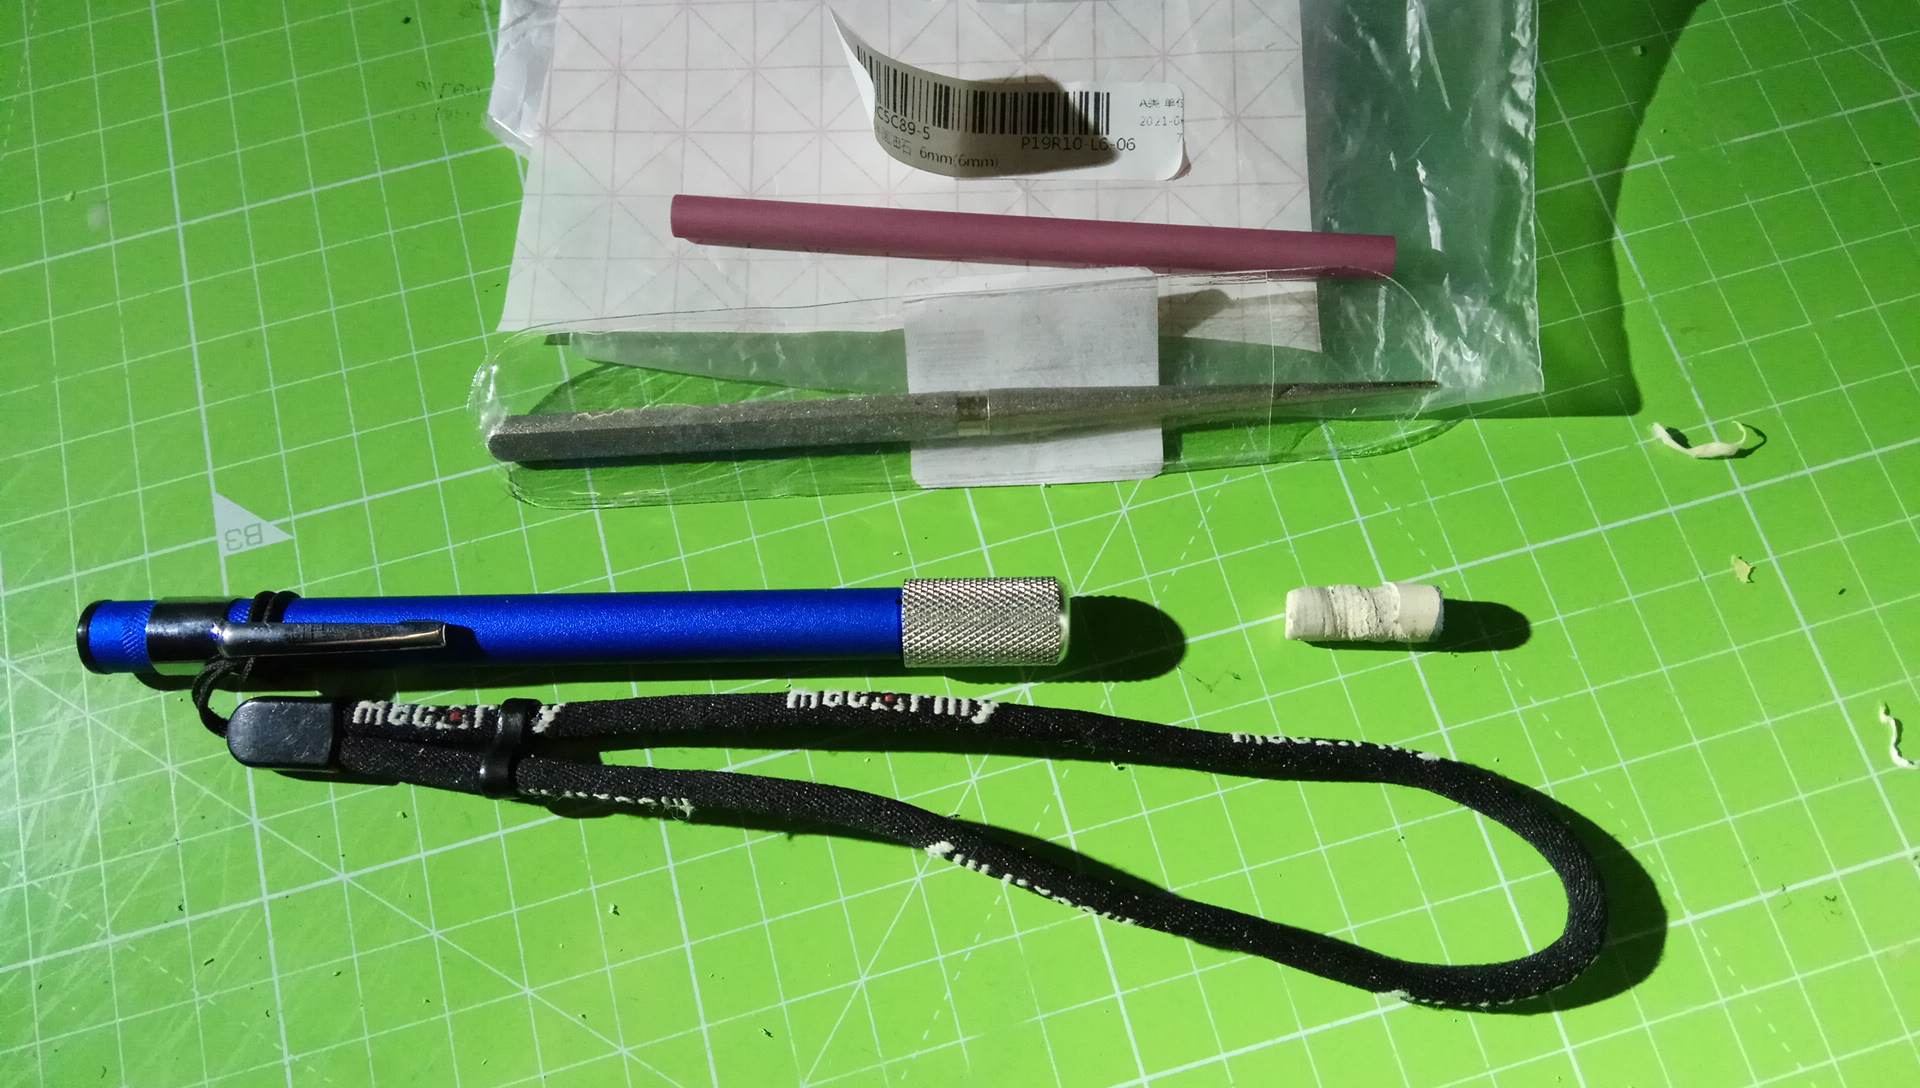
Wait, where is the holder? Probably you have it already in your garage, it is a ubiquitous thingy, search term <
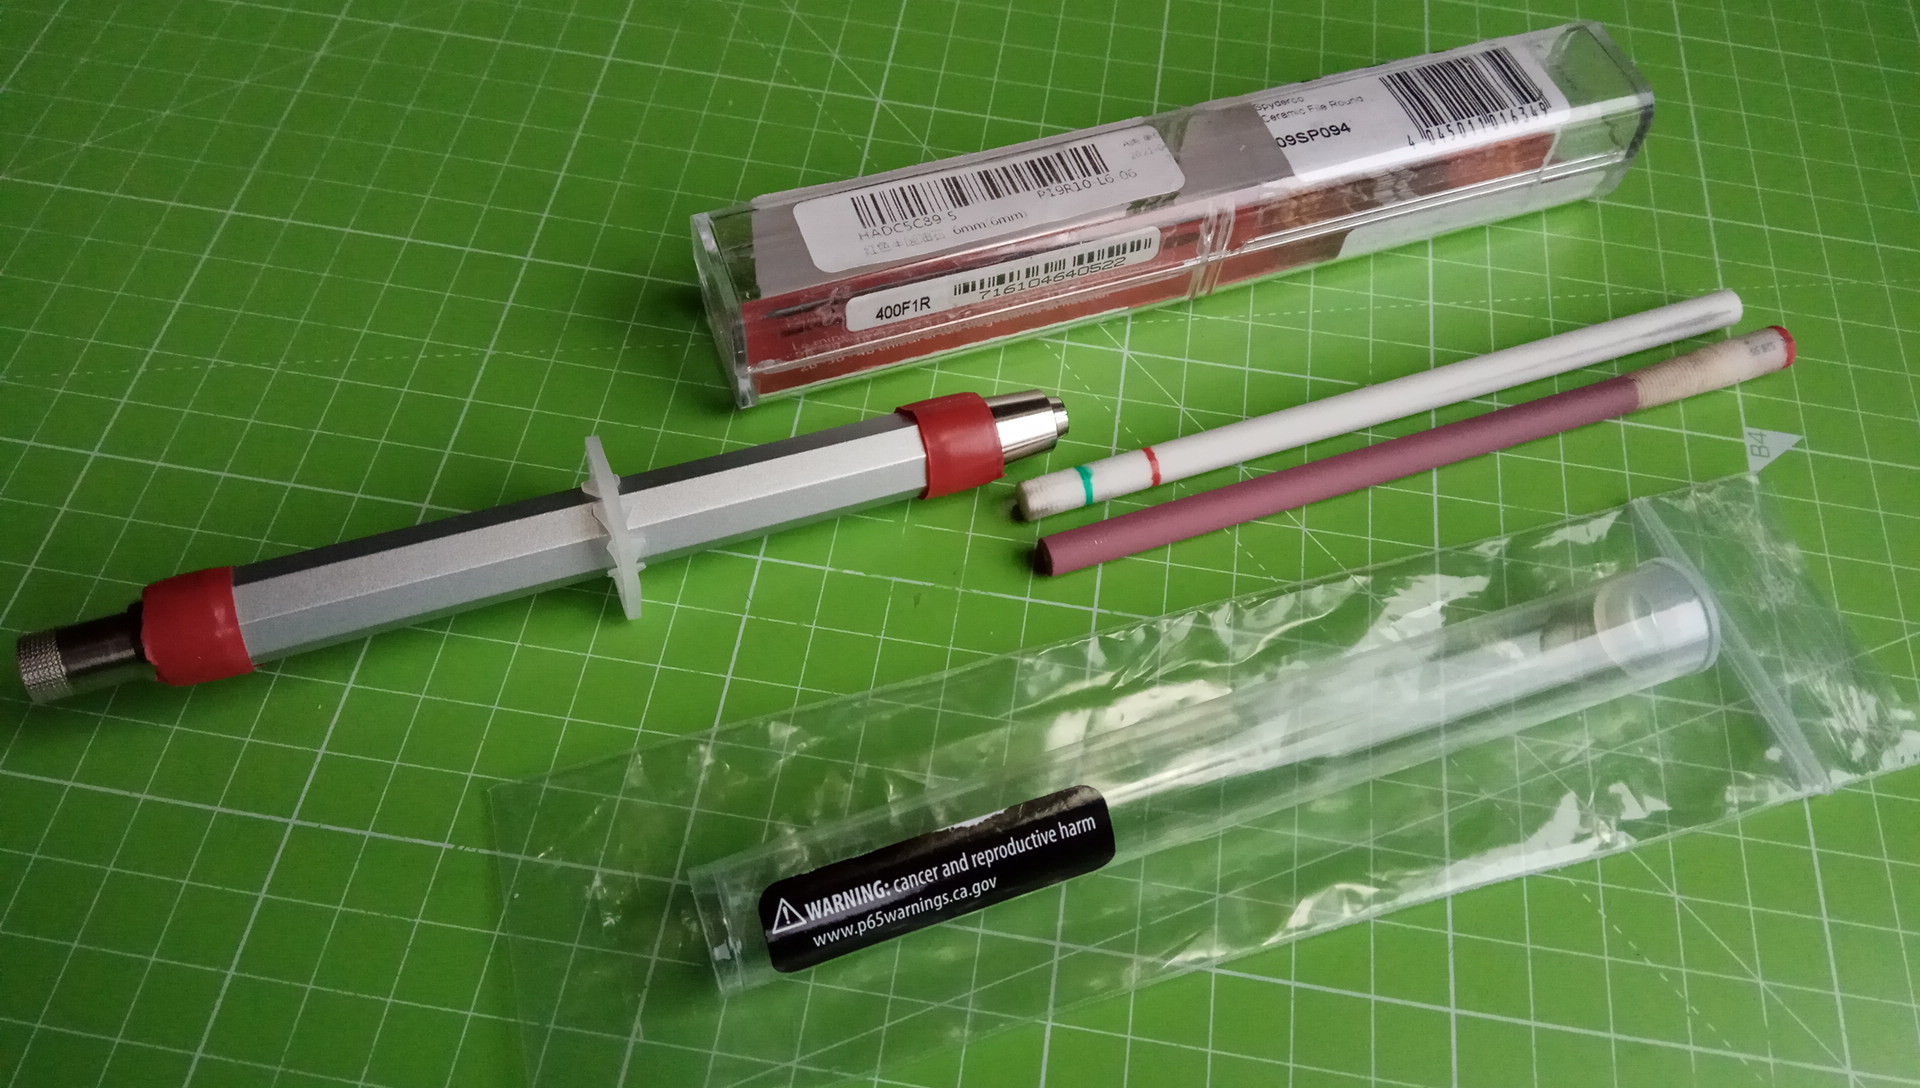
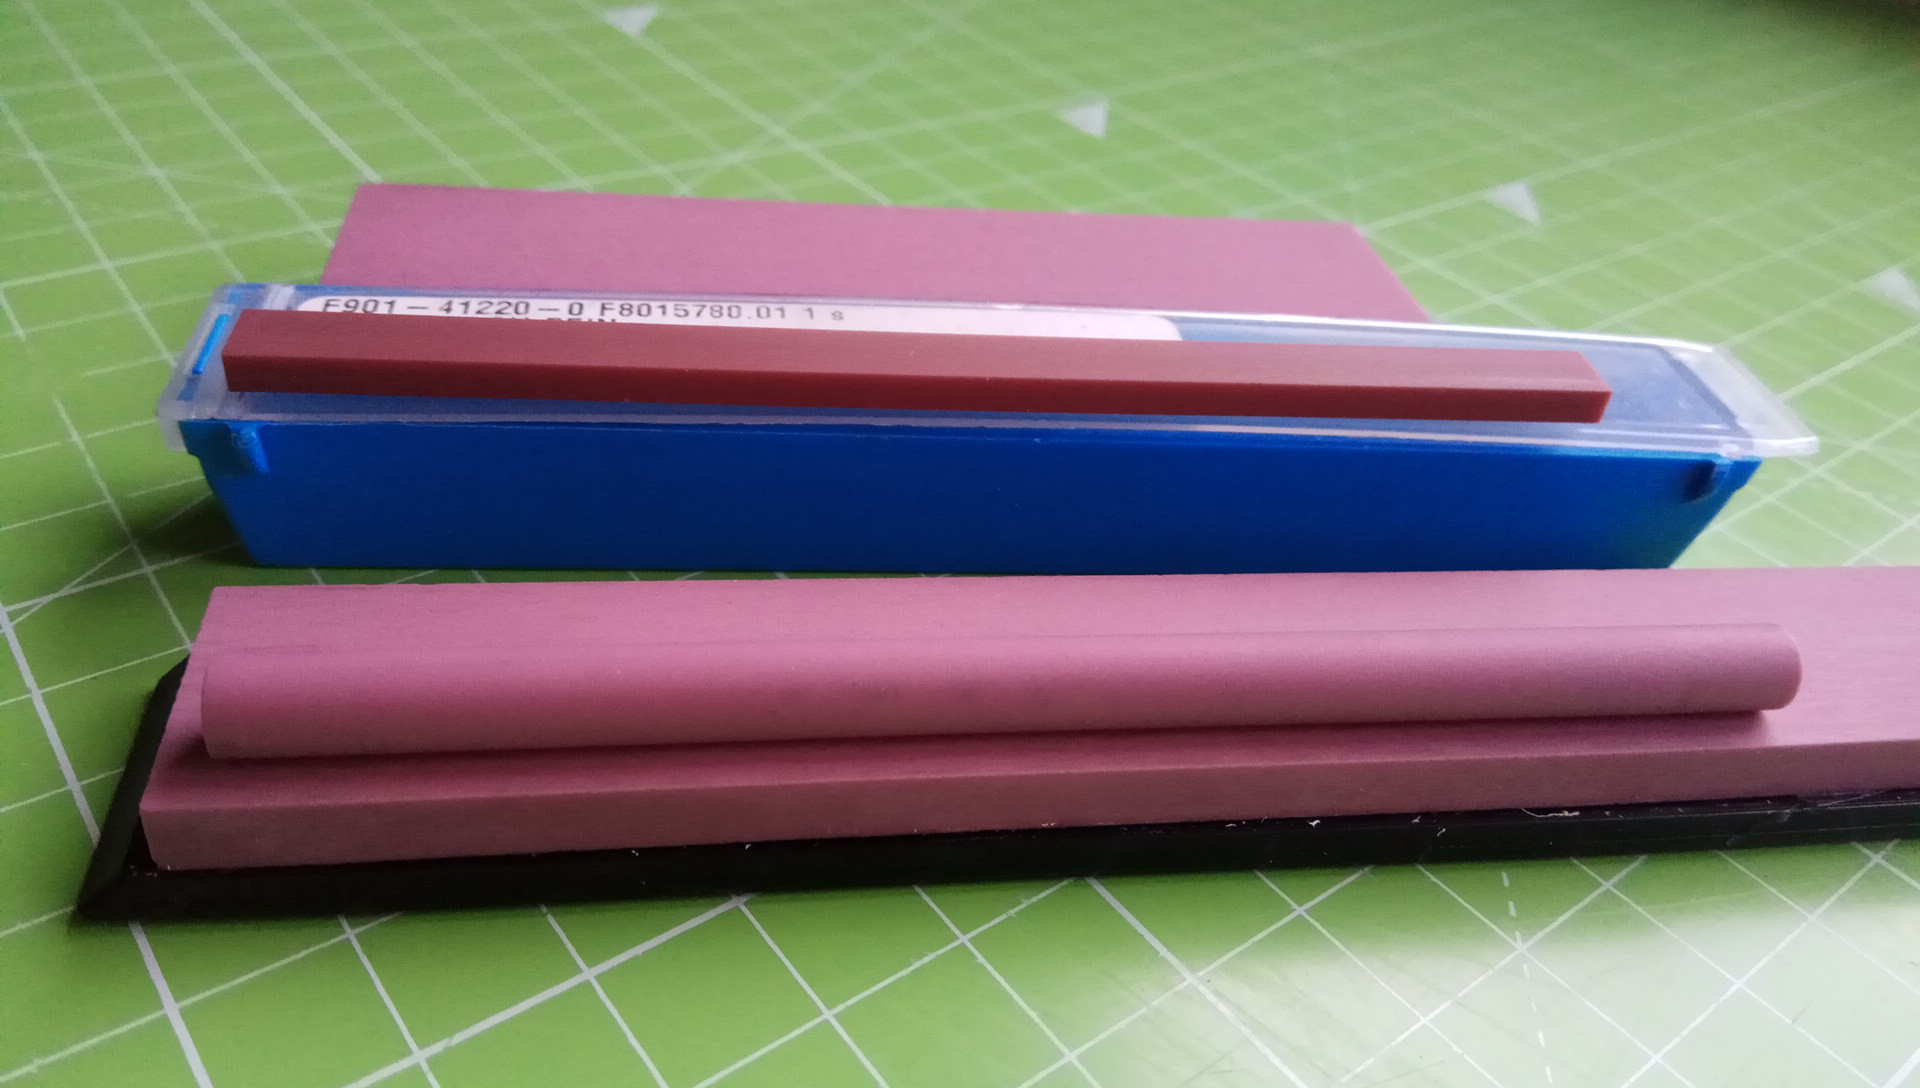
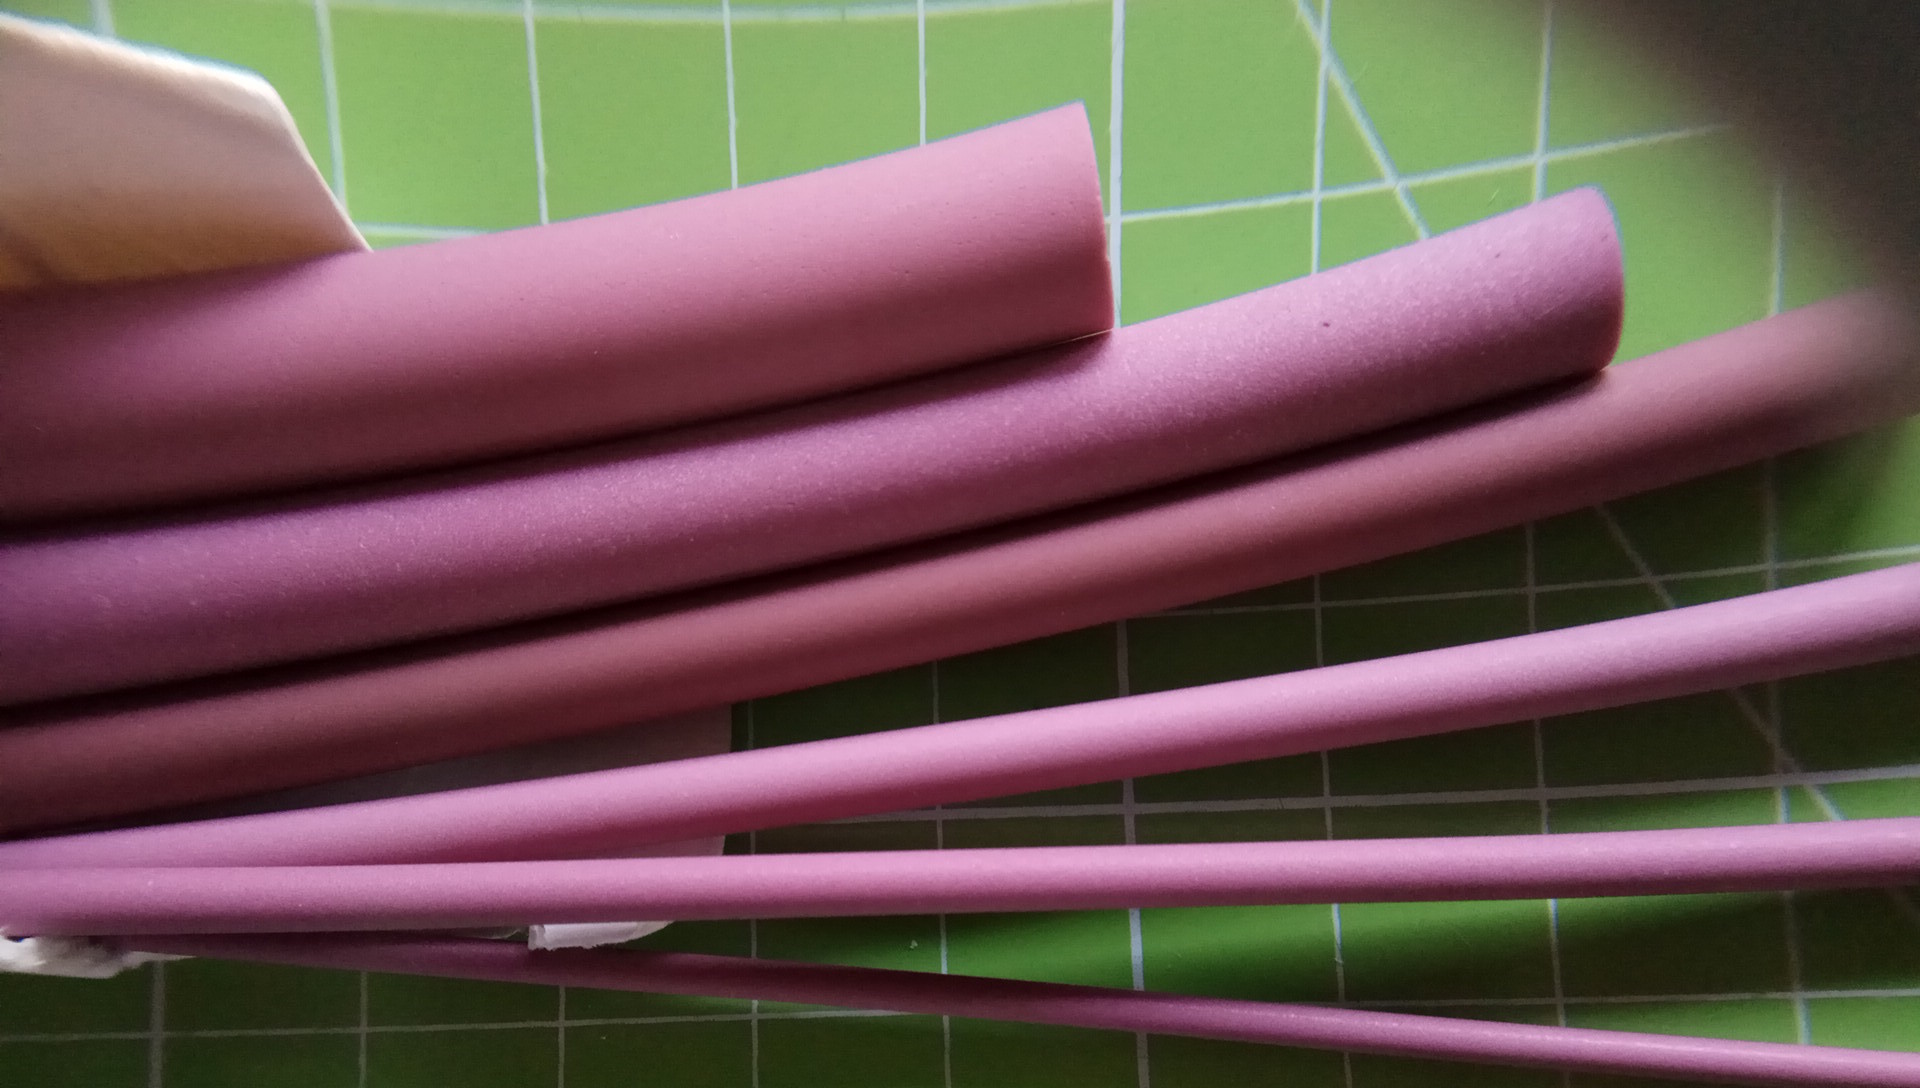
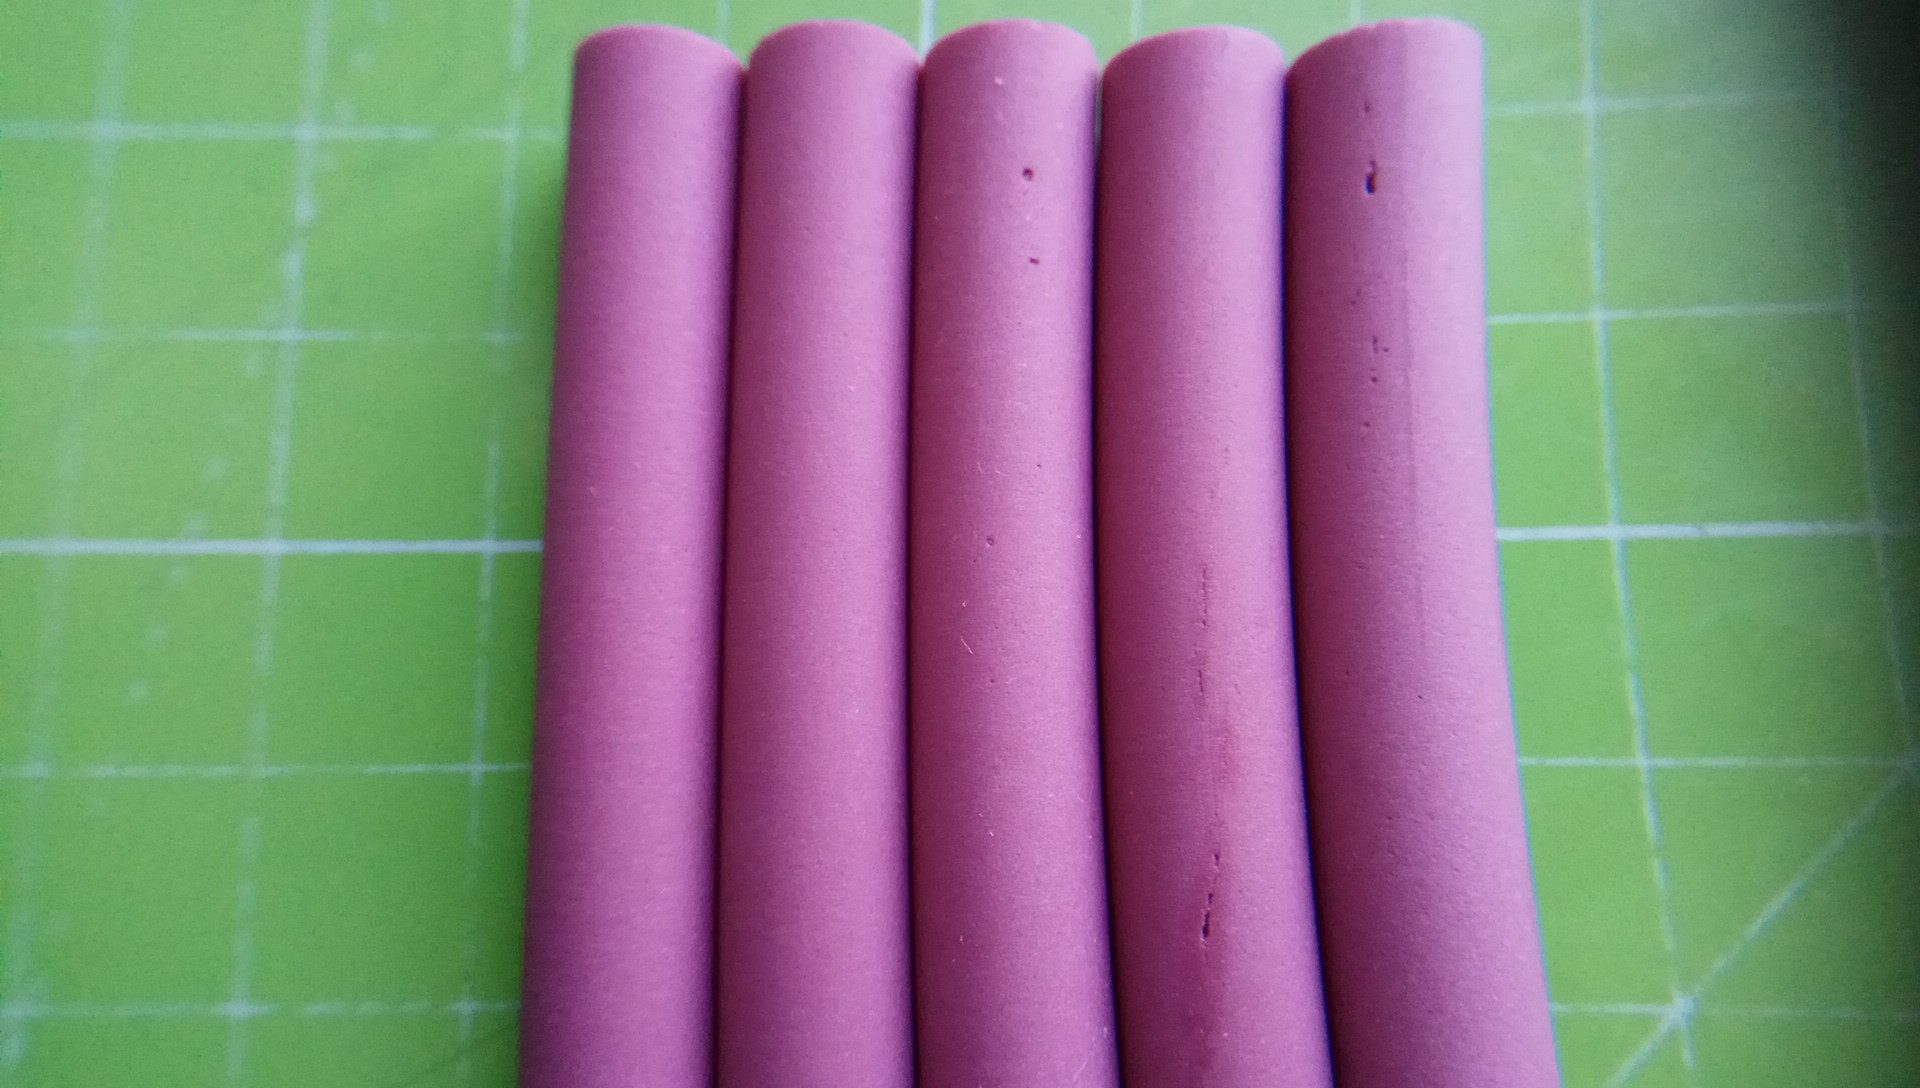
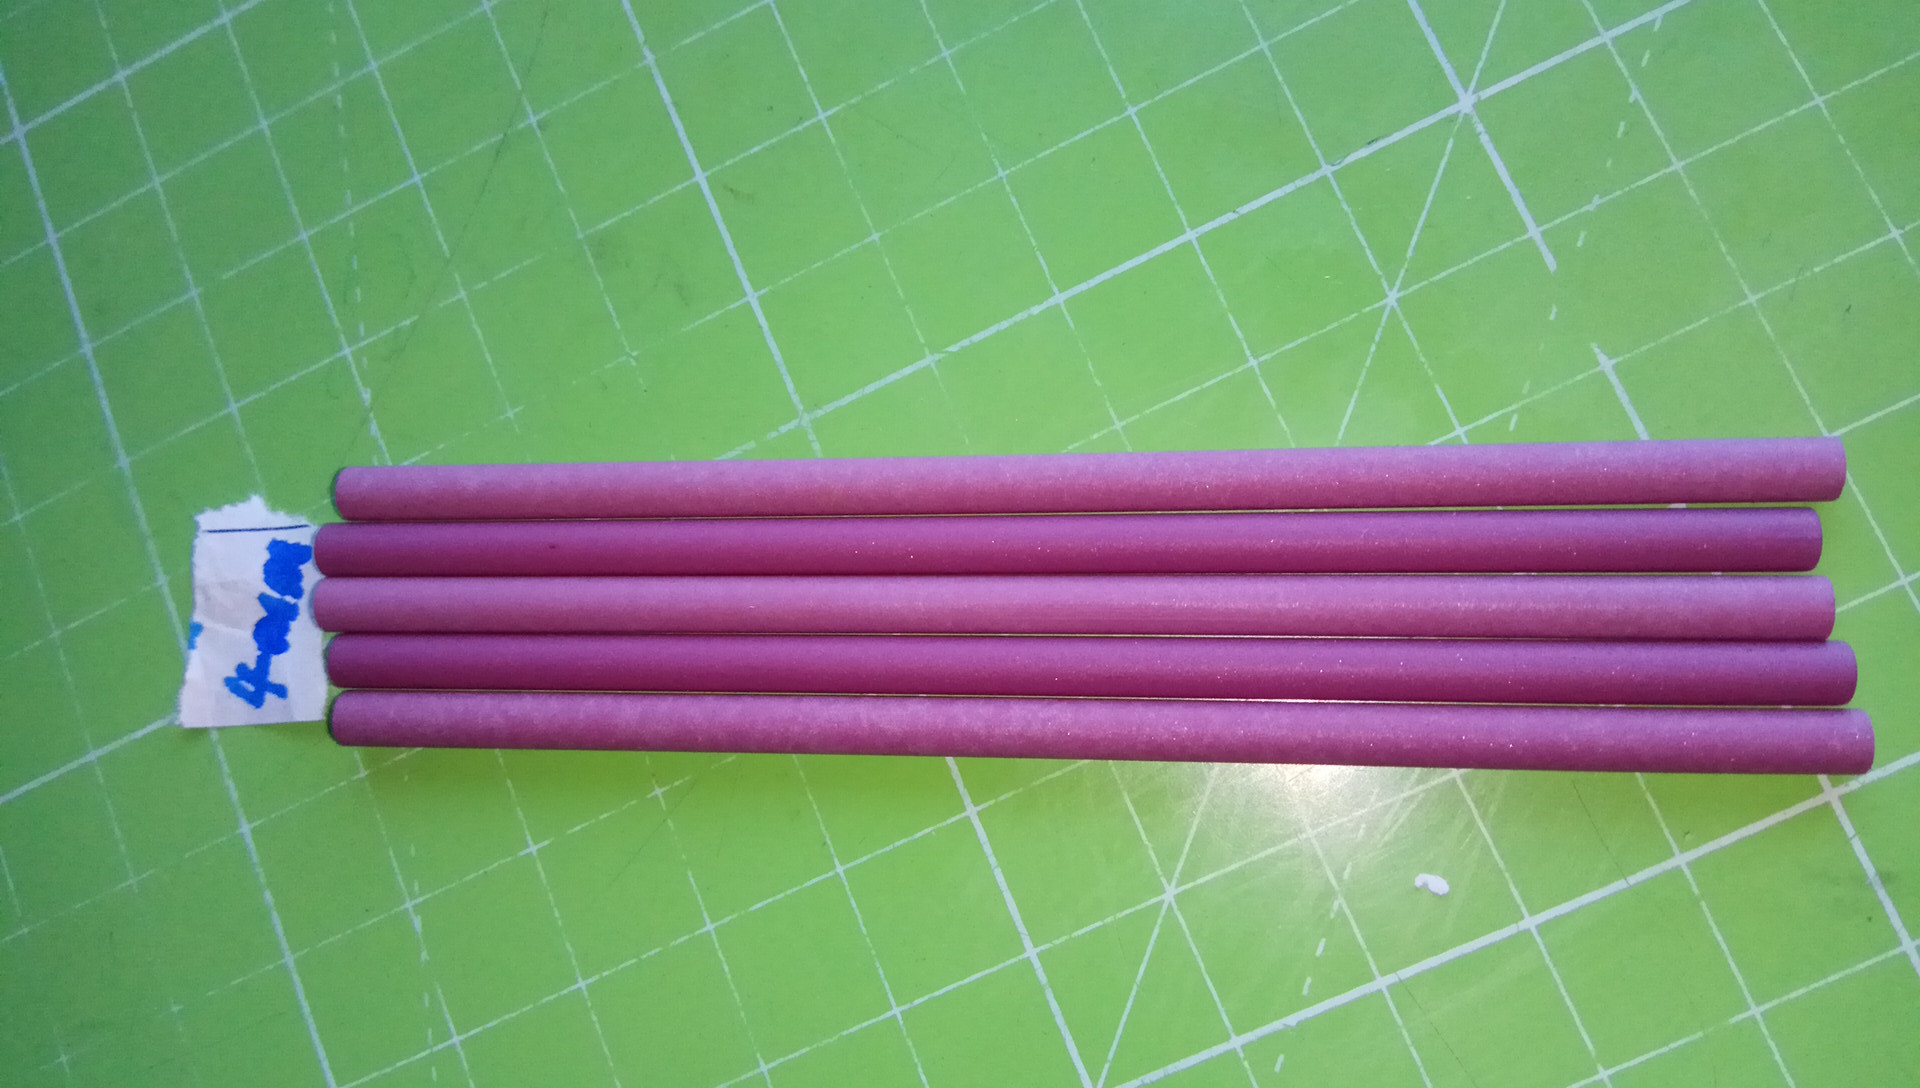
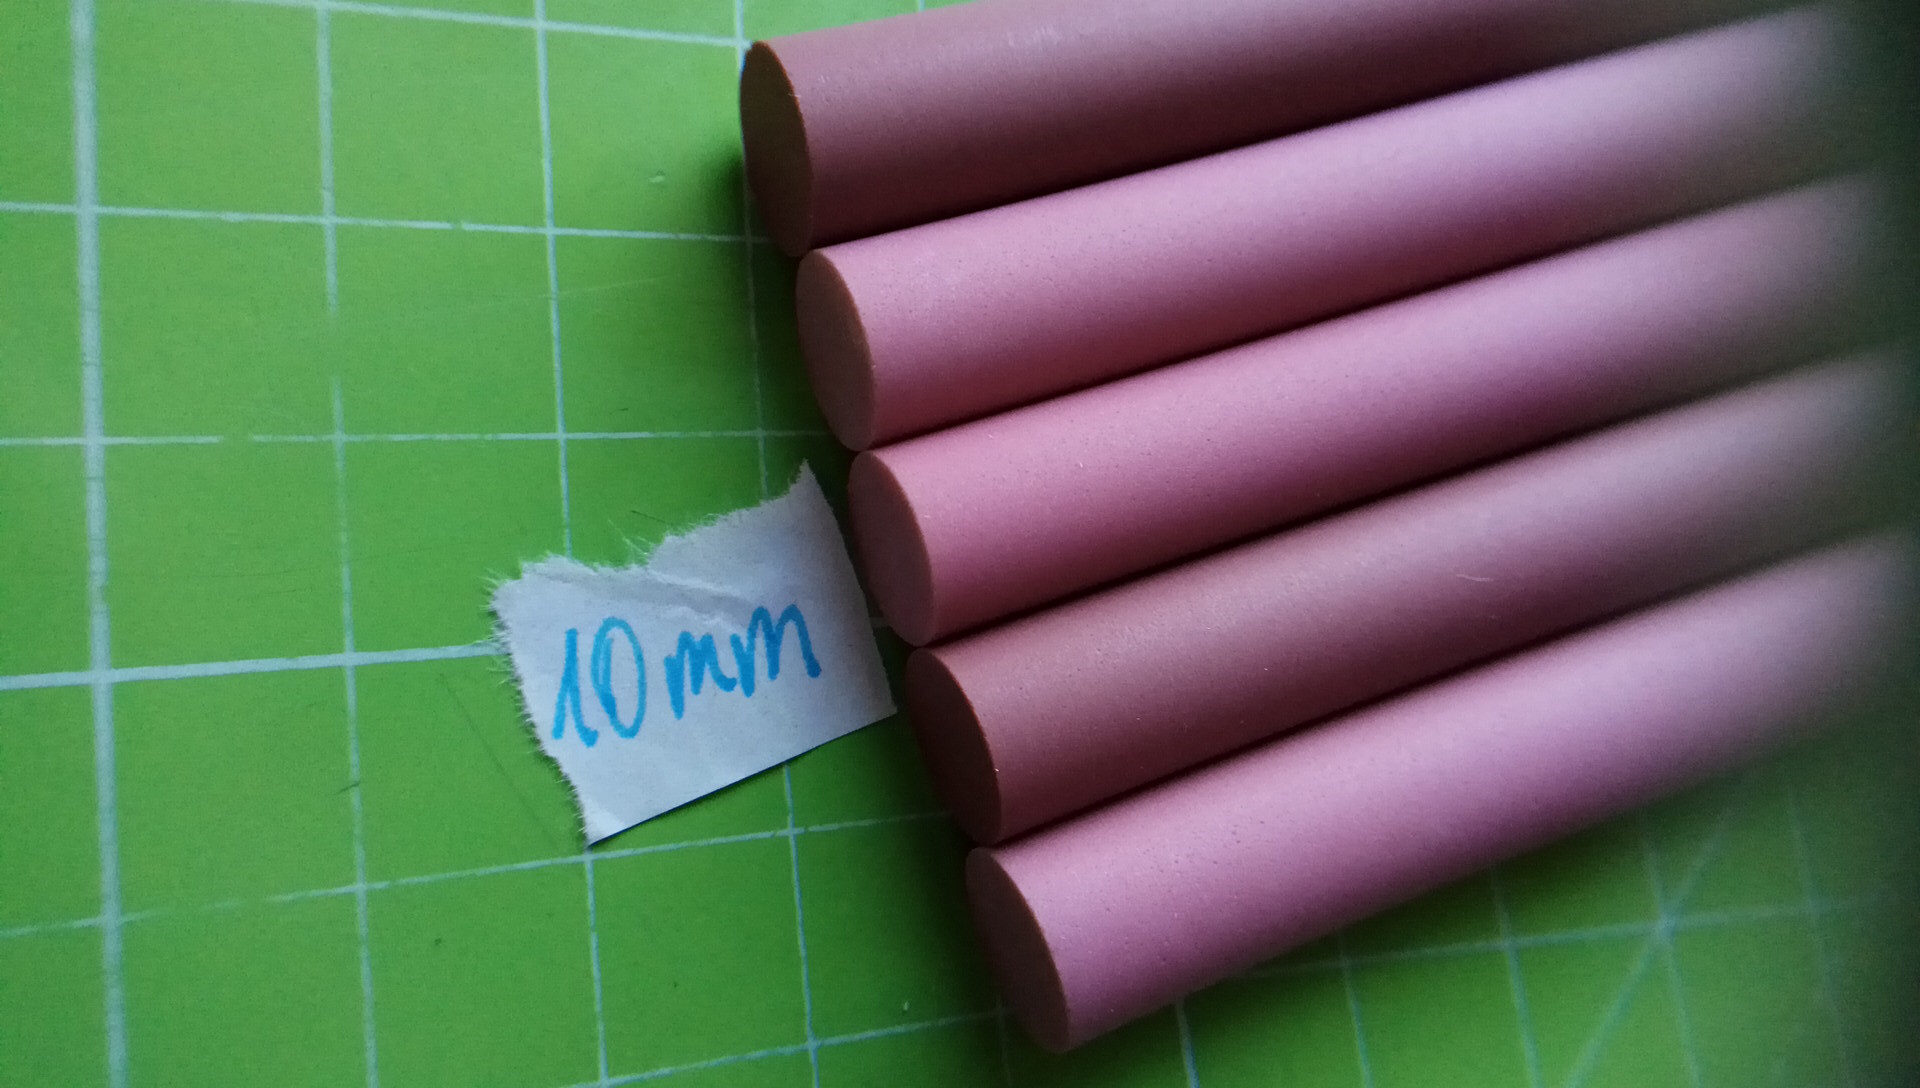
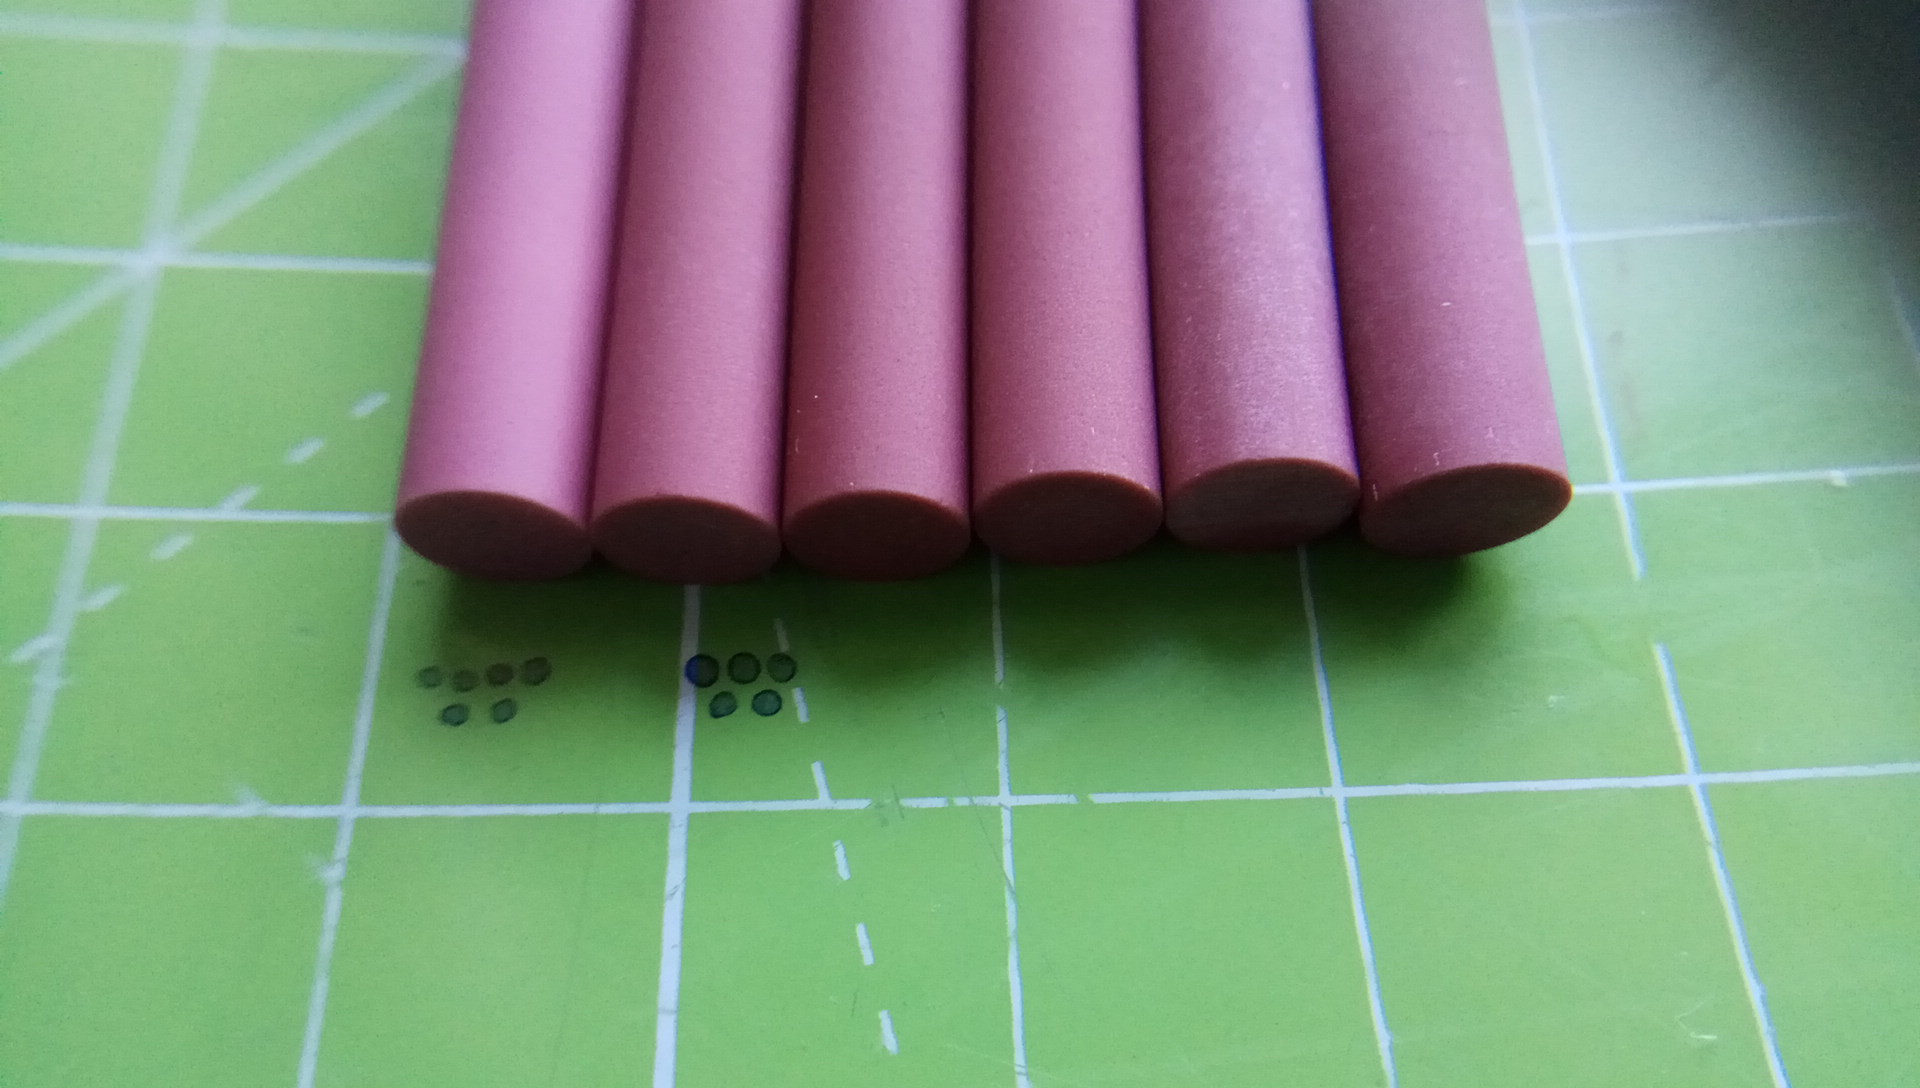
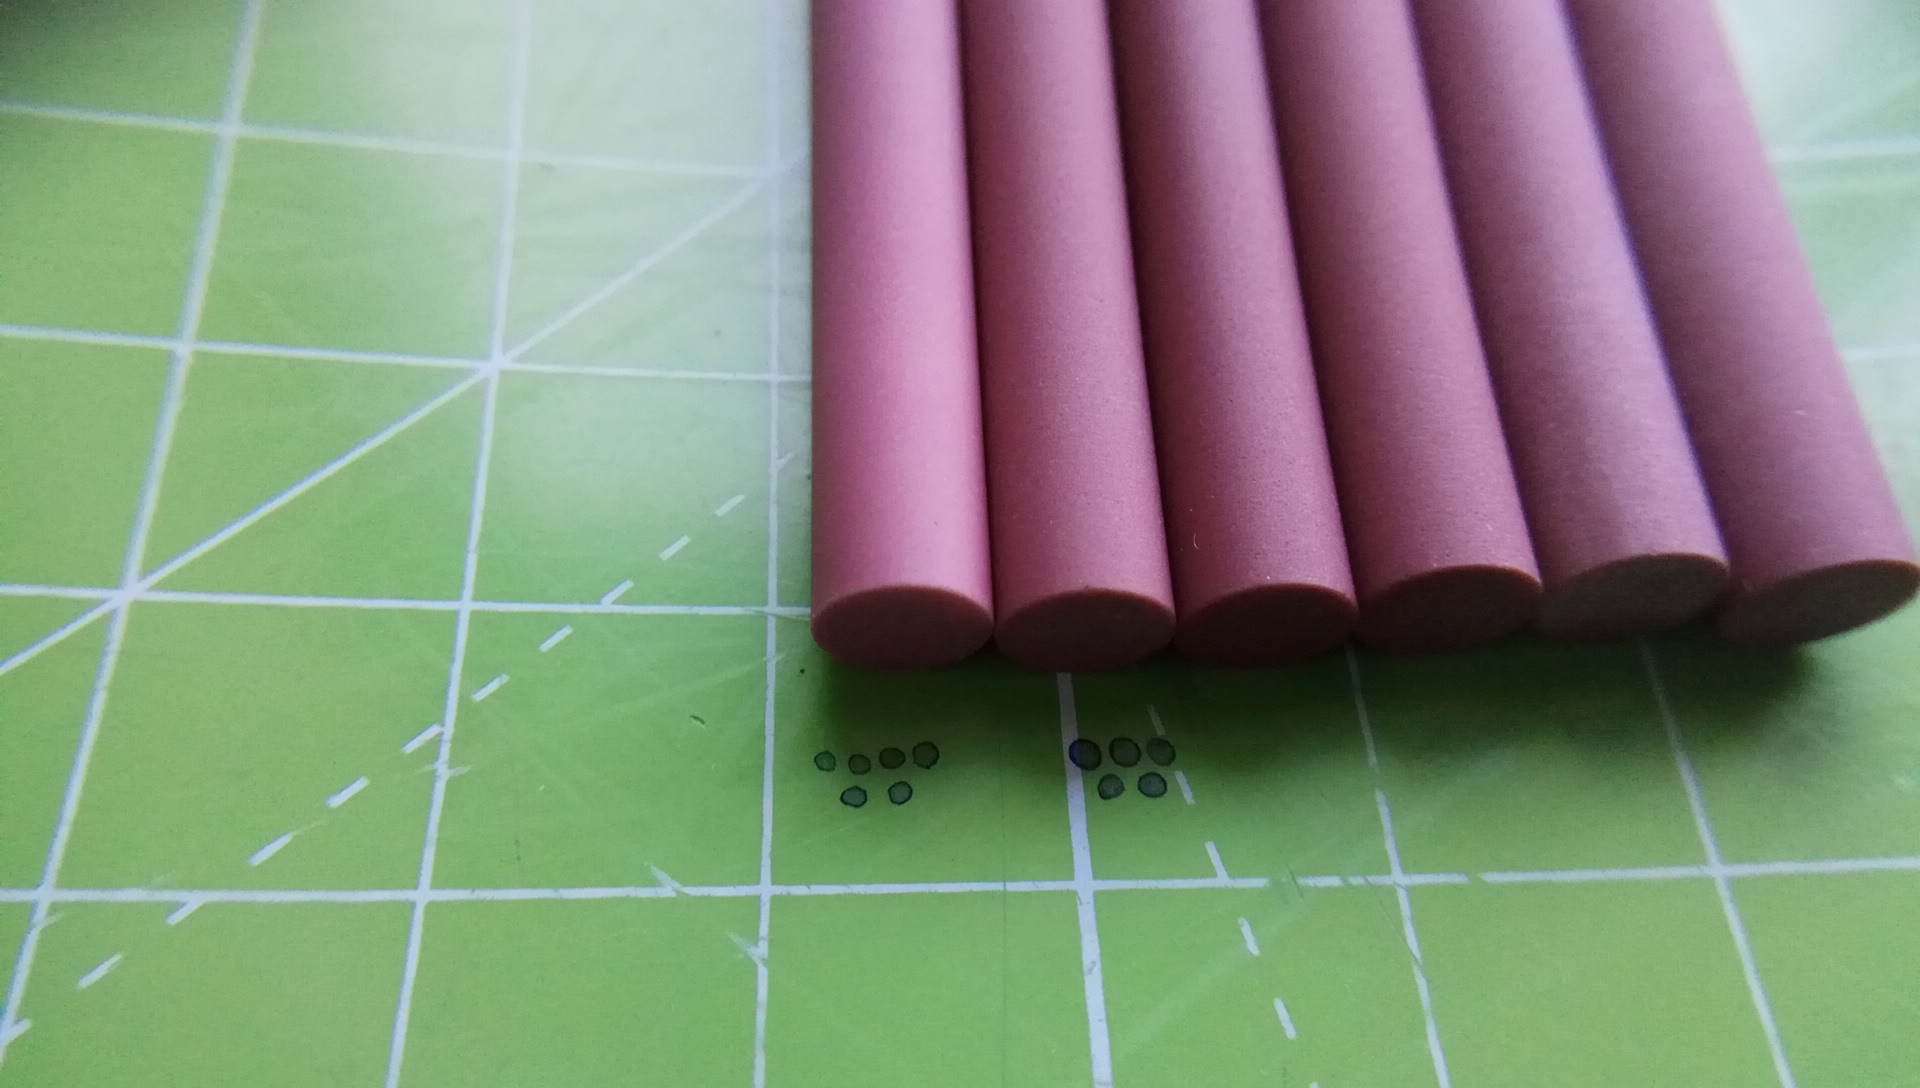
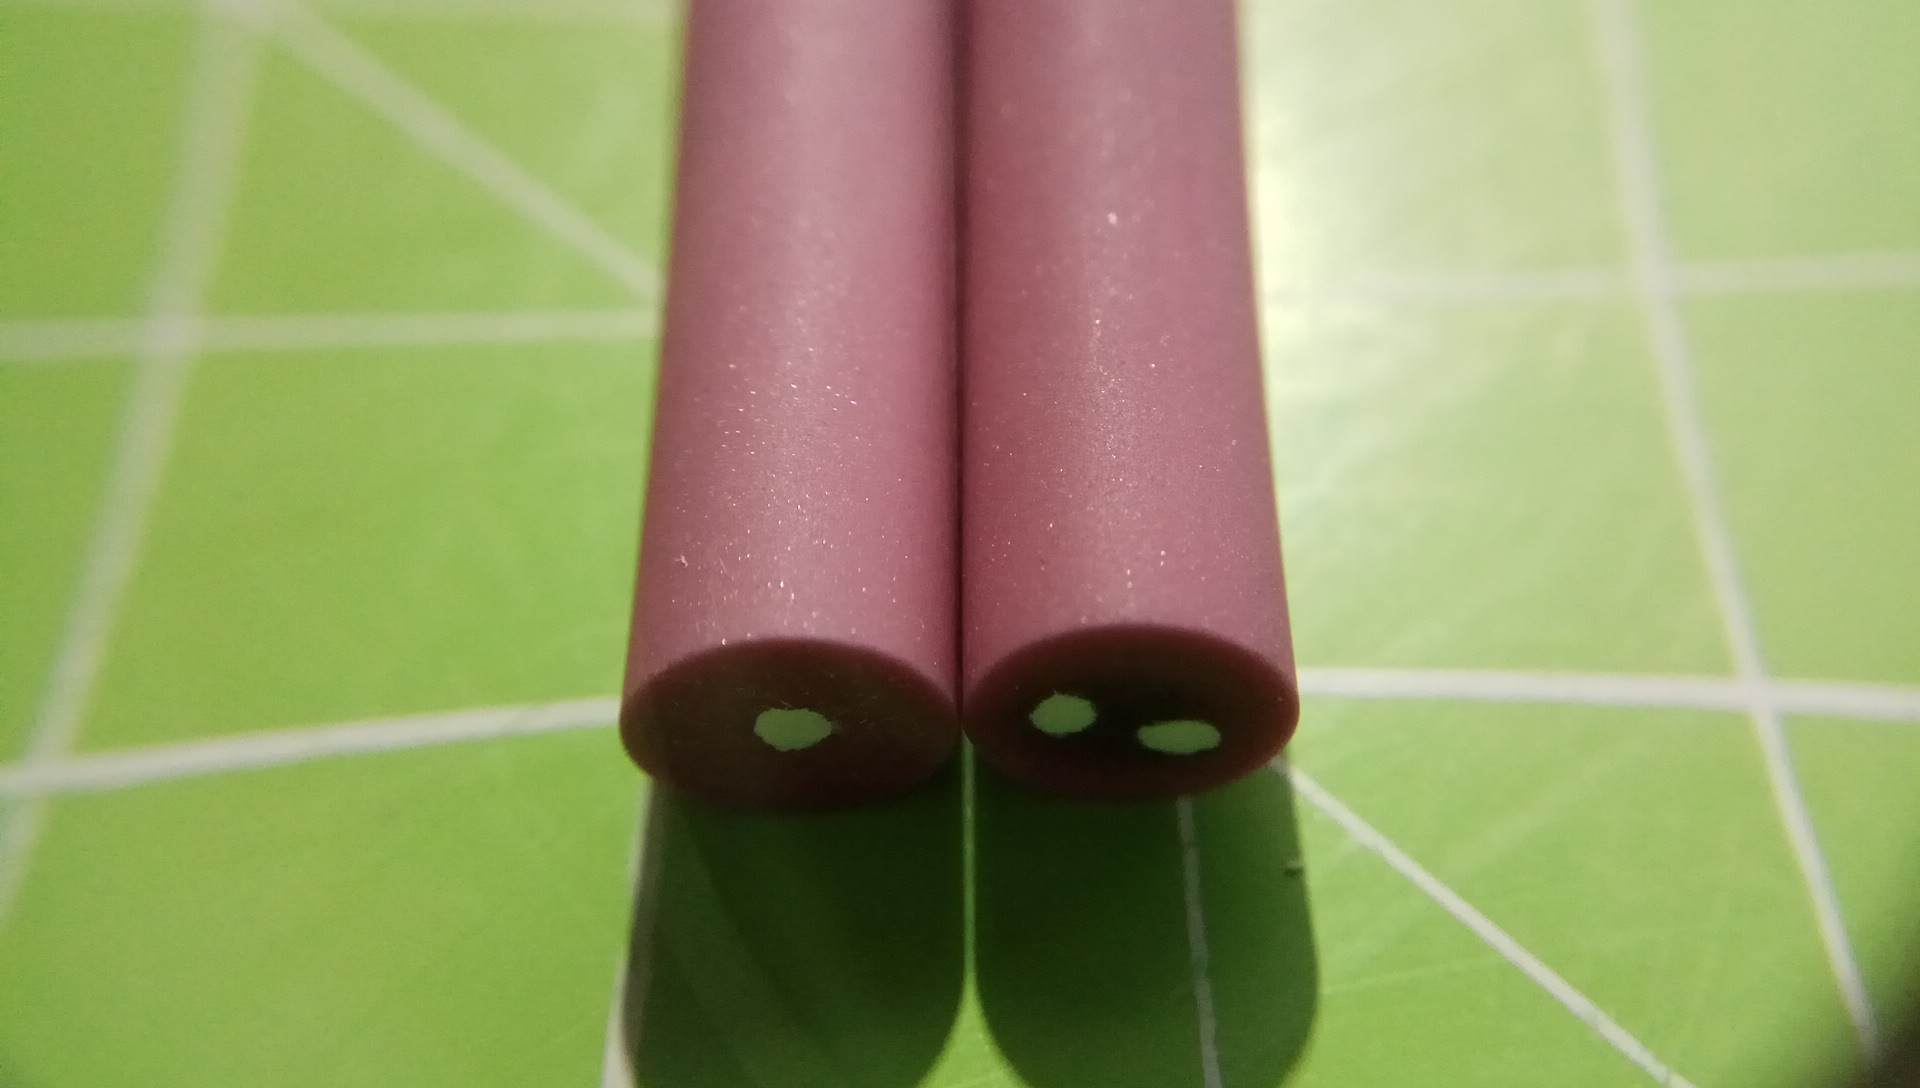
Before we get to the fitment/assembly of the RRS, let's have a look at the stone quality in comparison to my other rubies from 5 similar viewing angles:
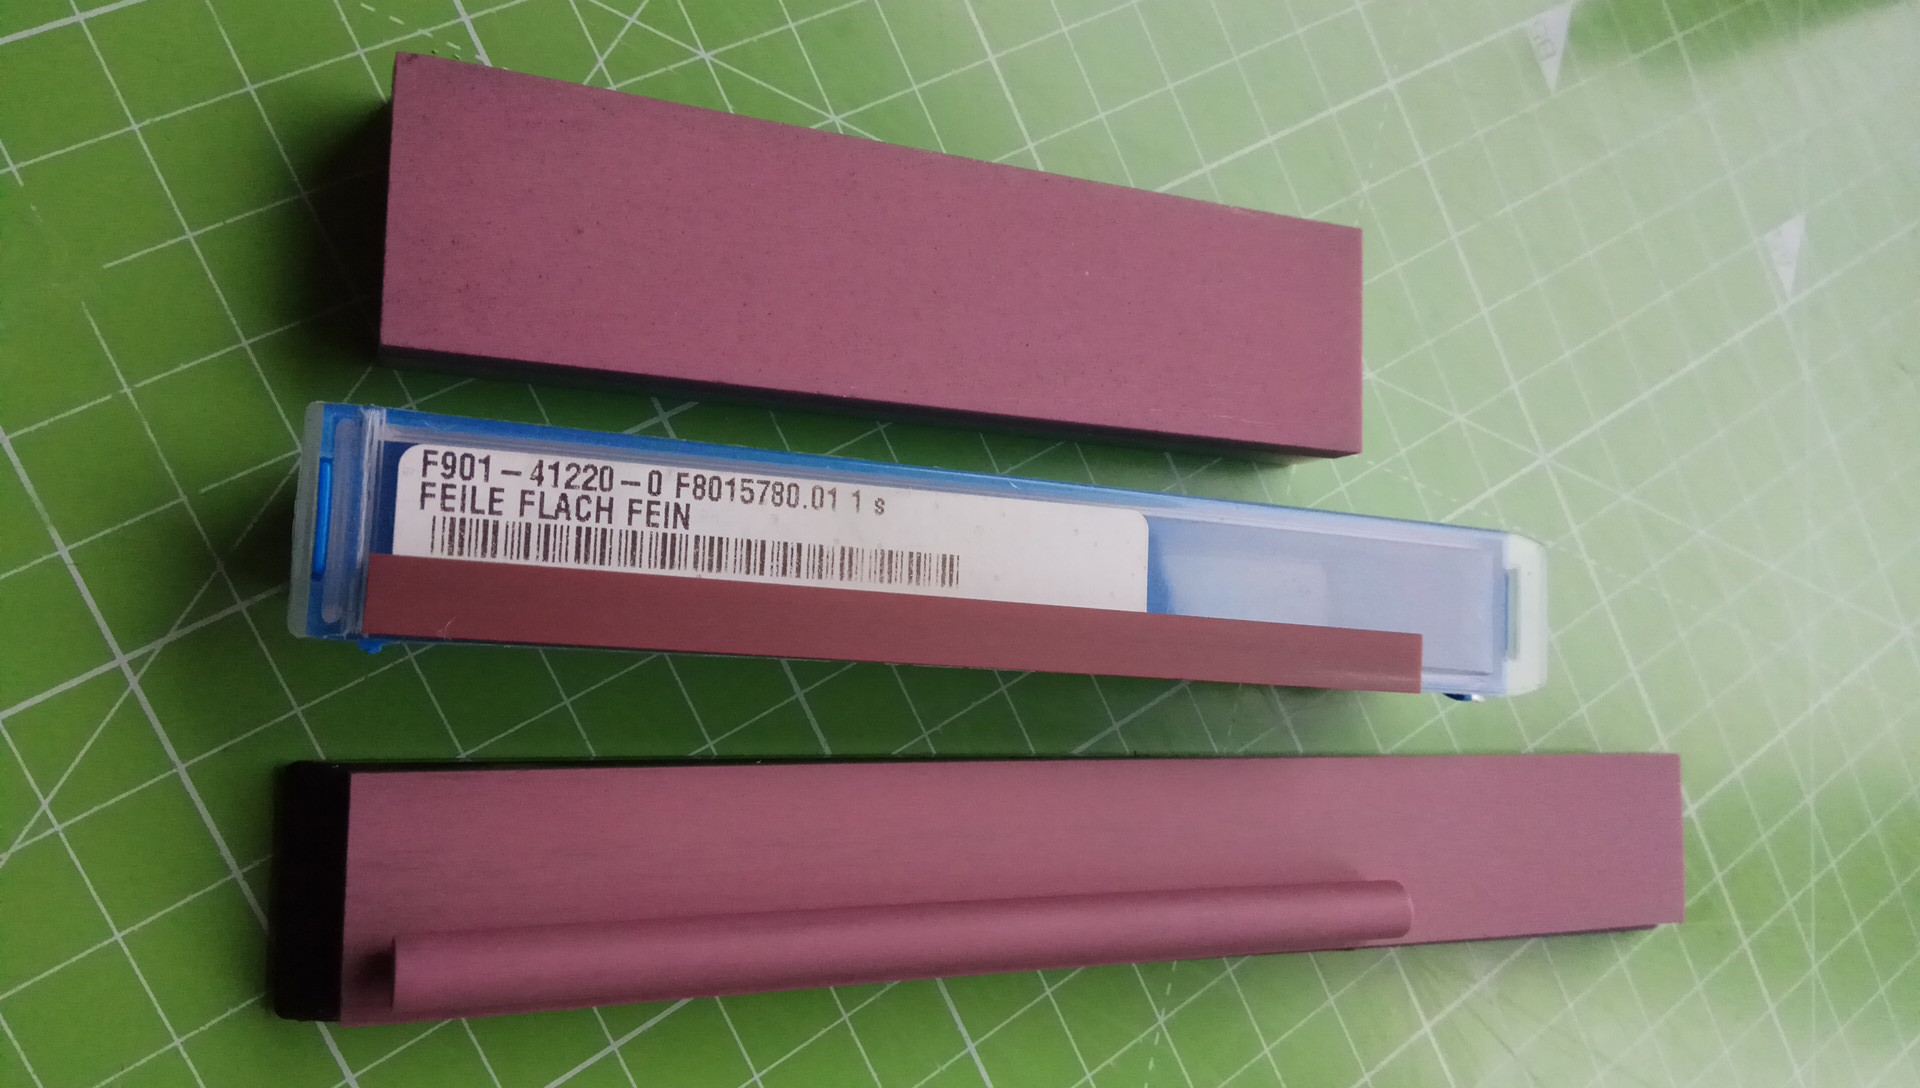
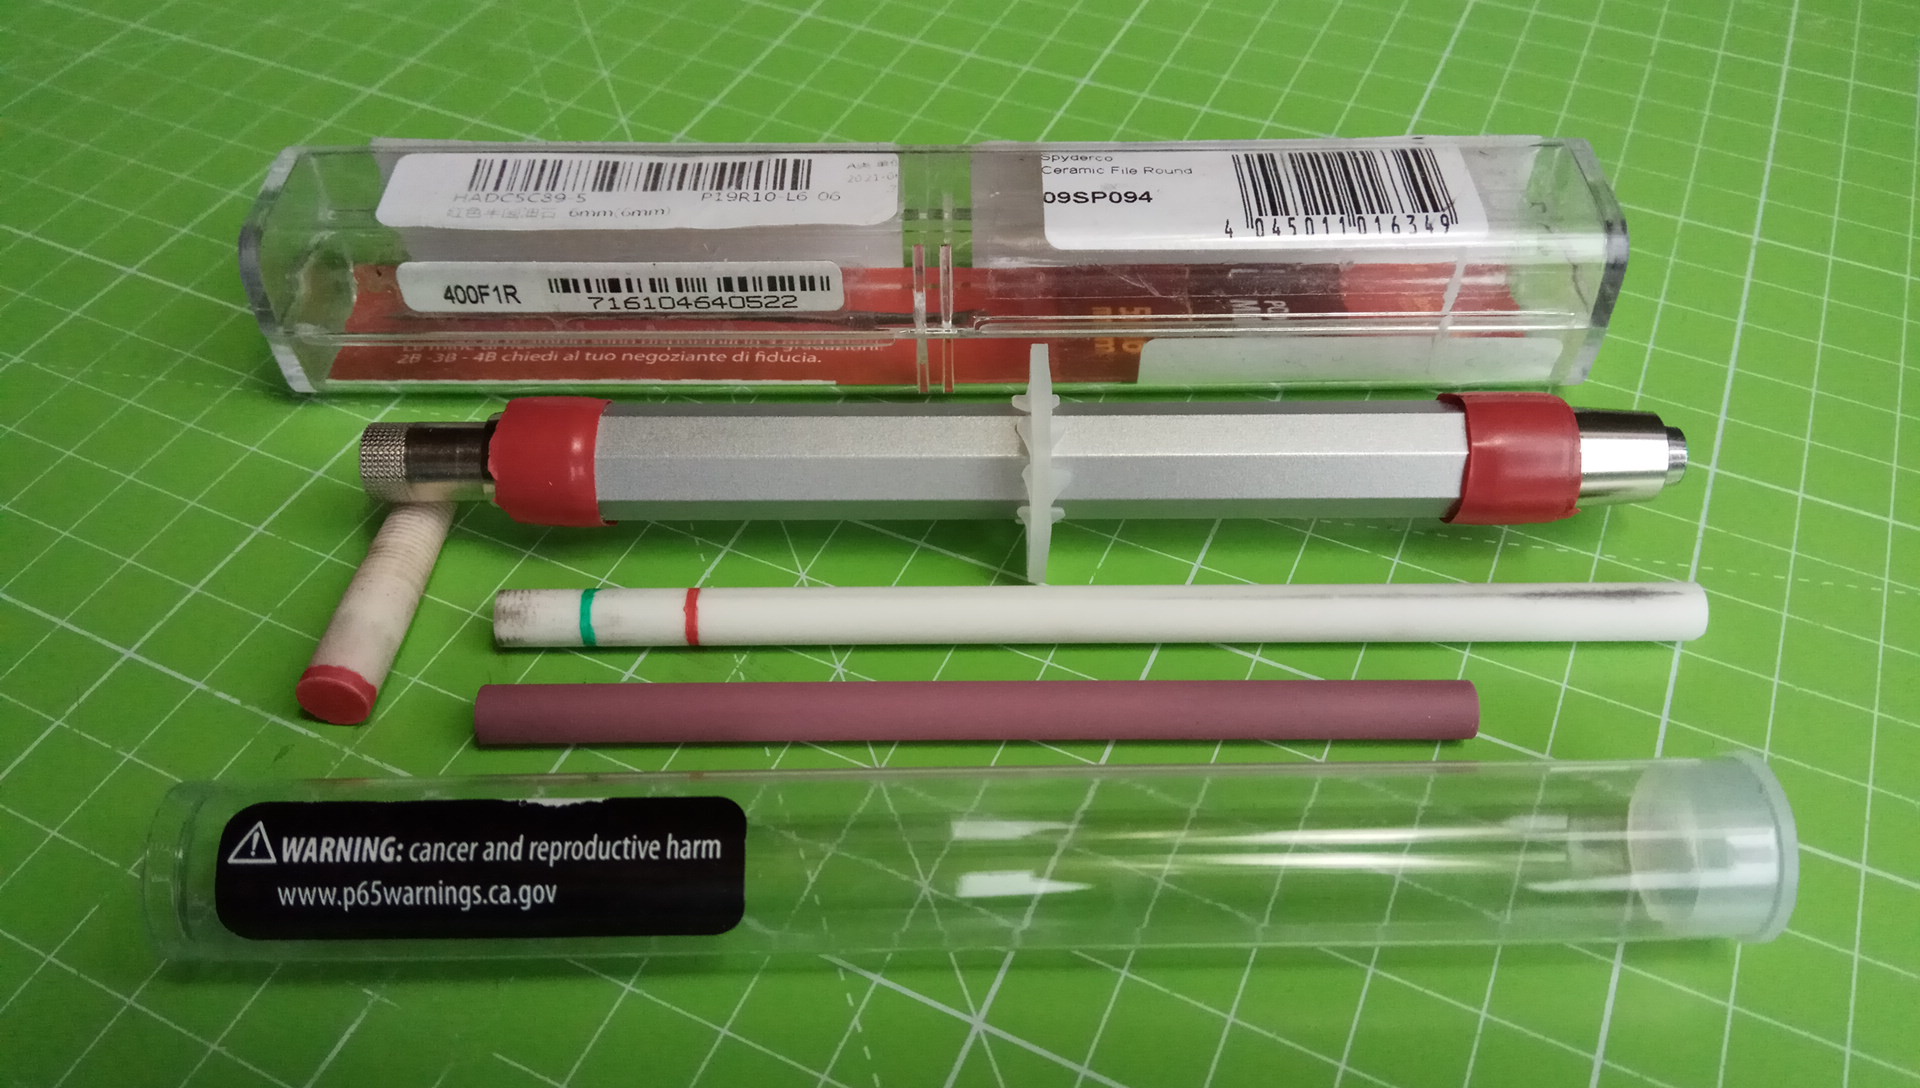
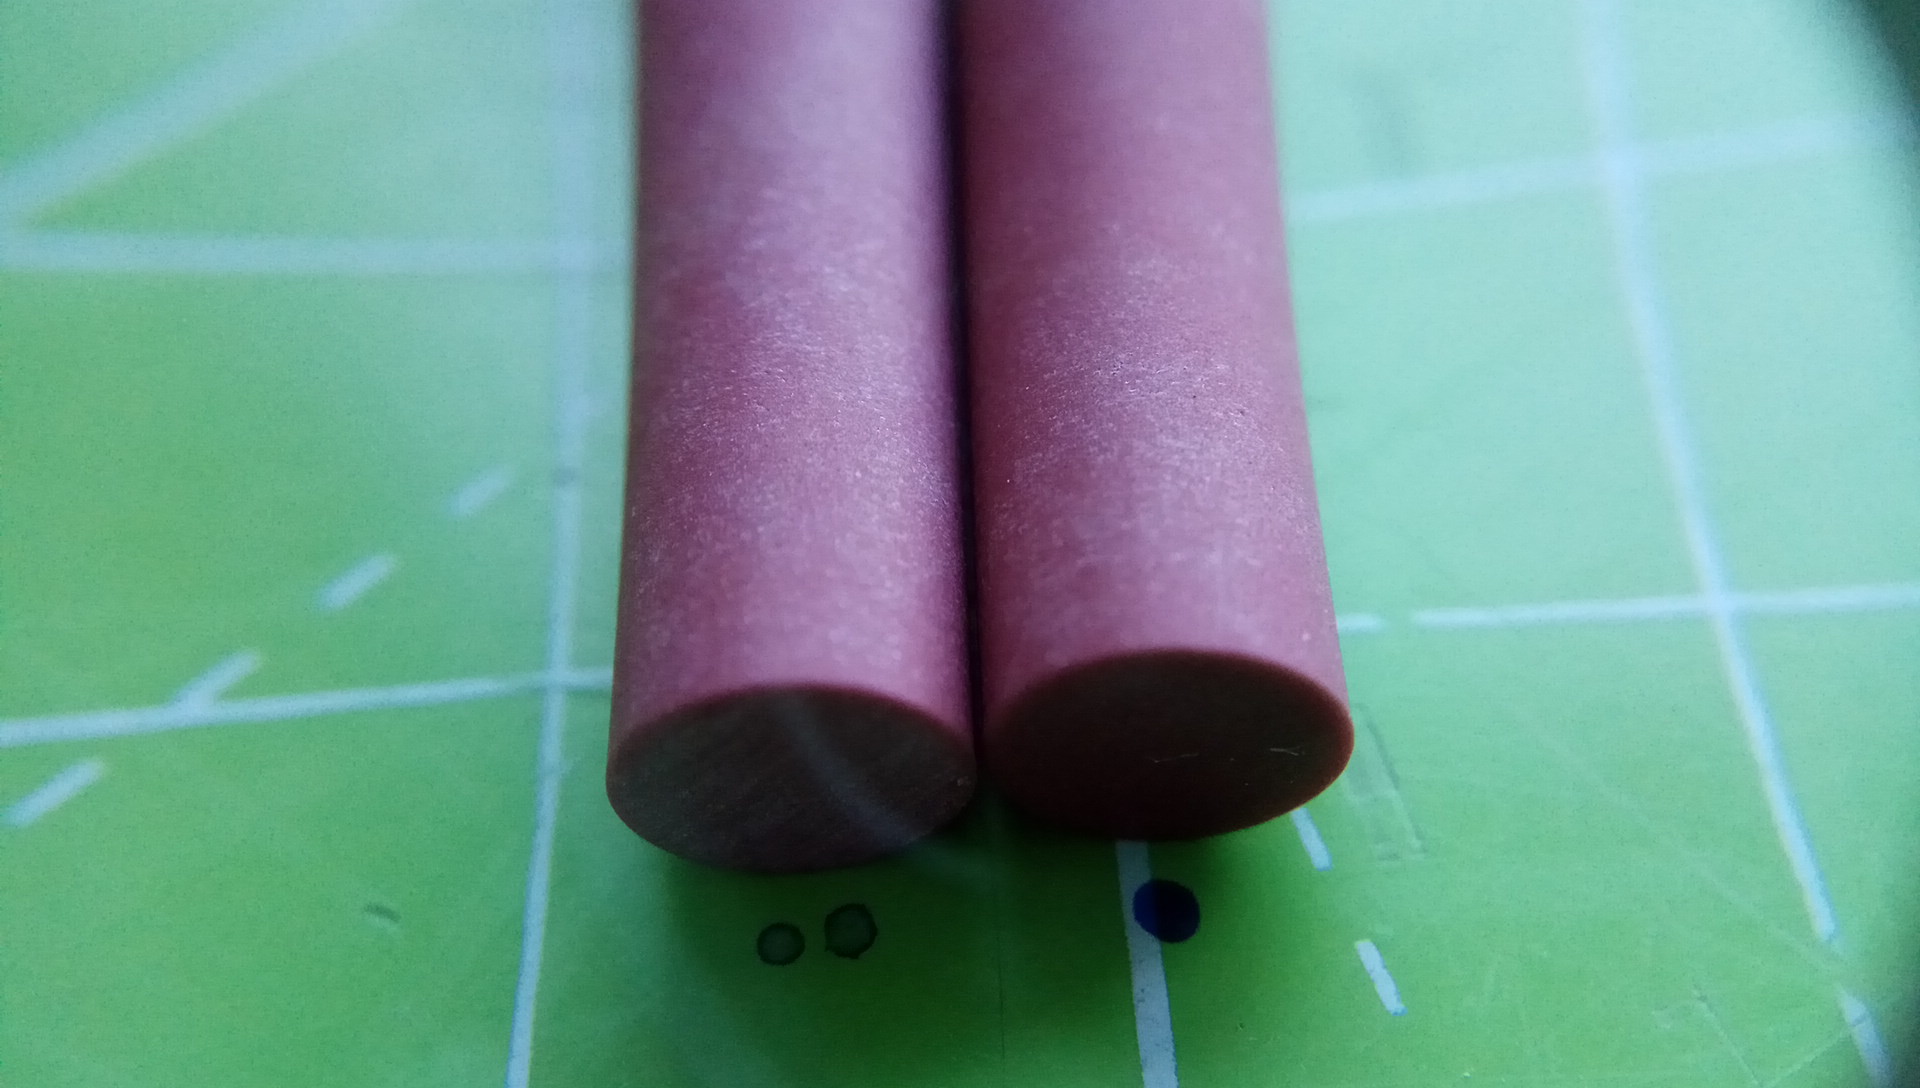
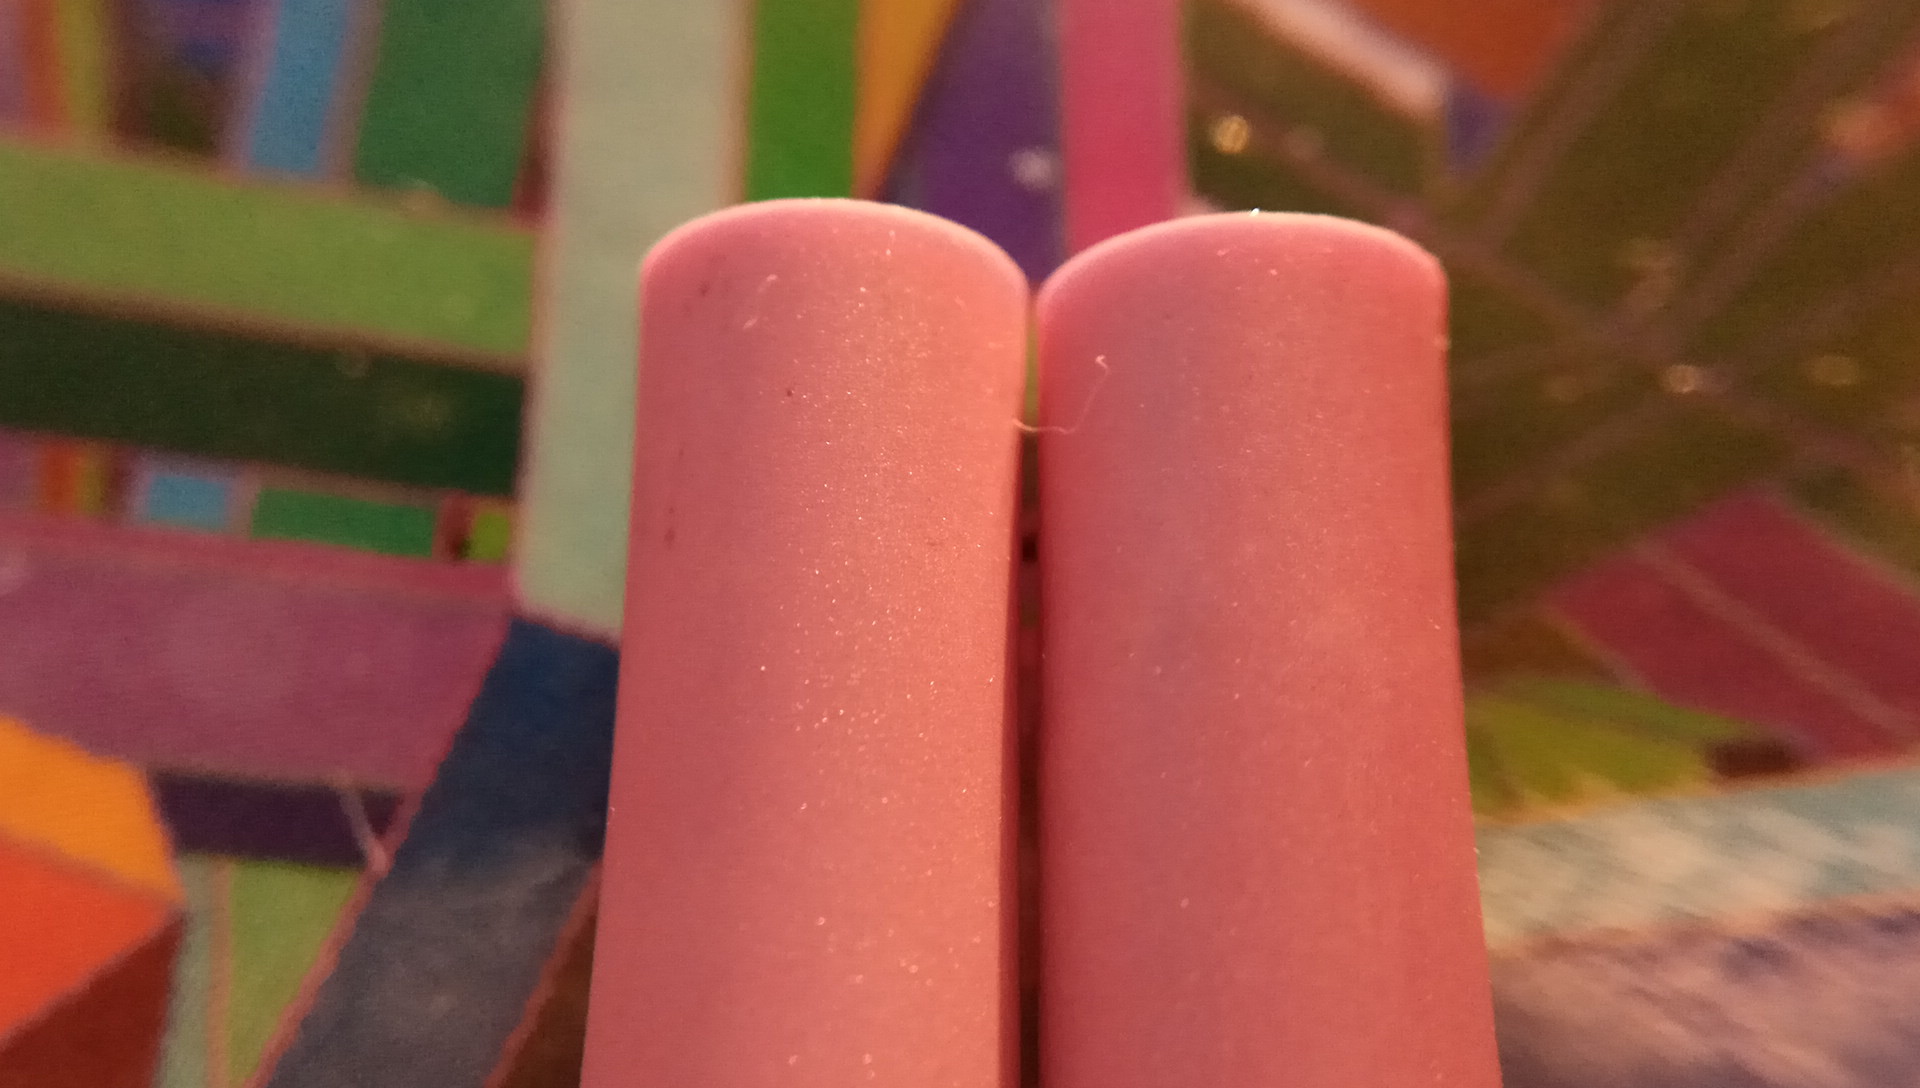
I will say that the color of the cylindrical ruby is very similar to, i.e. pretty much the same as the other 2 CN rubies, as you can see (short stone at top of pic, long stone at bottom):
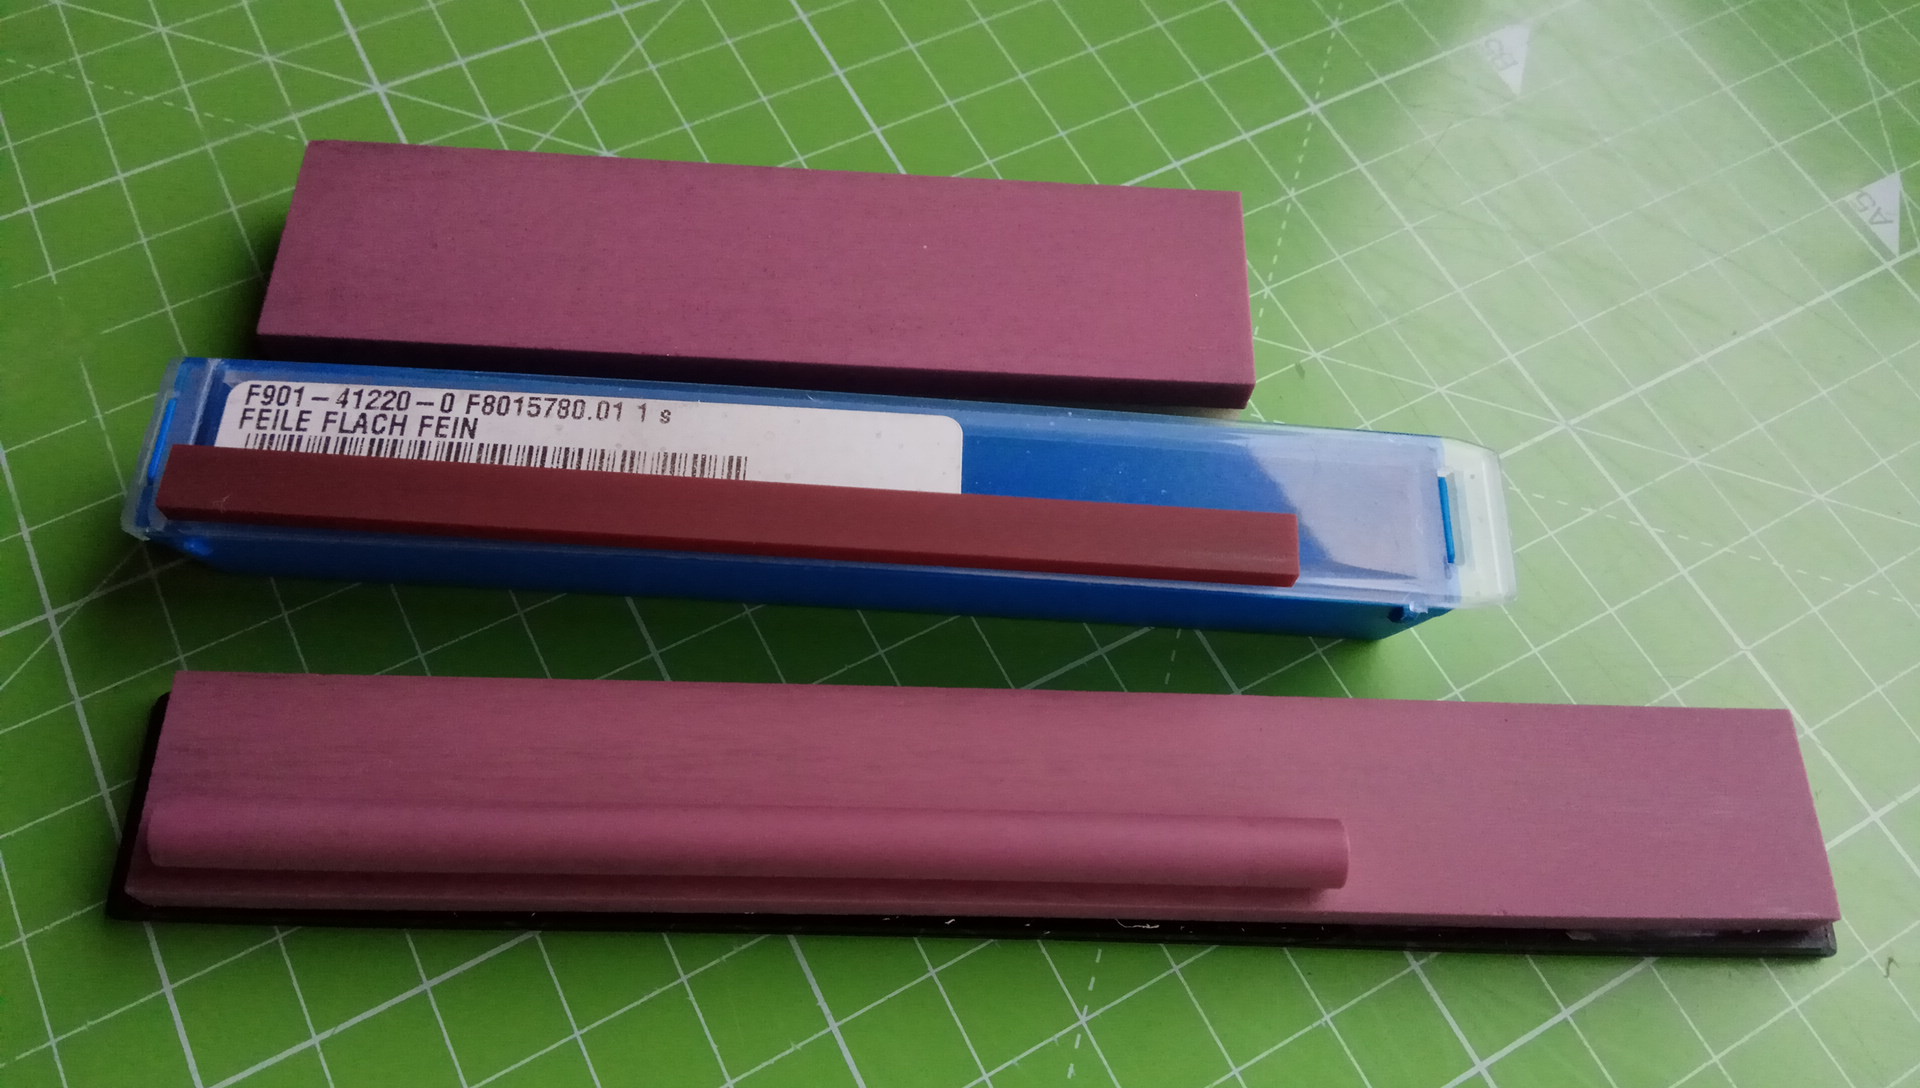
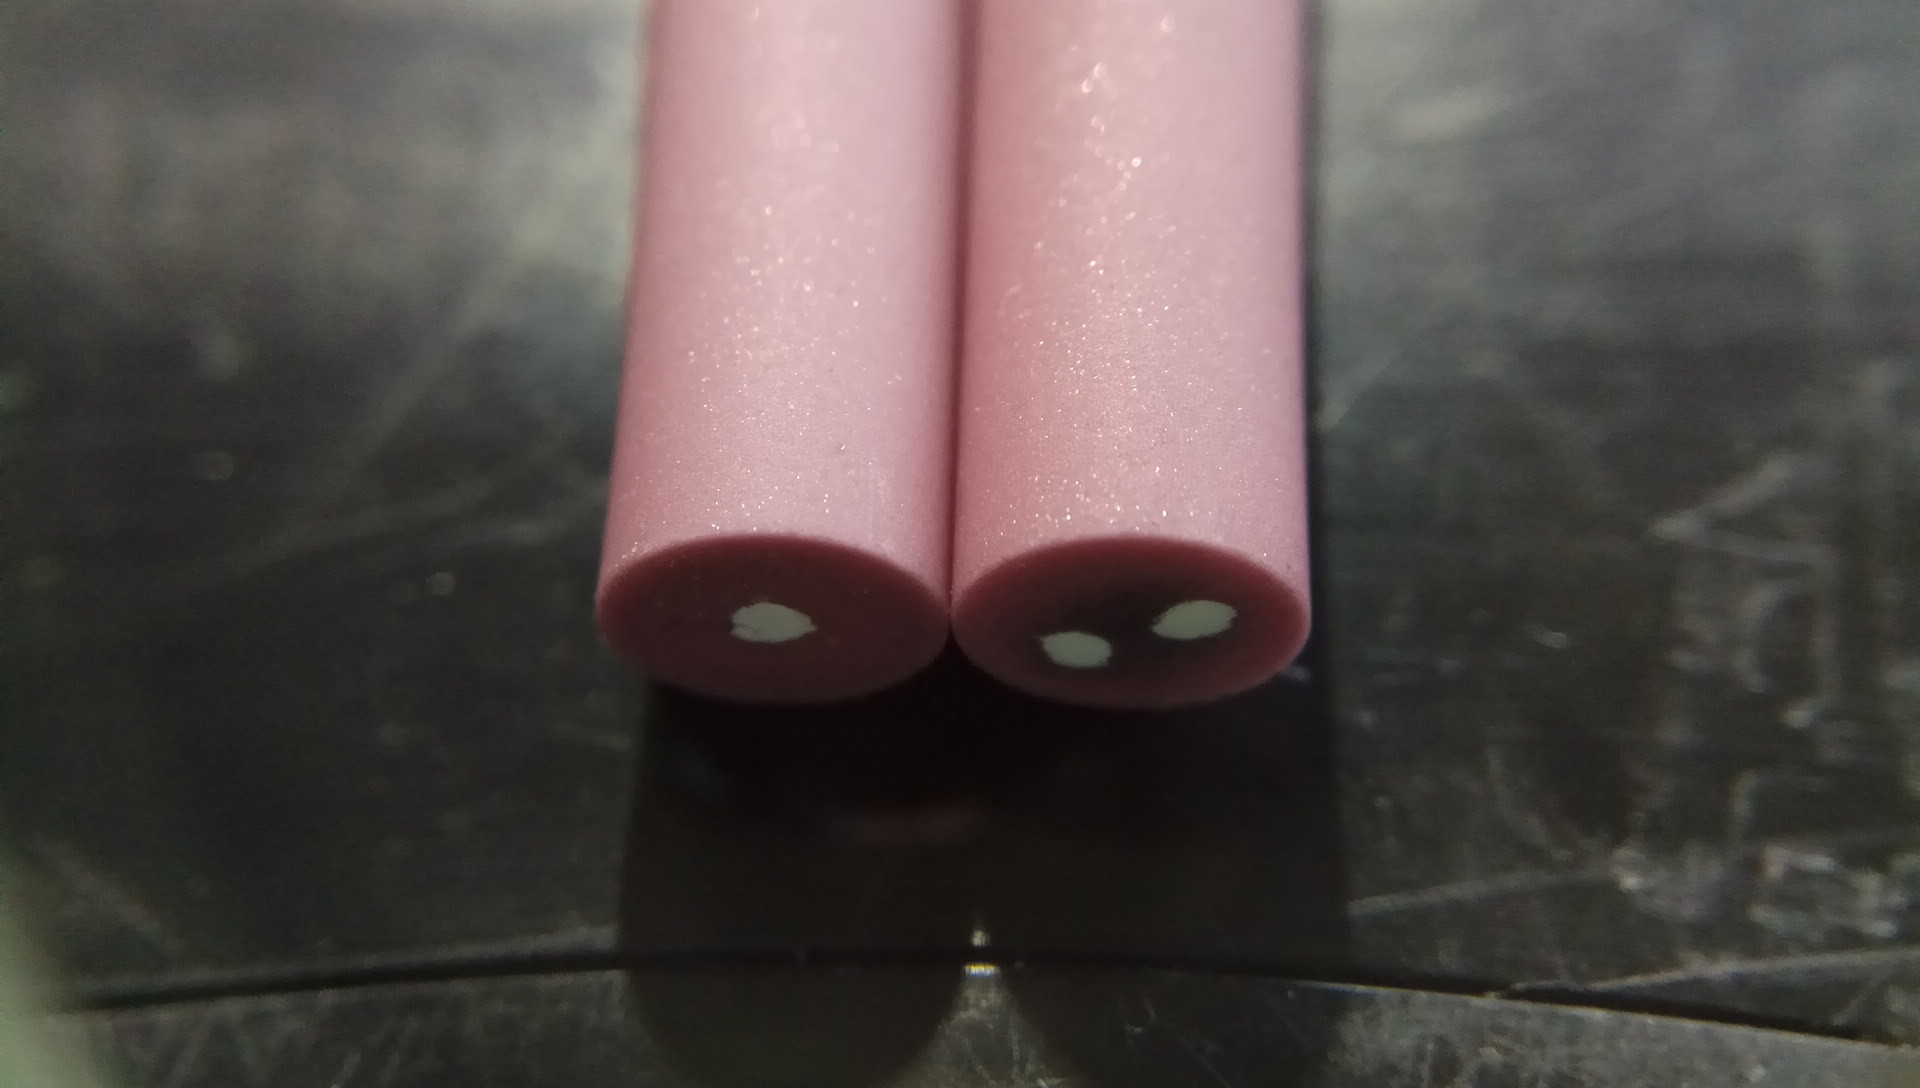
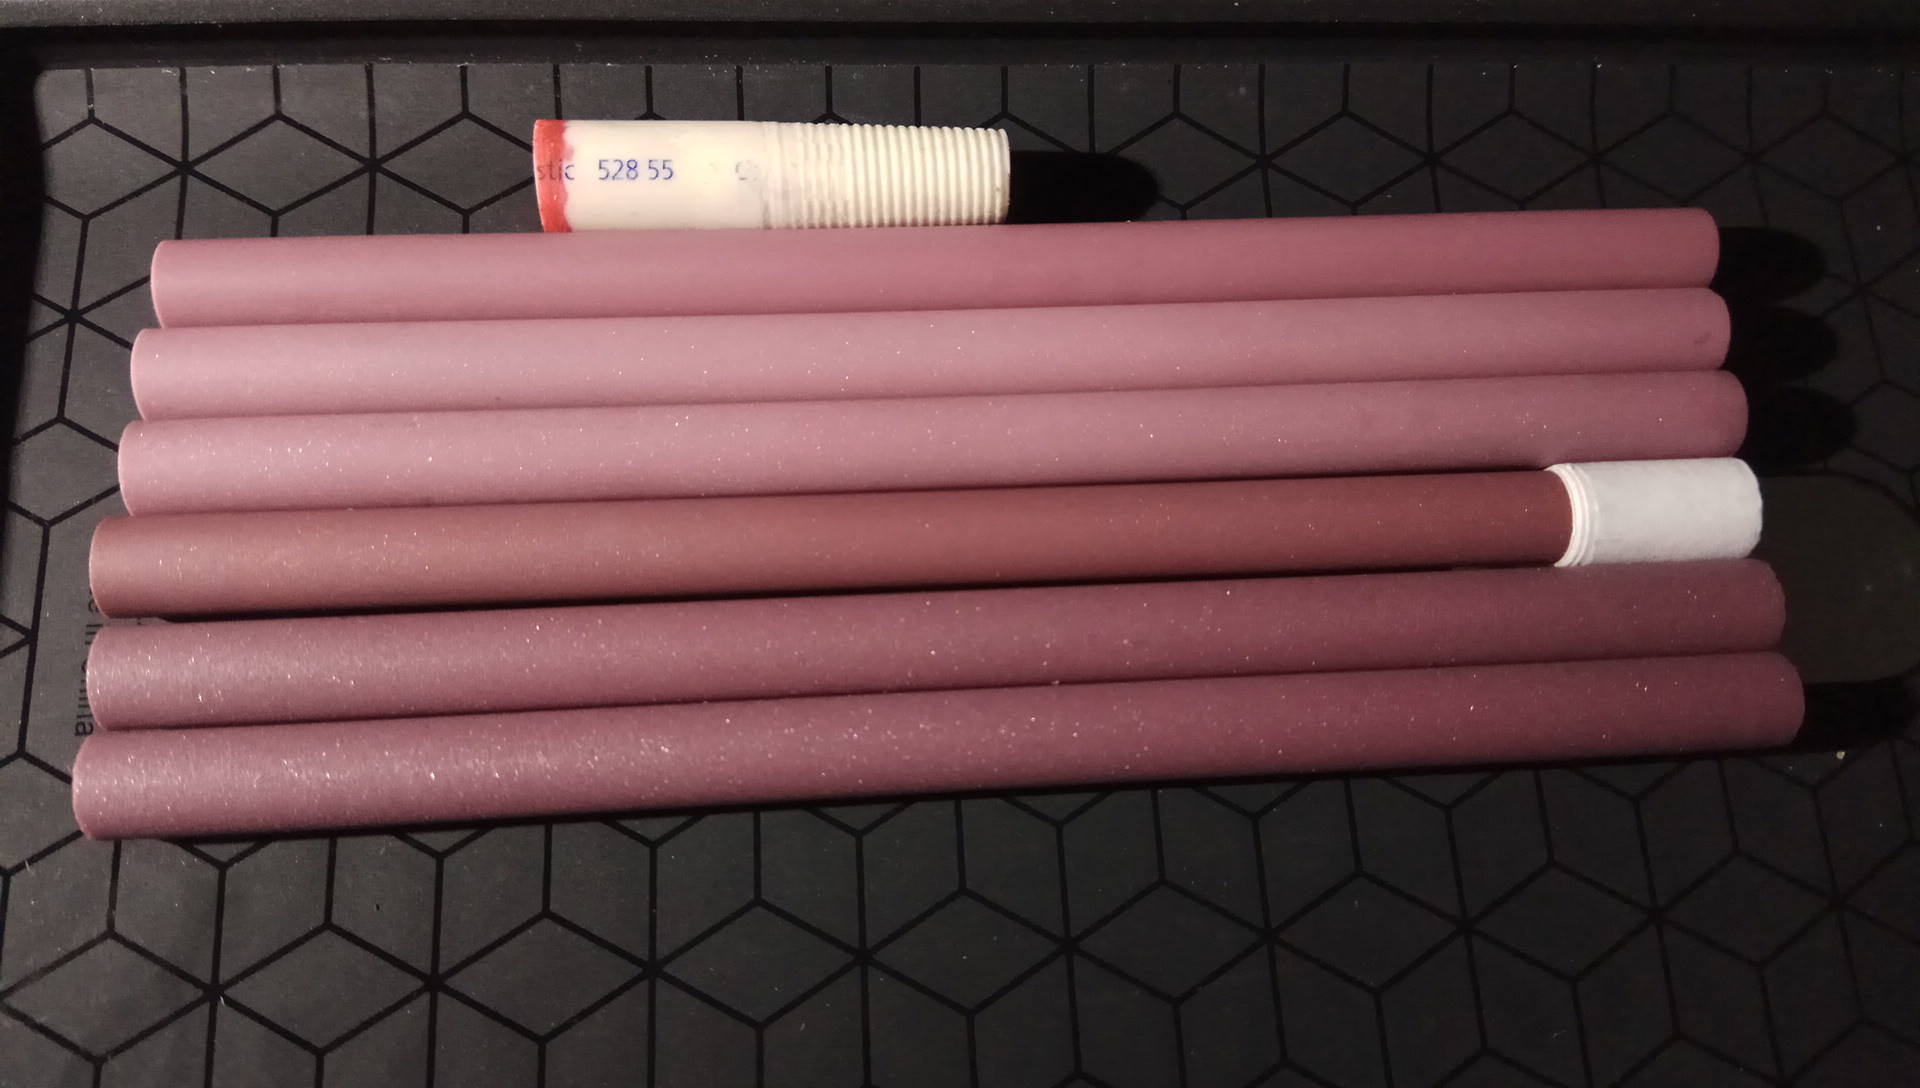
The long stone, mine marketed by ANSELF brand for use with Ruixin Pro III, has amazing quality and properties for itself but the surface quality of the cylindrical ruby is even higher, and finer - by direct comparison i knew that i had to be satisfied with the delivered cylindrical ruby and that i couldn't have asked for more:
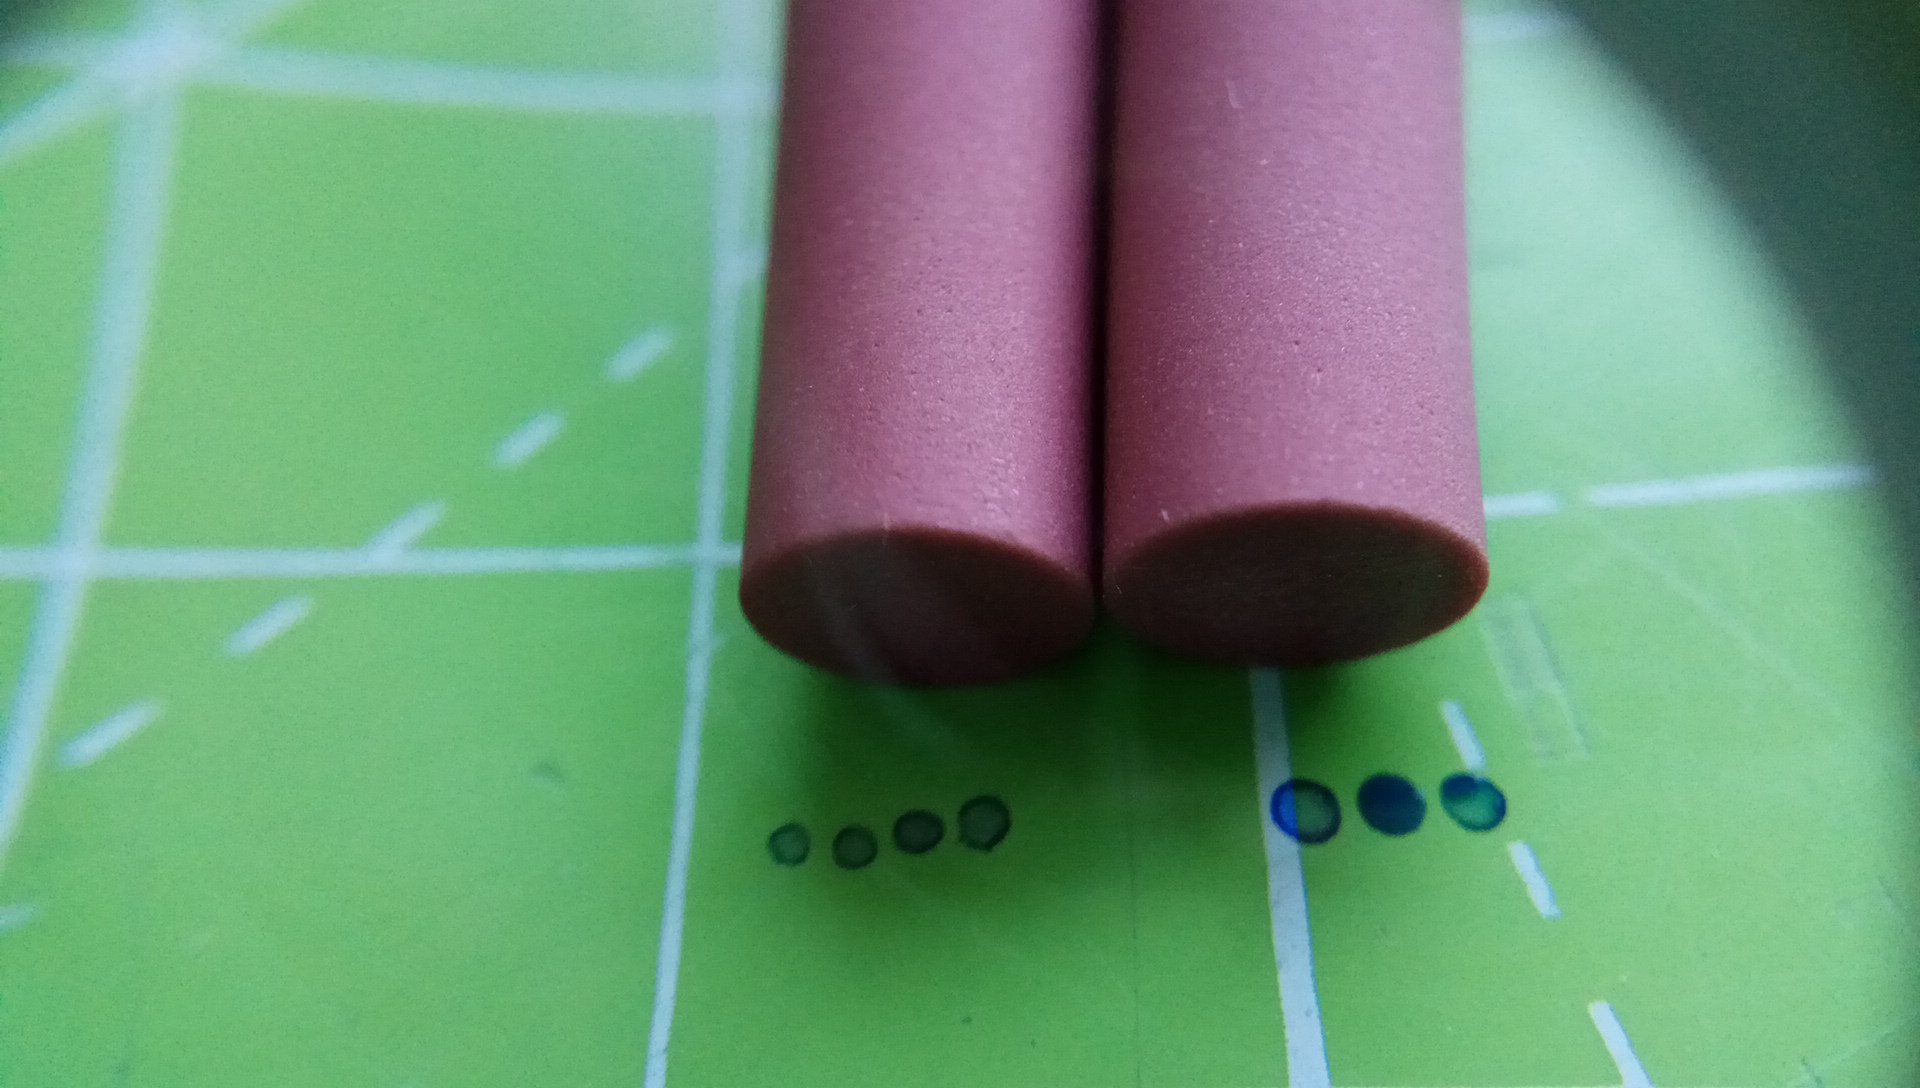
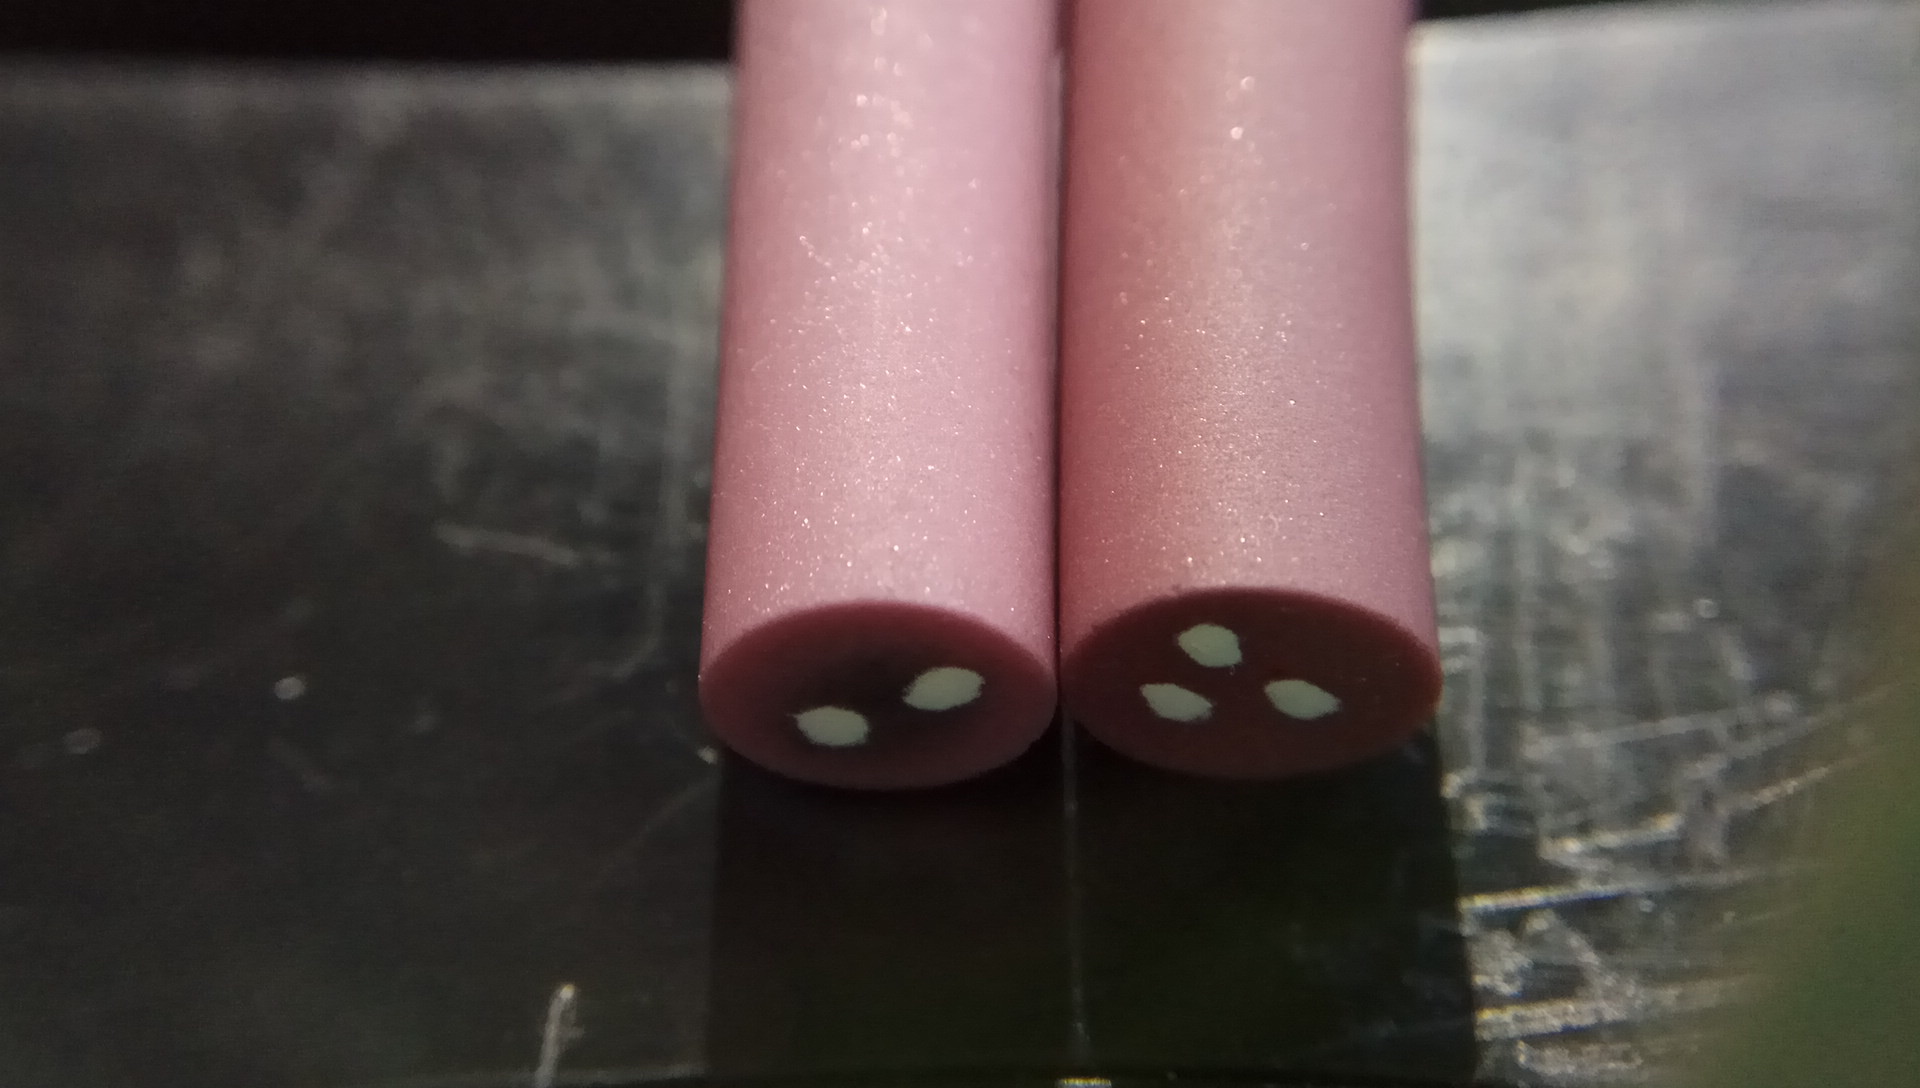
The left small stone ("DoubleStuff") has a meh surface quality, one could even tell from the photos. If all CN doublestuffstones have this identical quality, then i would probably not recommend it to other shoppers:
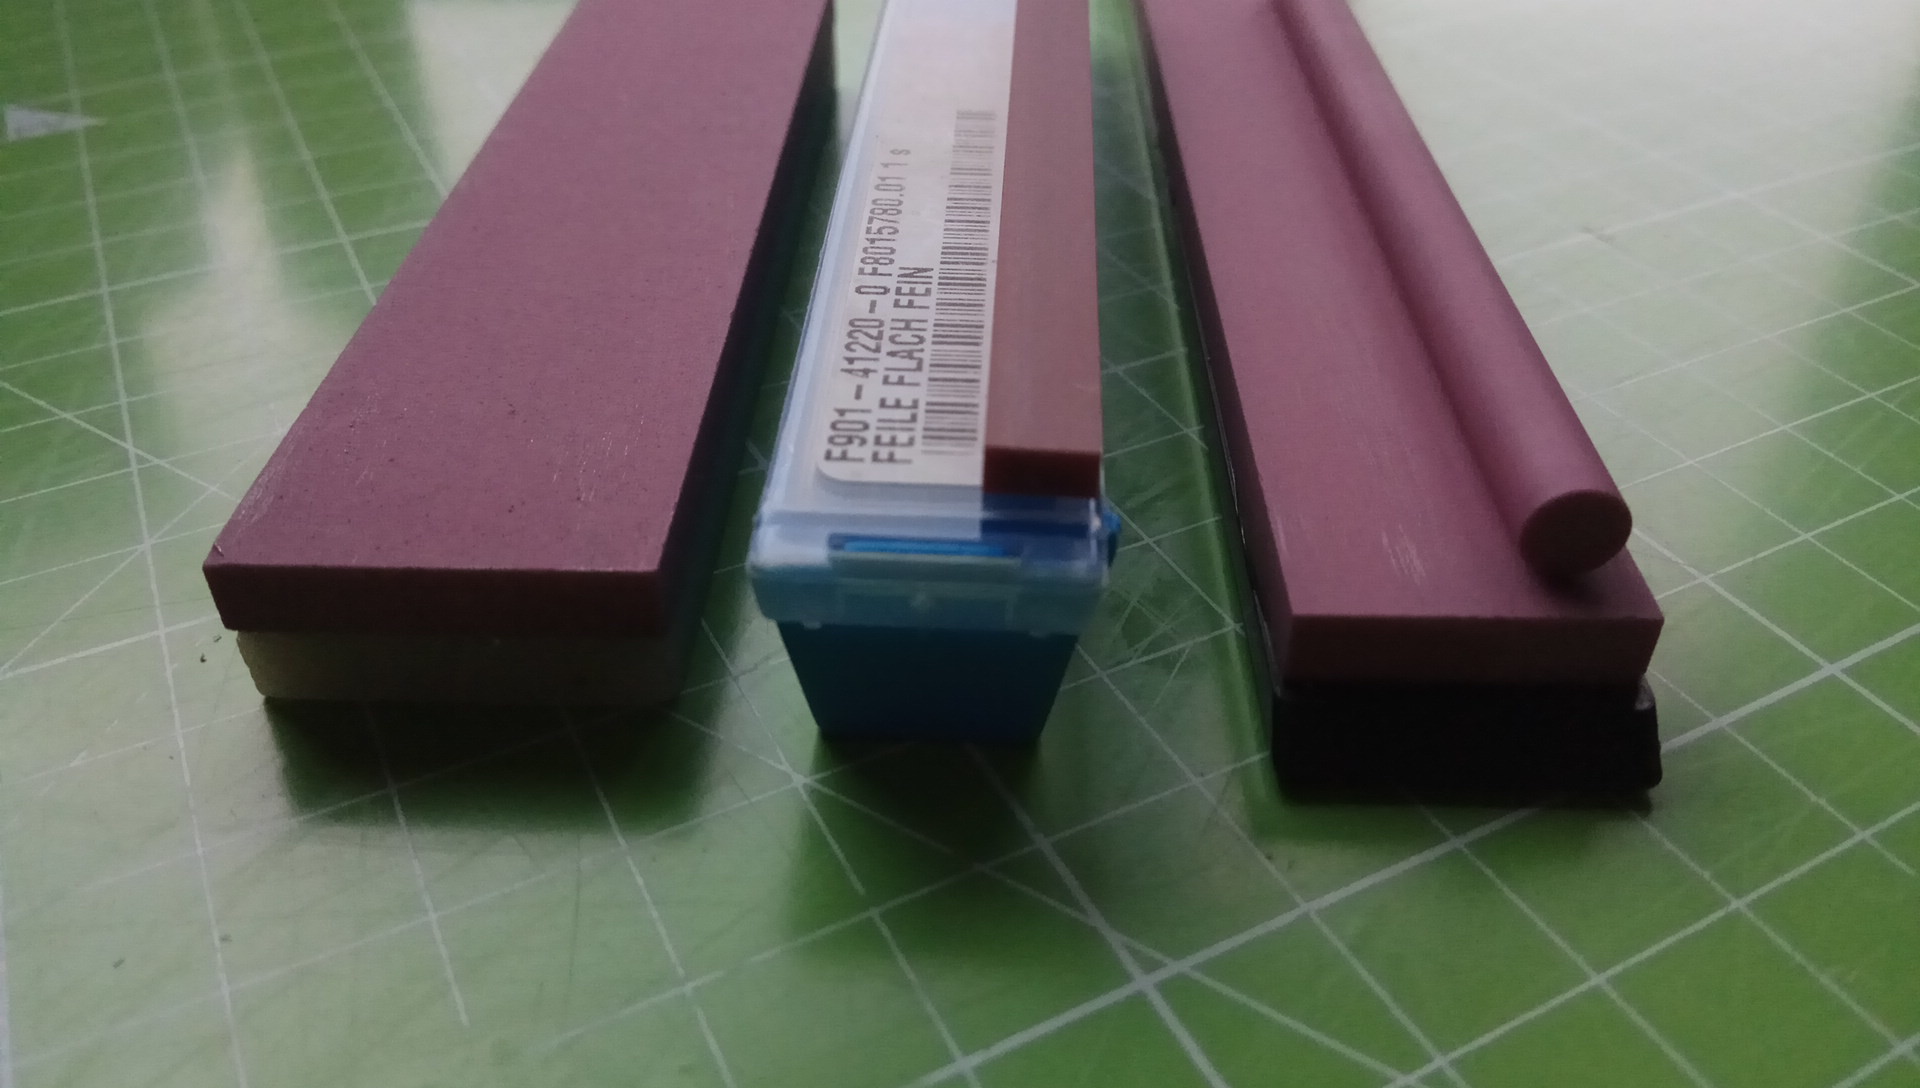
Personally I still find the CN doublestuffstone useful for some rough grinding/sharpening/deburring of tools or old knives. You can see machining marks on the ANSELF stone and none on the cylindrical stone:

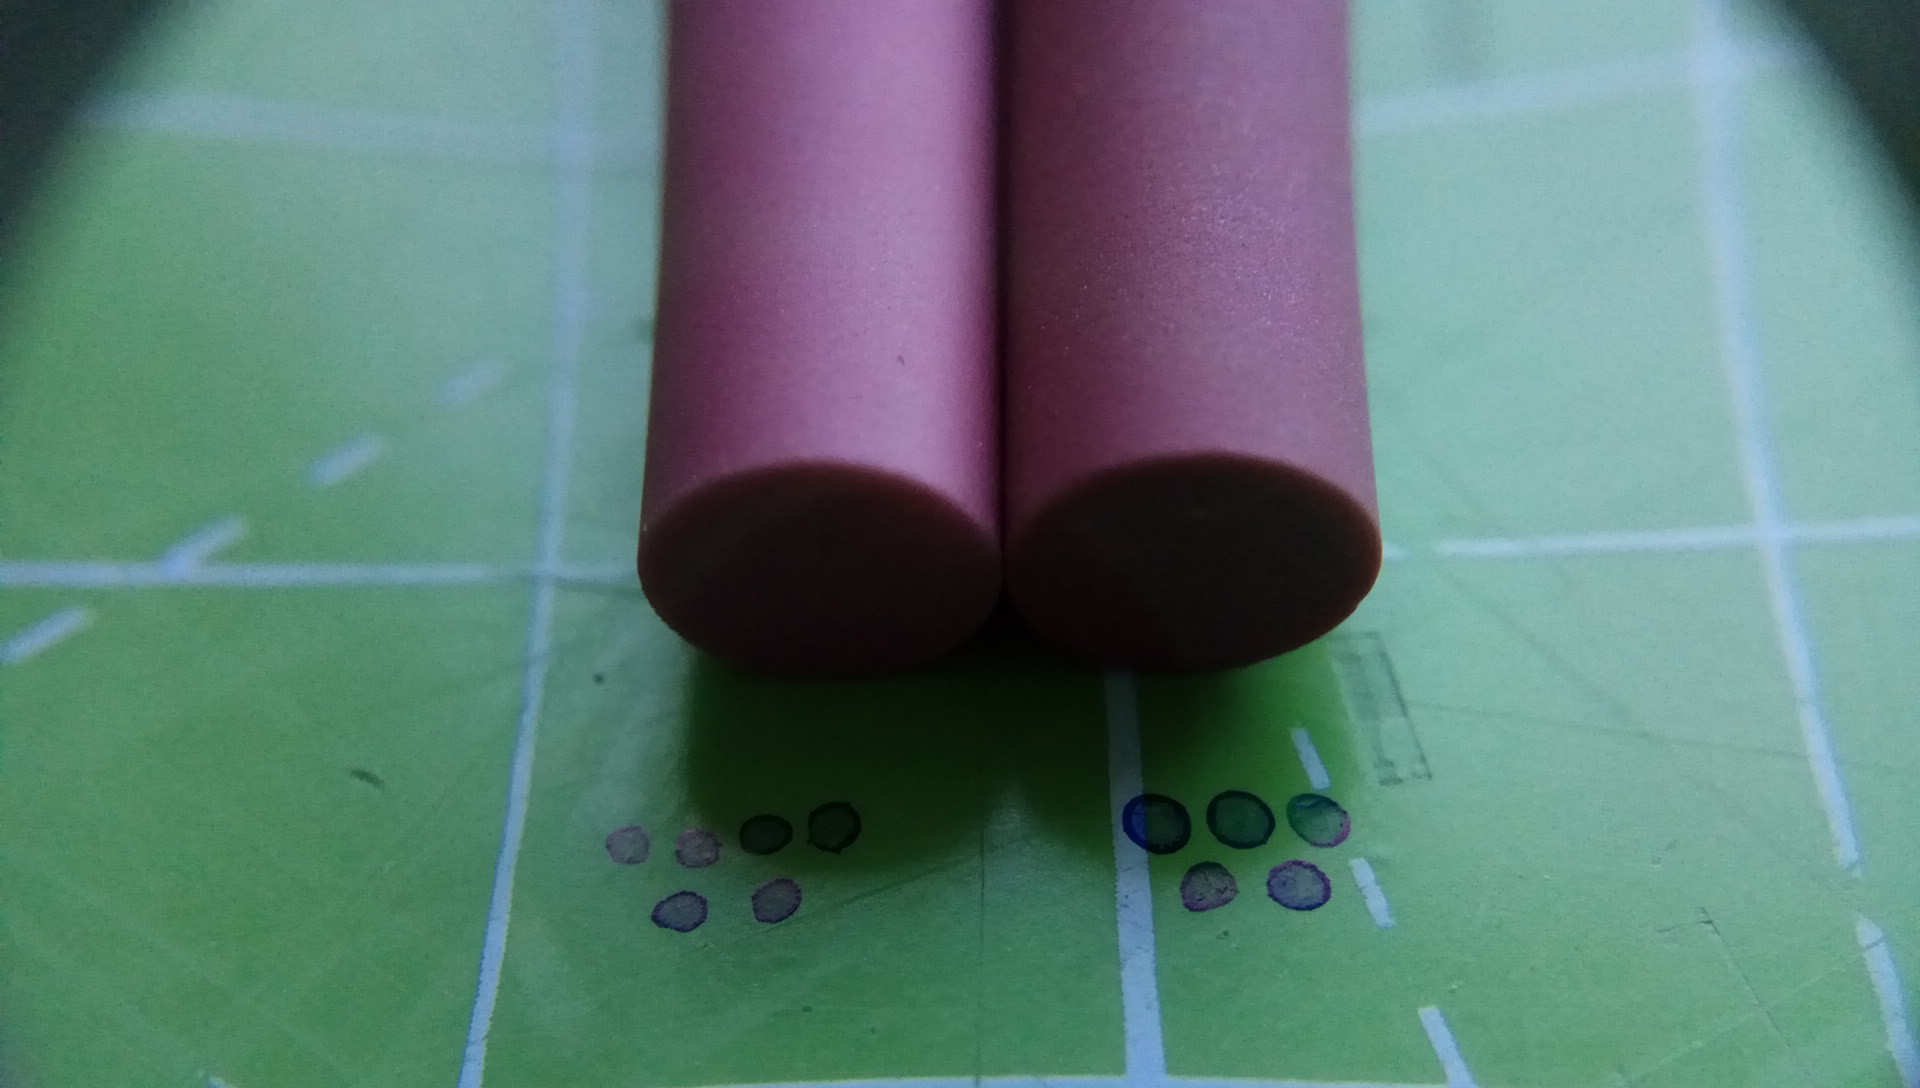
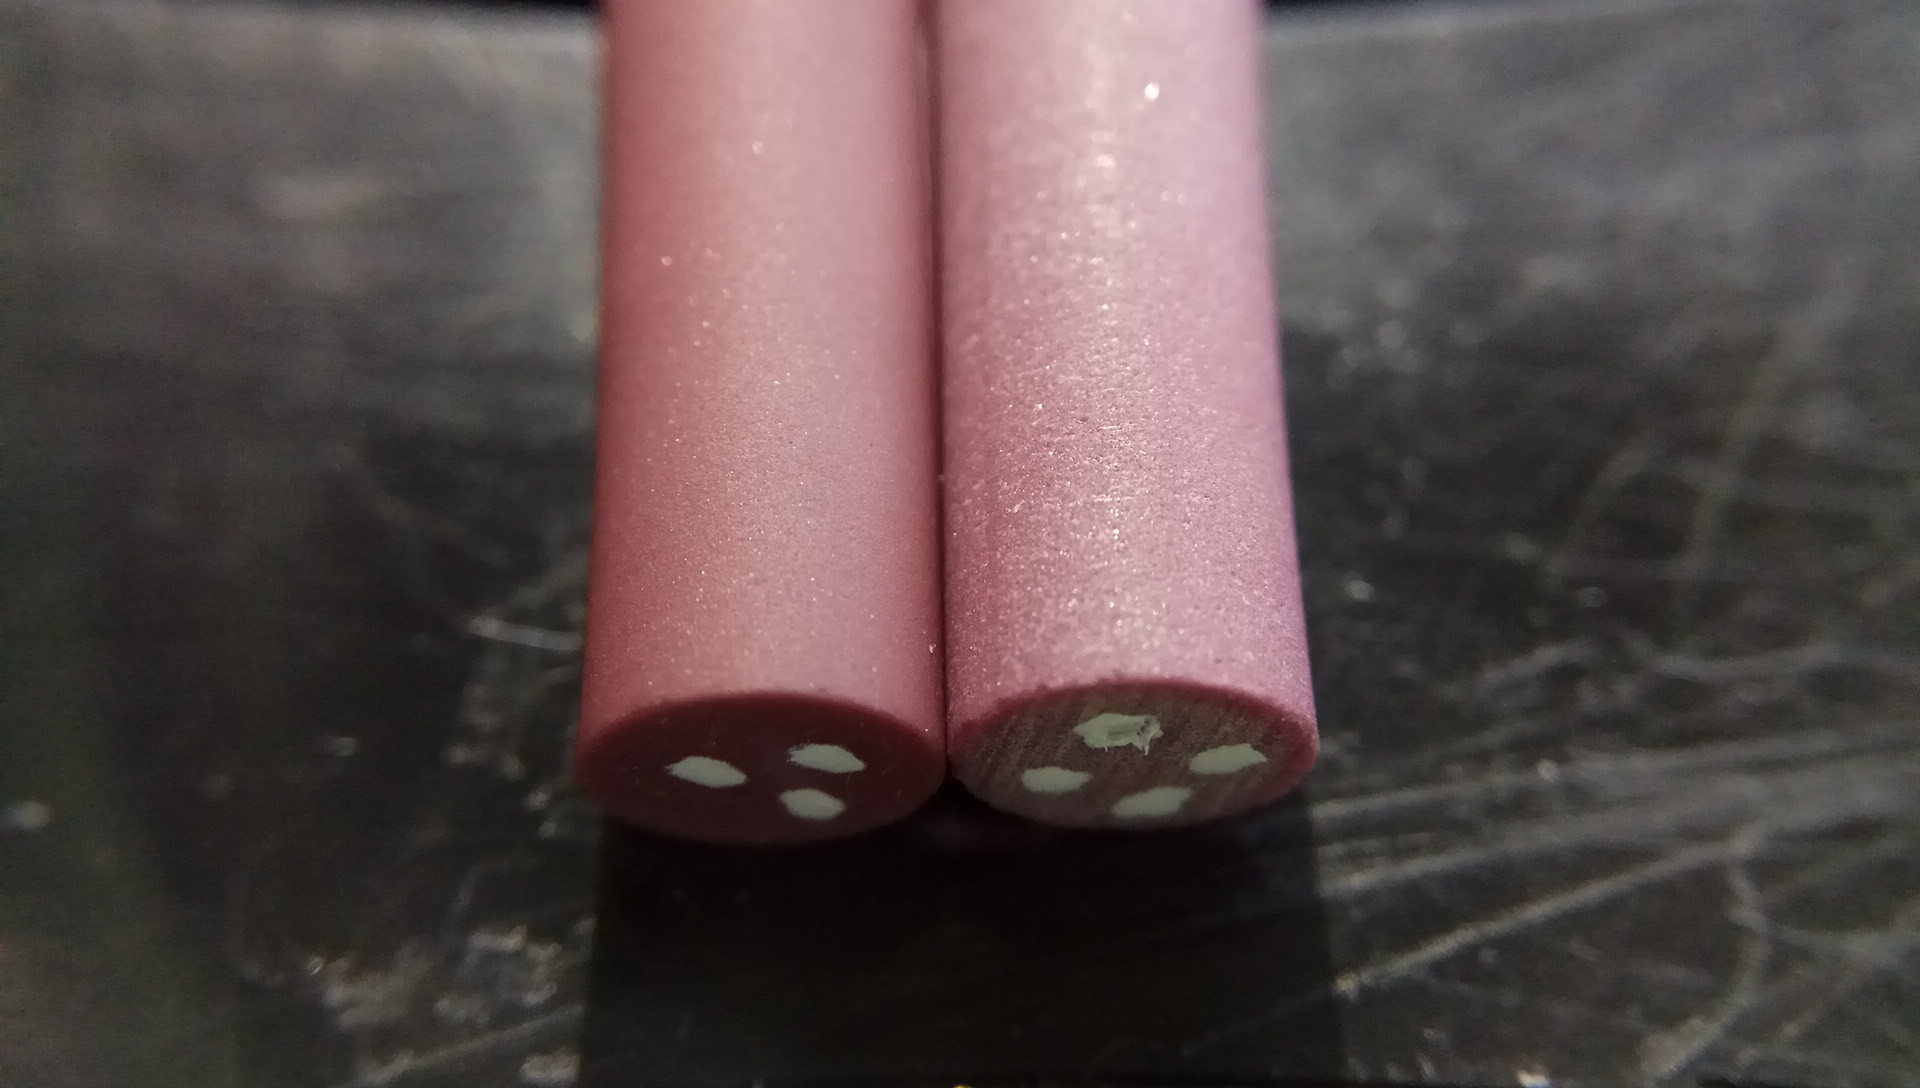
Oh and the darker red ruby stone in the middle of the photos is the DD57F 100x6x3mm stone (Degussit Fine dist. Gesswein 35-2203/Congress Tools DEG220F); DD57F is a tad finer than 204UF and, of course, superior to the CN cylindrical ruby.
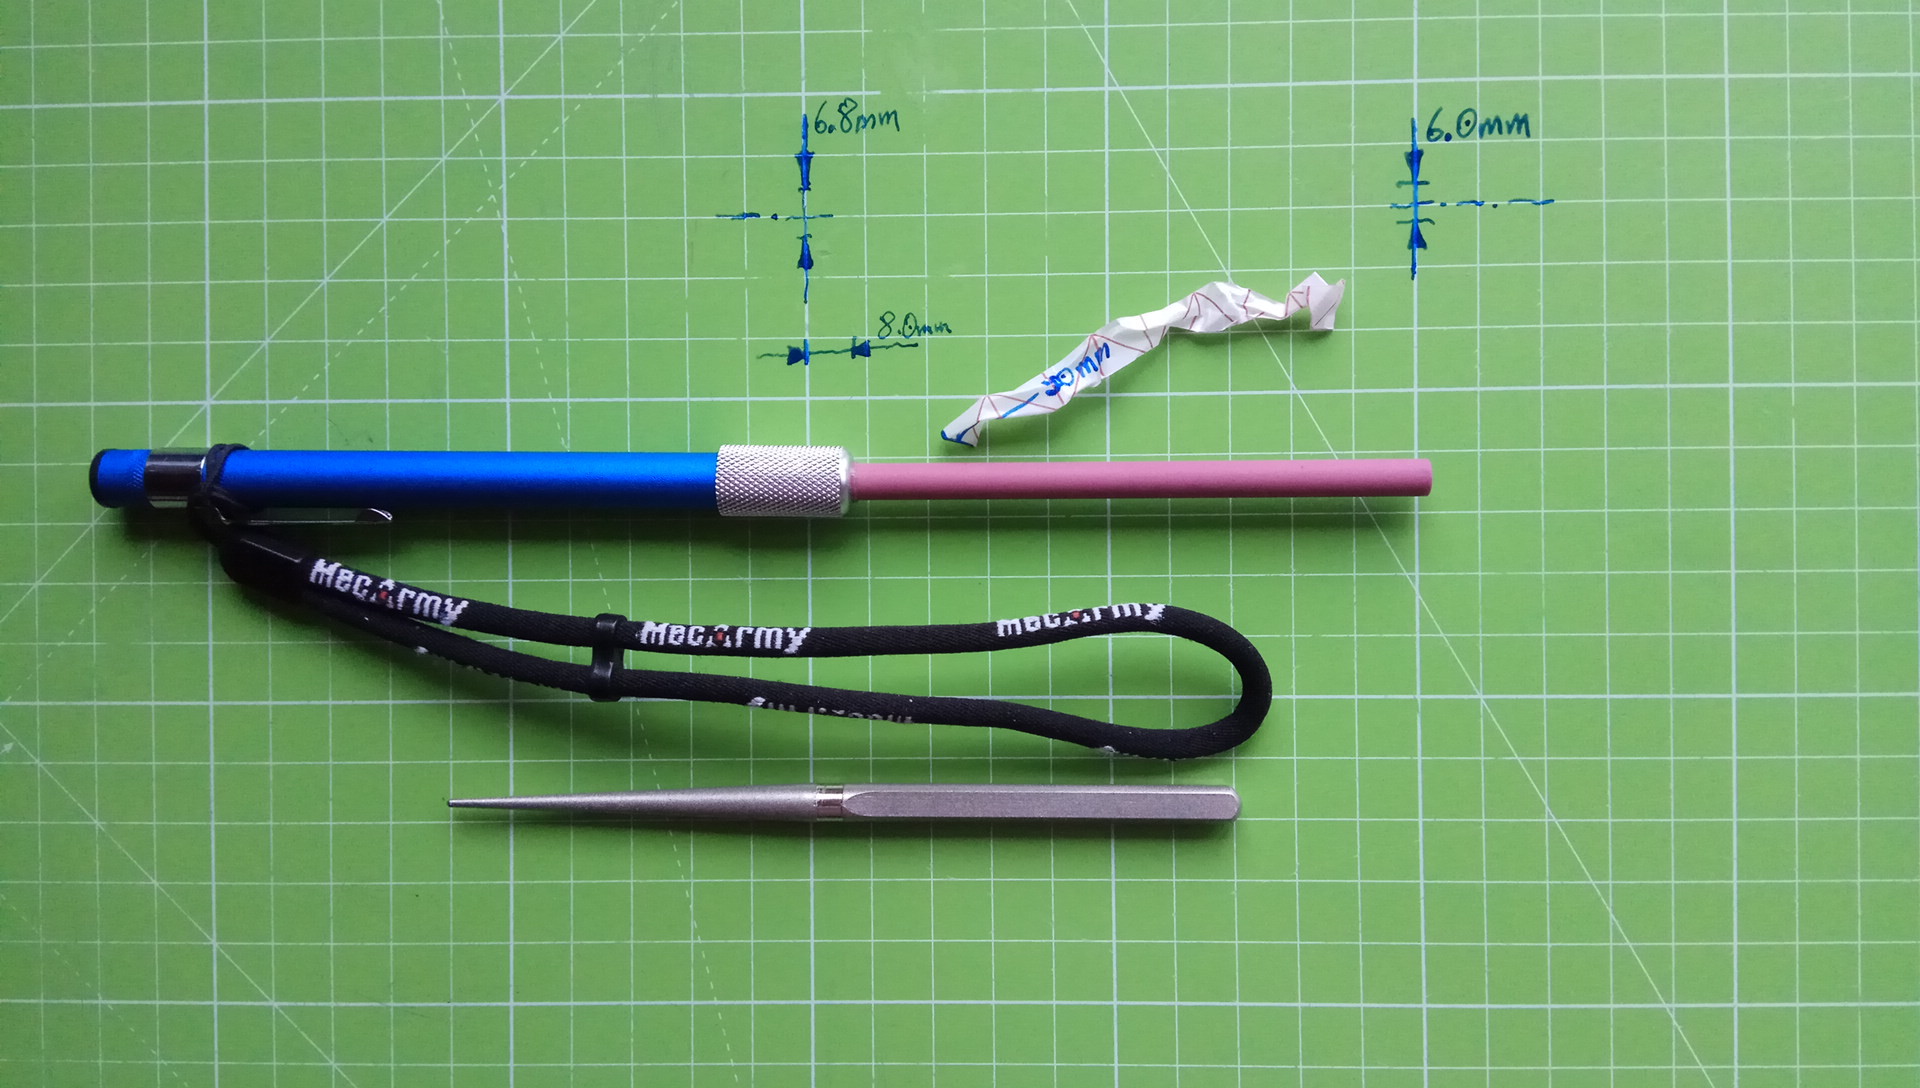
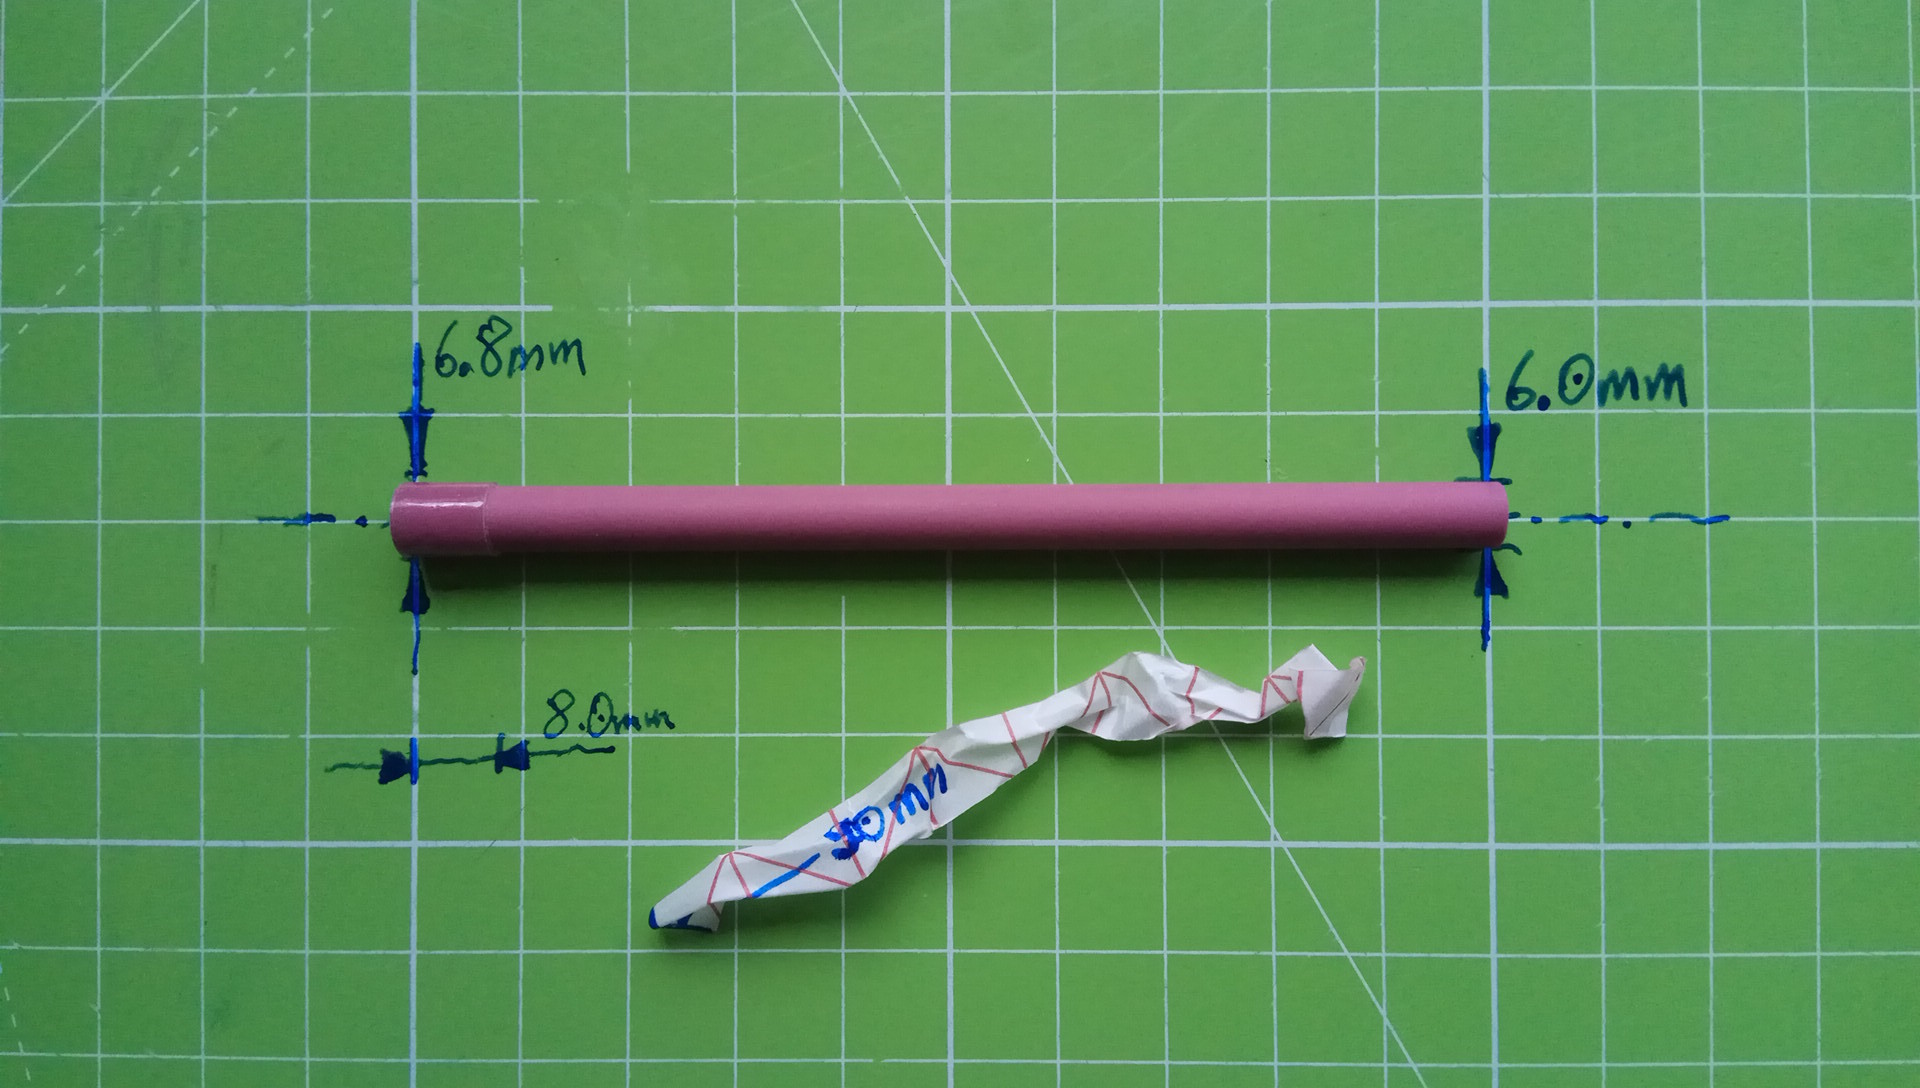
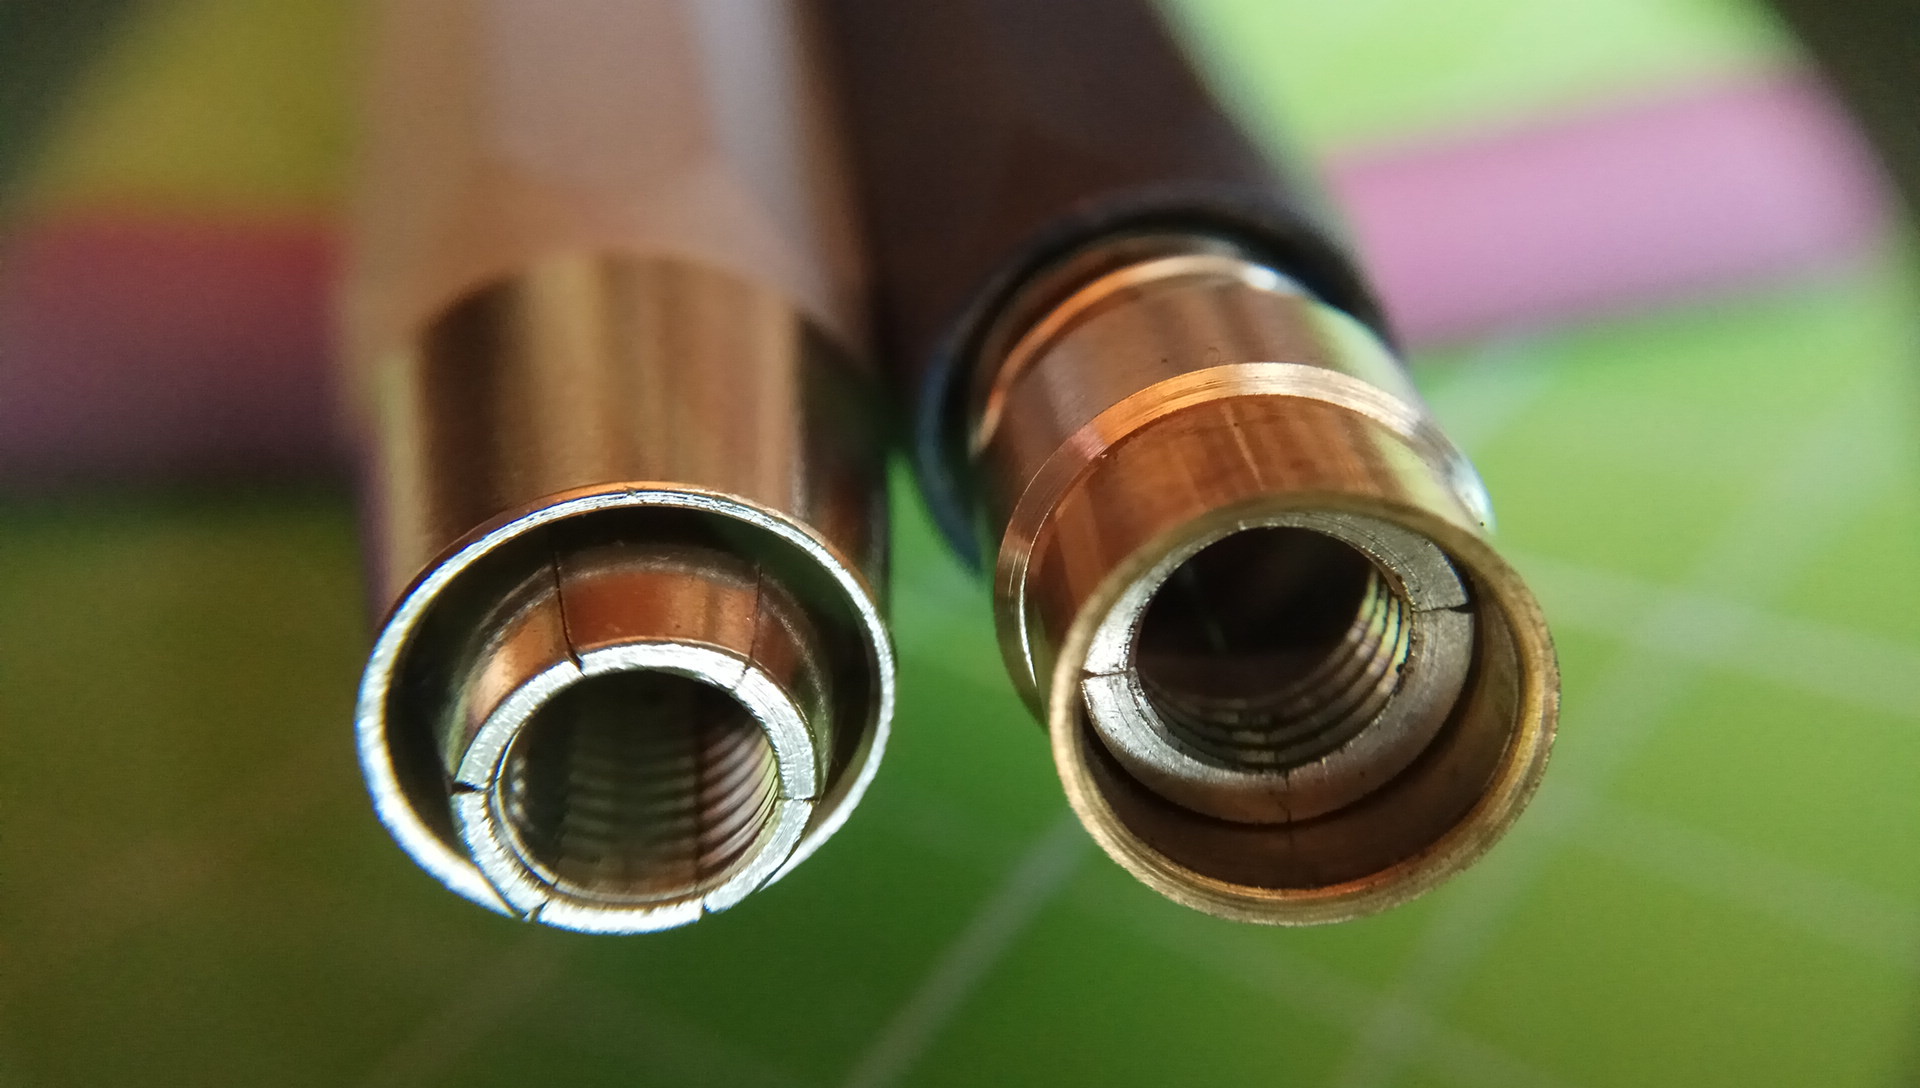
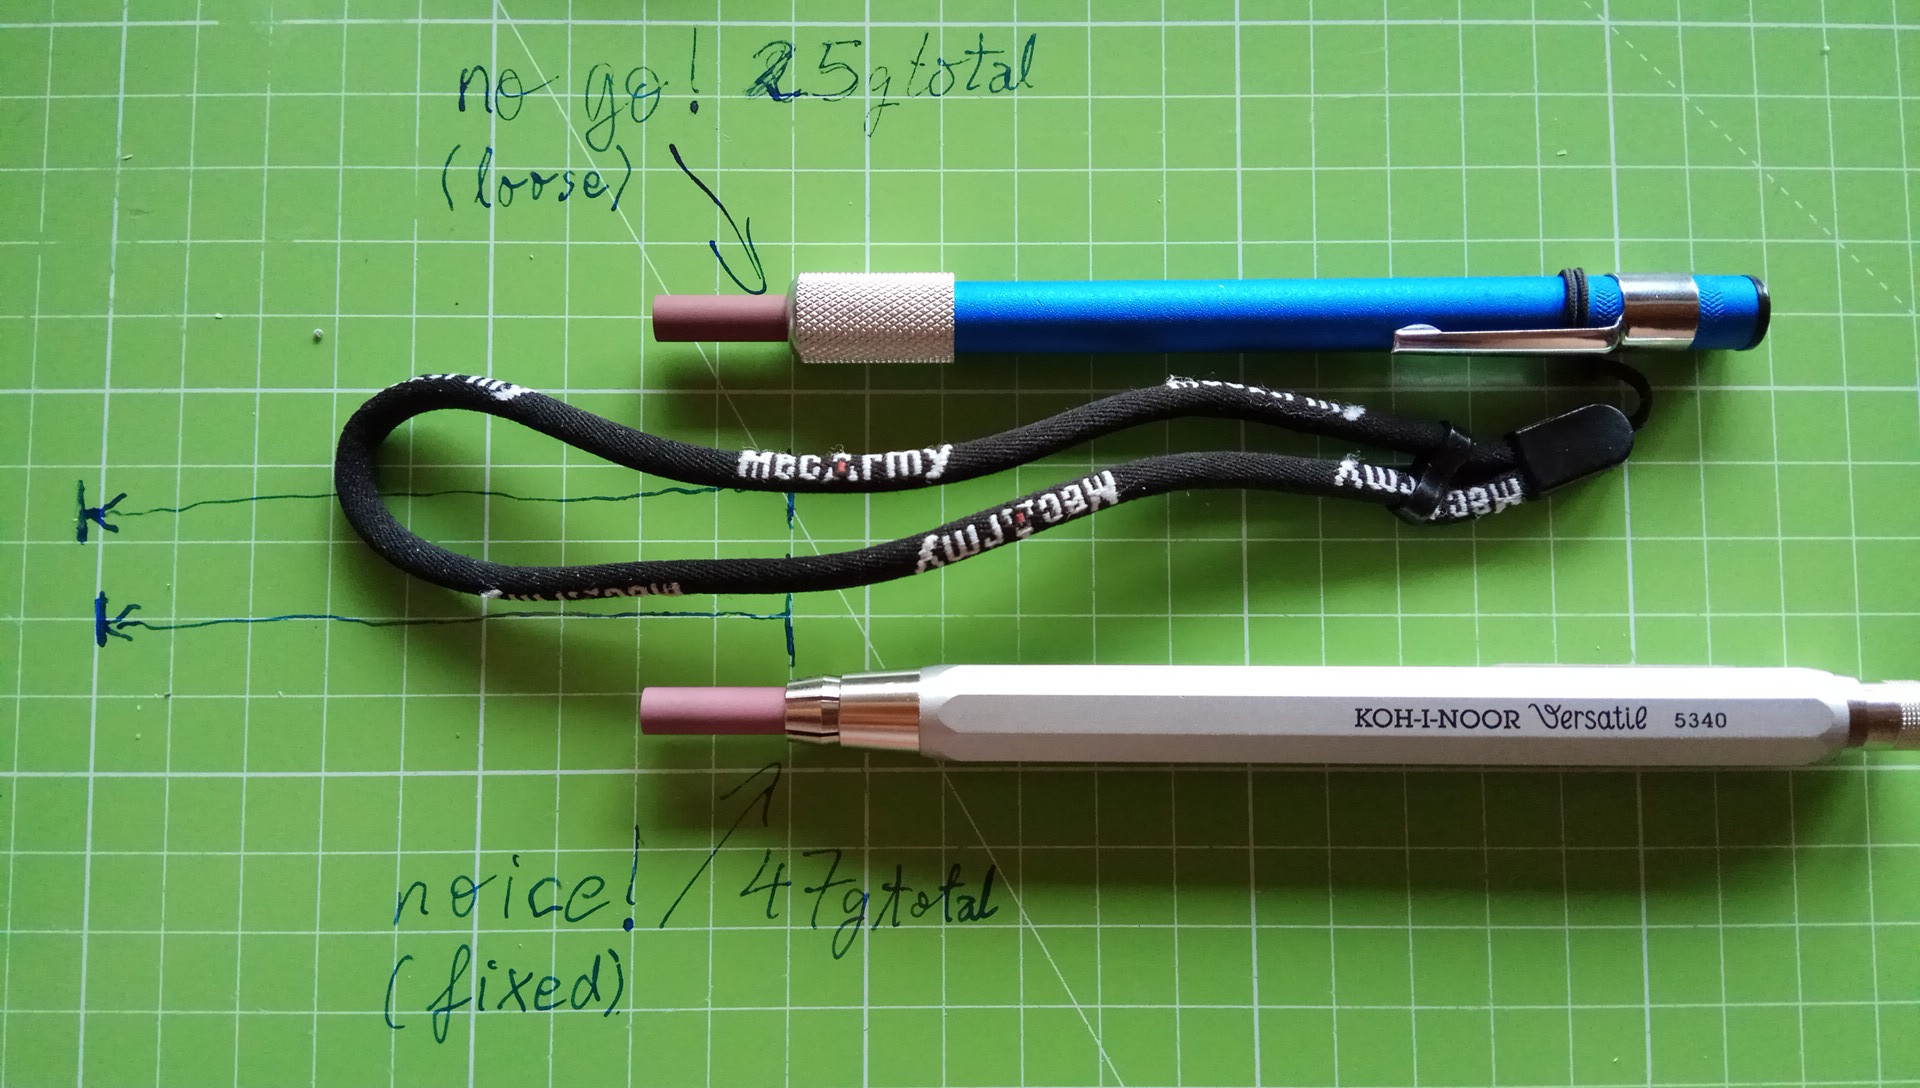
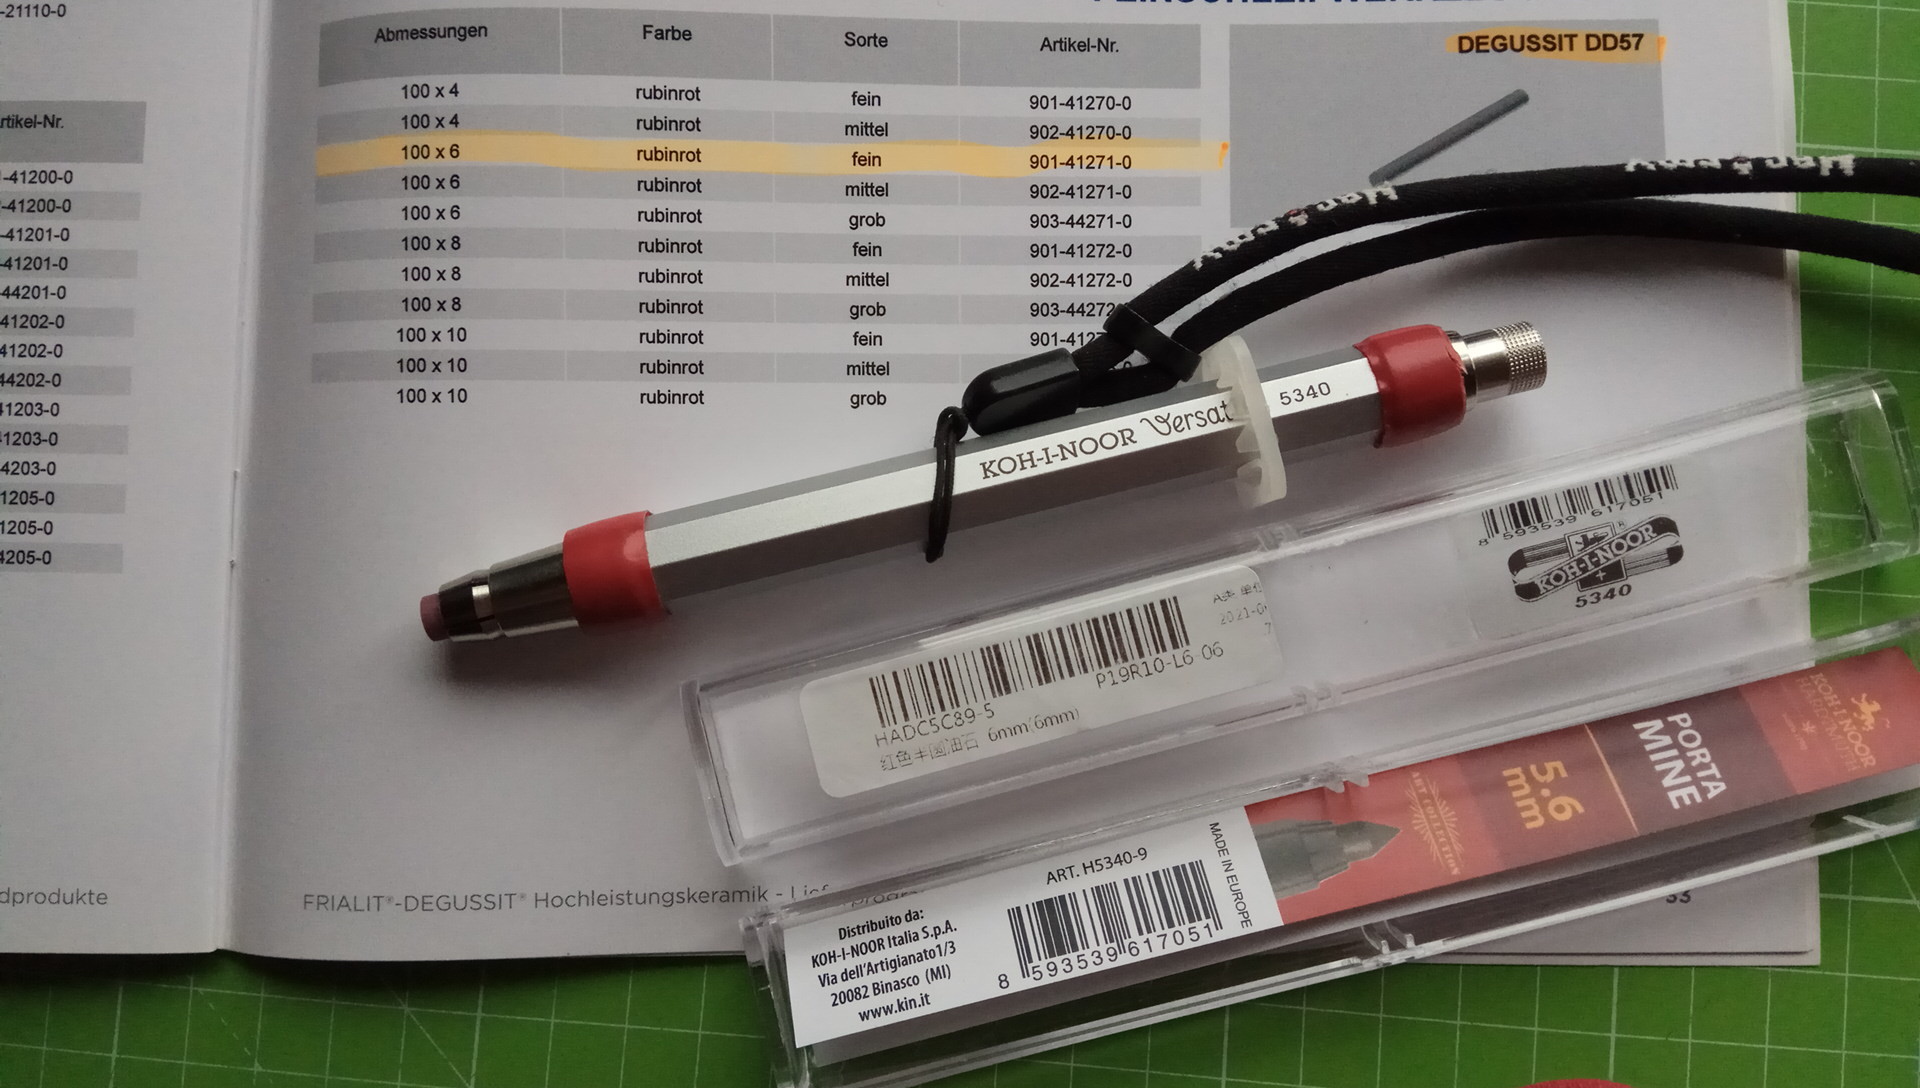
Now it's time to understand the fitment. Please find all relevant measurements from the photo. In particular, learn that the Ø6.0mm cannot be fastened by the collar lock, without mod. Imho the optimal rod diameter would be anything between 6.5-6.8mm, so the provided diamond rod with ~Ø6.25mm doesn't even fall into that optimal range lol:
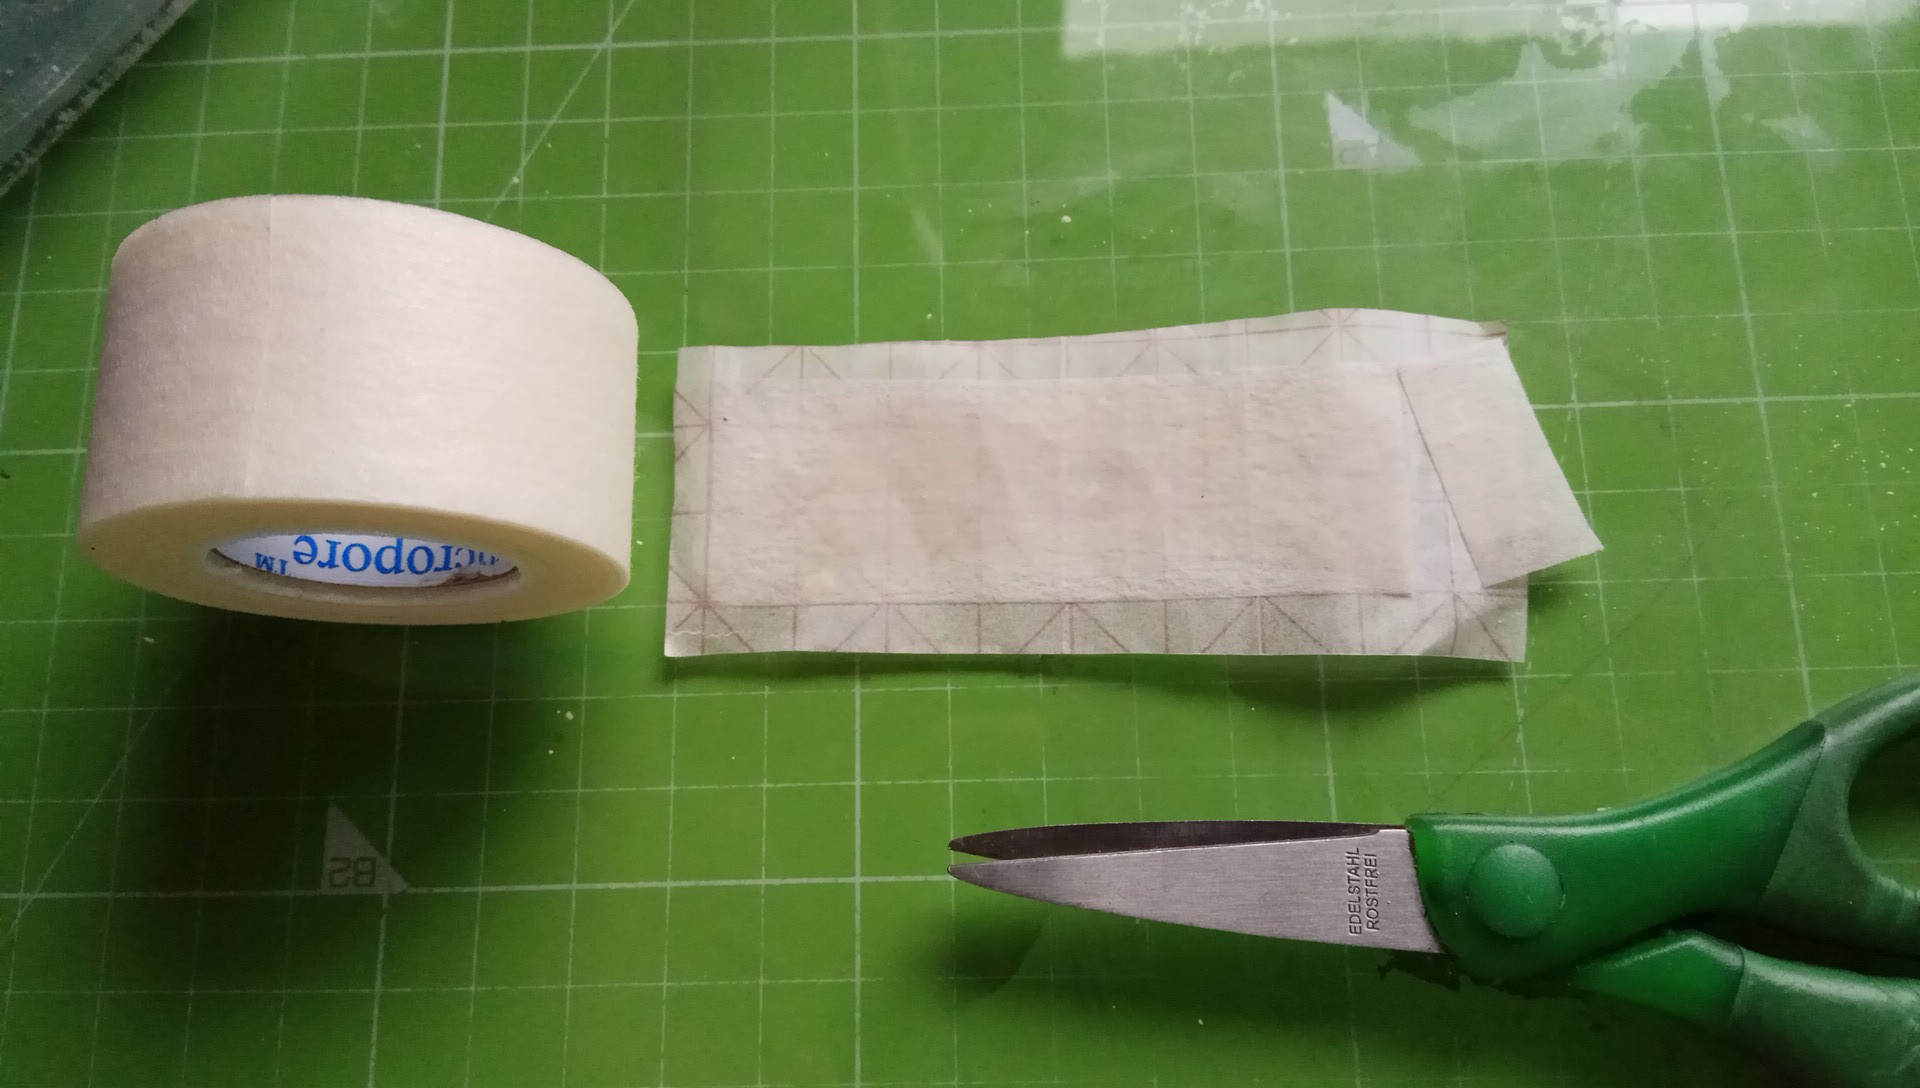
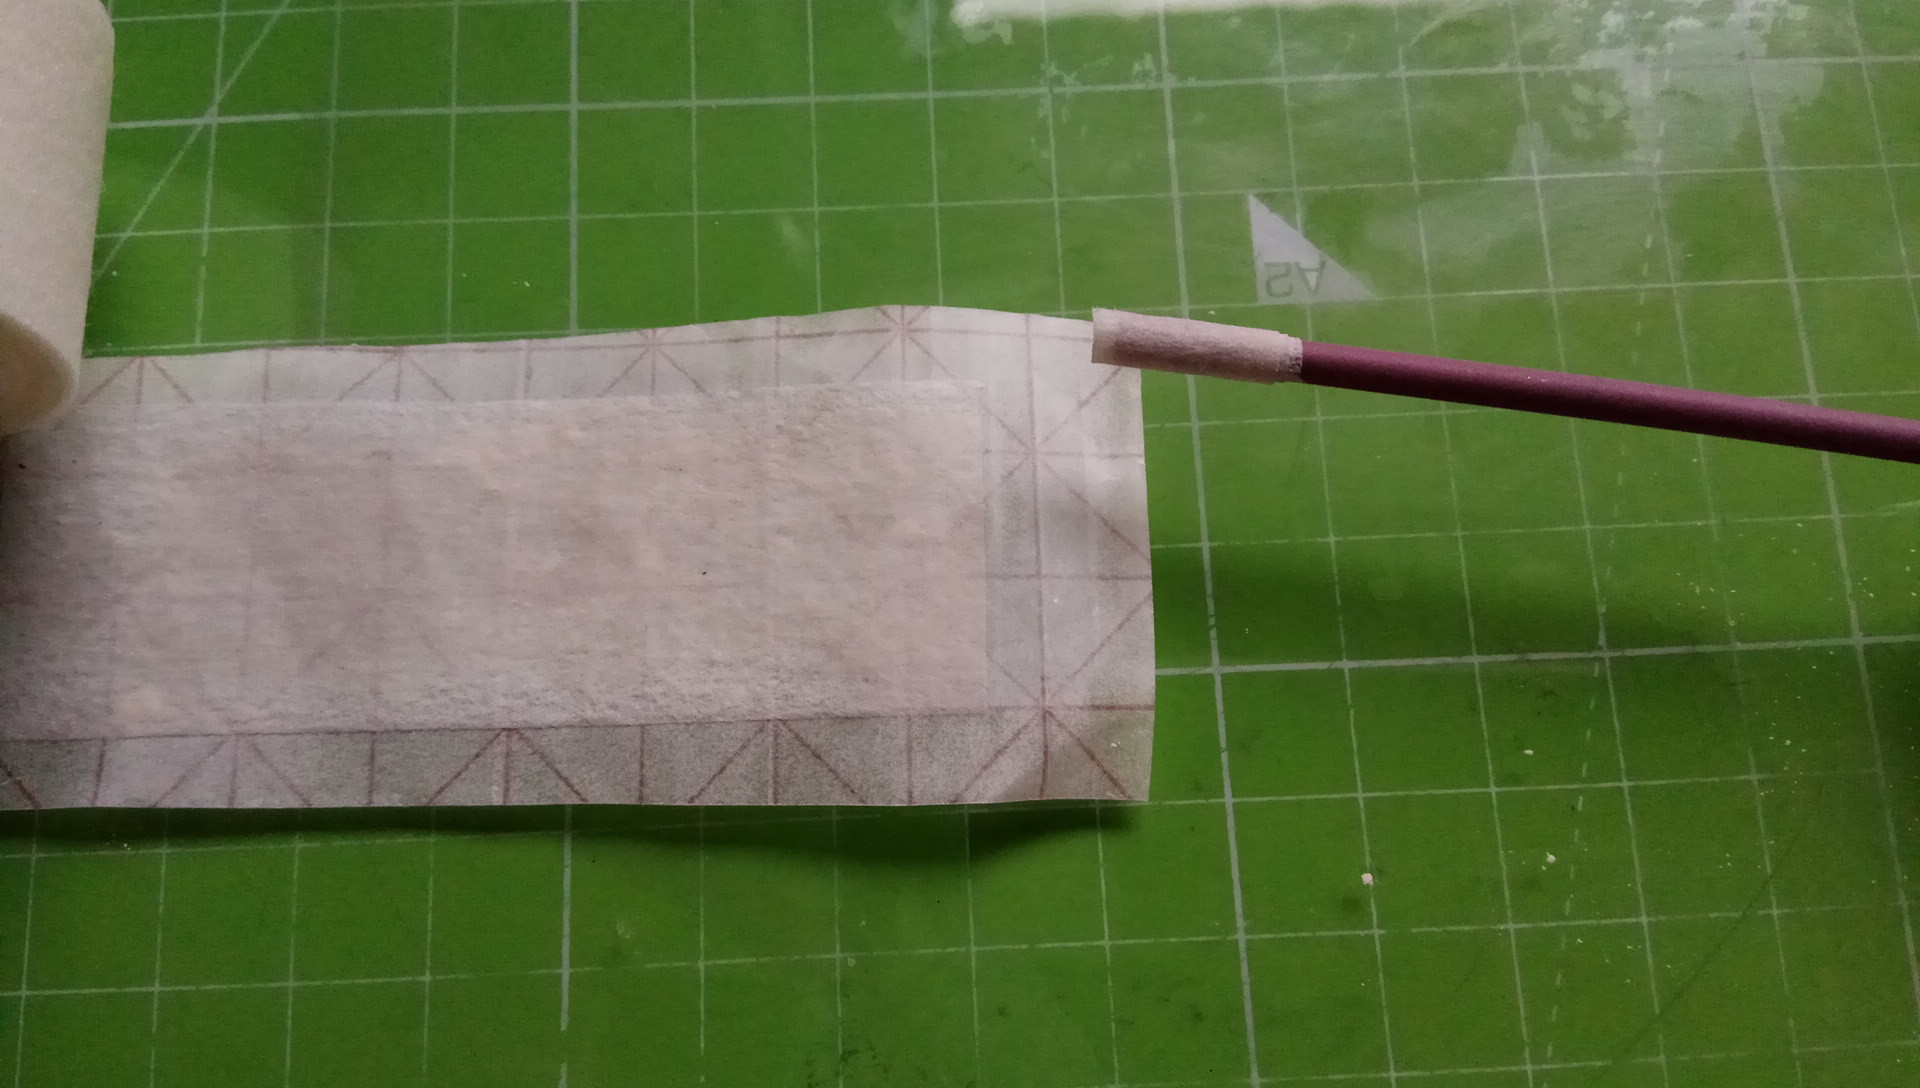
The blue tube seems to have an inner diameter (ID) of ~6.9mm (hey hard to measure, right!?). I cut a 90mm long piece of thick tape (left-overs from a book protection roll, i.e. inoffensive nonaggressive adhesive) and wrapped it around one ruby end to approach that measure:
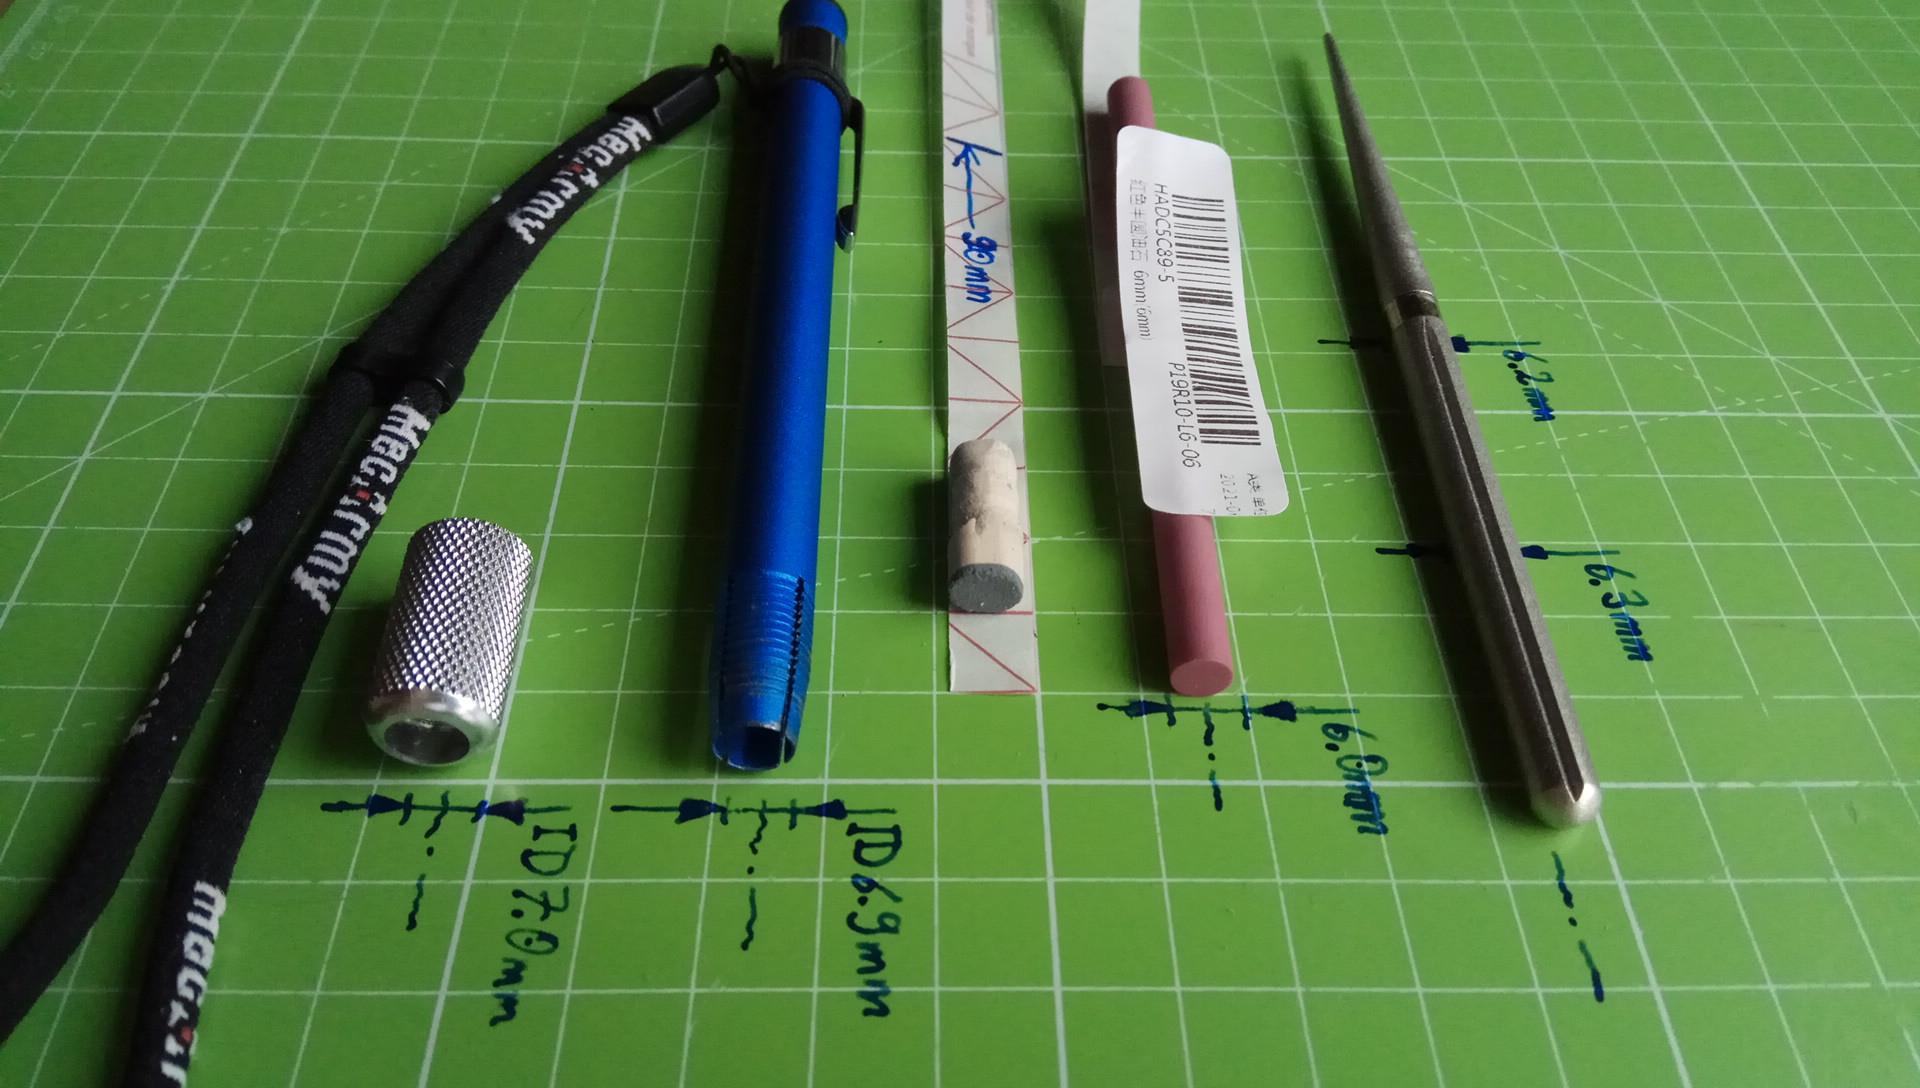
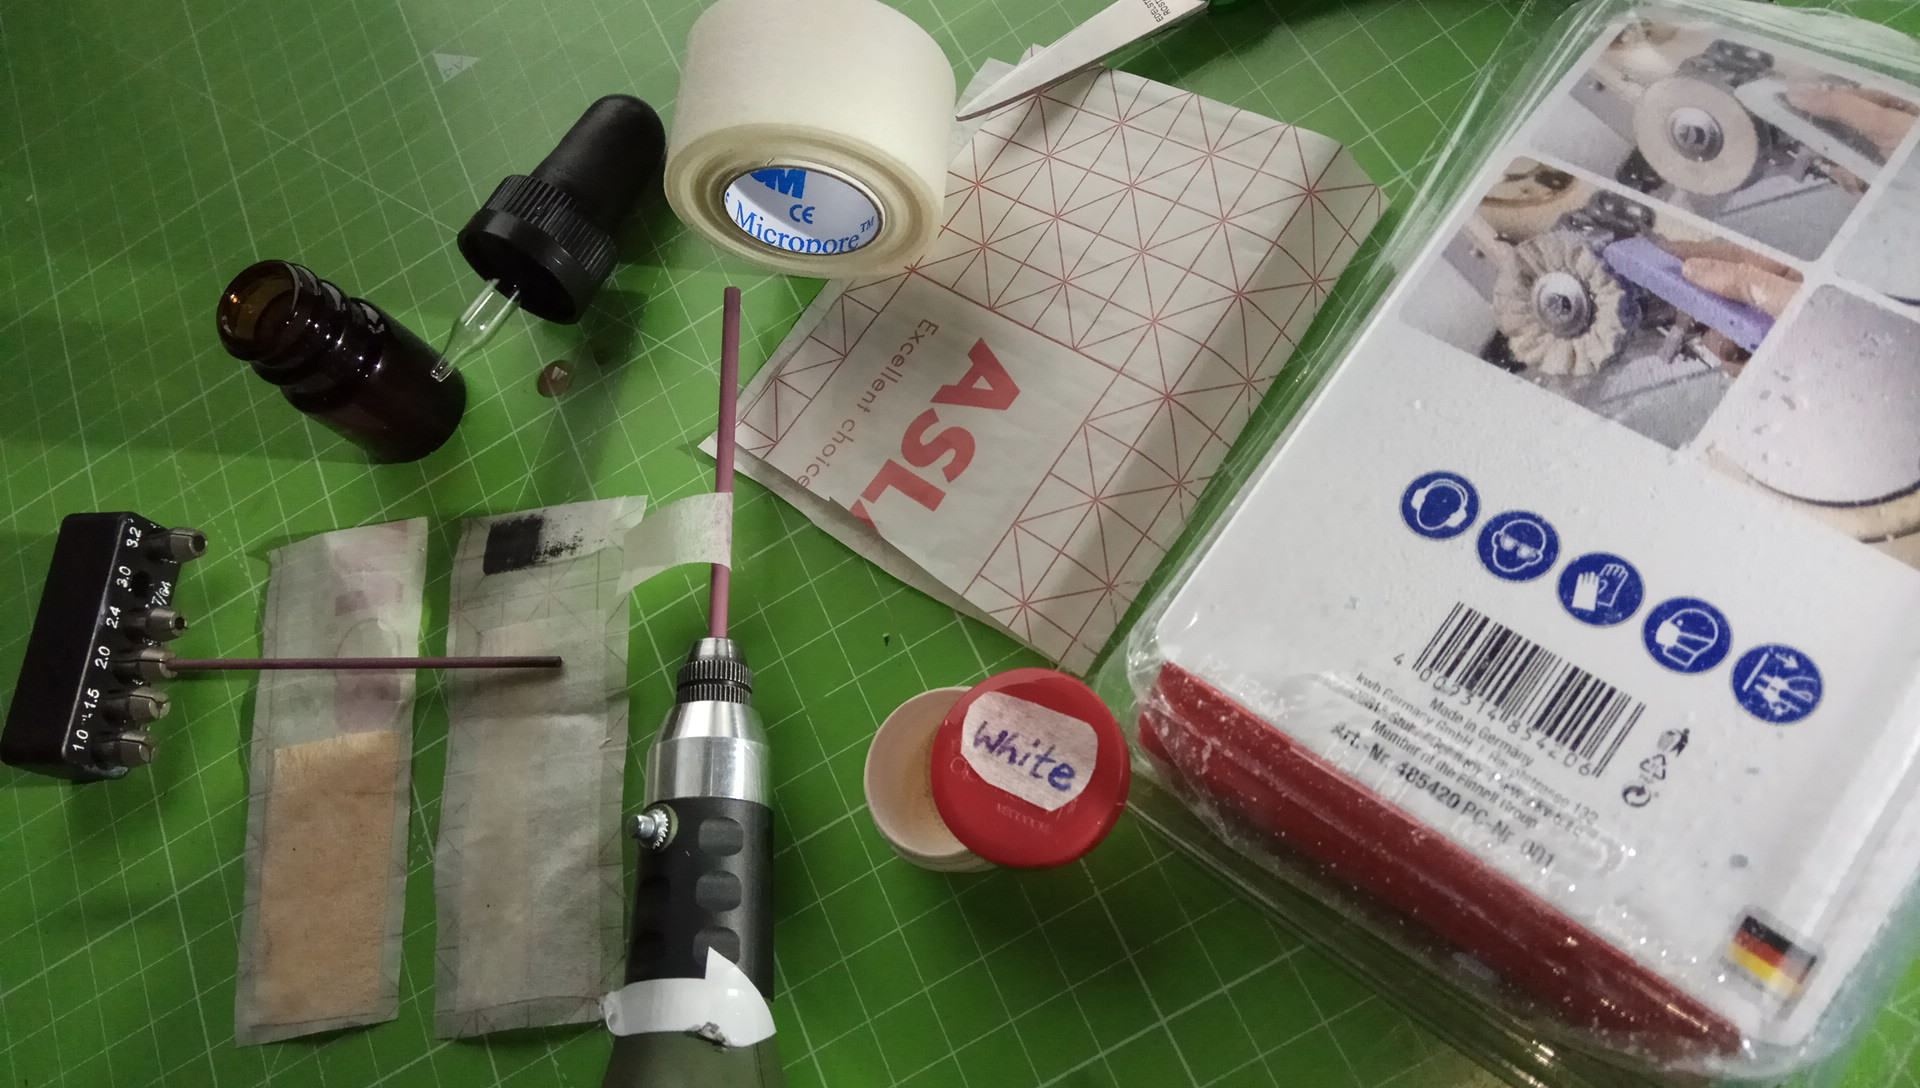
Instead of book tape one could find/use other media to enlarge the diameter from 6.0mm to ~6.8mm, for example paper, label paper, rubber, plastic, scotch tape, etc. After some time the tape must be renewed anyway because of moist or oil creeping in. This photo explains it well:
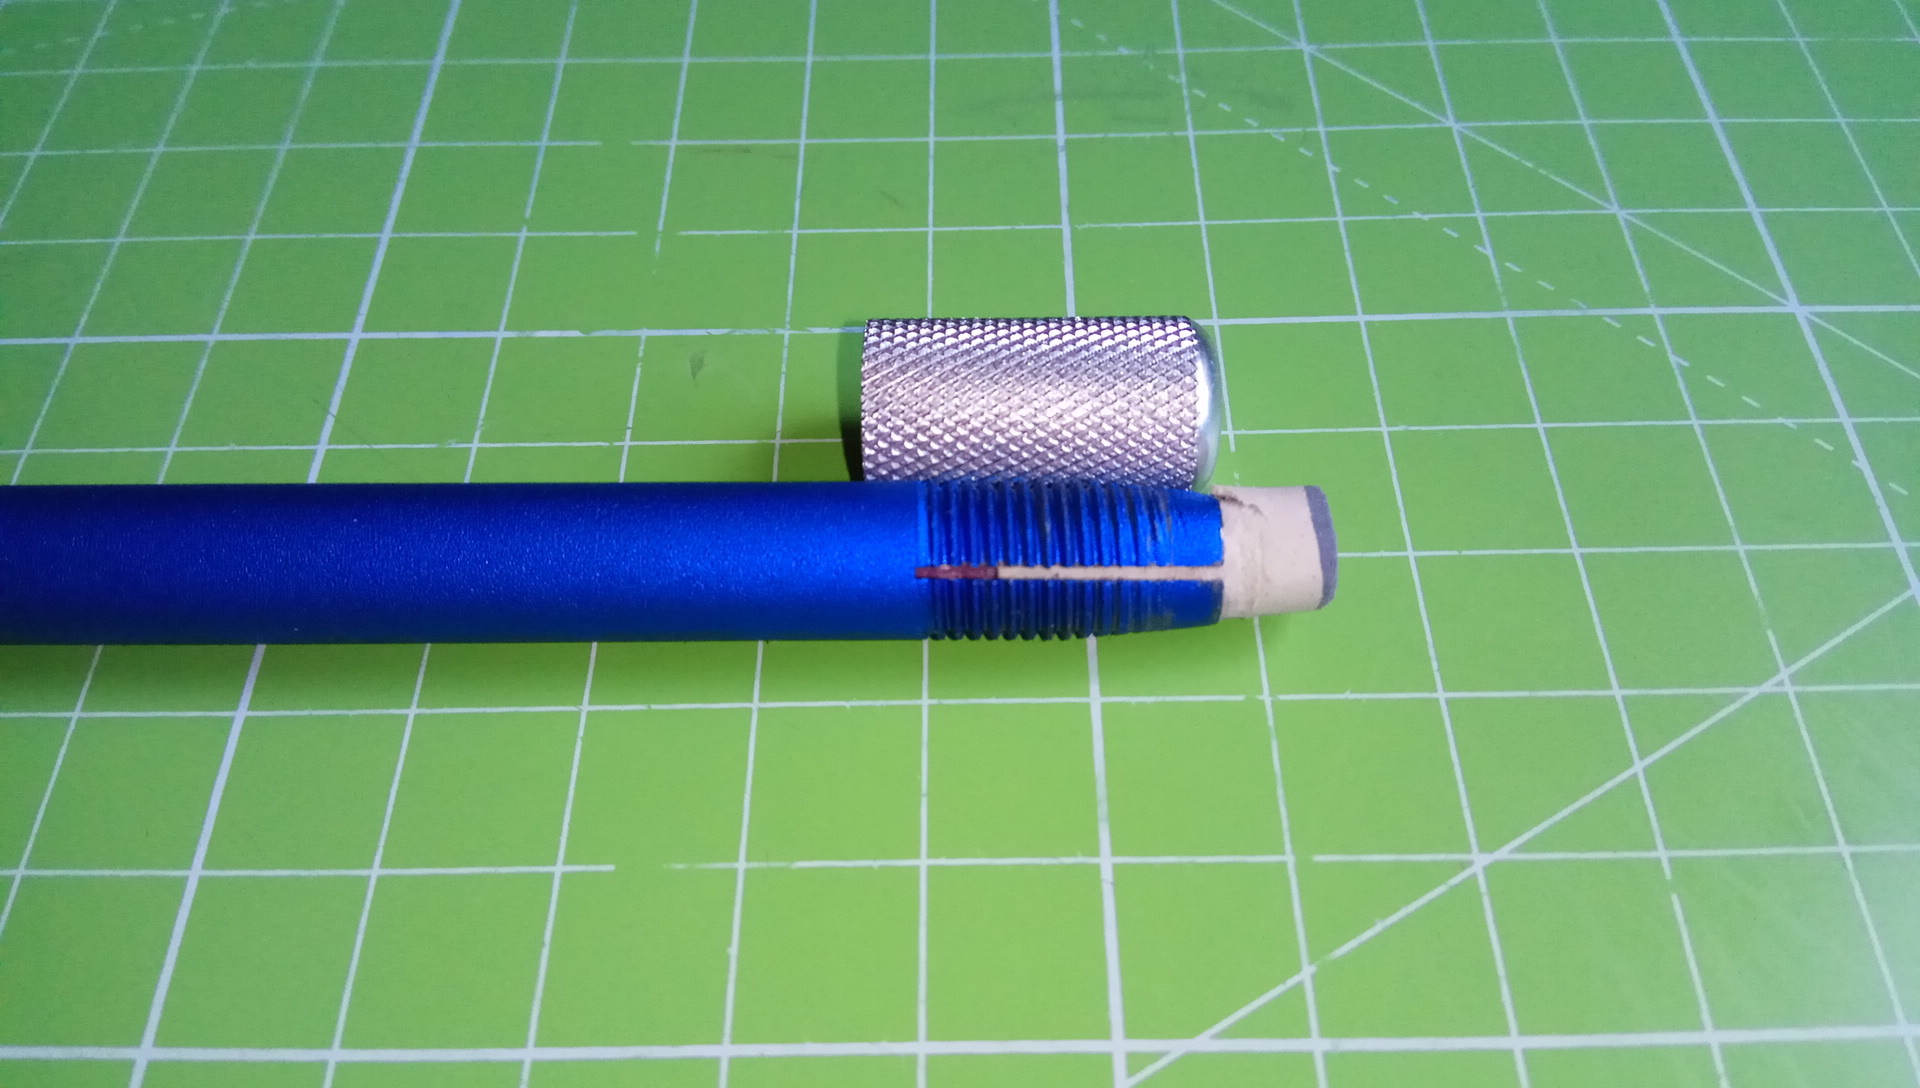
Enlarged to Ø6.8mm and with a fully tightened collar, the ruby rod is seated firmly, without any wiggle, in the holder. You get about 90mm (of the 100mm) of ruby use for comfortable sharpening/deburring, which is more than the original diamond rod! See photo again at top of the thread lol.
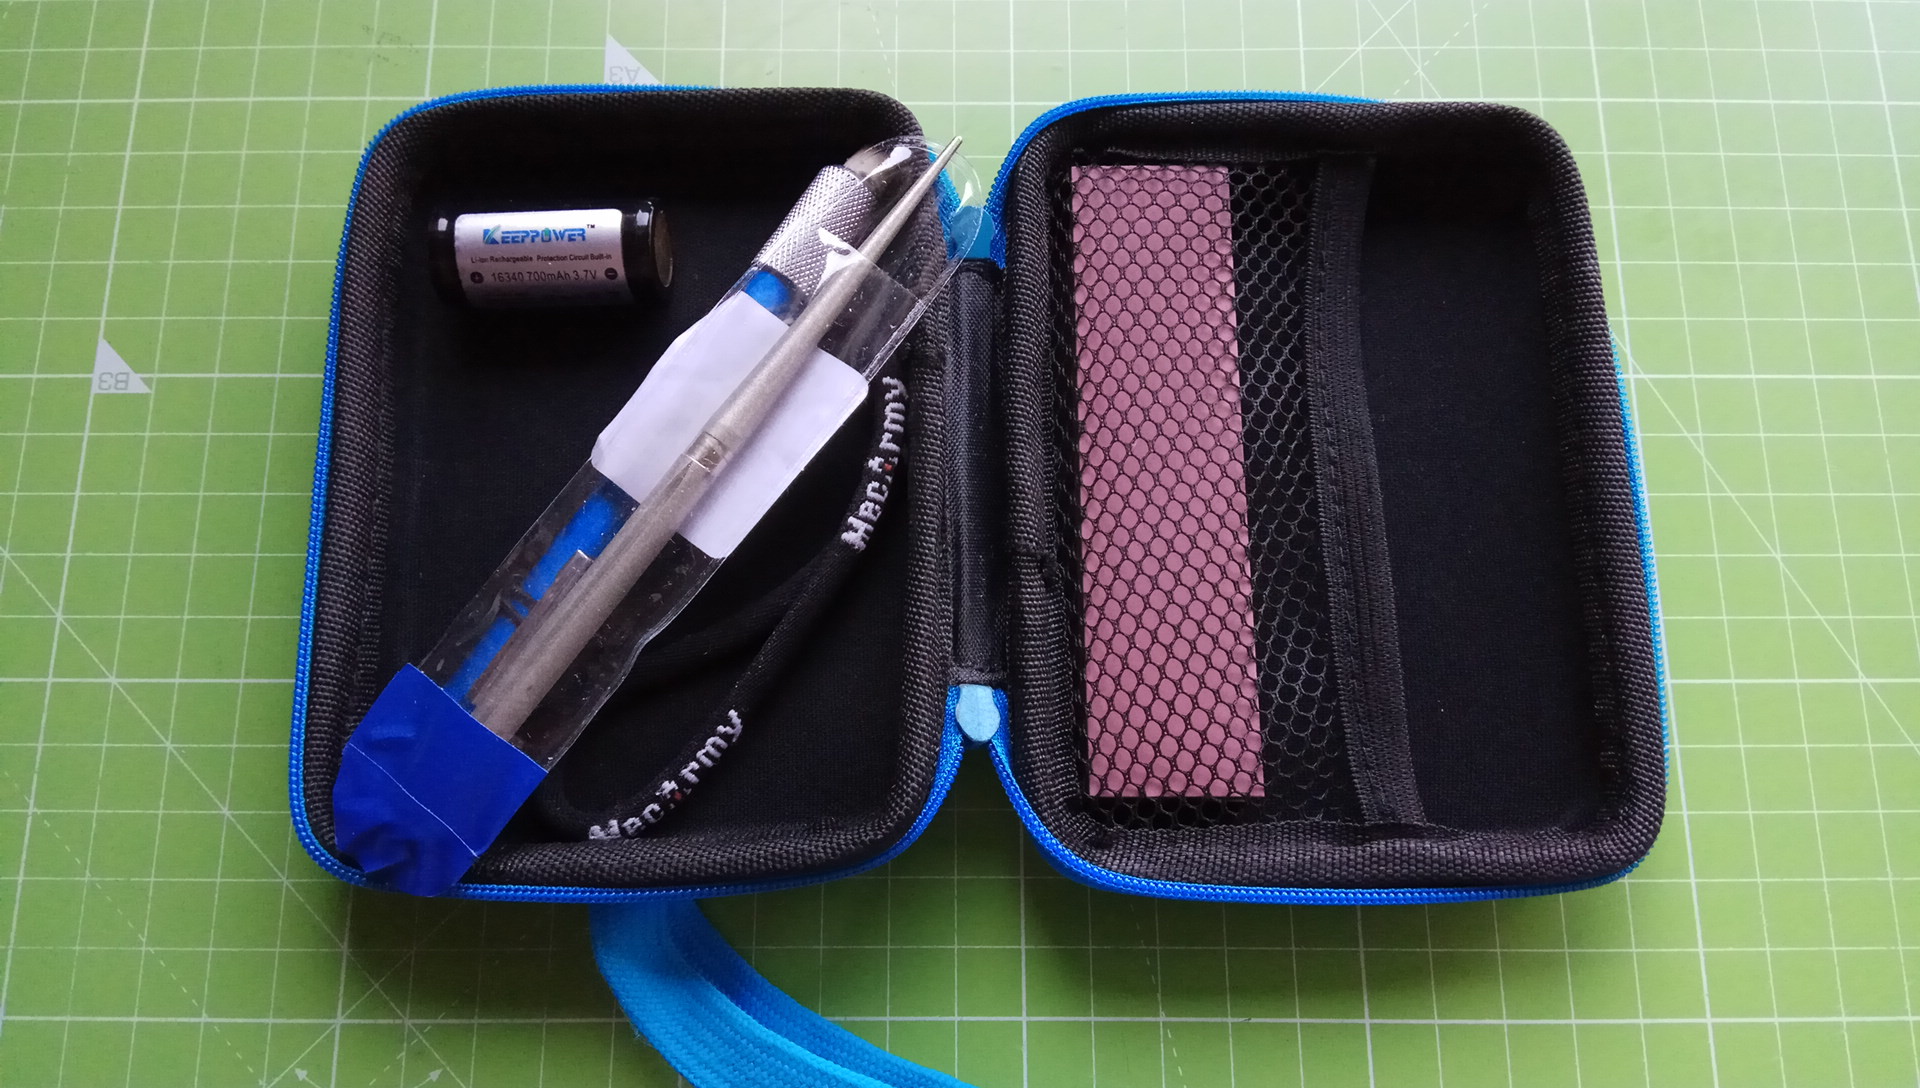
For storing inside the holder, i insert the rod upside down, and tighten the collar with an inserted diy plug, for rattle-free storage:
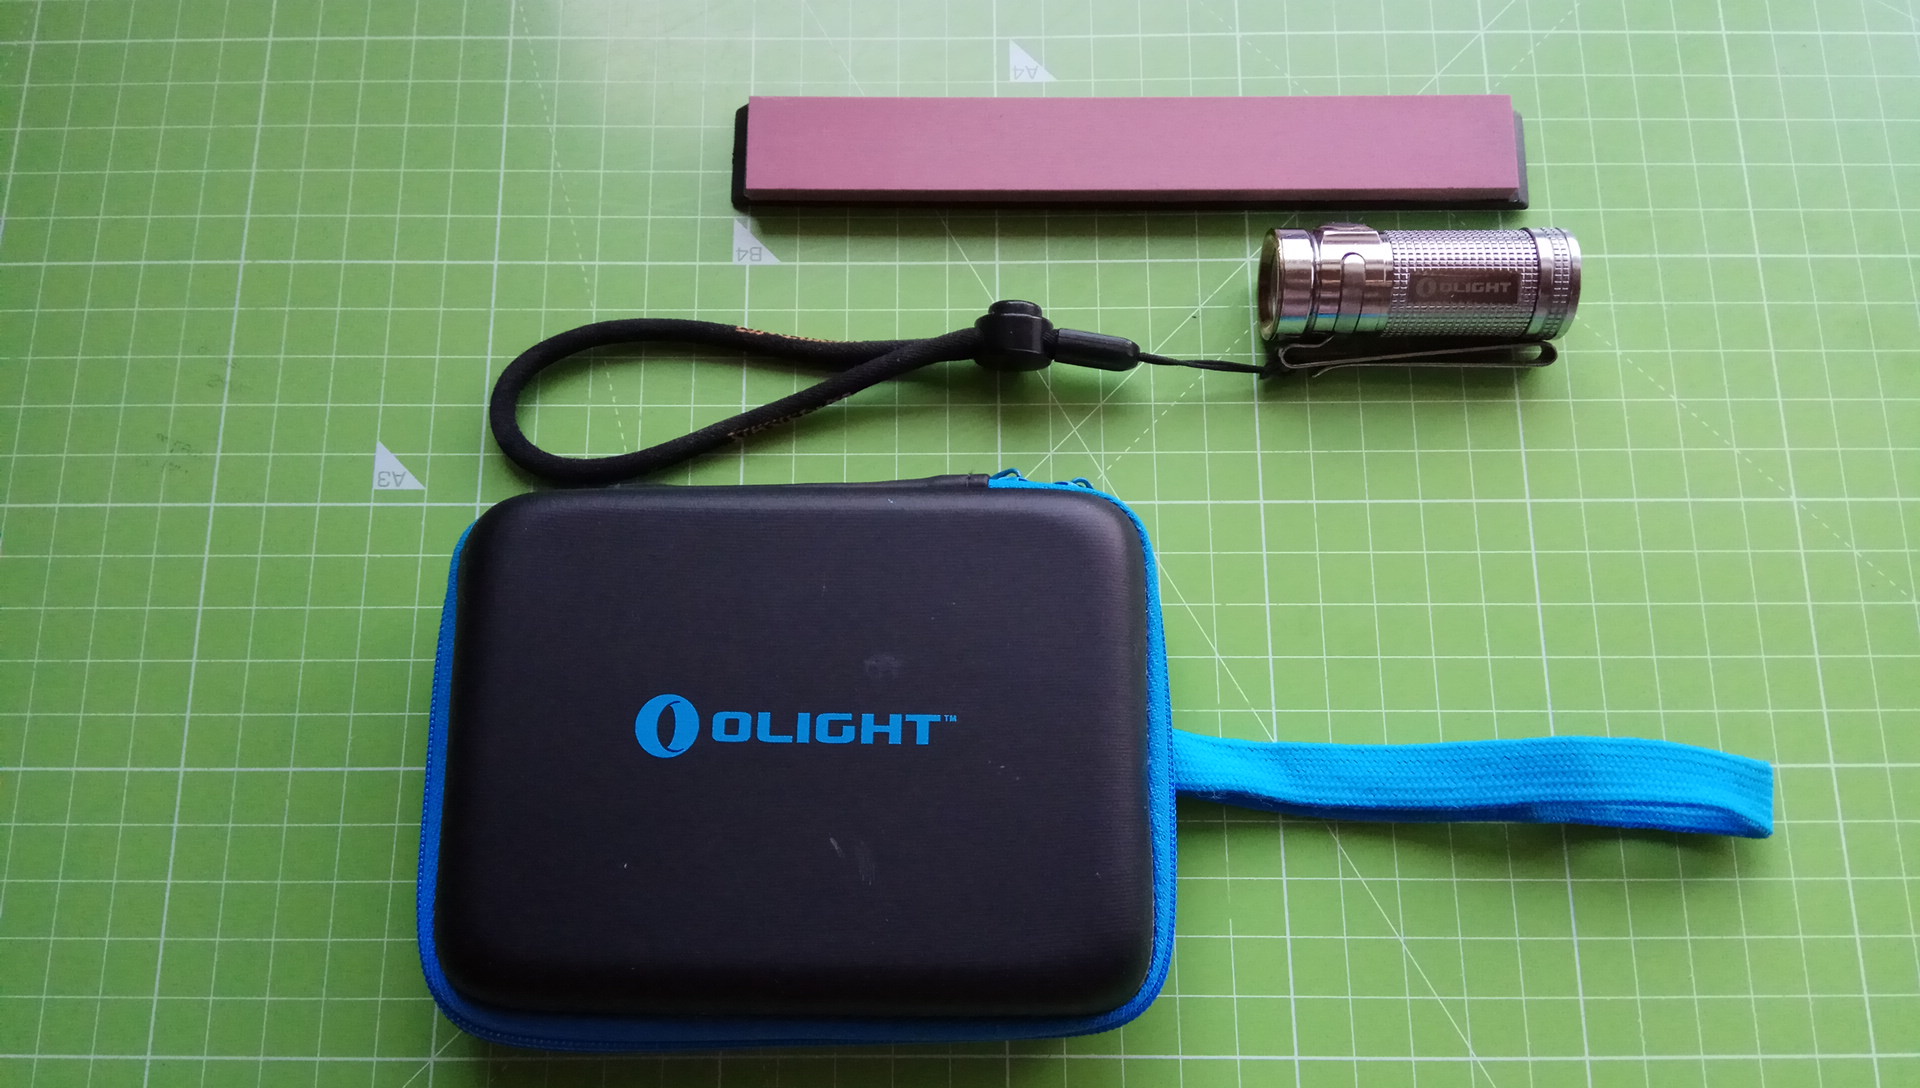
I love the RRS product, so i keep it in an Olight carry case within direct reach. The diamond rod can be used without the blue holder; after sharpening two knives with it the diamond rod was fully broken in: it is finer than expected and i like it FWIW. Also great as general file (finger nails, wood, etc), not only for sharpening blades. Great to have:
The RRS is phuntastique stuff! Portable sharpening (and tabletop deburring) just got easier and funner!
The End. Hope you enjoyed reading/looking or the idea. Hopefully i could inspire some readers to follow this example. Please report once you got your own RRS. For me, the story doesn't end here. I am so stoked about this incredibly fine ceramic pen-style sharpener that I'm looking at the cylindrical Degussit Fine …
Summary
The pen-style retractable ruby is an inexpensive high-feedback sharpener most suitable for macro-/micro-deburring and because of its wondrous efficiency a powerful must-have item in anyone's sharpening arsenal, not only in one's portable kit. Hand-held white or gray cylindrical (or conical) ceramic rods/sticks/files, or pen-style sharpeners, exist on the market for ages, they have been acknowledged and successful, e.g. the popular pen-style Victorinox Dual-Knife Sharpener (43323). What makes this diy variant —let's code-name it "RRS"— special is the fineness, effectiveness, tactile feedback, and cost of replacement (if drop'n cracked).
Pro's:
- Fineness ("3000 grit"): as fine as Spyderco 204M! The surface quality is very dense/smooth, homogeneous, flawless, unicolor, and finer(!) than any other CN ruby i had before! It leaves a shiny metal finish similar to that by an untouched Spyderco Medium stone. And who didn't ever want a portable 204M stone with non-degrading rounded edges? — Can you remember when you held a brand-new 204M rod for the first time in your hands? It felt slippery and shockingly smooth: nothing felt "Medium" about it, not even with the fingernail or tempo test! Well, that's how my AX ruby unit feels and performs. With the difference being: Spyderco Medium stones are friable and the long edges of the 204M get broken in/get consumed/become coarse
 (even after a short while, depending), whereas #rubysharpening is so hard that it retains its smooth surface properties "forever".
 - Effectiveness: not only in my experience, ruby stones are more effective at removing microburr. One can start with edge-trailing but ultimately do edge-leading strokes to shear off any kind of burr. Of course, it is also possible to grind/sharpen/touch-up with the RRS and raise a burr.
- Feedback: holding the item loosely in the left hand (LH) in horizontal orientation makes the LH more sensitive to tactile feedback. The RH, holding the blade equally loosely, receives lots of useful feedback: drag the blade slowly, with very little pressure, at same or slightly higher bevel angle, from heel to tip (or from tip to heel) across the dry ruby, and especially during edge-leading movements the RH can feel higher resistance when the burr gets sheared off. One could not feel such a difference, if the stone wasn't that fine! The LH can hold the item so loosely because of the item's light weight, slim form factor, and secure length; the holder weighs practically nothing, so all stone feedback gets transferred to the LH in pure form. Holding loosely also helps controlling the pressure between stone and bevel.
- Cost of Replacement: the ruby costs only 1-3$ shipped, depending.
- The ceramic rod could break inside the aluminum holder, if dropped on bathroom tiled floor from 3 feet. If all fails, the cost of replacement is low.
- Shoppers might run into problems of ready availability (stock, delivery time) and lottery. I ordered from AX and received better-than-expected quality, while packaging was poor; maybe i was lucky, or maybe the current AX production batch of Ø6mm is like that: like a flawless 204M quality. If you're lucky to find the required 6mm-diameter on Bezos platform, it might be of lower quality! US stock might be running low, so if you do find a good source and like the product, it'd make sense to order a spare (in case you drop'n break one). Is it lottery/gamble to receive a flawless unbroken unit? I doht know. It's a con for shoppers, not for owners of a flawless unit.
TL;DR — Suitable for:
+ readers who have experience with ceramic rods, croc sticks, portable sharpening, pen-style sharpeners, Spyderco Sharpmaker, or similar
+ readers who own blades with recurved parts (concave blade sections)
+ readers who have problems with deburring
+ readers who are sharpening beginners and/or on a tight budget
+ readers who are curious to experience the power of a high quality sintered ruby ceramic whetstone (in comparison to other ceramics)
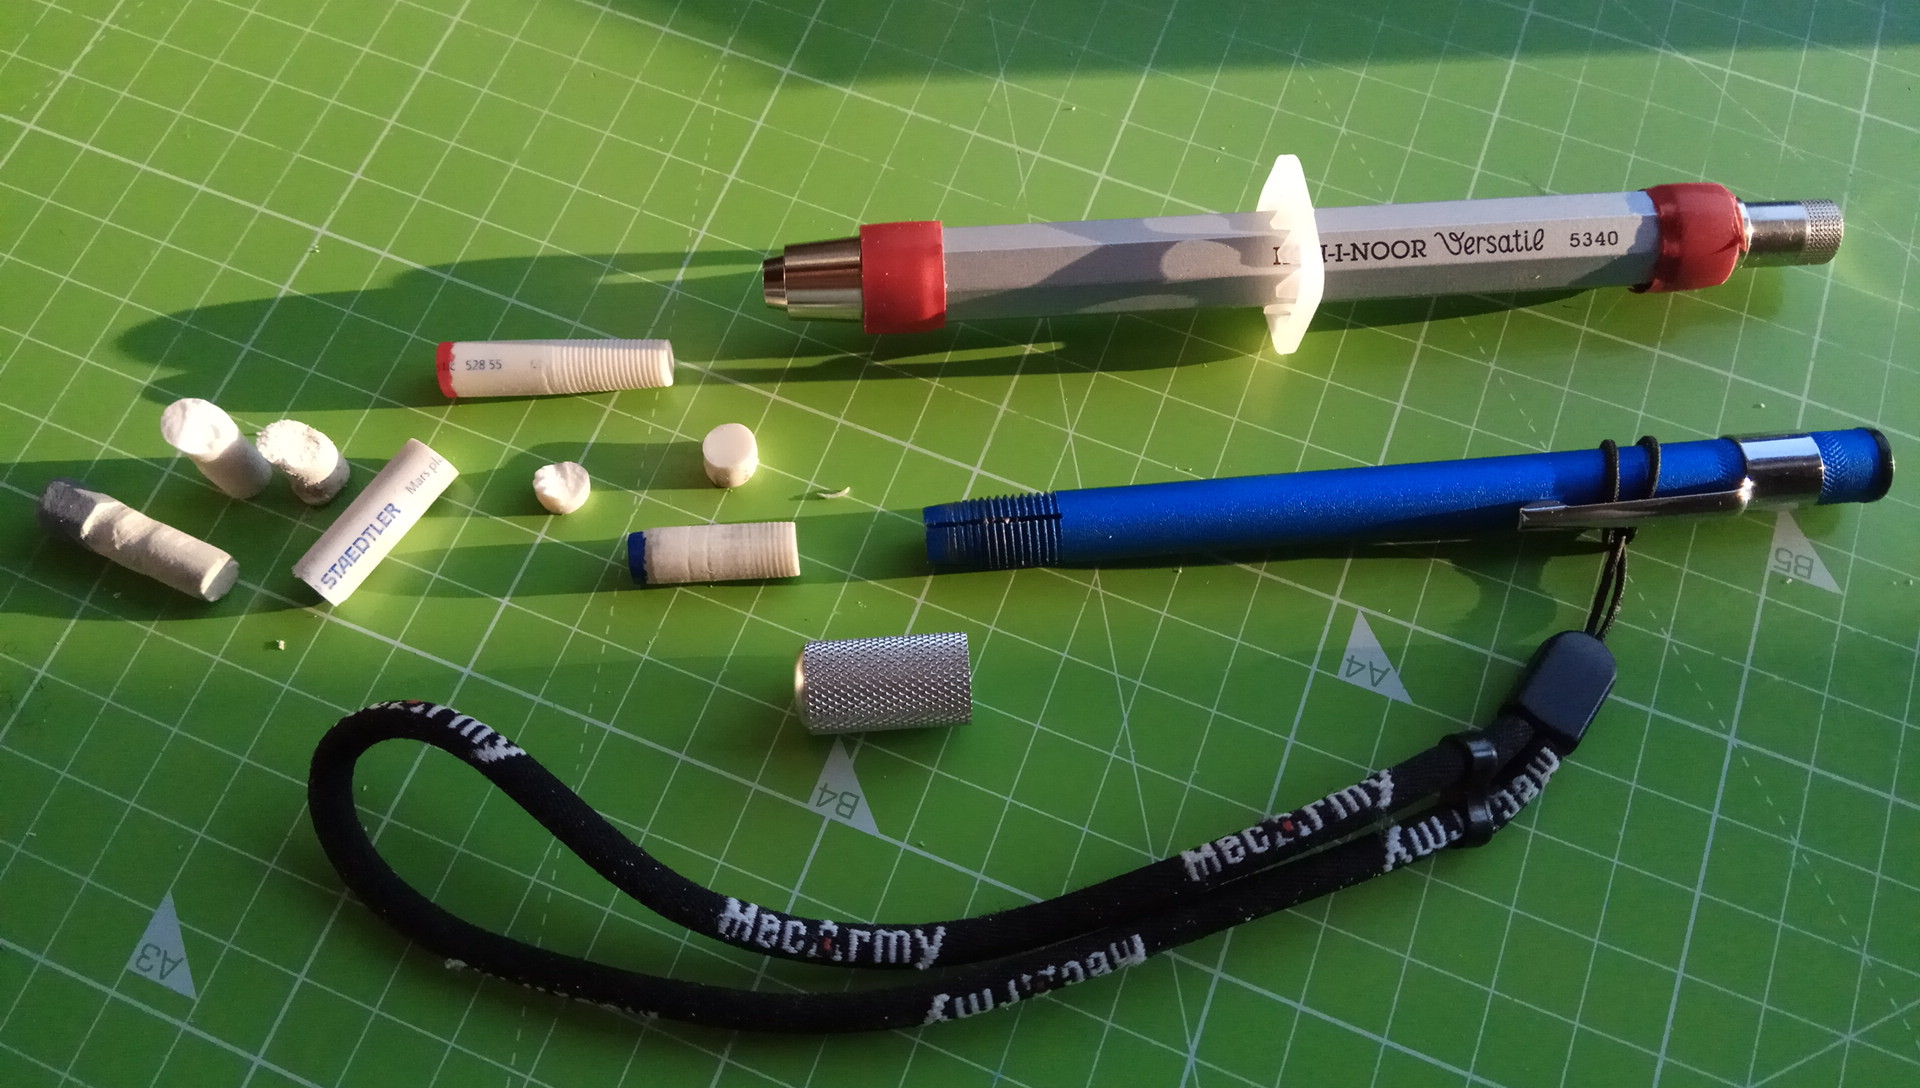
The made-in-chinas sintered(?) ruby cylindrical stick came unharmed in a bubble-padded shipping envelope with no further protection like cardboard, styrofoam or whatever. Maybe it is fortunate that i had ordered just 1 unit because 2 units would have banged against each other inside the envelope and could have caused chips and cracks. Furthermore i had reason to fear that the package wouldn't contain the correct diameter. After some 3.5 weeks between order day and delivery day i was fully relieved: the package didn't get lost during transit, the item arrived unbroken, the item had the correct diameter of Ø6.0mm, and the item was in better-than-expected quality:
Wait, where is the holder? Probably you have it already in your garage, it is a ubiquitous thingy, search term <
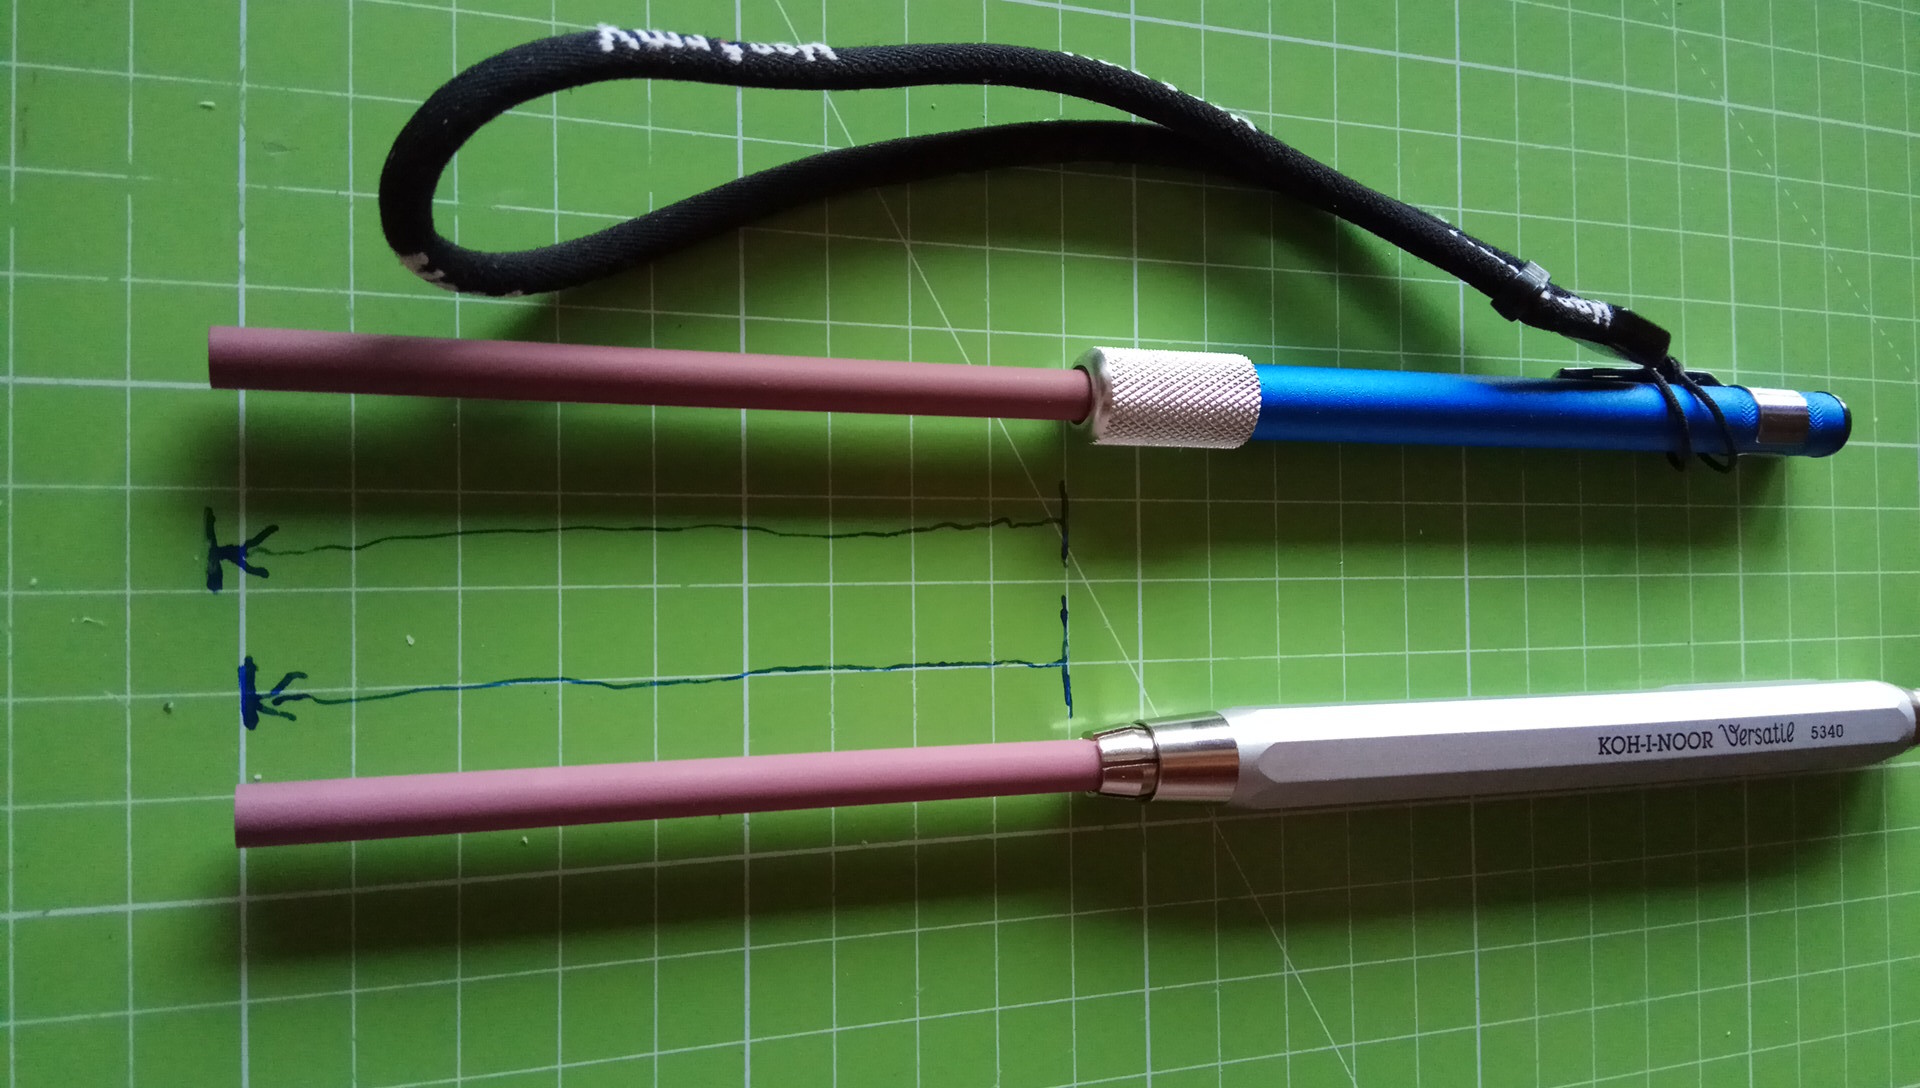
retractable sharpening> on Bezos platform, the auction platform, or in your preferred local hardware store. I made a Ø6mm-plug out of an old eraser to stop the ruby from sliding inside the holder during storage/transportation, and i added an easy-to-remove wrist strap to secure the product to my loosely holding LH:
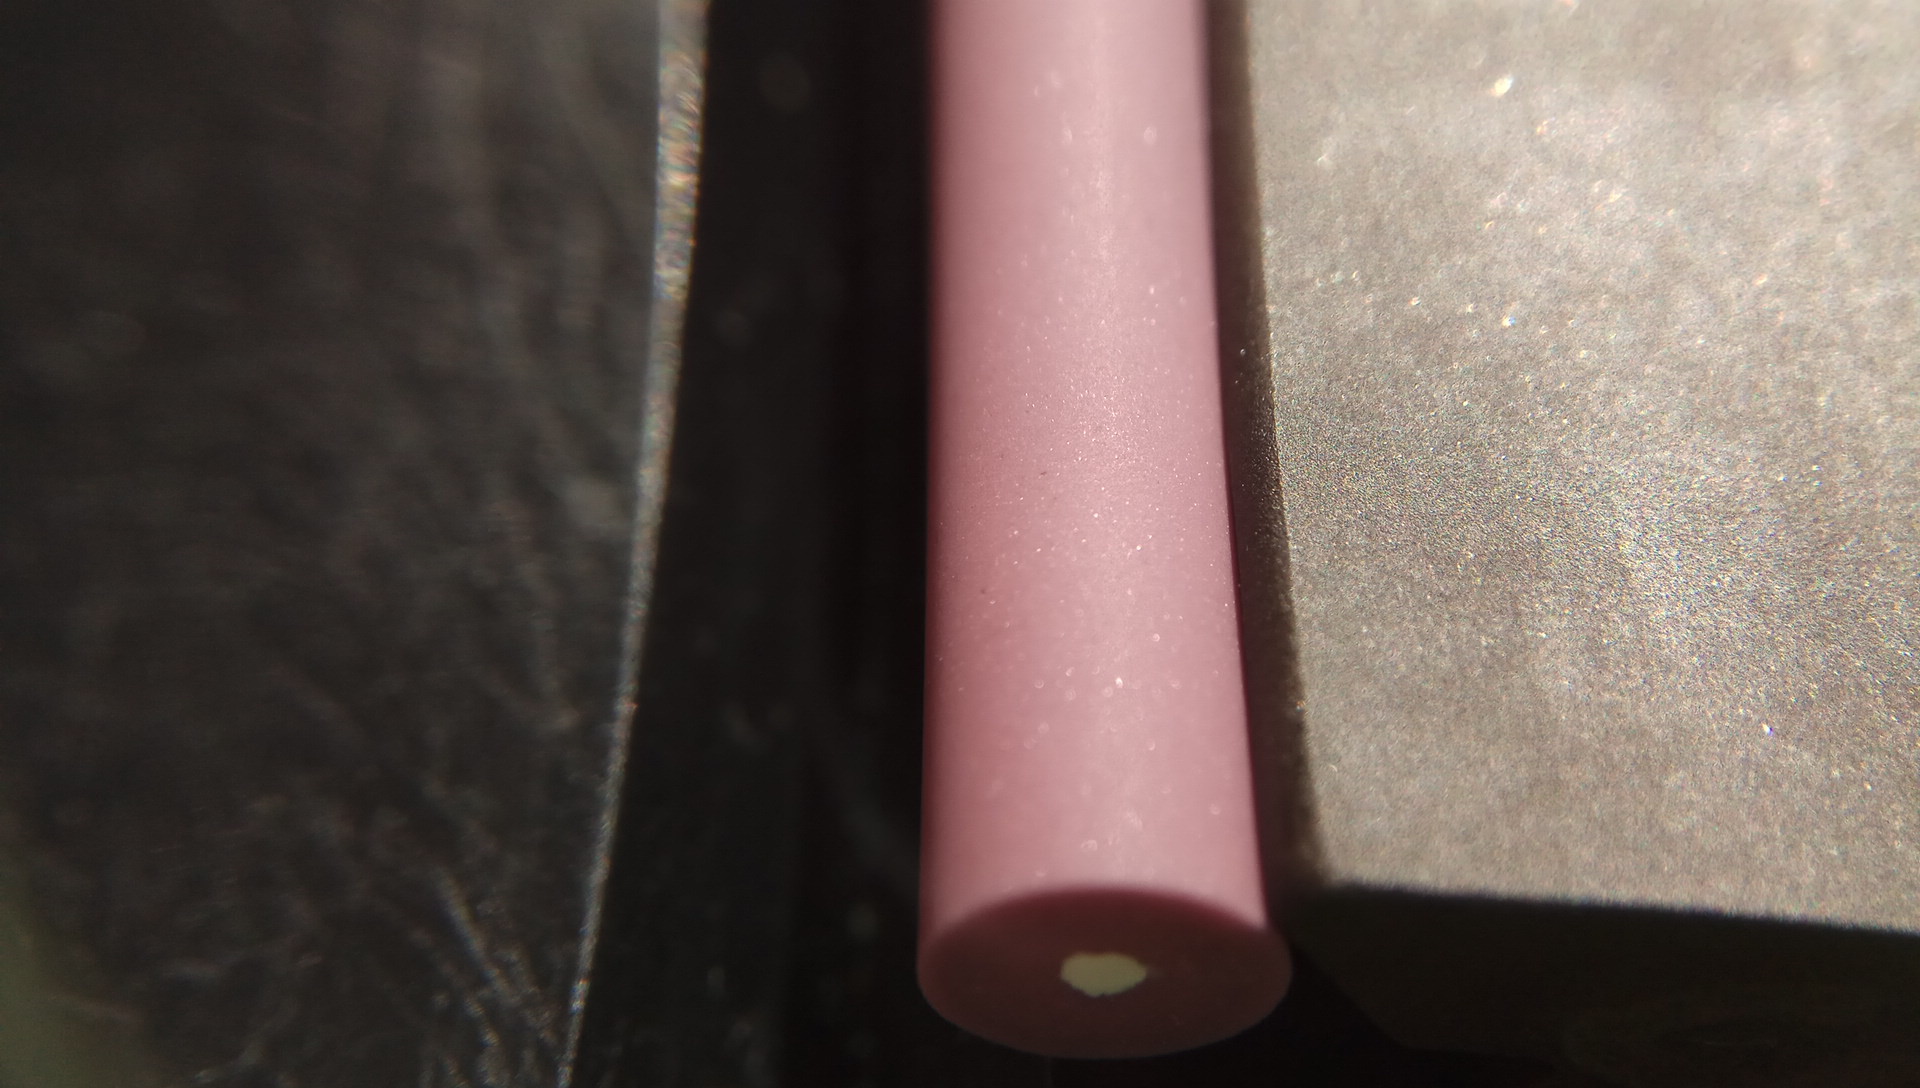
Before we get to the fitment/assembly of the RRS, let's have a look at the stone quality in comparison to my other rubies from 5 similar viewing angles:
I will say that the color of the cylindrical ruby is very similar to, i.e. pretty much the same as the other 2 CN rubies, as you can see (short stone at top of pic, long stone at bottom):
The long stone, mine marketed by ANSELF brand for use with Ruixin Pro III, has amazing quality and properties for itself but the surface quality of the cylindrical ruby is even higher, and finer - by direct comparison i knew that i had to be satisfied with the delivered cylindrical ruby and that i couldn't have asked for more:
The left small stone ("DoubleStuff") has a meh surface quality, one could even tell from the photos. If all CN doublestuffstones have this identical quality, then i would probably not recommend it to other shoppers:
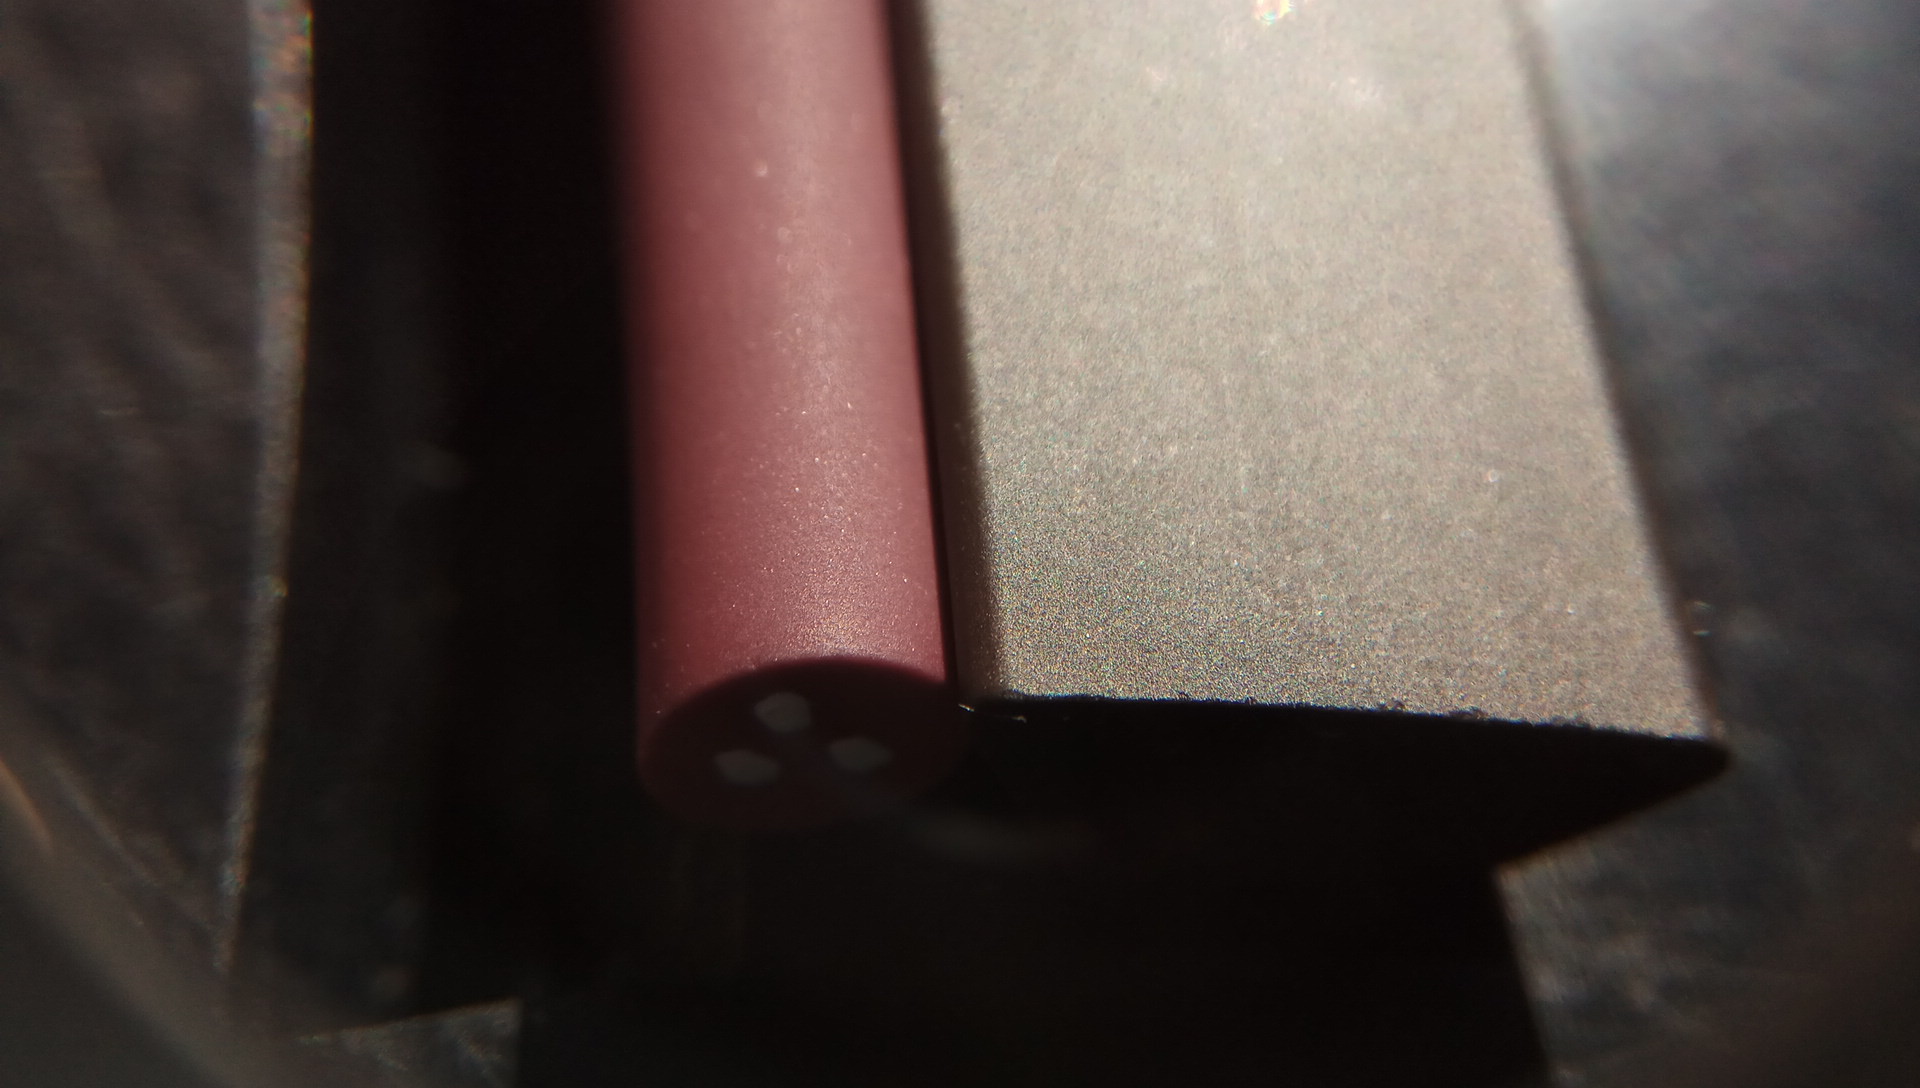
Personally I still find the CN doublestuffstone useful for some rough grinding/sharpening/deburring of tools or old knives. You can see machining marks on the ANSELF stone and none on the cylindrical stone:
Oh and the darker red ruby stone in the middle of the photos is the DD57F 100x6x3mm stone (Degussit Fine dist. Gesswein 35-2203/Congress Tools DEG220F); DD57F is a tad finer than 204UF and, of course, superior to the CN cylindrical ruby.
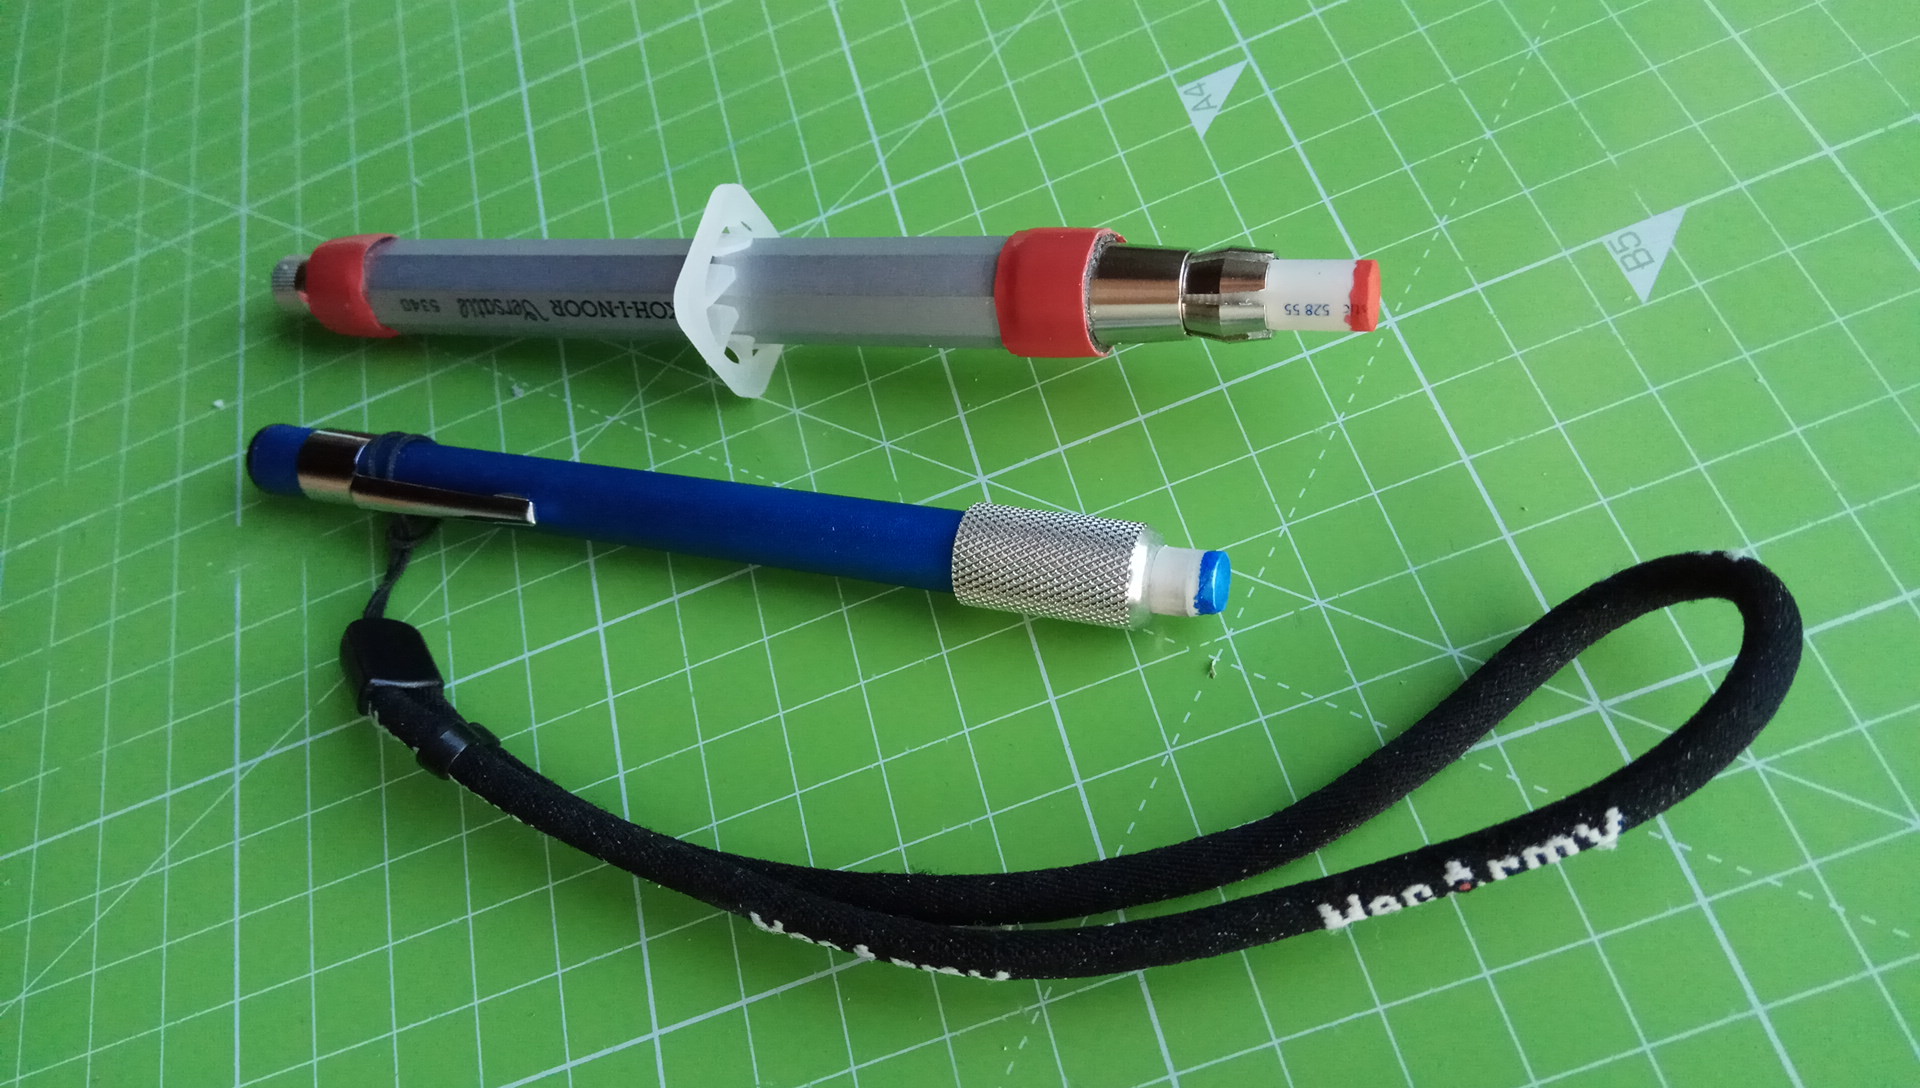
Now it's time to understand the fitment. Please find all relevant measurements from the photo. In particular, learn that the Ø6.0mm cannot be fastened by the collar lock, without mod. Imho the optimal rod diameter would be anything between 6.5-6.8mm, so the provided diamond rod with ~Ø6.25mm doesn't even fall into that optimal range lol:
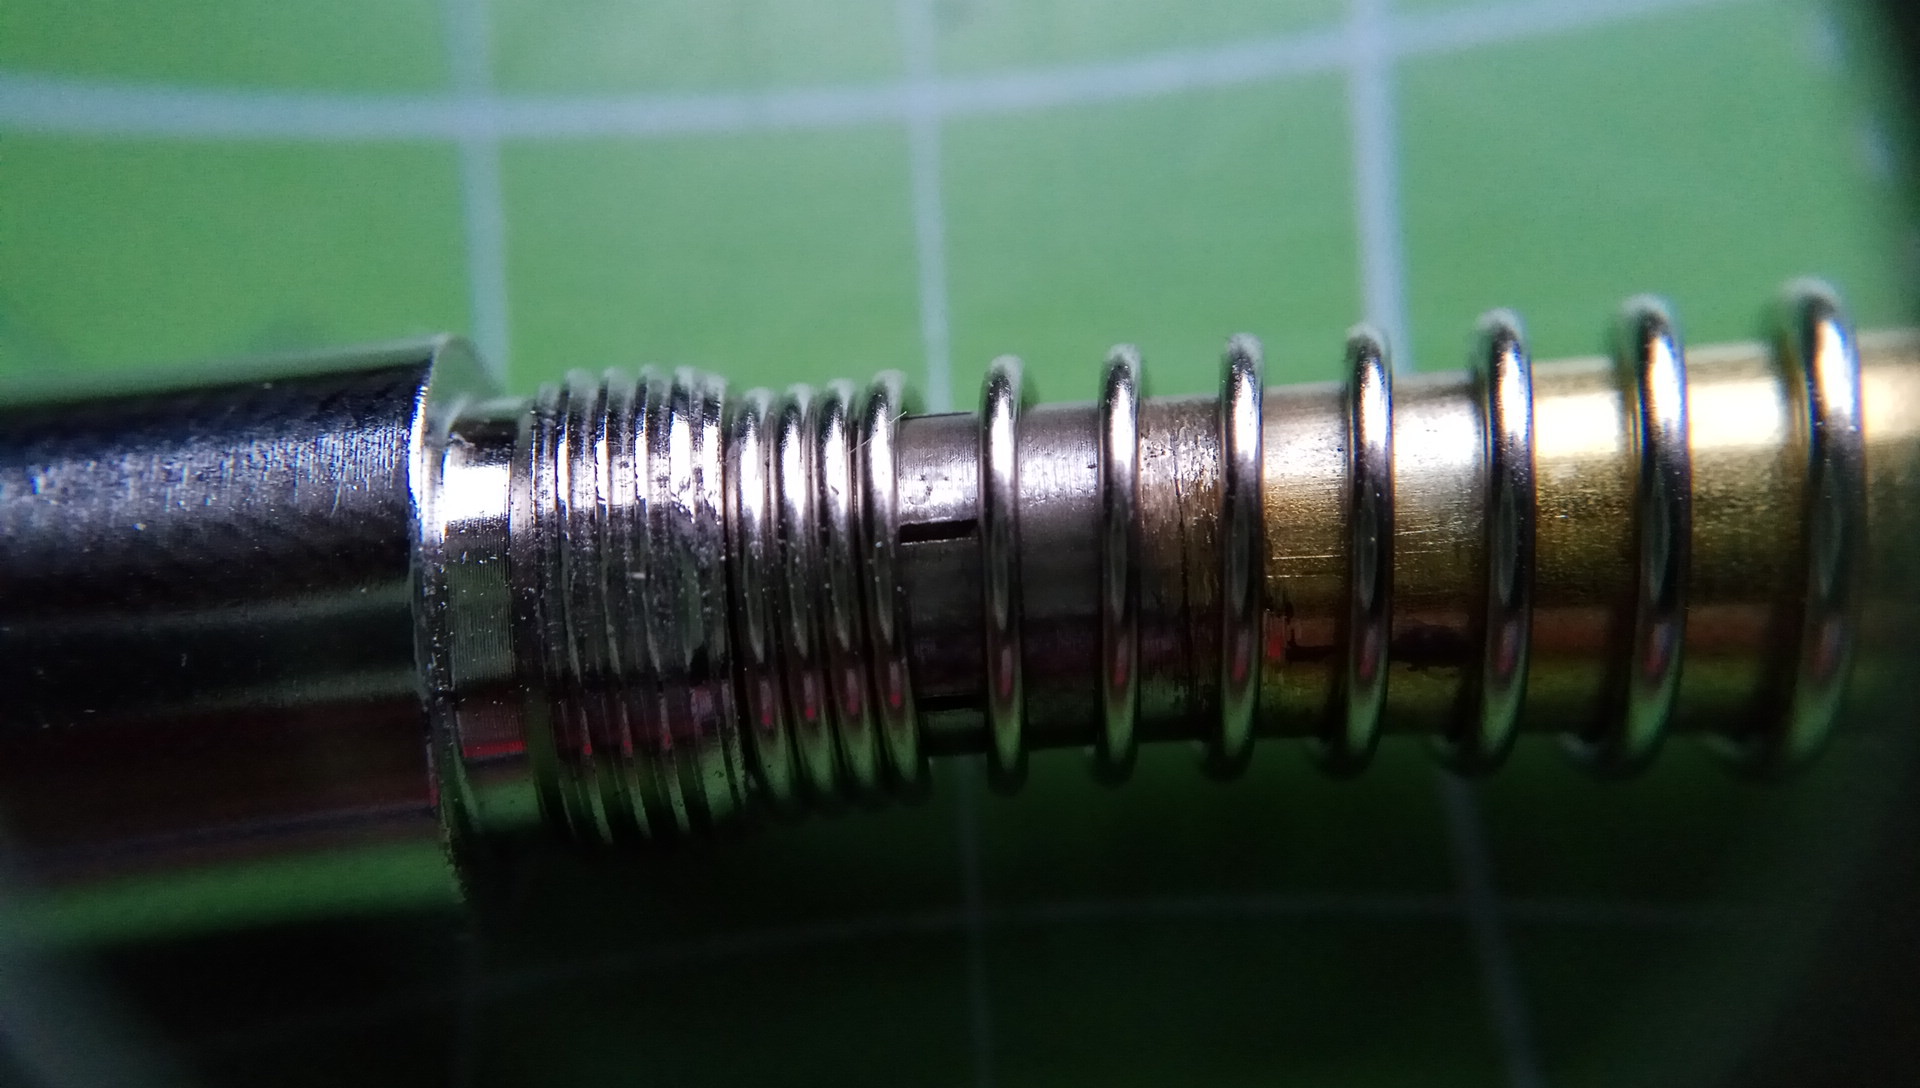
The blue tube seems to have an inner diameter (ID) of ~6.9mm (hey hard to measure, right!?). I cut a 90mm long piece of thick tape (left-overs from a book protection roll, i.e. inoffensive nonaggressive adhesive) and wrapped it around one ruby end to approach that measure:
Instead of book tape one could find/use other media to enlarge the diameter from 6.0mm to ~6.8mm, for example paper, label paper, rubber, plastic, scotch tape, etc. After some time the tape must be renewed anyway because of moist or oil creeping in. This photo explains it well:
Enlarged to Ø6.8mm and with a fully tightened collar, the ruby rod is seated firmly, without any wiggle, in the holder. You get about 90mm (of the 100mm) of ruby use for comfortable sharpening/deburring, which is more than the original diamond rod! See photo again at top of the thread lol.
For storing inside the holder, i insert the rod upside down, and tighten the collar with an inserted diy plug, for rattle-free storage:
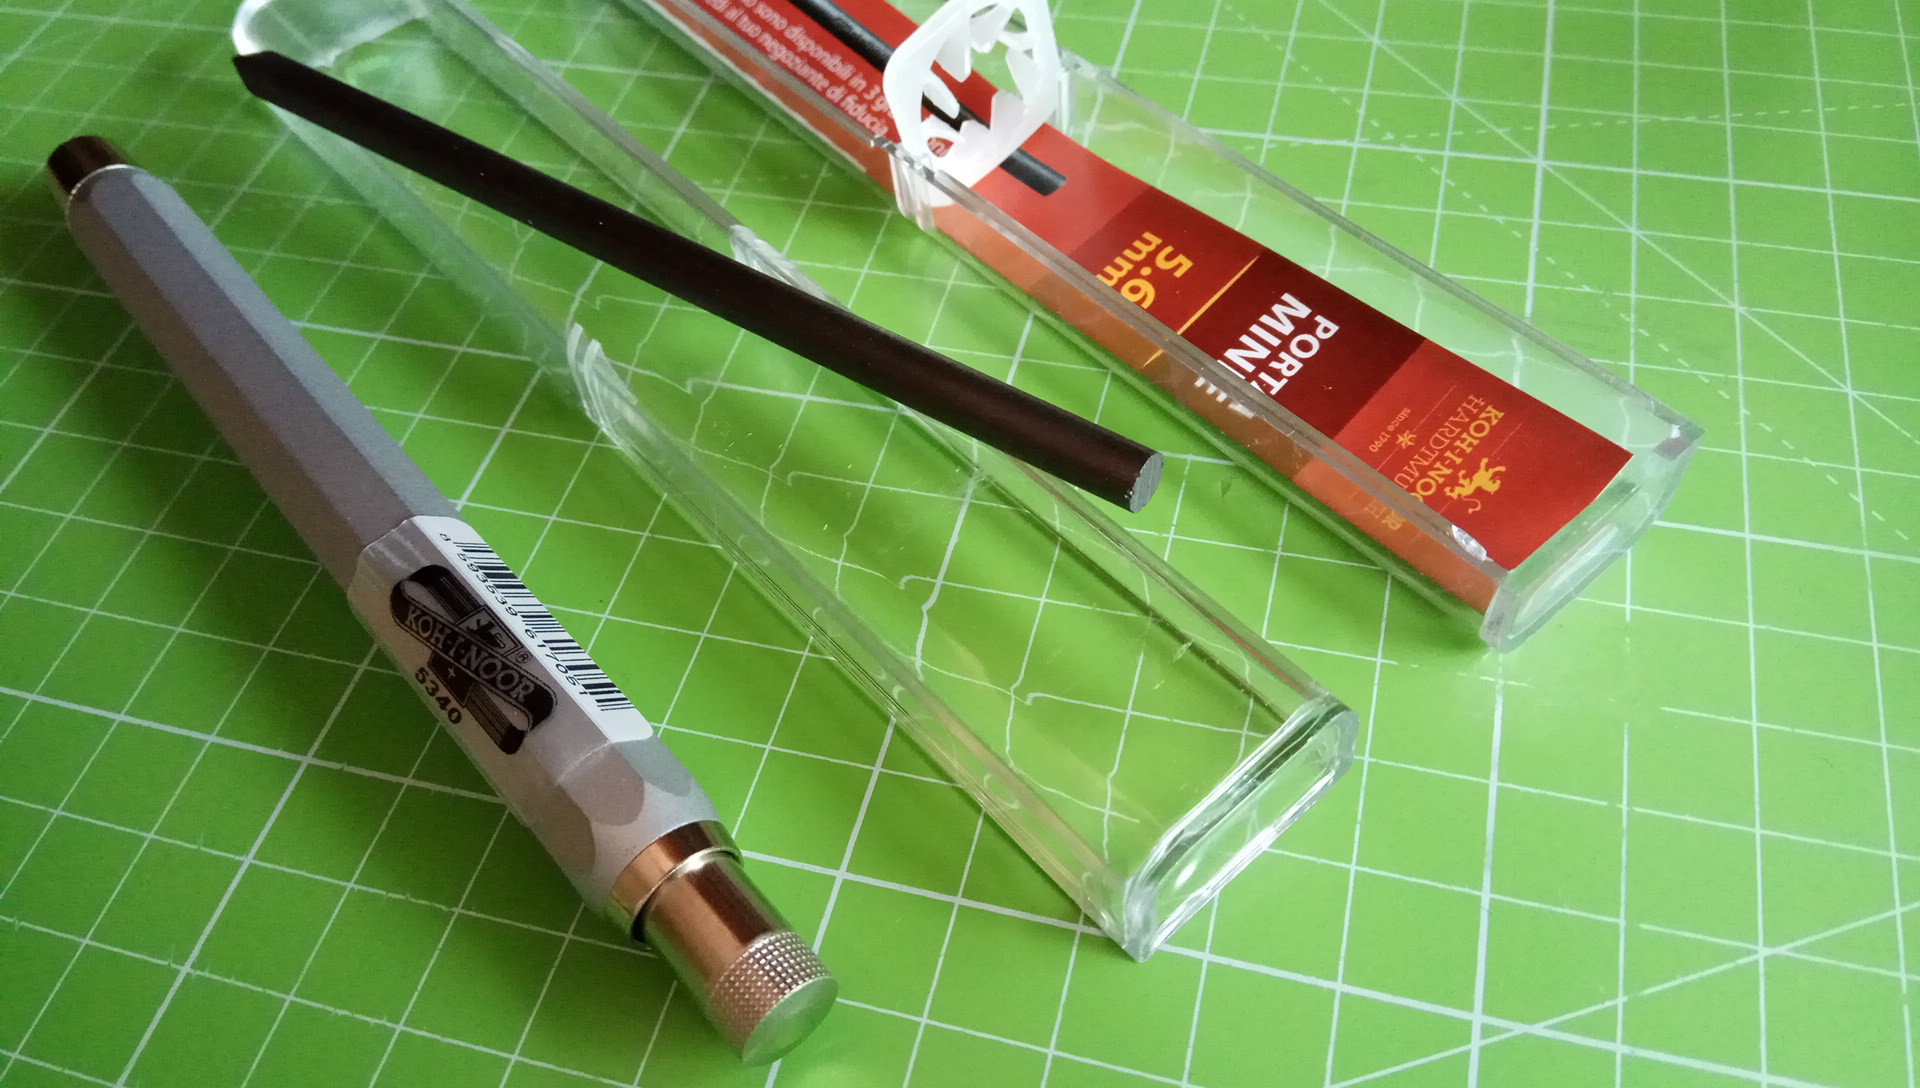
I love the RRS product, so i keep it in an Olight carry case within direct reach. The diamond rod can be used without the blue holder; after sharpening two knives with it the diamond rod was fully broken in: it is finer than expected and i like it FWIW. Also great as general file (finger nails, wood, etc), not only for sharpening blades. Great to have:
The RRS is phuntastique stuff! Portable sharpening (and tabletop deburring) just got easier and funner!
The End. Hope you enjoyed reading/looking or the idea. Hopefully i could inspire some readers to follow this example. Please report once you got your own RRS. For me, the story doesn't end here. I am so stoked about this incredibly fine ceramic pen-style sharpener that I'm looking at the cylindrical Degussit Fine …
Last edited:


 ), using an inexpensive well-made so-called "clutch pencil (5.6mm lead holder)". I tried his solution, and i like it very much, thanks! The silver RRS has cool advantages over my original "blue RRS".
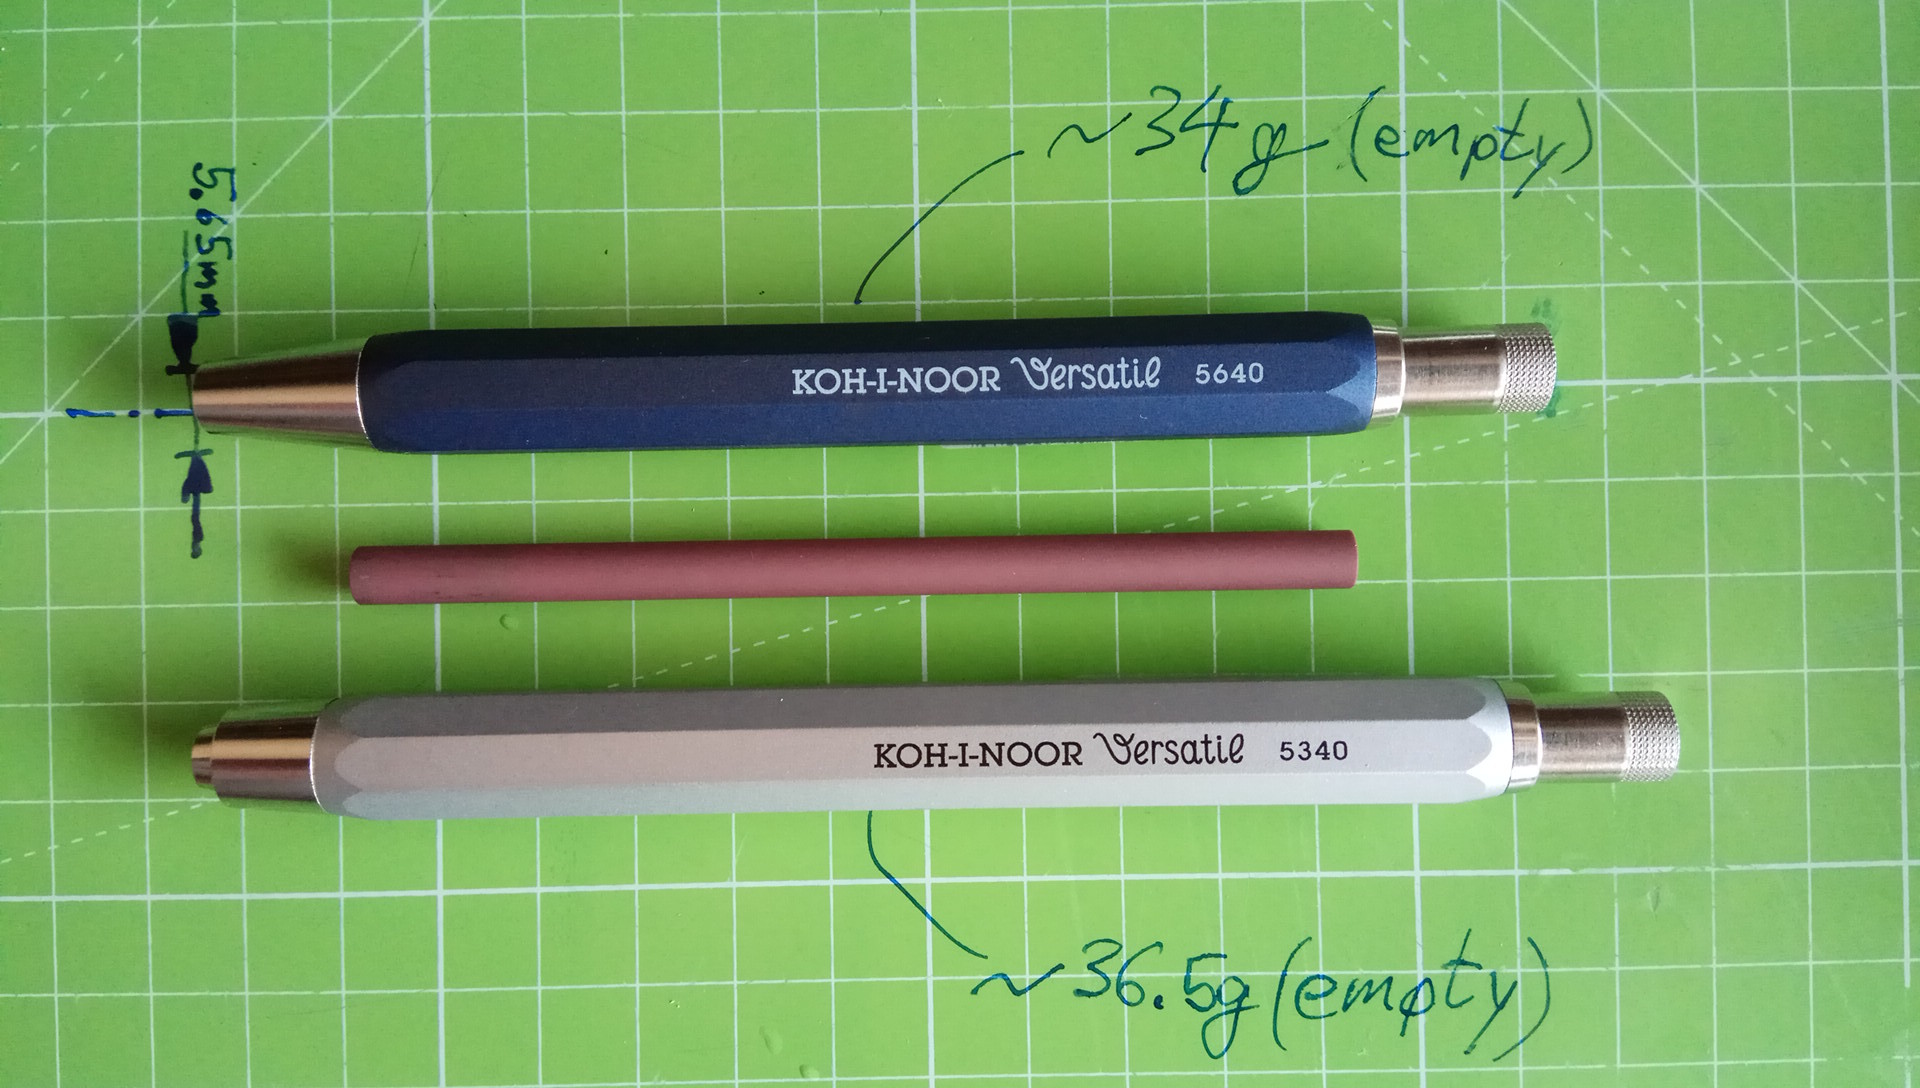

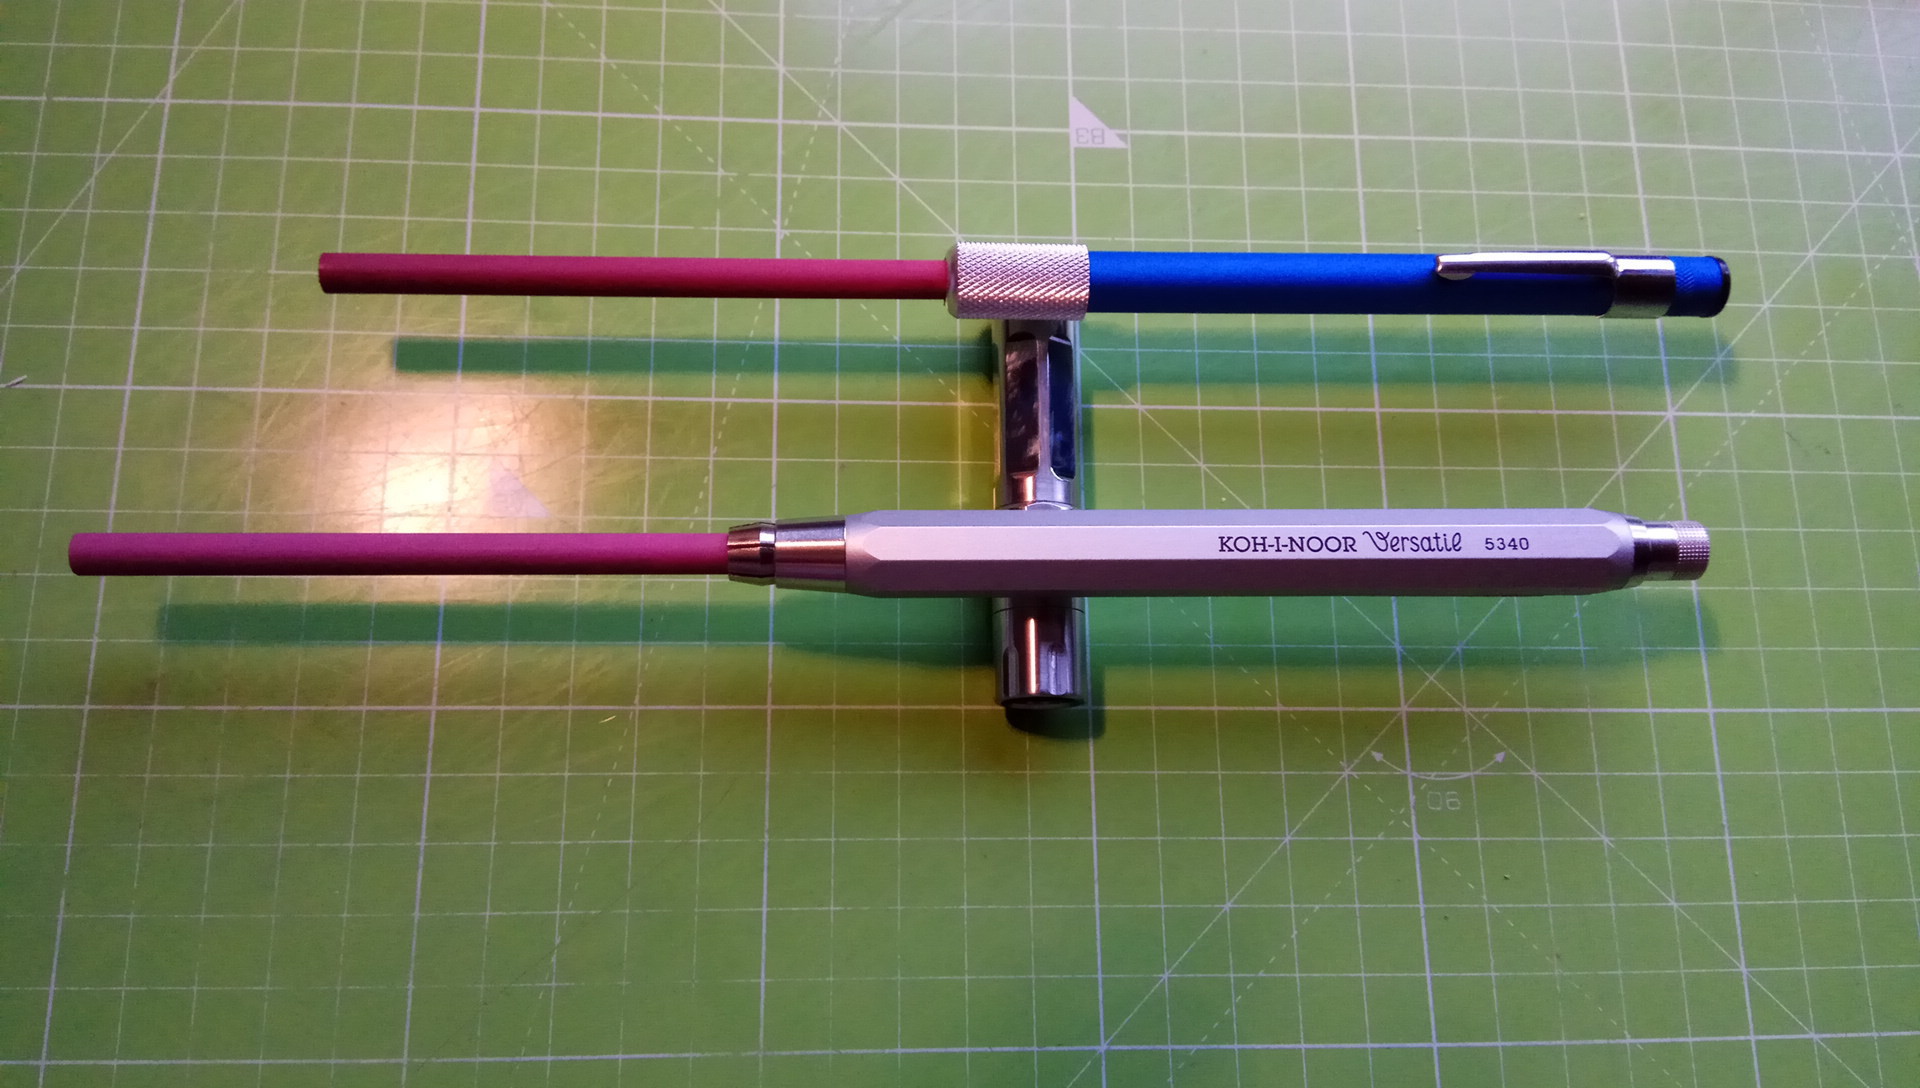


 deployment more on the silver, so it's become my personal preferred choice in-house. If i were to go on a field trip and wanted to carry a portable sharpener (in my pocket, pouch, or backpack), i'd take the blue with me, for sure (the diy plug isn't very secure, unfortunately). However if i were a professional workman, mechanic, craftsman, i'd have the silver in my toolbox. both items are great value stuff and one could afford to buy them both if you like the concept of RRS.
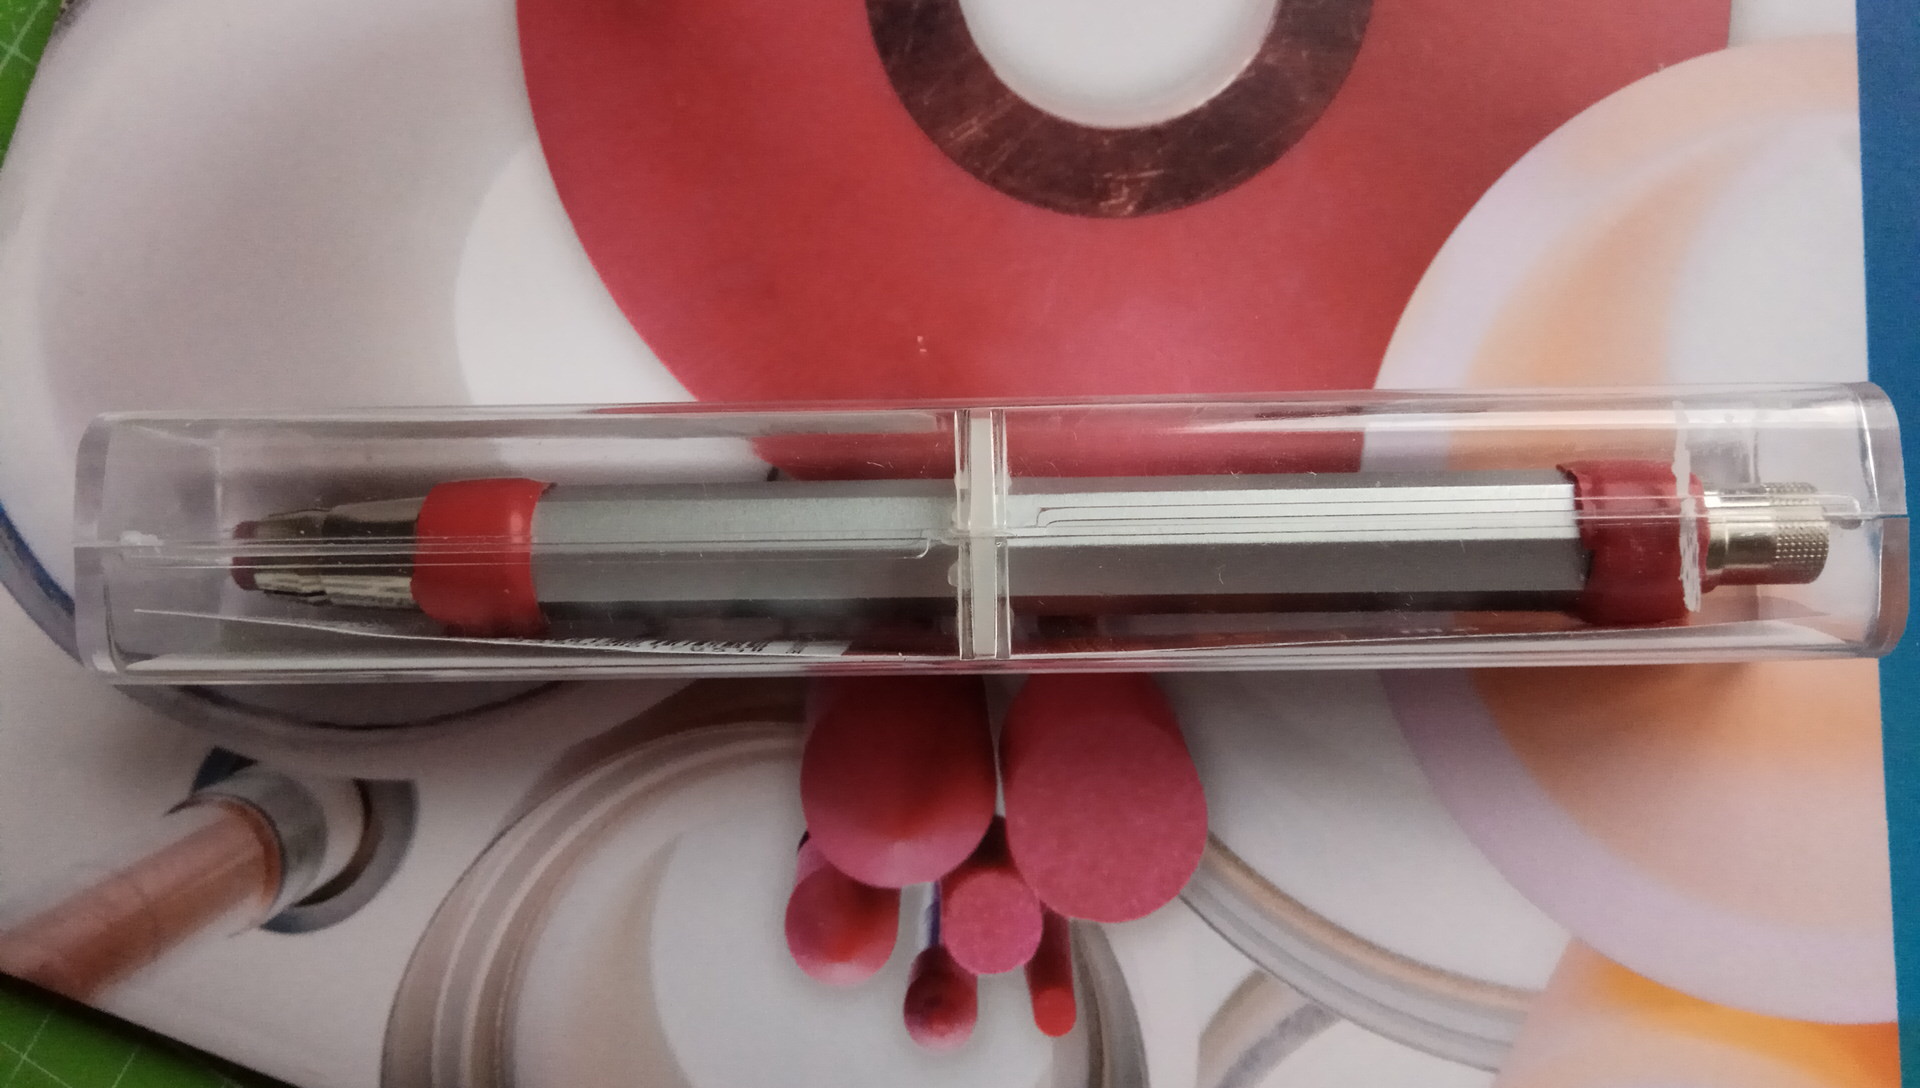


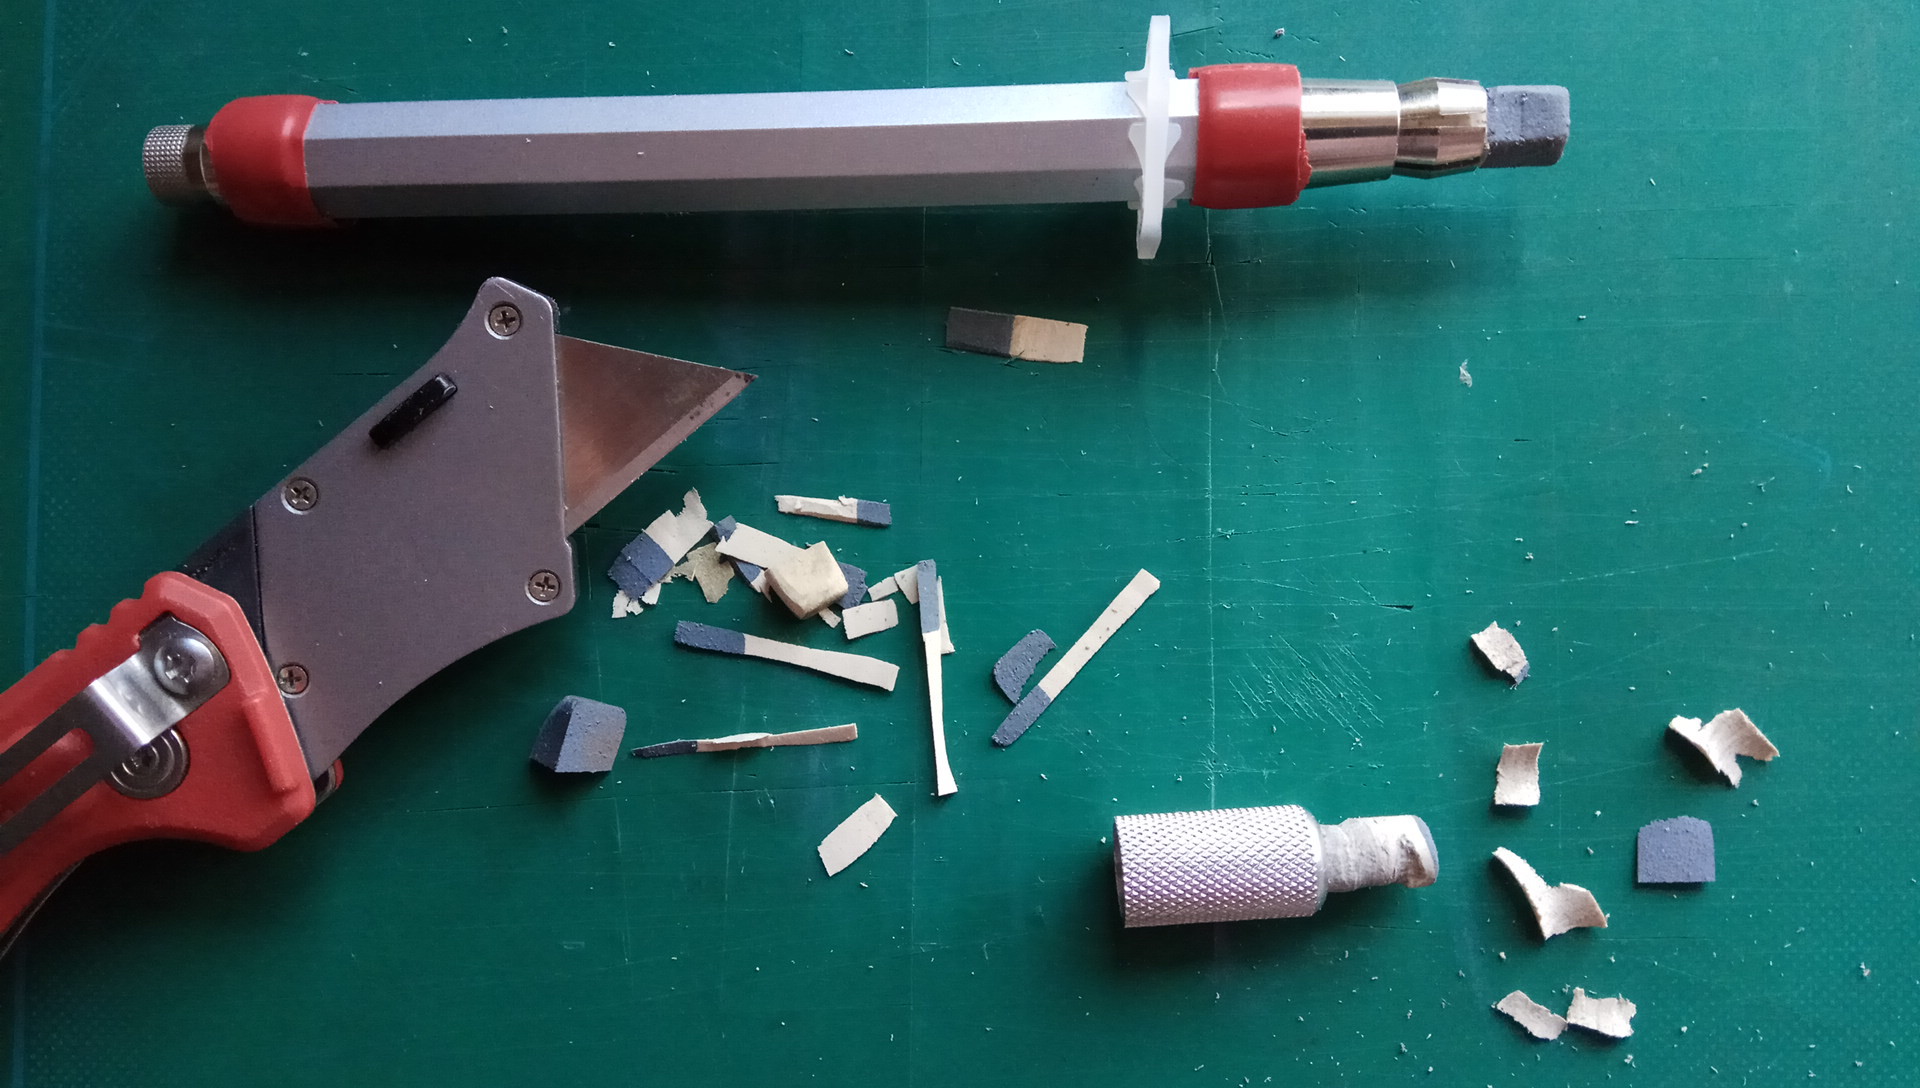


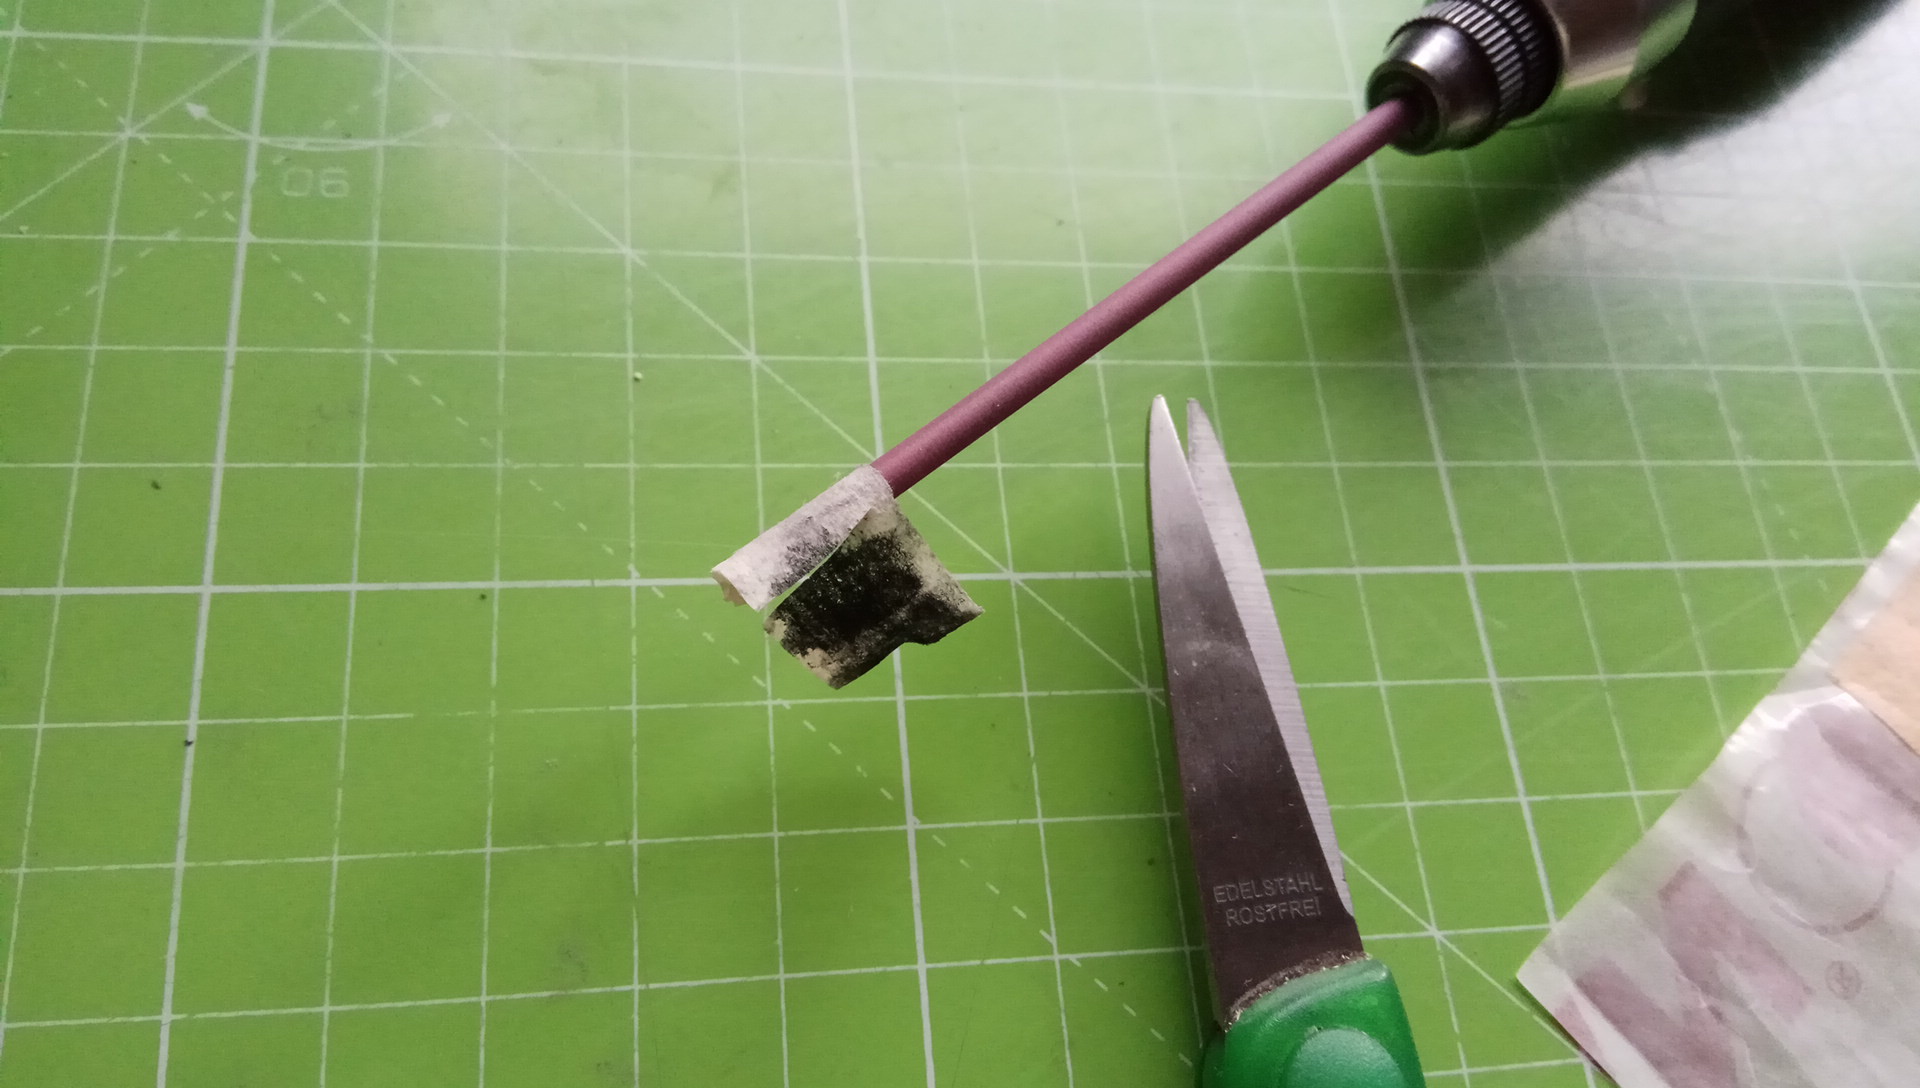
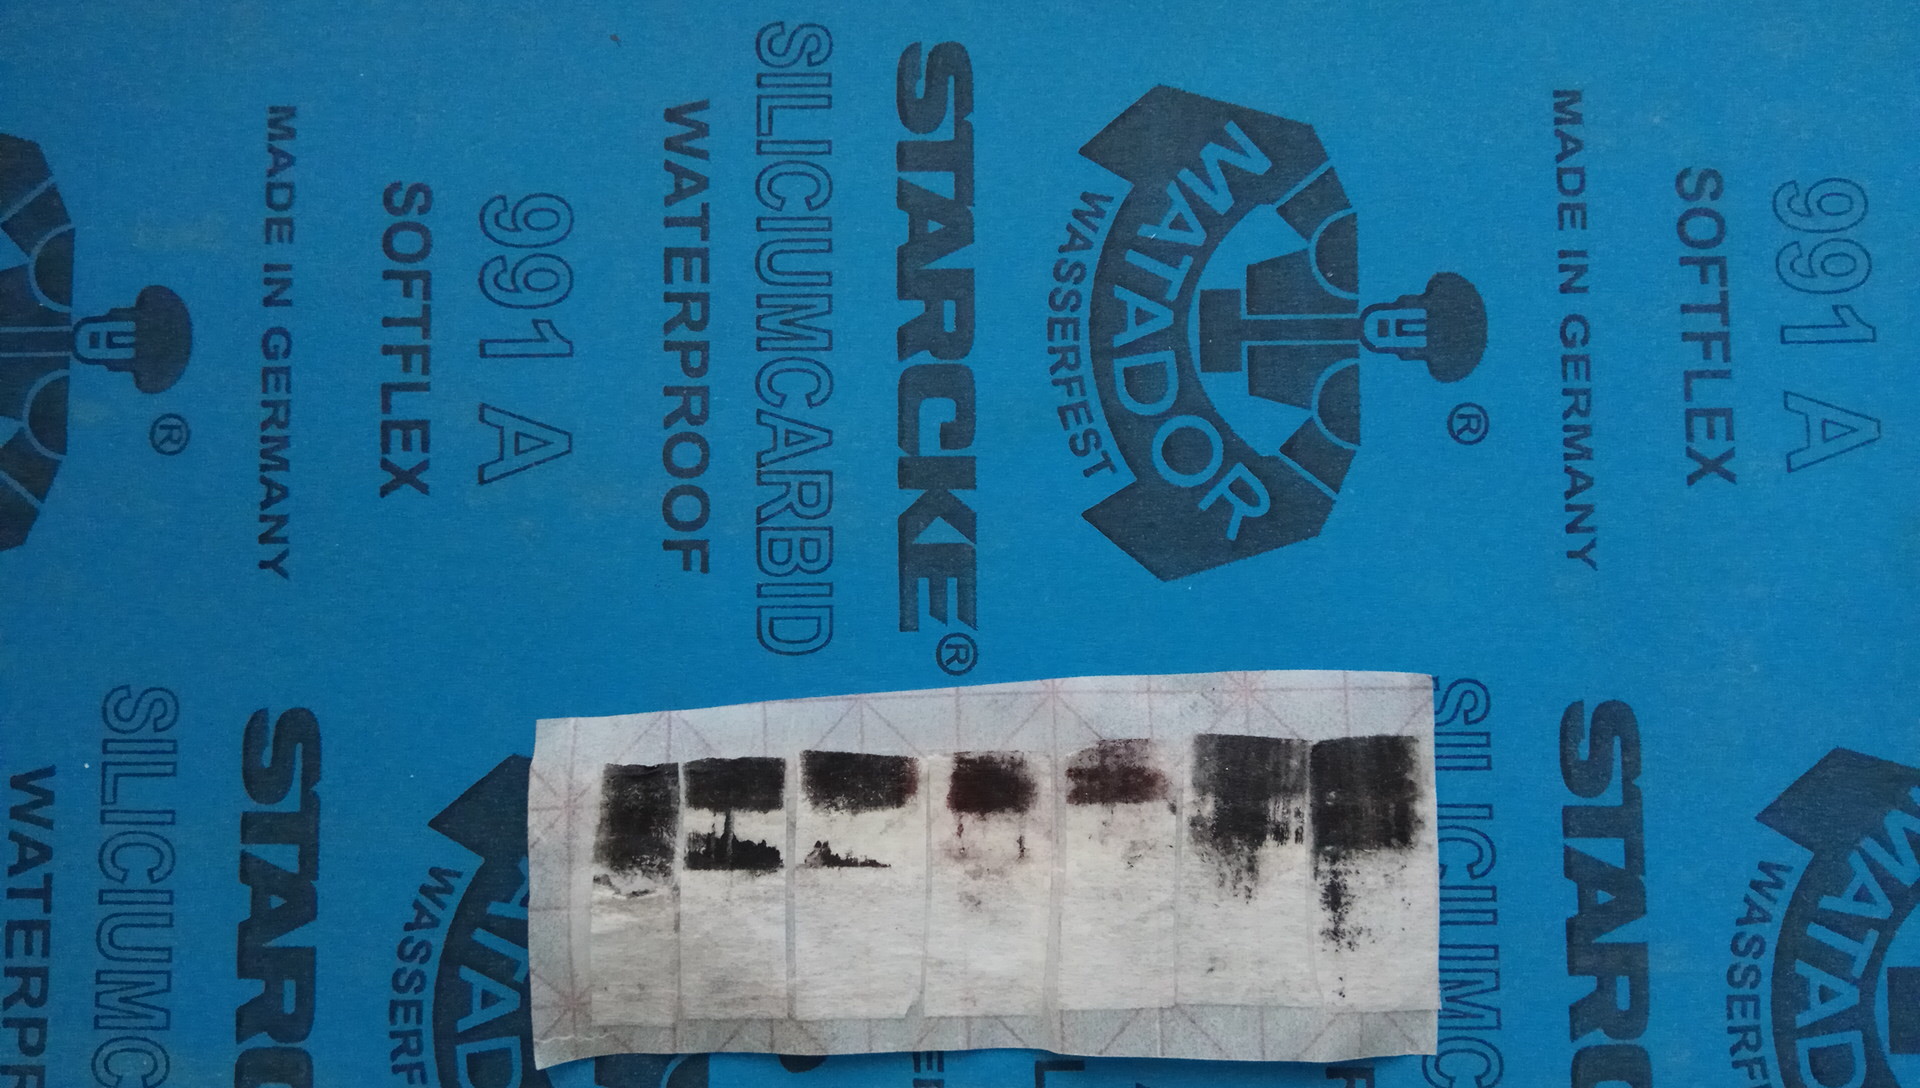
 Rubí Dremel: This post is to show that the cylindrical rubies can be used successfully as 'holder' for finer abrasives (compound loaded surgical paper tape for use with dremel, or superfine sandpaper for manual use).

 . My silver RRS doesn't have a clip but it has that