Slipjoint back spring gaps

Joined
Oct 17, 2009
Messages
1,076
I'm not sure if this is the right place to ask, but I'm sure someone here can help.

So Im putting together my second slipjoint (Trapper pattern) and the gaps between the spring and liners are so large I can see the pins. How is this avoided?
The liners were perfectly flat, and I can't figure out what I'm doing to make this so bad. This is the second time I've had this problem, so I'm missing something in the process.
 
pics?
did you surface grind the parts?
is the spring parallel? flatness and parallel are different things.
how flat is it? you can see .001 off with the eye
 
There is a difference between one side flat and both sides flat and parallel. It is also possible that your spring warped during heat treat, even a very small warp can leave a big gap. Was everything surface ground after heat treat? A picture might help.
 
Is your backspring perfectly flat and straight? What about your handle scales (covers)? Also, did you deburr after drill your holes? Is or was everything peened together tightly to begin with?

It's also important that everything is squared up properly. If there's an angle where your spring and blade tang meet, it could potentially push things apart with repeated opening and closings.
 
I didn't construct this knife myself, but assembling from a kit. I didn't realize all that can factor into getting these knives perfect, or near so. But, that's part of the reason I wanted to buy a few of these kits. Slipjoint construction is complex!

All the holes were deburred and the blades nice and square. I think I have it peened as tightly as I can get it. The action is smooth and snappy in open and closed positions.
But visible pins are a big turn off!

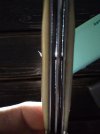
IMG_20180120_184645.jpg

Sorry for the bad pic, poor lightening and poor camera.
 
Since you are using a kit, i would hope the kit maker gave things reasonably flat and straight. Did you peen the pins down tight? I mean, can you squeeze the gap closed with your hands? Also, poorly drilled holes can cause misalignment and gaps.

If the spring is touching one scale at each end and the other scale in the middle, then it is a warped spring probably. Also the scales themselves can be warped. If it doesnt use too much pressure to do so, lightly clamp it shut and check if the blade is still centered, if it is then finish peening. Use a shim at the pivot so you dont peen the blade shut, then pull the shim and the warp should take out any side play, but if it doesnt then finish peening a little at a time until no side play in the blade. If you do peen the blade shut you can open it up a bit with a flat screwdriver by prying around the pivot area until it lossens up. Dont pry too hard or you will gouge it up.
 
Last edited:
Since you are using a kit, i would hope the kit maker gave things reasonably flat and straight. Did you peen the pins down tight? I mean, can you squeeze the gap closed with your hands? Also, poorly drilled holes can cause misalignment and gaps.
I was able close the gap pictured above by gently squeezing in a vice, revealing more pin material which I just finished peening back down tight. That gap closed, now there is a gap between the rocker pin and the pivot, and a gap between the rocker pin and the pin at the other end.
 
Tread carefully. Keep checking the blade to make sure it wont rub the liner when closing. You need to check this after squeezing tight and before peening. It is a poorly made kit, but you can either be content with it, try to fix as much as you can without ruining it, or crack a scale or get the blade alignment wonky or ruin it completely some other way.

I would keep trying to gently squeeze gaps and keep peening and checking for issues. Use padding in your vise.
 
Hard to tell exactly from one close up pic, but I'd guess you didn't squeeze everything together tight enough when you peened your pins. The process of properly peening will draw things in a little tighter than where you start, but it won't close that big of a gap. You can try to squeeze everything tight as it sits now, and maybe continue peening the pins to keep it tight, but if you've already bent or deformed the pins too much you may as well drill the heads out and start over.

Are the pins pre-trimmed to proper length to start? Or are they long to begin with? You shouldn't need much more than half the diameter of the pin sticking out on either side before you start peening.
 
I normally stick some shim stock around the blade pivot before I peen the pivot pin. Then I'll peen tight and remove the shims after, and if I need to I can adjust it a little tighter after the shims are removed.

Remember though, you're not hot riveting steel beams together. A few light taps with a small finishing hammer will go a long way.
 
Tread carefully. Keep checking the blade to make sure it wont rub the liner when closing. You need to check this after squeezing tight and before peening. It is a poorly made kit, but you can either be content with it, try to fix as much as you can without ruining it, or crack a scale or get the blade alignment wonky or ruin it completely some other way.

I would keep trying to gently squeeze gaps and keep peening and checking for issues. Use padding in your vise.
Thanks for the tip, I'm going to give this try tomorrow and see how much, if at all, I can tighten this up. Its hard to tell how much of this is error on my part or due to the quality of the kit itself.

Hard to tell exactly from one close up pic, but I'd guess you didn't squeeze everything together tight enough when you peened your pins. The process of properly peening will draw things in a little tighter than where you start, but it won't close that big of a gap. You can try to squeeze everything tight as it sits now, and maybe continue peening the pins to keep it tight, but if you've already bent or deformed the pins too much you may as well drill the heads out and start over.

Are the pins pre-trimmed to proper length to start? Or are they long to begin with? You shouldn't need much more than half the diameter of the pin sticking out on either side before you start peening.
I followed the rule of half the diameter of the pin. The pins dont appear to be bent at all, but I do think I failed to compress everything tightly enough, leaving too much pin stock to be able to snug everything up.
 
Take apiece of cloth backed sandpaper...maybe 100 grit or so, 1/4” wide and 2” long. Wrap as in a U round the spine of knife 1/2” away from the pin you are working on. Clamp pretty firmly with needle nose vise grips. It should close perfectly. If it does not...something wrong. Start from the end of knife, pein, pein middle pin, pein pivot end...all the time moving your clamping rig near the pin you are Peining. It works.
 
Take apiece of cloth backed sandpaper...maybe 100 grit or so, 1/4” wide and 2” long. Wrap as in a U round the spine of knife 1/2” away from the pin you are working on. Clamp pretty firmly with needle nose vise grips. It should close perfectly. If it does not...something wrong. Start from the end of knife, pein, pein middle pin, pein pivot end...all the time moving your clamping rig near the pin you are Peining. It works.
Just so I'm on the same page, the sandpaper is to protect the knife from the vice-grips correct?
And when I'm clamping, I'm clamping the liners and springs together?
 
I just had this problem myself. The gaps grew over several days after finishing the knife. First time I ever saw that. It was the wood scales. Unstabilized lignum. I guess they got hot while sanding and warped. They were glued and pinned to brass liners. They sprung the brass. I popped the wood off and everything went flat again.

Just one more possibility you might consider.
 
Just so I'm on the same page, the sandpaper is to protect the knife from the vice-grips correct?
And when I'm clamping, I'm clamping the liners and springs together?
Yea...clamp everything together....scale, liner, spring, liner, scale. You will not close up merely peining. Sandpaper serves two purposes....protecting scales from vise grips and keeping the vise grips from slipping off. Grit to scales
 
Yea...clamp everything together....scale, liner, spring, liner, scale. You will not close up merely peining. Sandpaper serves two purposes....protecting scales from vise grips and keeping the vise grips from slipping off. Grit to scales
That's clever. Thanks! I'll give this a shot and hopefully close these up, at least more so than they are now.
 
It worked! Thanks for all the tips guys, I can still see small gaps when held to the light, but the pins are no longer visible and the back looks nice and flush.
This was a $30 kits so I cant expect a $300 custom as the final product, but it was extremely fun and I can wait to try and build one from scratch.
 
Very good. I always have gaps if i hold up to a light. I know guys that use a surface grinder that still do.
Thanks, I'm definitely satisfied with the end result. This was mostly for fun but I might actually drop this in my pocket and use it.
Next time I'll know what to look out for.
 
Back
Top