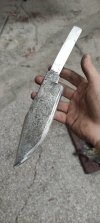
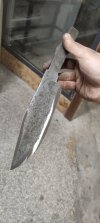
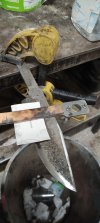
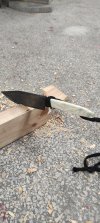
[WiP] Charity collaboration feat. Tony Mont

Joined
Sep 12, 2007
Messages
317
Right after last year's KITH Tony Mont Tony Mont has suggested that he and I could do a collaboration for charitable purposes. Of course I jumped on it and we are now on the way! The format is that each of us makes a blade, it will be sent to the other person, who will finish it. After that we will sell/auction it off for charity (the way this will be done or the beneficiaries are yet to be determined at this point).

We will post some pictures and updates as we go.

EDIT: I forgot to point out that Tony suggested a fighter blade, so that is the theme of this collab.
 
Last edited:
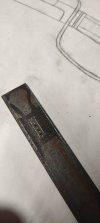
I intend to make a blade like this. Originally this was a subhilt, but as you see in this sketch, it is not anymore. And who knows what Tony will do anyway
O4Rrhhm.png

I'm starting with Vanadis 4E, over 5mm thick
NSosAaS.jpeg

Here the blades are profiled, along with some kwaiken designs from the rest of the steel
qVqWbFV.jpeg
 
Excellent work my friend as always! Can't wait to work on this knife!

My approach to this blade was a bit different than usual. I've been practicing a lot for my journeyman smith test, something that involves a perfect satin finish on the blade. For a change, I wanted to get as far away as I could from that. With that in mind, I had a plan, it will be a combination of forging and grinding to achieve it.

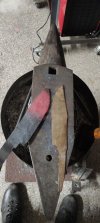
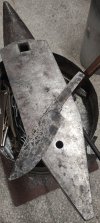
I began by forging out the basic shape of the blade from a bar of C70 steel.
1.jpg

Some profile clean up on the grinder and I was ready for the next steps.
3.jpg

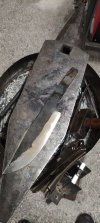
I ground in portion of the bevels and clip.
4.jpg

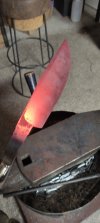
And then I kept forging once again.
5.jpg

And this is the end result, a brut de forge style blade but really consistent all the way around. To be fair, if I were much much better with the hammer, I wouldn't need to use the grinder at all.
6.jpg
 
I ground the bevels with a jig - I wanted the bevels to be as nice as possible.

I also used a bevel angle calculator, which I do not do often. Recently some people on reddit complained that Dan Comeau's calculator was good and it is gone now (or at best in the internet archive), so I reimplemented it here: https://respite-engineering.com/flat-grind-bevel-angle-calculator/

Using that I set the angle and went to town.

jW9UrYN.jpeg

1Amdbub.jpeg


I tried to take a plunge shot, they are not perfect, but decent enough.

3cl3WZc.jpeg


3Vq05Ou.jpeg


The main bevels were also ground with the jig, and a precalculated angle. The grit progression is something like 40 (to about 75% of bevel height) - 120 (to about 95 %) - A100 (to final height).

4lShn0D.jpeg


gUz5kUf.jpeg


hlL6zrj.jpeg


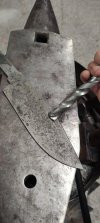
Then I went to drill a hole in the end of the tang. I make a scribe line where I want the center line of the hole to be, and then I have this jig where I sandwich the blade, tighten it and there is a guide hole for the drill to not wander (too much). I align the scribe line in the peeking window to make sure it's in the right position. I do not have enough z-height on my mill to drill this standing up.

pOhkqAF.jpeg

dGH6SkL.jpeg

YMnudXh.jpeg

5KkUUuH.jpeg


Still the holes ended up being a little offset to one side, resulting in the threads punching partially through the side. I am fairly certain it's ok, but it could be nicer for sure.

9k59nsY.jpeg


One last shaping operation is rounding of the spine and the bottom. I made this "faceting calculator" for this purpose.
I find that if I mill/machine/chew three facets of a quarter circle at the right distance, then it is a good enough baseline to then simply finish the rounding with a freehand filing and shoe shining with sandpaper.
So here is the layout with two lines on each face and corner. The two lines closest to the corner basically indicate a 45° chamfer, and then I would go half that (by eye) towards the further line. Repeat for all 4 corners.

iJhreZ5.png

fa50u0u.jpeg

jmFBCnw.jpeg

m7JBeiA.jpeg


Not too bad

93AfTfo.jpeg


So here I am after today.

rgj5kKK.jpeg


Now the goal is surface refinement before heat treat (I want to go at least 320, preferably more time permitting), and I also want to drill a cross pin hole in the tang to give Tony more possibilities for afixing the handle.
 
The pre heat treatment preparations are completed.

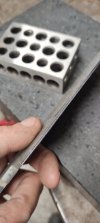
With my trusty carbide file guide, I prepared the shoulders.
7.jpg

Took most of the material on the grinder and finished it up with a 4mm(0.157") round file. This creates a lovely rounded transition.
8.jpg9.jpg

Sliding a square towards the tang is an easy way to check whether it's ready or not. When ready, the square should not feel anything while passing over the shoulder (it will not reach the tang but will cover most of the distance).
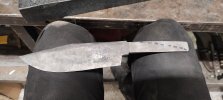
10.jpg

With the shoulders done, I tapered the tang, made sure the ricasso was the thickest part and begal checking centricity.
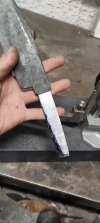
12.jpg13.jpg

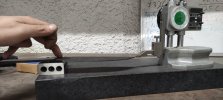
An easy way to check centricity is with a flat surface and height gauge.
With the blade laying flat, raise the height gauge until it scratches the tip but passes over it, take note of the measurement. Flip the blade and do it again. The difference shows how much off the centricity is. Ideally there should be no difference in the measurement. On this case, it was a little bit less than 0.1mm (a bit less than 4 thou) which is good enough for prior the heat treatment.
I'm not sure whether my explanation above made any sense, that's why there is a video bellow showing the process.

Other than truing up the shoulders, the tang is left extra wide. I don't know what Pavel has in mind for the handle and I do not want to restrict him. With the extra wide tang, whether a drop on the handle is desired or go straight for a coffin handle, both are possible. It will require some trimming for sure but a small price to pay just for the extra options.

14.jpg15.jpg

Finally, the blade got thermocycled and annealed, awaiting for hardening. Tomorrow is the equivalent of 4th of July in Greece and will not be at the shop, I will be back in a couple of days.
 
With the blade prepped, it was time for the final stages of heat treatment.

As quenched.
16.jpg

Since the blade was quite thin, it took a warp. If a carbide hammer is not available, a masonry carbide bit will do the trick. However, the divots will be uglier than a carbide hammer. I don't care much in the case of this knife since it will have a rough style anyway.
17.jpg

Scribed my center line and began grinding.
18.jpg19.jpg

240grit on the left and 400grit on the right.
20.jpg21.jpg

Checked centricity once more. There is a slight difference after the warp it took but it's good enough for a blade of this style.

With a soft backed piece of steel, it was really easy to sand everything.
22.jpg

And this is the current state of the blade. I can almost see the end of the tunnel!
 
pafka pafka All of these knives look really nice!

Today's update may seem backwards and that's because it is. All of those steps should have happened earlier.

First order of operations, soften the tang. I really love my induction forge for this task, it takes literally a minute.


I let the heat bleed into the shoulders. Also, I checked with a center punch in various places that it indeed got soft. I believe Pavel will not have any trouble drilling through the tang to place a brass insert.
23.jpg24.jpg

With that done, I began the final stage of finishing. I used cold blue to darken up the blade and some 3000grit sand paper to clean up the oxides from the satin parts.
25.jpg

However, before I began sanding, I popped a quick edge into the blade, wrapped a bunch of tape for the handle and chopped a 2x4 twice.
26.jpg27.jpg

Pretty happy with the geometry of the blade, it was still shaving after that.

With the testing done, I made the blade safe again by taking off the edge a little bit and sanded the blade to its final stage. 0000 steel wool on the forge scale and some sanding to remove the oxides on the satin bevels.

The blade is pretty much done, I do want to check it again in a couple of days with a fresh pair of eyes.
I really like the combination of the forge scale and satin finished bevels. I will definitely do it again pretty soon.
As a preliminary feedback to myself, I'd prefer if the straightening marks were not as visible (the video makes them pop more than they do in real life but they are visible). On my next one I'm going to use a different way to straighten any warps.
 
I have had some issues with putting a nice finish on the blade - but eventually with combination of diamond abrasives and a lot of cursing I think I am done. Far from perfect but hopefully passable.
So this blade is going for a trip to Greece soon.

ZrIWpa1.jpeg

DdmQnCB.jpeg

E7f0lUJ.jpeg
 
Been a while since the last update in the thread. This update will be in two parts due the number of pictures.

Both blades got shipped and arrived safely to their destination.
Pavel's blade arrived at the perfect time, I thought it'd be a good time to take a break from my journeyman test knives. These knives suck all the fun out and a project like this will be the perfect distraction for a few days.

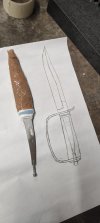
First and foremost, I traced the design and then oiled/covered the blade to make sure I don't scratch it while working on it.
Even tho the blade is based on a subhilt design, I noticed the slim design also resembles the trench knives from WW1. With that in mind, I think it's time to make my first d-guard knife!
28.jpg

I used a piece of wire to measure how much material I will need for the guard.
29.jpg


The irony is, I was happy to take a break from my js knives because I've been fiddling with guards the past 15 days, and the first thing I do is to make another guard.
Cut the material to length and marked the location of the slot.
30.jpg31.jpg

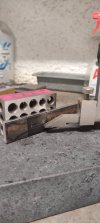
Center punched, drilled and began filing the slot away. It's some much better working with mild steel compared to stainless for the guards.
32.jpg33.jpg
34.jpg

end of part 1
 
A known process by now, file a little bit and check the fit.

35.jpg36.jpg

Just some filling away to close the last gap.
37.jpg38.jpg

And it's done!
39.jpg

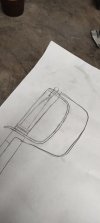
While working on the fit, I had a brain wave. I usually do not care if the slot is 100% parallel to the guard material because it simply does not matter.
However, in this case it does matter, a lot actually. The length of the guard is so long that even if I'm a little bit off with my slot, the rear side of the guard will end up on the side of the handle.

The lines beneath show clearly what I mean. Luckily, I checked it while I was midway fit and was able to fix my course. I was not in the mood of fitting another guard.
40.jpg

The next steps will cover fitting the spacers and choosing up the handle materials.
 
A known process by now, file a little bit and check the fit.

View attachment 2877300View attachment 2877301

Just some filling away to close the last gap.
View attachment 2877302View attachment 2877303

And it's done!
View attachment 2877304

While working on the fit, I had a brain wave. I usually do not care if the slot is 100% parallel to the guard material because it simply does not matter.
However, in this case it does matter, a lot actually. The length of the guard is so long that even if I'm a little bit off with my slot, the rear side of the guard will end up on the side of the handle.

The lines beneath show clearly what I mean. Luckily, I checked it while I was midway fit and was able to fix my course. I was not in the mood of fitting another guard.
View attachment 2877305

The next steps will cover fitting the spacers and choosing up the handle materials.
Good catch!!!!!!! Time.......its the be all end all......👌
 
I have also received Tony's blade. It is quite something and hope I don't mess it up too much.
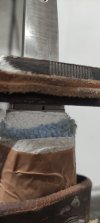
I started by taking measurements of the ricasso, so that I know how wide the guard slot should be.
I was quite surprised that the first two measurements (at the top and at the bottom) were only 5 microns apart. Obviously the measurements fluctuate a little bit due to the brut de forge finish, but still, they are incredibly close, meaning the two sides of the ricasso are very parallel and that makes the process of making the guard slot much easier.

otv4Q3g.jpeg
ipTYZxN.jpeg

I used a piece of 14 220 steel (steel for cementing, eq DIN 16MnCr5).
tf49Lf4.jpeg


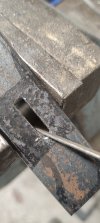
The slot milling went ok without much drama, as usual I mill out a slightly wider slot from the back first, but not all the way through, and then I mill only about 3 mm of depth from the front face to the final precise width.

xKHXzaa.jpeg

BPDD1l8.jpeg


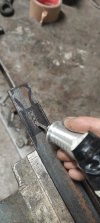
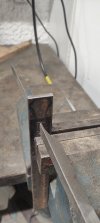
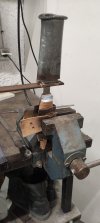
This is my pounding setup - I use a copper plate between the tube and the guard to prevent marring it (too much).

yo2yVYF.jpeg


Fit is ok.
uweUuu5.jpeg


I wanted to add some visual interest to the guard, so I opted to add these facets to each side, which will then be blended together almost to a point (although the guard will not be as long as it is now). Hopefully it will also visually lighten the guard when it is shaped.

Layout
MSkr6PP.jpeg


Filing
9N5YkDu.jpeg

kYLq4x3.jpeg


Blending
rYahxv0.jpeg


lhfswsI.jpeg


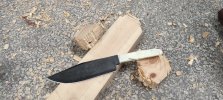
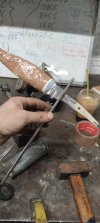
This is a mockup of what I am going for. The blade gives me these vibes of old firearms and rough outdoorsmen from the time when men were men and sheep were scared. So I will try to do a simple hardwood handle, but I am thinking I will add some stippling to portions of the handle, to sort of mimic the checkering on a firearm. But we will see, I have never done it, I only did some tests now and they are "meh".

ahWiGTu.jpeg
 
Last edited:
Back
Top