-
The BladeForums.com 2024 Traditional Knife is ready to order! See this thread for details: https://www.bladeforums.com/threads/bladeforums-2024-traditional-knife.2003187/
Price is$300$250 ea (shipped within CONUS). If you live outside the US, I will contact you after your order for extra shipping charges.
Order here: https://www.bladeforums.com/help/2024-traditional/ - Order as many as you like, we have plenty.
You are using an out of date browser. It may not display this or other websites correctly.
You should upgrade or use an alternative browser.
You should upgrade or use an alternative browser.
[WiP] Charity collaboration feat. Tony Mont
- Thread starter pafka
- Start date
Tony Mont
Knifemaker / Craftsman / Service Provider
- Joined
- Apr 15, 2018
- Messages
- 1,477
My update is going to be bittersweet and two parts due to the 10 pictures limit.
Following the same process as the guard, I fit up the spacer. Sighting against a light source will reveal any gaps between the guard and the spacer.

A few drops of superglue will keep them together while I drill for the line up pins.
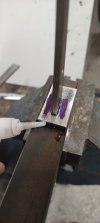
Adjusted the depth and voala! Now the spacer is going to go at the same place everytime.


Next in line is the handle. I chose wenge because I have a very specific finish for the handle which wenge takes.
Since the tang will go all the way through, I need to drill from both sides.
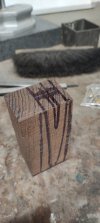
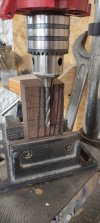
Always a good sign when you can see light, it means the holes are at least somewhat lined up.

Some broaching and the handle fits like a glove.
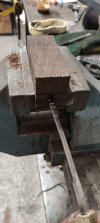
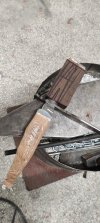
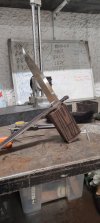
end of part one.
Following the same process as the guard, I fit up the spacer. Sighting against a light source will reveal any gaps between the guard and the spacer.

A few drops of superglue will keep them together while I drill for the line up pins.

Adjusted the depth and voala! Now the spacer is going to go at the same place everytime.


Next in line is the handle. I chose wenge because I have a very specific finish for the handle which wenge takes.
Since the tang will go all the way through, I need to drill from both sides.


Always a good sign when you can see light, it means the holes are at least somewhat lined up.

Some broaching and the handle fits like a glove.


end of part one.
Tony Mont
Knifemaker / Craftsman / Service Provider
- Joined
- Apr 15, 2018
- Messages
- 1,477
Things are going unexpectedly smooth so far, the handle had no gaps to the spacer from the get-go.
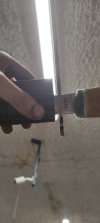
Same process for the line up pins. Some superglue, the spacer as a guide and drilled the handle block.
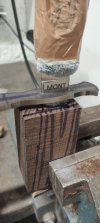
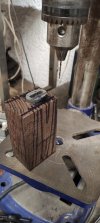
With the line up pins going from the guard all the way to the handle, I mounted up a makeshift pommel to check whether everything is still gap free.
Aaaand the tang broke. Even tho my plan for a d-guard is ruined, I'm glad it happened now.
I knew the threads were not the strongest and could have been compromised with overtighting, however, I didn't overtighten the bolt at all in this case, which means it could have happened later to the person who will purchase the knife.
In hindsight, since I planned on using the threads, I should have extra tempered the spot to add some toughness.
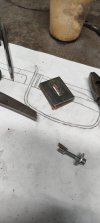
The silver lining is that the grain is perfect!

And with that terrible disappointment, it's time to find a new plan.

Same process for the line up pins. Some superglue, the spacer as a guide and drilled the handle block.


With the line up pins going from the guard all the way to the handle, I mounted up a makeshift pommel to check whether everything is still gap free.
Aaaand the tang broke. Even tho my plan for a d-guard is ruined, I'm glad it happened now.
I knew the threads were not the strongest and could have been compromised with overtighting, however, I didn't overtighten the bolt at all in this case, which means it could have happened later to the person who will purchase the knife.
In hindsight, since I planned on using the threads, I should have extra tempered the spot to add some toughness.

The silver lining is that the grain is perfect!

And with that terrible disappointment, it's time to find a new plan.
braillediver
Gold Member
- Joined
- Oct 6, 2007
- Messages
- 3,048
I really appreciate you sharing the process and the journey.
Mitch
Mitch
Tony Mont
Knifemaker / Craftsman / Service Provider
- Joined
- Apr 15, 2018
- Messages
- 1,477
With the original idea scrapped, I fiddled with the idea of a subhilt. I did some sketches and made a couple of blanks to figure out the distance between the guard and the subhilt.
The sketch bellow has the minimum distance between the two needed and the pin hole would be too close to the subhilt for comfort.
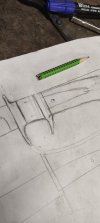
Since I didn't feel comfortable with pulling the trigger on the subhilt, an idea struck me.
I picked up another block of wenge, made a nice fit and bedded the handle. I forgot to take more pictures of the process, it's pretty straight forward. Some vaseline on all the parts, fill the block with epoxy and let it cure. The vaseline will prevent the tang sticking to the block but will create a perfect casting of the handle.
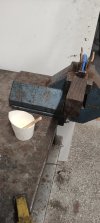
Since I was at it, I used line up pins along with the bedded handle.
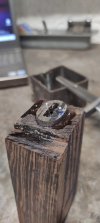
The fit is so tight with the line up pins and the bedded handle that I could leave it as is and probably be fine.

Rough ground the shape of the handle, found center and scribed some lines.
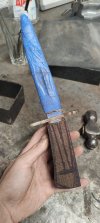
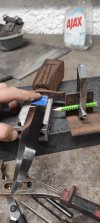

end of part1
Tony Mont
Knifemaker / Craftsman / Service Provider
- Joined
- Apr 15, 2018
- Messages
- 1,477
Prior to tapering the handle, I drilled the pin hole on the handle.

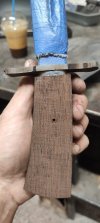
Also inlaid a piece of brass to drill through later on. I could leave it as is and let epoxy fill the hole but I prefer the pin going through some metal.
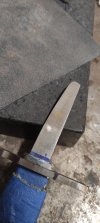
While looking at the handle, I couldn't help but notice that the handle was bigger on side. A few measurements and head scratching later, I remembered that I never shaped the spacer properly.
Made a half shaped spacer from plexiglass and scribed on both sides for symmetry.
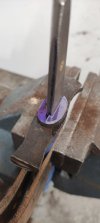
The joy of being able to easily mark around the spacer without having the guard interfere is immeasurable
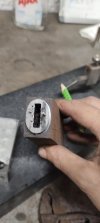
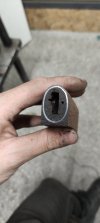
And after some more rough grinding, I called it a day. The handle has a relatively simple design but I wanted to maintain a slender design overall.
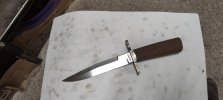
Tomorrow's plan is to work on the fittings, hopefully will have time to do it.


Also inlaid a piece of brass to drill through later on. I could leave it as is and let epoxy fill the hole but I prefer the pin going through some metal.

While looking at the handle, I couldn't help but notice that the handle was bigger on side. A few measurements and head scratching later, I remembered that I never shaped the spacer properly.
Made a half shaped spacer from plexiglass and scribed on both sides for symmetry.

The joy of being able to easily mark around the spacer without having the guard interfere is immeasurable


And after some more rough grinding, I called it a day. The handle has a relatively simple design but I wanted to maintain a slender design overall.

Tomorrow's plan is to work on the fittings, hopefully will have time to do it.
- Joined
- Sep 12, 2007
- Messages
- 317
This weekend I picked a piece of ironwood, outlined the tang and drilled/milled/carved out the slot.


And then a quick trip to the grinder to create the rough profile.


Bonus points: the tang does not peek through the bottom of the handle Mentioning that for NO REASON whatsoever, never could have happened to me.

And then today I did a basic layout on the handle, and roughed out the shape - still lots of meat to be removed. I am going for coke bottle shape if that was not obvious.
I postponed drilling the crosspin hole so much that I will have to do it now with the handle already being shaped, so I will have to reference the ricasso, but no big deal.

I also started to roughly shape the guard (I have a very sketchy setup to grind the bottom inside curve that you will never see). I will be making a simple mounting rod/handle so that I can access the guard better for further shaping and finishing, I wanted to do that couple of times already but better late than never. That will be the next update I suppose.


And then a quick trip to the grinder to create the rough profile.


Bonus points: the tang does not peek through the bottom of the handle

And then today I did a basic layout on the handle, and roughed out the shape - still lots of meat to be removed. I am going for coke bottle shape if that was not obvious.
I postponed drilling the crosspin hole so much that I will have to do it now with the handle already being shaped, so I will have to reference the ricasso, but no big deal.

I also started to roughly shape the guard (I have a very sketchy setup to grind the bottom inside curve that you will never see). I will be making a simple mounting rod/handle so that I can access the guard better for further shaping and finishing, I wanted to do that couple of times already but better late than never. That will be the next update I suppose.


Last edited:
This weekend I picked a piece of ironwood, outlined the tang and drilled/milled/carved out the slot.


And then a quick trip to the grinder to create the rough profile.


Bonus points: the tang does not peek through the bottom of the handleMentioning that for NO REASON whatsoever, never could have happened to me.

And then today I did a basic layout on the handle, and roughed out the shape - still lots of meat to be removed. I am going for coke bottle shape if that was not obvious.
I postponed drilling the crosspin hole so much that I will have to do it now with the handle already being shaped, so I will have to reference the ricasso, but no big deal.

I also started to roughly shape the guard (I have a very sketchy setup to grind the bottom inside curve that you will never see). I will be making a simple mounting rod/handle so that I can access the guard better for further shaping and finishing, I wanted to do that couple of times already but better late than never. That will be the next update I suppose.


Should look great...
Tony Mont
Knifemaker / Craftsman / Service Provider
- Joined
- Apr 15, 2018
- Messages
- 1,477
Not much has happened sine my last update. I did however the finish I wanted on the fittings.
I could have used the induction forge for this but there was the laser cutter running in the background and the main breaker cannot handle the load.
I made a quick and easy forge to do the finish.
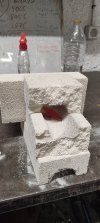
Aaand that's about it for today. I wrapped the guard with some insulating tape and then some masking tape for the extra protection.
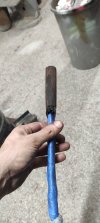
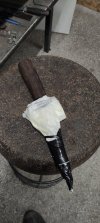
Hopefully I will start wrapping things up soon.
- Joined
- Sep 12, 2007
- Messages
- 317
I only have a small update, I finally made the tool for holding the guard for finishing. It is like a machinist parallel clamp, but it clamps on the outside. Not sure how well the brass screws will hold up, but I can make new ones. It holds the guard well enough for filing and of course sanding.


I only have a small update, I finally made the tool for holding the guard for finishing. It is like a machinist parallel clamp, but it clamps on the outside. Not sure how well the brass screws will hold up, but I can make new ones. It holds the guard well enough for filing and of course sanding.


Pretty slick....
- Joined
- Sep 12, 2007
- Messages
- 317
With the new tool I started with a clean up of the guard (this is of course not done yet).


The inside curve is now at a dirty 240 grit finish, but it will be easier from here.


And I also etched our makers marks. With a bit of chemically plated copper I think it will go well with the ironwood (I hope to cold blue the guard).

I do have the hole for the crosspin drilled as well, but no picture unfortunately.


The inside curve is now at a dirty 240 grit finish, but it will be easier from here.


And I also etched our makers marks. With a bit of chemically plated copper I think it will go well with the ironwood (I hope to cold blue the guard).

I do have the hole for the crosspin drilled as well, but no picture unfortunately.
