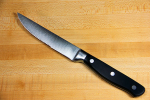
Worthwhile to prototype steak knife handles?

Well that actually went ok. :) It was my first time using a belt sander to shape wood, so there was a bit of a learning curve. The Harbor Freight 1" x 30" certainly doesn't perform like the 2" x 72" I was using on steel at Bob's, lol. I got overconfident a few times, but no huge errors. I didn't want to spend a ton of time shaping what is just a rough prototype, but I'll be sure to really take my time on the G10 pattern/template. I was going to contour all five handle prototypes, but I don't think that is necessary anymore. After softening the edges of the five contenders, it was obvious that two of them weren't going to work at all.

Also, is there any better feeling than getting a temperamental band saw to track absolutely dead straight?!

If I have time tomorrow, I'll add contours to the top three and thin out the handles where they'd meet the blade and see how they feel.

The one up top felt the best to me. The second down felt the best to my wife. The one in the middle was the runner-up for both of us. The fourth and fifth down both felt lame and are out of the running.

Right now I'm kind of leaning towards the second from the top, just because it's the only one that I came up with without looking at pictures on the internet.

drlVXuY.jpg


I've got go back to the drawing board when it comes to handle material. I thought I had enough stabilized walnut burl for six knives, but it looks like I only have enough for four. I also decided not to use the stabilized curly walnut for these either.

So that leaves either cocobolo, african blackwood, or desert ironwood. I'm a little hesitant to use unstabilized wood for kitchen knives, but these should all be plenty durable.
 
Last edited:
African Blackwood would be a good choice.

Remember this saying: Hand made means Hand washed.

Here is a good example of a basic steak knife handle and blade shape.
1623926576672.png
 
Last edited:
Well that actually went ok. :) It was my first time using a belt sander to shape wood, so there was a bit of a learning curve. The Harbor Freight 1" x 30" certainly doesn't perform like the 2" x 72" I was using on steel at Bob's, lol. I got overconfident a few times, but no huge errors. I didn't want to spend a ton of time shaping what is just a rough prototype, but I'll be sure to really take my time on the G10 pattern/template. I was going to contour all five handle prototypes, but I don't think that is necessary anymore. After softening the edges of the five contenders, it was obvious that two of them weren't going to work at all.

Also, is there any better feeling than getting a temperamental band saw to track absolutely dead straight?!

If I have time tomorrow, I'll add contours to the top three and thin out the handles where they'd meet the blade and see how they feel.

The one up top felt the best to me. The second felt the best to my wife. The third was the runner-up for both of us. The third and fourth down both felt lame and are out of the running.

Right now I'm kind of leaning towards the second one down just because it's the only one that I came up with without looking at pictures on the internet.

drlVXuY.jpg


I've got go back to the drawing board when it comes to handle material. I thought I had enough stabilized walnut burl for six knives, but it looks like I only have enough for four. I also decided not to use the stabilized curly walnut for these either.

So that leaves either cocobolo, african blackwood, or desert ironwood. I'm a little hesitant to use unstabilized wood for kitchen knives, but these should all be plenty durable.
In the future..... actually write numbers on the blanks. Or put numbers on pieces of paper next to them.... Easier to understand that mixed up garble. Less confusion. Thanks.

* Without holding them....I think I like the First one from the bottom row. The one after the second last one..... ;)
;)
 
African Blackwood would be a good choice.

Remember this saying: Hand made means Hand washed.

Here is a good example of a basic steak knife handle and blade shape.
View attachment 1584248

I just realized I have three other kitchen knives in african blackwood, so I think that’s going to be the winner.

Definitely! All blades are hand washed in our household. :)

I think you’re probably right. A basic handle with flat sided scales with mild contouring is probably best. I was messing around with contouring the handle that is second from the top, and it’s going to take a lot of contouring to get it to the final shape I want. And frankly... It’s likely beyond my ability right now to make six heavily contoured handles that are close to indetical.
 
In the future..... actually write numbers on the blanks. Or put numbers on pieces of paper next to them.... Easier to understand that mixed up garble. Less confusion. Thanks.

* Without holding them....I think I like the First one from the bottom row. The one after the second last one..... ;)
;)

Oof... Yea I butchered that post, lol. I think I fixed it for the most part, lol. It should at least make some sense now.
 
#3 but with a smoother transition at the front and butt. Look at the photo I posted to see what I mean. You just want a smooth curve, not a suden change of angle. Fingers don't have corners on them. What you want is #3 with the front underside of #5 and the butt of #1 .... sort of :cool:.
 
Of these I like ~

• # 3 - classic & comfortable & uncluttered.

• Then # 2 - could be cool but I would need to hold it.

• # 5 if I had to pick a 3rd.

My 2¢. Has been interesting watching these develop. Will be a very fine project and the results will be heirlooms. :thumbsup:


View attachment 1584284

Thanks for the input! It's been a lot of fun so far. :)

Thanks for numbering them, I'm gonna go ahead and adopt that, lol. Number three and number two have been running away with it. I changed them a bit for "version 1.1," but I'm gonna go ahead and focus on those two.
 

Absolutely gorgeous! Bloodwood? I like that the front of the handle comes up. I was actually thinking the quillon(?) on some of mine could make it difficult for the blade to easily make contact with the plate near the heel.
 
Well, contouring with a belt sander is a WHOLE different beast (and fun!) compared to the shaping with rasps/files/sandpaper that I'm accustomed to, lol. I'm really glad I took on this project now. If nothing else, I'm better with a belt sander than I was two days ago. Every aspect of knifemaking just seems to set the hook deeper. There is SO much I have to learn, so I'm trying not to overwhelm myself, but holy cow I'm having a blast so far!

Today I contoured the three best handles from yesterday. It's hard to tell in the picture, but the front of the knives get quite a bit thinner where the handle meets the blade to help facilitate the pinch grip I use when cutting steak. Keep in mind that they're just quick mockups, and don't judge too harshly, lol. The baby is going through a cluster feeding phase so I had to work on them between feedings. They could use some cleaning up, but it's really given us a better idea of what the knives will feel like when finished.

#1 felt solid. Like many steak knives I've used over the years. That's a good thing. Don't fix what's not broke, right?

#2 was actually the clear favorite for my wife, my neighbor, and me. I was pretty surprised by this (especially when my neighbor chimed in). Neither my wife or neighbor know that that is the one I designed, so I have to admit it stroked my ego a bit, lol.

#3 was a dud. The front just doesn't feel right (good call Stacy). I like the rear of it more than the rear of #1 though, so I decided to make some changes today. :)

nY4T8SO.jpg


And here is version 1.1 of the handles! They are just rough drafts that haven't had the lines cleaned up, or been contoured just yet. Maybe tomorrow. :)

#4 is basically handle #1 with some minor changes that were suggested by Stacy. I made the rear of the knife more like #3 and I made the front a little more sweeping, instead of so abrupt. I feel like the front of the knife (not sure what to call it? The quillon? Where the bolster would be, if there was a bolster) comes down a little to far though...

#5 is the same as #2 with the front finger groove dialed back a bit. So far it feels just as good as #2, but should be a little more versatile with the more subtle shape. I'm really thinking about going this route.

#6 is the same as #4 but with the front of the knife toned down. This is sitting in second place right now.

gGT8oZB.jpg
 
Last edited:
I know that number 6 and 4 will be comfortable and work great. Number 5 is more difficult to judge from a picture. I know for a fact that you can make that kind of handle shape work but you if you make the concave part too thin it becomes really uncomfortable.
 
#6 or #4 - the difference is mostly personal choice.

On thing to consider is that a steak knife does not need much finger rest at the front. It is usually used in a modified pinch grip more than a baseball grip.
 
#6 or #4 - the difference is mostly personal choice.

On thing to consider is that a steak knife does not need much finger rest at the front. It is usually used in a modified pinch grip more than a baseball grip.


I'll probably go with #6. I want to contour them a bit tomorrow (today), to see how they feel though. I can definitely use the practice anyways. One thing I worry about with #2/#5 is that while they feel great in my hands and my wife's hands... It may not work for dinner guests with larger hands. The wife and I both have tiny hands, lol. I think the palm swell that #6 has might be more of a universal fit.

Alright, I just spent $160 between Pop's and TruGrit on belts, corby bolts, and a counterbore... I think that's my queue to go to bed, lol. I probably shouldn't be investing any money into this crappy 1"x30", but it's gonna have to do until we move. :/

I'm also finding the way handle #5 and #6 fit together interesting... Yea, it's time to go to bed.


YvRvXOp.jpg
 
Oh yea... My wife made the mistake of mentioning that the bread knife is going to be the odd man out with it's plastic handle and cheap steel. She should have known...

ZilhOnz.jpg


Ok, now bed.
 
At the risk of distracting - you are so enjoying using your sander ;) We have used these quite contentedly. Please note, our contentment is ONLY IN REGARDS TO THE HANDLES. The blades are awful and I am working on building a replacement set and so have been watching your progress here with interest. I've already ordered the san mai blades from a knife maker friend.

Anyway - this simple handle form works remarkably well - for what it's worth ( maybe nothing more than a side note :confused:).
 
Last edited:
Absolutely gorgeous! Bloodwood? I like that the front of the handle comes up. I was actually thinking the quillon(?) on some of mine could make it difficult for the blade to easily make contact with the plate near the heel.
Padauk, kiln dried but not stabilized. The piece had some nice small knots that gave it some good figure. Finished with natural Danish oil, wet sanded to fill the pores, and then wax. Padauk is pretty hard and dense, but it does have large open pores. Some report that the red color fades over time.
 
At the risk of distracting - you are so enjoying using your sander ;) We have used these quite contentedly. Please note, our contentment is ONLY IN REGARDS TO THE HANDLES. The blades are awful and I am working on building a replacement set and so have been watching your progress here with interest. I've already ordered the san mai blades from a knife maker friend.

Anyway - this simple handle form works remarkably well - for what it's worth ( maybe nothing more than a side note :confused:).

View attachment 1584848

Yea... This might come as a really big surprise to you, but I tend to overthink things (lol). I grew up using a set of Old Hickory steak knives that had a handle shape really similar to that and they did everything we ever asked of them.

I hope to see some pics of the knives you're working on, they sound like they are going to be some beauties!

Padauk, kiln dried but not stabilized. The piece had some nice small knots that gave it some good figure. Finished with natural Danish oil, wet sanded to fill the pores, and then wax. Padauk is pretty hard and dense, but it does have large open pores. Some report that the red color fades over time.

Wow, that is some intense coloring on the padauk. really awesome. They turned out great. :)
 
Last edited:
Back
Top