- Joined
- Jan 14, 2015
- Messages
- 1,312
thank you sir! your help is much appreciated, as always!
The BladeForums.com 2024 Traditional Knife is available! Price is $250 ea (shipped within CONUS).
Order here: https://www.bladeforums.com/help/2024-traditional/
")


 i also haven't found a "good" way of bending the leather even though it was wetted... it shows a lot of creases.


")

Limited on the number of images per post, so it will be broken up a little;
I had to remove some of the images above, if you want to see what tools
look like, I'll add links to the images;
Vertical sheaths;
I like the vertical sheath as it takes up less room on your belt, here is some of
the things I do as I go about making one;
Patterns, I recommend using the small bubble wrap plastic to figure out how you
want the sheath to wrap around your knife, not all knives work well in all sheaths
so the knife is key, I've turned down some work because of the knife, but that's
just my style of sheath making, very tight to the contours of the knife.
I wrap the knife up with saran wrap to prevent moisture from weeping onto the knife
I wet my leather under HOT water until it's pliable, wrap the leather around the
knife and then using the bone folder, start shaping along the spine until you
get to the end of the knife, where it will make an indent;

Where the leather dimples in, I cut down there, as you need to remove a
small piece of leather so it will fold down tightly without puckering


Then tightly form around the end of the knife

Didn't have any other in process shots of this, but here is the finished sheath
it's one that I do not take orders for, the old combo deal, sorry guys, but it may give you
something to try your hand at doing; All one piece of leather with one exception
inside the bottom area of the light side, I glued in a small strip of leather, this prevents
the light from passing all the way through, easier and much cleaner than trying to squish
it closed.

Once the leather is dried, then I would emboss and dye as needed,
I dye before gluing up as glue can mess up your project.
But you can just barely see at the top of the sheath where the leather folds down behind the sheath and meets down at the bottom of the sheath so there isn't any stitching inside.That sheath is all one piece of leather, interesting but a pain to make, hence my resistance to build more
The leather is formed over the knife first and then I formed the light holster part, that is cut so it wraps around the light and around to the back of the sheath, where it will be stitched down between the light and knife.
I start sewing down from the top and when I get near the bottom, then I'll glue the belt loop to the bottom and continue stitching around the end.
G2
Horizontal sheaths and embossing stuff;
These sheaths take a bit more time and material to do, as they are
not made from one piece of leather;
Form the top section using the bone folder and then glue it down to
another piece of piece of leather, then I put holes around the sheath
and then trim to the final width along the top.
those two will be glued onto a third piece of leather that will be a backing
and belt loop.

The leather needs to be ROUGHED up in order for the glue to adhere properly
I use a small knife to rough up close to the line;
EDITED to say that I've since changed from Barge to Weldwood contact cement, you can get
it at Wally world pretty cheaply and it works VERY well too, wish I had tried it years ago!!!
I use Barge Cement to glue things together, apply on both sides and let
dry for 20 minutes or so, not TOO heavy, no big globs!
both sides
I then punch the rest of the way through the third layer of leather

use the one awl to enlarge the first hole to start the thread

Sew n Awl threaded

I use a little more than double the length of the path around the sheath for thread
and pull one side through the sheath so you have one half of the thread on
each side of the sheath.
Push the needle through and pull back to form a loop and insert the one thread
through that loop

Then pull tightly

it'll come through on the other side, I then pull the knot back into the middle of
the leather
Hi.
One thing that always puzzled me about these sheaths: Isn't the "bottom" layer (between the top and loop layers) expendable? Couldn't we just have the top layer and have the bottom also be the loop layer? It would mean we'd need less leather and less layers to punch through (less bulky sheath in the end).
Does this makes sense to anyone else? Any reason for the 3 layers?...
Thanks.
and remember this is just for the horizontal style sheaths, I don't do the extra layer on the vertical as the vertical style carry isn't in as much danger of falling out as a horizontal sheath carry.


 110side by GaryWGraley, on Flickr
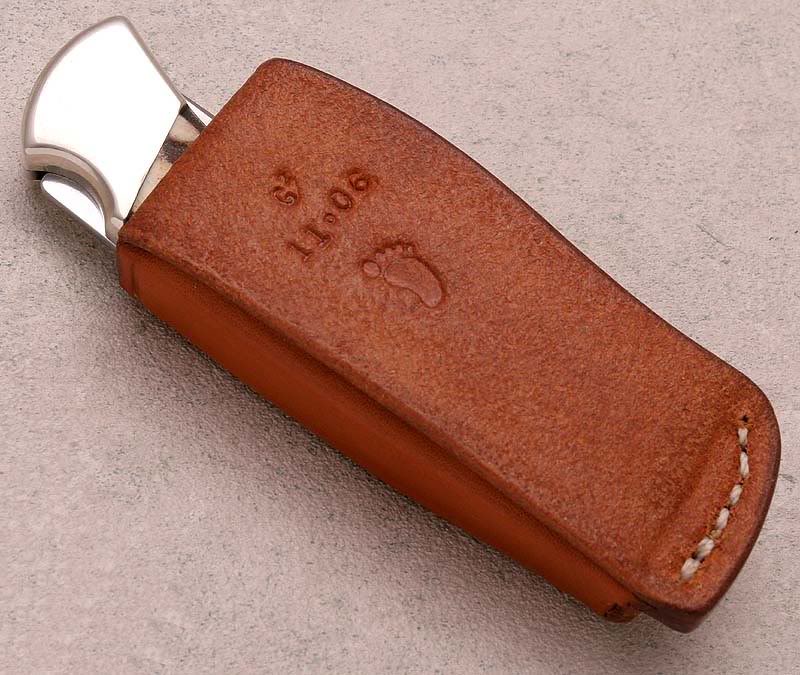 110back by GaryWGraley, on Flickr
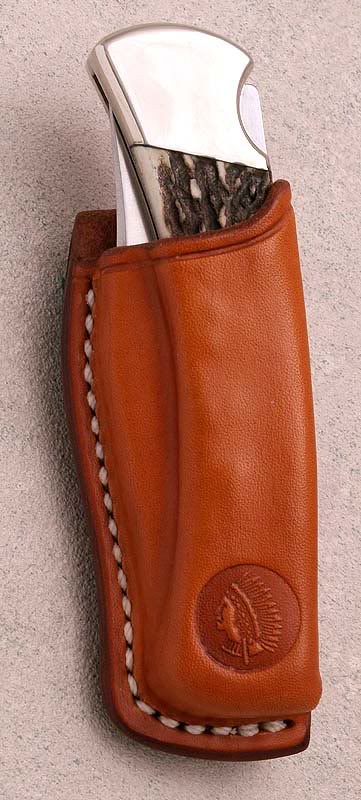 buck110sheath2 by GaryWGraley, on Flickr
First off, welcome to BladeForums !
and as to that extra layer of leather, it is something that I decided a very long time ago to add rigidity to the overall fit of the knife in the sheath.
Imagine, the top section is formed very tightly over the knife, it holds the knife securely. Now, below the knife is a layer of leather, remember it is just leather and can also move, or expand, so in time that great retention can loosen up and your knife might not be held as secure as it once was.
With the addition of that middle layer, it reinforces the backing for the knife, so the sheath doesn't expand as it might have without it. It offers some structural integrity at the expense of a little bit more leather and a little harder stitching, but I feel that it is worth the effort and for that small layer, it really doesn't make the sheath more bulky. Without it, I would fear that the knife may come loose in time and during carry, it might come free of the sheath, something no one would want to have happen.
So yes, more work but overall it is a stronger better retention acting sheath.
G2
edited to add, you don't 'have to' use the middle layer, it's anyone's prerogative to not do so, those are just my reasoning for doing so, it certainly not written in stone that it has to be done that way
:thumbup: it happens to the best of us