The HI Cantina Cookbook

Gluten Free Fried rice with a twist

Ingredients:
2 garlic cloves
2 to 3 stalks cellery
1 medium to large onion
3 mushrooms
1 to 1-1/2 cup favorite mixed veggies

Seasonings:
Red Pepper
Salt
Basil
Oregeno
Rosemarry
Vineger
Butter or Oil

Cut up ingredients and place them in seperate containers.
Take a 12" frying pan and put the following in while heating the pan on medium: Oil or butter, Garlic, red pepper, Oregeno, and Rosemarry
Stir the ingredients while the pan gets hot
When the pan is hot add the cellery and saute.
When the Cellery is almost done add the onion and continue sauting.
Add Mushrooms when the onions start to go clear
When the mushrooms look about done add the veggies
Add Basil, more Rosemarry and Oregeno to taist
Add Vineger
Saute everything till they are done. At this point you can either add the rice, more Vineger and some Soysauce or not. Serving the fried veggies on the side is the twist and my prefered way of doing it.

Goes great with Grill chicken and Brockly or Candied yams.
 
8 Quart Dutch Oven - 12" deep

2 Onions (medium or large)
2 Bell Peppers
12oz Green Chilis
2 28oz cans of Whole Pealed Tomatoes
2.5 to 3 Pounds meat (ground or cubbed)
Vegetable oil

10 cans of beans:
2 kidney
2 black eye
2 pintos
2 Red
2 black


Seasonings:
Salt
Black Pepper
Chili powder
Basil
3 Bay leaves


*Dice the following ingredients into large chunks and set aside; One onion, bell peppers and chilis.
*Put the Dutch oven on your hear sorse and add about 2 table spoons worth of oil and heat.
*Dice second onion then saute it in the hot dutch oven. When the onion is done, add beef and brown it.
*After browning the meat add some seasonings then add the 2 cans of Whole Tomatoes and simmer for 20 minutes or so.
*While the ingredients are simmering, open the cans of beans, rince them off and add them at the end of the 20 minutes.
*After adding the beans, add more seasonings and simmer for 20 to 30 minutes.
*Once you've simmered the beans add the veggies you set aside earlier. Bring to a boil then simmer. Taiste the chili every 10 minutes or so to see if you have it where you want it.
*The Chili is done when all the flavors have mixed and the Bell Peppers are cooked how you like them.

Serve with your favorite Corn bread recipe and cheese if you like.

Feeds between 8 and 12 guys.
 
2 Quarts water
1 Large onion (Diced)
8 large potatoes
8 Large carrots
5 to 6 stalks of cellery
6 to 8 Chicken thighs (with bone and skin still on)
Salt
Black Pepper
Spike (if you can find it)
Italion Seasoning
About 2 table spoons vegetable oil

8 Quart dutch oven (12" Deep)

*Place dutch oven on heat source and add the oil. While the oil is heating dice the onion.
*Add diced onion to the hot oil and saute on medium heat till done.
*Add 2 quarts hot water to the dutch oven and the Chicken thighs
*Add some seasonings, Slowly bring the chicken to a boil then simmer on low for about 3 hours.
*While the meat is simmering (but close to the 3 hour point), Cut up the Carrots, Cellery and Potatoes.
*After 3 hours or so remove the chicken thighs from the broth and cool. Add the veggies.
*Bring the soup to a boil then simmer. Separate the Meat from the skin and bones and set aside again
*Add more seasoning to taiste if needed.
*About 5 minutes before you think the veggies are done add the meat back into the pot.

Serve with Rolls, Corn bread or Whole wheat bread and a light salad.

Should feed about 8 to 12 guys.
 
6 to 8 quart dutch oven
2 to 5 pounds of beef roast
1 to 2 large onions
6 to 10 potatoes
6 to 10 Carrots
A sprinkle of water
Salt
Black Pepper

Note cook the meat for 1 hour per pound (3 pounds for 3 hours ect..) at 300 degrees


Preheat oven to 300 degrees
*Peal and ring an onion. Place some onion rings into the bottum of the Dutch oven
*Cover the Roast in your favorite seasonings then place on the bed of onion rings.
*Cover the top of the roast with more onion.
*put less then 2 table spoons of water in the bottom of the dutch oven
*Place lid on Dutch oven and put in the oven.
*1 hour and 20 minutes before the meat is done, cut up the potatoes and carrots and any remaining onion if you want it.
*Slide the dutch oven out of the oven, remove lid and add veggies then slide back in and finish cooking for the last hour.

You can make a gravy out of the broth or serve over the veggies. Also goes well with Sweet Cream butter and Ketchup or BBQ Sause.
 
I take the liberty to copy this here, it's also as a BTT:

HI ASTK Chicken Curry

INGREDENTS

3 Lb chicken, skinned and cut into bite size
3 tbsp olive oil
1 medium onion, sliced
1 medium tomato, halved and sliced
3 large black cardamom pods
1 tsp cumin seeds powder
1 tsp chilli powder
1 tsp salt
1 tsp garlic pulp
1 tsp turmeric for color
1 Wash and trim the chicken pieces, and set to one side.
2 Heat the olive oil in a deep round -bottomed frying pan add all spices and steer and lower the heat add two cups of water and cook for about 30 minutes.
Once the curry is cooked serve with steam rice or whole wheat roti

Enjoy!!!
 
Ingredients:
1 1/2 pounds Ground Beef
1 (10 3/4 ounce) can Condensed Tomato soup
1/2 cup Water
1 (10 ounce) package Frozen Mixed Vegetables, thawed
3 cups Hot Mashed Potatoes

Tabasco Green Chipotle sauce to taste (I tend to use about 10 good blasts from the bottle or so but I am a little whimpy when it comes to heat.

some fresh Garlic, Smoked Paprika, Basil, Oregano and whatever else you like in the way of spices and herbs...

Directions:

Heat oven to 375°F. Cook meat in large skillet until browned; drain. Stir in soup, water, Tabasco Sauce and seasonings. Heat to boiling.

Pour mixture into 2-quart casserole. Spoon vegetables over beef mixture. Top with mashed potatoes.

Bake 20 minutes or until heated through.
===========================
Sometimes when I am super lazyified, ok then, most of the time, for the spuds I use Idahoan's Four Cheese Instant Mashers. They cook up easy in the microwave while you are browning and boiling the other stuff too. I also use all different types of the veggie blends for variety. In fact, I have varied this one a lot, even making it with different soups like cream of shroom or celery etc...

As a bachelor, this is one of my favorite meals, it is even better on day's two and three too.
Served with some sort of bread is a good thing for sopping up the goop left after you eat all the big stuff.

Also, it is a pretty easy one to clean up after which is a really big plus for me... I mean really big. :thumbup:
 
Great story, Piso.

______________


Golden Hominy Chili

persian18038wt0.jpg


This came out really good. I just took a package of hamburger meat, browned it with garlic, onion, salt, pepper and red pepper flakes. I added a can of Ro-Tel diced tomatoes and chilies, a 8-oz can of Hunts tomato sauce.... and a can of Bush's Golden Hominy.

It came out like chili, kinda, but with hominy instead of beans. The hominy took on the hamburger taste nicely.

Hominy is a neat staple Americans don't use much. A couple years ago Yvsa gave us a recipe for a chicken-onion-hominy soup :thumbup: that really rocks. My wife actually asked for it when she was going through chemo. So the hominy was in the house... and came to the rescue, since there wasn't a can of beans in the pantry like I thought. :p

Mike

Okay this looks really good. A couple of other recipe's with hominy. I made the first one yesterday.

Chicken Posole


About 5-6 cups of chicken stock
3 chopped garlic cloves. (I used 1 heaping teaspoon of garlic paste)
2 bay leaf
1 tb dried oregano
1 medium diced onion
2 small cans of chopped green chilli's
1-1/2 cups of tomatillo sauce (salsa verde) You can use premade in a jar. That is what I use this time but you can make homemade.
Chicken (easiest is to buy a precooked one from the deli and shred it into the soup. I used chicken breast since I try to watch fat since my gallbladder bothers me even after it has been removed)
2 cans of hominy drained. ( add this in the last 15 minutes of cooking or it breaks down)
1/2 tsp ground cumin
salt and pepper to taste

Basically put a little oil in a stock post and sweat the onions and garlic for about 5 minutes. Throw everything else in the pot but the hominy and chicken and cook on medium heat for an hour or so. The last 15-20 minutes throw in the hominy and shredded chicken. This is a very hearty soup.

The best part of it for me are the garnishes. Shred up cabbage, radishes and cut up an avocado. Use any or all on top of the soup. The cabbage especially gives to a nice textural contrast.

Tomatillo Sauce
If you want to make your own tomatillo sauce that's easy too. Husk and wash 10 tomatillo's and cut in half. Put them cut side down on a cookie sheet along with 4-6 jalapeno or serrano, 1/2 of a large onion and 2 or 4 garlic cloves. Put them under the broiler in the oven for 8-10 minutes. Throw it all in the food processor or blender and whiz up and add salt and pepper as needed. You can also use some llime juice but I have found that you get a similar tartness from the tomatillo. I also chop in some cilantro at the end but that can be optional.


For you hominy fans I got another one that I make that's very good, quick and easy.

Mexican Hominy

Dice up a jalapeno and 1/2 of a medium yellow or white onion. Oil the pan and saute until tender. Throw in a can of drained hominy. Add 1/4 cup or more sour cream and then add shredded cheddar cheese and warm through. salt and pepper to taste It's spicy, creamy and cheesy. Can't ask for a better combo and it's great! I tend to be a chili head so I usually use more peppers and add cayenne as well.
 
Okay one more for mexican food fans and meat and potato fans. This is a hell of an easy recipe that tastes awesome. I have made it with or without potato's and it's great. If I don't use the spuds (make sure you use small red potato's as the others break down and turn to mush) I just make a side of rice for the meat and gravy.

Carne Guisado


• 1 pound stew beef
• 2 tablespoons vegetable oil
• 1 small can of tomato paste
• 10 1/2 ounces condensed beef broth, undiluted
• 1/2 teaspoon ground black pepper
• 2 cloves garlic, crushed
• 1 teaspoon chili powder
• 1/2 teaspoon cumin
• 1 or 2 small jalapeno or serrano chile peppers, chopped ( you can throw them in whole to reduce the amount of heat in the dish)
• 8-10 small red potato whole.

Dust meat with some flour and brown meat in oil on all sides in a pan with 2 tbs of oil. Takes 5 minutes or so. Pour off excess grease. Throw the meat and all of the other ingredients in a crock pot and cook on low for 8-9 hours.

That's it. It comes out perfect everytime. If the juice/gravy is not thick enough for you take a 1/4 a cup of water and dissolve a tb of corn starch and pour it in. That will thicken it up in 10 minutes or so.

Food gets me almost as excited as knives. Sorry about the multi post ramble :D
 
Biltong is a style of cured meat from South Africa.

Kudos to Jack Spirko at the Survival Podcast for turning me on to this style of curing meat.

1. Cut red meat into 1" slabs with a khukuri. Trim off fat. Don't use pork or other meat that may contain parasites.
2. Lightly spray with vinegar from a spray bottle. I like to use Bragg apple cider vinegar but that isn't critical.
3. Sprinkle lightly with coarse salt.
4. Liberally sprinkle with ground coriander and black pepper.
5. Put in refrigerator overnight.
6. Rig a string between two supports. Every few inches create a loop by tying an overhand knot into a bight of the string. These are for hanging the meat, so they will stay separated.
7. Take meat and hang from string using fishhooks or unbent paper clips. I hang over the sink for the first day in case there are any drips.
8. Come back in 2 weeks to a month to take biltong off the string and eat it. You can test at different times to see how dry you like it.

Stores indefinitely without refrigeration, tastes great. When I don't have time for breakfast I grab a chunk of biltong and hop in the car for my drive to work.
 
Last edited:
No offense to Howard and Yvsa, but the first recipe is NOT green chile, it doesn't even have any mean green in it! :confused:

I'll edit this later and post a real green chile recipe. Oh, my credentials? I'm a damned good gook and a native New Mexican, where green chile comes from. And our family's been here since before The War of Northern Aggression. ;)

Here ya go:

Real NM Green Chile:

- 4 lbs unpeeled (2 quart sized ziplocks) or 2 pounds peeled and mostly deseeded (1 quart bag) NM green chile.
Medium, hot, or extra hot, according to your tolerance level. If you have relatives here or live close, use the
real thing. The canned crap will work if you are desperate, but at least try to order some frozen stuff online.
It's worth it! :D
- Garlic powder (NOT garlic salt!)
- Mexican oregano
- Cominos/cumin
- Salt

Chop the chiles up fairly fine and toss them in a mixing bowl, or drain and dump the contents of the containers in there. Cover the chiles with garlic powder, dust that with a decent amount of salt, and then add 1/2 tsp each of cominos and oregano. Be careful with those, they are powerful, and the flavor will intensify when cooked. You can always add more later.

If you can barely taste the spices when it's cold, ya done good. Now you have chile to incorporate with almost anything. Enchiladas, tamales, burritos, etc. You can dice up and brown about 3 lbs of pork shoulder or pork butt if you want chile with meat, ready to go. For the health-conscious, pork loin will work just fine, there's obviously a lot less fat. The taste is almost as good.

But people like mean green stew, so:

NM Style Green Chile Stew:

- Prepped green chile from above (double entendre, it IS almost Heavenly!) ;)
- 3+ lbs pig meat, diced and browned, referenced above
- 3+ lbs russet taters, diced 3/4" (ONLY russets. Leave the skins on, but get rid of any nasty stuff)
- 2-3 yellow onions, diced 3/8-1/2"
- 1 14 oz can diced tomatoes (Optional. Traditional in some parts of the state, and frowned upon in others.)

I use a 3 gallon pot, but a 2.5 gallon would work. Fill it halfway, bring to a boil, and toss in everything but the taters. Boil lightly for at least an hour, preferably 2. Remember, the longer you cook it, the hotter it will get. Dump in the taters. Let them go for about 20 minutes, 'til they're just soft enough.

You're done. Maybe in more ways than one. Learn to enjoy pain as a flavor. Wimpy people should have liquid dairy products on standby. Real men (and women) tough it out, sweat profusely, and scream into a kitchen towel. Don't let your dog sense your weakness or you will become the beta dog of your pack. :p

Seriously, the extra hot is the only thing that will do that to you. But you'll still perspire a bit with the others.
If you keep reheating the batch, the taters will disintegrate, but most people don't care about that.
Enjoy ... :D
 
Last edited:
Godfather:
1.5 oz bourbon
1 oz oz almond liqueur

Empire State:

Juice of half a key lime
1 oz simple syrup
Muddled with 4-5 blackberries
Shaken with ice with two shots of vodka and one shot of bourbon
Garnish with a rosemary sprig, and I insist on the garnish

I suppose I should be recommending things that require some knifework here though. :D

I don't so much follow "recipes" for anything other than baking anymore. I mean, I can post a list of ingredients, but I eyeball pretty much everything.

Now that summer is coming up, you have the option to grill a lot of your vegetables. And I don't mean sides of vegetables, any sauce or soups that you make using vegetables can now have a much richer but slightly more bitter flavor. If you plan to puree, don't be afraid to leaven them be and blacken most of the exterior.
 
Sabrage is the art of opening champagne with a knife. Here I use a chef's knife but a khukuri will work. A sabre was used back in the Napoleonic era and that's how it got its name. Watch the video first and then read on.

https://www.facebook.com/photo.php?v=1314743463182&l=9050740847432239353


Tips:

Locate the seam on the bottle and orient it upward. You will strike the lip at the seam.

Turn the blade so you strike with the back of the knife.

Slide the blade along the bottle until it hits the protruding lip. You are moving the blade parallel to the main bottle, not perpendicular to it.
 
Last edited:
Man the top of that bottle would have been gone if I tried that! No worries tho. Let the glass settle and dont forget to not pour the bottom when ya get to the end. Problem is by the time you get to the bottom you dont remember as much as you did before you started:D Ill have to try and open a bottle of Khukri rum like that!
 
Since we were discussing the Tibetan Yogi Milarepa who turned green from eating mostly stinging nettles, it is time to record some nettle recipes.


Nettles Milarepa

Fortunately Milarepa's original recipe has been preserved. One day some hungry hunters stopped by his cave and asked for some food. He had a pot with boiling nettles he shared with them. When they asked for some meat or salt for flavor, he said "We could put in some more nettles."

Hunter's Nettles

If your tastes run more like those of the hunters, you could put in a bit of salt pork and a dash of vinegar. Pick the tender young leaves of the nettles, and leave the old tough ones and the stalks unless you really really like fiber.

Nettle Smoothie (or "If only Milarepa had a blender" nettles)

Lightly cook the tender young nettles so that most but not all of the stinging capacity is destroyed. The leaves should still be bright green. A dark olive green means they have been cooked too long. They are then blended up in a smoothie with other smoothie ingredients. This gives the smoothie a certain zing that is unattainable in any other manner. Something likely to be appreciated by aficionados of jalapeno peppers, etc.

ndoghouse Texas Bull Nettles

I use a propane torch to burn the nettle spines from the nuts before harvesting. Then roll them around on the driveway and burn them on all sides. Kind of dries out the husk a bit too. The nuts are great! Not much too them and a lot of trouble but once you get the technique down they are well worth it. They make great pesto! I do it bare handed. I dont mind getting lightly bit in fact I kinda enjoy it in a sick way maybe? Forget the flogging tho. Overindulgence is misery.

b31daf124aa2efb56833ab3e2ac4aa8f


Heres what they look like after burning the spines off. Put them in the oven and roast them if you like but they are good raw too. They pop all over the place so be ready to collect them from the bottom of the oven.

Yangdu’s Sisno (Nettles) soup

6162FFC9-1583-4818-A3F0-EB6046F933F4.jpeg

Boil with potatoes, add garlic and salt.
 
Last edited:
Sherpa Tea

On a recent visit to Kami Sherpa and Yangdu, Red Flower and I had a chance to share a few cups of delightful Sherpa tea with our hosts. This tea, with slight regional variations, is popular in Tibet and surrounding regions, including Nepal, Bhutan, Northern India, Western China, and Mongolia. Frequently going by the name Po Cha, or Butter Tea. This tea has significant caloric value and is great for people doing hard work in cold climates. A quick internet search will turn up many recipes, but here’s a simple one I use. If you give it a try, don’t expect it to taste like any tea you’ve had before. It won’t. It is its own, special drink.

If you drink a cup of Sherpa tea in the morning you can skip breakfast and it will keep you going for a long time. It is low on carbs so it won’t cause a later blood sugar crash like sweet or starchy breakfasts can.

Old recipe: brew up some hot tea. Pour it into a large wooden churn. Toss in some yak butter, yak milk, and some salt. Churn vigorously for several minutes to mix everything up. Serve hot.

Modern recipe: Brew a cup of black tea. Toss it hot into the blender with a tsp butter, a pinch of salt, and a couple of glugs of half-n-half. Pulse blender a couple of times to mix thoroughly. Drink while hot.

The recipe above is for a single cup. Adjust ratios of salt, butter, and half-n-half to your own taste. You can also use a bit of sweetener, star anise, or other ingredients to vary the taste. Once you figure out just how you like it you will be easily able to scale the recipe to larger batches.

26 April 2019 Addendum - the Sherpa tea concept generalizes to the addition of butter or other oils to hot beverages. In recent years Dave Asprey built a marketing/podcasting/book business around “bulletproof coffee.” That’s his name for coffee with butter and MCT oil blended in. He says he got the idea from a little old lady who served him Po Cha somewhere around Mt. Kalias in Tibet. That’s entirely possible but Mt. Kalias is far enough in that he probably had to pass 50 other places serving the popular beverage before he finally got hungry enough to try the cup of buttered tea the old lady offered.

Dave has taken the idea and run with it in his “Bulletproof Diet” book. There he advocates buttered coffee as a stand alone breakfast. The addition of the MCT oil helps induce ketosis. He has some good nutrition ideas and his book is worth reading, especially if you’re a Sherpa Tea lover.

This morning I generalized the Sherpa Tea idea by using Japanese powdered green tea (matcha) with turmeric, butter, half and half, refined fish oil, and MCT oil. A Nepalese elder would probably look at me a little funny and mention that it tastes odd, but it was good and recognizably in the same family as the Sherpa Tea and Bulletproof Coffee.
 
Last edited:
Tsampa

Tsampa (pronunciation is more like champ-a) is a staple food of Tibet and surrounding areas. It is parched barley flour. It is lightweight so makes a great trail food for travelers in the mountain regions. Historically barley has been the major crop in much of this region, and much of it was turned into tsampa before being eaten.

Tsampa has similarities to the pinole of the Aztecs, which is a parched corn flour. Pinole was also used as trail food.

Perhaps the most famous and most popular way of eating tsampa is to reconstitute it with a small amount of Sherpa tea. (See above for the Sherpa tea recipe). You put the tsampa in your traveling cup, and add just enough tea to knead the tsampa into a dough ball. Then you knead the ball to the proper consistency and eat it. It takes a little practice to find the right ratio of tea to tsampa so the dough ball is not sticky, and also not powdery with excess flour. Tsampa prepared like this has both fats from the tea and carbohydrates from the flour, making it a fairly complete trail food. I think the doughball tastes like buttered popcorn, with a little caffeine kick.

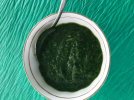
Tsampa can also be made into a porridge with the addition of hot water. Other ingredients like fruit might also be added to the porridge as available. Pictured below is Kami Sherpa mixing up his champa chemdur (Yangdu’s spelling) by reconstituting the tsampa with Sherpa Tea and a little honey or sugar sweetener.
4DB58B1E-DADE-4D7A-8753-F8D397B31204.jpeg

8FF08F34-7E7B-4EED-8D5B-B98B8E379F9D.jpeg

According to Yangdu’s sister Kanchi, the traditional method for making tsampa involves washing the barley, then mixing it with heated sand to parch and cook evenly. The barley is winnowed from the sand, and then ground into flour, either on a stone hand mill or a larger mill facility in the community.

Here’s my modern take on making tsampa.

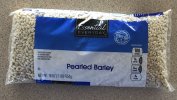
Get a bag of barley from the store.
1E4FE6D7-97DC-4036-BA3B-362C7BC75FBD.jpeg
Wash the barley in a bowl of hot water. Pour the barley into a colander. Then pour boiling water over the barley in the colander, cover it with a towel, and let it set for 15 minutes. This will cook the barley a little bit.

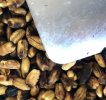
Use a large, flat pan to parch the barley. Put it on the stove over high heat, with no oil, and add the barley. Stir the barley frequently so it doesn’t burn. It should start to smell like popping popcorn. When the grains are nicely browned and piping hot turn off the heat and allow them to cool.
DD8C1AC3-1AAB-4F82-838D-FE1411AF75B1.jpeg

I’m pretty sure a Nepalese grandma would give me a hard time over the uneven parching of this method, but it works even if not quite up to the quality standards of the traditional, labor-intensive method.

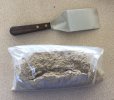
The next step is to mill it into flour. A mortar and pestle could be used, or a coffee mill. I use a high powered vita mix blender from the ‘80s that is powerful enough to mill grains to flour. (Not all blenders are powerful enough to do this.) Here’s the final product.
7F5EBDCD-DE9C-4B94-8F98-8338719737CF.jpeg
 
Ningrok

Bracken fern grows both in Nepal and in North America. The young shoots, called fiddleheads because their curled tips resemble the head of a fiddle, have been gathered and eaten by indigenous people in both areas for millennia.

52E353BF-3A5B-4048-8318-5E56FE356627.jpeg

Recently scientists have identified a compound in bracken fern that causes cancer in livestock. Some have gone so far as to suggest everyone should stop eating bracken. They seem to have forgotten a fundamental principle of toxicology, first enunciated by Philippus Aureolus Theophrastus Bombastus von Hohenheim (Paracelsus for short) over 500 years ago: “All things are poisons, for there is nothing without poisonous qualities. It is only the dose which makes a thing poison.” The toxin in bracken is both water soluble and destroyed by heat, so blanching and cooking can remove much of what is present, if that is a concern.

In Nepal bracken fiddleheads are called ningrok. Here is a recipie for Nepalese ningrok, based on Yangdu’s recipe. I added the blanching step.

Gather the ningrok from where it grows in meadows, edges of woods, moorlands, etc. Snap off the young tips. If it won’t snap off cleanly it is either too old or you’re reaching too far down. You do not want to collect the stringy part.

Ningrok is naturally bitter. If you don’t want the bitter flavor, soak the stalks in cold water for a couple of days, changing the water at least twice. This should eliminate the bitterness and the ningrok can then be enjoyed either raw or cooked.

Here is one cooking method.

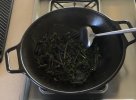
Blanch the ningrok in boiling water for 90 seconds. Remove to a colander and run cold water over to stop the cooking. Allow to drain.

Then per Yangdu, either stir fry with olive oil and soy sauce, or sauté with ghee (or regular butter) and garlic.

2EBD72F9-1606-4BAB-A357-9FD06D65C480.jpeg

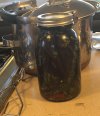
Another thing I like to do with ningrok after the blanching is to pickle it. This may not be traditional but it’s good. Put a tsp salt, and pickling herbs or spices (like peppercorns, hot peppers, garlic, thyme, dill, fennel, anise, etc) into quart mason jars. Pack jars full with ningrok. Pour vinegar over to cover. Store in refrigerator until eaten.

98104CF0-BB0B-45AD-94A9-2BD0E5B92291.jpeg

You can also can them in a hot water bath or pressure canner, but they will not be as crisp as the method described.
 
Back
Top