- Joined
- Jul 13, 2023
- Messages
- 610
Received. Thank you! The results are very interesting- I’ll have to do some playing around with the settingsI just emailed a photo to you.
The BladeForums.com 2024 Traditional Knife is ready to order! See this thread for details:
https://www.bladeforums.com/threads/bladeforums-2024-traditional-knife.2003187/
Price is $300 $250 ea (shipped within CONUS). If you live outside the US, I will contact you after your order for extra shipping charges.
Order here: https://www.bladeforums.com/help/2024-traditional/ - Order as many as you like, we have plenty.
Received. Thank you! The results are very interesting- I’ll have to do some playing around with the settingsI just emailed a photo to you.
I just sent two photos to you, one with 1 and 2 passes, and one with 4 and 8 passes. I have only tried this on AEB-L, but see no reason why it wouldn't work on carbon steel (though the settings might be different). I do believe others on this forum, with a LOT more knife-making experience than me, have used it with carbon steel (I'm a novice knife-maker and have only used AEB-L, so I don't have any carbon steel lying around to test).Ricky, please email me a picture of your test grid. curiousjess@use.startmail.com
Do the IR 2w laser work on carbon steel?
Yes, I finally caught up (somewhat) with the program’s abilities and cut all my sheaths, customize wood saya’s for kitchen knives and engrave my maker’s mark with it now.I'll bet you're cutting the leather sheaths out? My OLM3 10 watt diode laser does a GREAT job of that. The leather does smoke some when burning. I've got an exhaust fan running pulling the exhaust thru a charcoal filter so I can barely smell the leather when the enclosure is fully enclosed with fan running.
It does work on carbon steel. I haven’t done any grid tests but have done a fair amount of 1095 and it works great.Ricky, please email me a picture of your test grid. curiousjess@use.startmail.com
Do the IR 2w laser work on carbon steel?
Now when you say "Clean" and "Trace Clean", are you just doing the trace and fill passes at a different speed and/or power setting? Or is there a specific setting/profile in lightburn? Thanks.Lots of good information already.... here's my two cents when learning lasers.
- Dial in your own settings..... its the only way to get a premium mark.
- IMO all marks should have at least 4 separate things the laser does.... Fill, Trace, Clean, Trace Clean
- Black Marks will take some time on the laser.... If its brownish it means your rusting the blade.
- You don't actually need much wattage for blades.... a 30W fiber will basically do it all.
- MOPA lasers are not worth it..... because you can't color mark heat treated stainless. The free carbides are no longer free and blades wont take color.
- Make sure the work piece is clean and free of finger oil
- Pay for the setup/training..... and at a minimum have a professional verify your initial setup.
70mm lenses = Very small spot size, good at deep engraving and high detail work, small work envelope..... gives a low watt laser a lot more oomph
150mm lenses = good all around... usually what's on my laser.
300mm lenses = Very large spot size, lower detail.... large work envelope..... Avoid using it if you can.
I'm not going to win any brass coin competitions... but that's how they come out of the laser prior to tumbling and finishing..... 256 passes.
Now when you say "Clean" and "Trace Clean", are you just doing the trace and fill passes at a different speed and/or power setting? Or is there a specific setting/profile in lightburn? Thanks.


When you say "high frequency, lower power", what are the numbers? Is this for a fiber laser? What wattage?first steel marked since I got Lightburn and holy shit I can't believe how much easier it is to use than the program I was using. Like different universe easier.
these are all high frequency, lower power at 3-4000mm/s, 2 passes. I think another pass would've been good, but I'm satisfied enough with the result.


You can certainly get color on heat treated stainless.... I can get some vibrant blues on s35vnLots of good information already.... here's my two cents when learning lasers.
- Dial in your own settings..... its the only way to get a premium mark.
- IMO all marks should have at least 4 separate things the laser does.... Fill, Trace, Clean, Trace Clean
- Black Marks will take some time on the laser.... If its brownish it means your rusting the blade.
- You don't actually need much wattage for blades.... a 30W fiber will basically do it all.
- MOPA lasers are not worth it..... because you can't color mark heat treated stainless. The free carbides are no longer free and blades wont take color.
- Make sure the work piece is clean and free of finger oil
- Pay for the setup/training..... and at a minimum have a professional verify your initial setup.
70mm lenses = Very small spot size, good at deep engraving and high detail work, small work envelope..... gives a low watt laser a lot more oomph
150mm lenses = good all around... usually what's on my laser.
300mm lenses = Very large spot size, lower detail.... large work envelope..... Avoid using it if you can.
I'm not going to win any brass coin competitions... but that's how they come out of the laser prior to tumbling and finishing..... 256 passes.
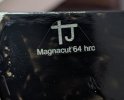
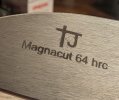
I got this nice, almost hologram looking pale blue when I was messing around. Super subtle, it would be great for something like a serial number or to mark steel type. No idea what the settings were, but if I stumbled across it before, I'll stumble across it again!You can certainly get color on heat treated stainless.... I can get some vibrant blues on s35vn
