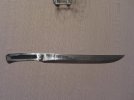
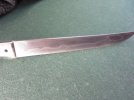
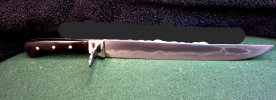
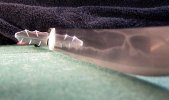
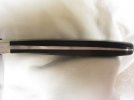
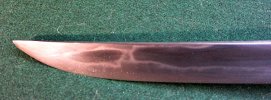
Time for a new BBQ Challenge - The Camp Sword

Count, yes it's a wad of stainless steel foil I hammered into shape to keep the inside form from collapsing or buckling (against the pressure from the cross lock tweezers from the outside) during the brazing. The tweezers help hold the silver piece in place. It also has some ceramic insulating wood wired around the outside to help keep it from getting too hot along the center seam of the main piece and to bounce some heat where it was needed for the brazing. Then I just fluxed it and silver soldered it on.
 
I started working on the guard and handle a little. The wood handle core won’t show in the finished knife, but I ebonized it just to see what it would look like.

DSCN3724.jpg


DSCN3734.jpg
 
Good call going with more spine temper......in the first pic it looked much too close to the spine to do much good. I should have said something yesterday, but I was tired from work and figgured someone else would respond soon. My appologies for being too lazy to offer an opinion. I like the extra mass you have up front on that.....should chop really well.
I have been sidetracked on another project lately so have not got any progress to share on my camp sword....soon I hope.
Darcy:)
 
Tai, Carl, William... Looking incredible!

I have some vineragoon going and really want to try a wooden scabbard after seeing Tai's work, Carl that looks like it will be perfect and very cool on the spine tempering, William that is absolutely what you want in a camp sword, awesome job!

I have been hand sanding mine when I have the time, this latest chopper batch is kicking my butt so I haven't gotten a ton done.

You guys can see the sword in this shop update video, it is at around the start of minute three.

[video=youtube_share;t540U2qDY78]http://youtu.be/t540U2qDY78[/video]
 
Thanks daniel! Its no where near what tai created but he gave me the inspiration to go wood on the sheath! Really like your tip sand the way it flows into the rest of the blade!
 
Looking good guys. You all do nice work. :)

Here’s how mine goes together.

The all thread is silver brazed into a notch at the end of the tang. The coupling nut is trimmed down flush to the top of a counter sunk hole, with a notch sawed in the top so I can screw it on and off. The end cap has a band of silver, a 20 gage piece of copper and an 1/8 inch thick bronze semi dome and soldered in. The copper has a hole in it so I can fill the space with epoxy and form an internal epoxy “rivet“. The end piece fits over the end of the wood core with a nice tight friction fit and will get epoxied on.

DSCN3743.jpg


DSCN3745.jpg


DSCN3751.jpg
 
I'm late to the party but It is in the works, I'm making it as big as I can heat treat.

I'll post pictures later today.
 
Hey Guys,
I did not see this thread until today. Too busy with my real job.
anyway, here is a bauernwehr I made that fits this definition, for sure.

The first pic is just after forging and rough grinding.
IMG_0601.jpg

The secon pic, I have drilled for nickel silver bolsers and pinned them on

IMG_0626.jpg

In the rest of the pics, you can see how I attached the nagel (just pinned - I really made a mistake and was test fitting while talking to a repairman working at my home. I was just not thinking, and I started peening the end of the nagel down before I had finished shaping it. The lack of a curve and the way the nagel doesn't mate fully with the bolster are the result of this lapse of concentration). grumble, grumble...

scales are buffalo horn, blade is low manganese 1075. First thing heat treated with my new controlled vertical evenheat.

IMG_0641.JPG

IMG_0643.JPG

IMG_0649.JPG

thanks for looking.
Next one, I hope I get the same hamon but with the nagel attached. The fit and finish otherwise is pretty good for me...

kc.
 
Here are some shots of the hamon. I love this low manganese 1075 for shock resistant blades with hamons (in fact, my avatar is the tip of a low mang 1075 dao w/ 27" blade)... By the way, I think I have learned a ton from just watching what the rest of you guys have done. I am supposed to make a 2 gladii this summer, and watching Tai work with the nonferrous stuff is inspiring. Literally, I am working to get better at brazing and shaping copper, etc. Especially copper, can't really afford silver without a buyer and copper is so much fun to work.

IMG_0640.JPG
IMG_0645.JPG

take care,
kc
 
Been a long day, but felt I needed to catch up,
ended up pounding out 2, first was out of Aldo's 1075 and the 2nd Is a San Mai, 96 layers of 1084,15n20 and 1075 on either side of some of Don Hanson's W2, I think I'll finish that one first. Both are 13" blades with 5.5" handles and .260ish @ spine.
It's been fun pounding on these BIG (to me anyway) chunks of steel.

Picture463.jpg

Picture465.jpg

Picture464.jpg

Picture467.jpg

Picture466.jpg


Should be able to get them both ready for HT this week.
 
Here’s a good overview of the reticulation process:
http://www.ganoksin.com/borisat/nenam/ajm-reticulation.htm

They refer to the prep as “depletion gilding”, … but it is also called “depletion silvering”.

I used to do some reticulation with a super hot oxygen/acetylene torch and a pencil flame, which would give some wild looking textures in deep relief, but it’s hard to get a large piece nice and even, and without any holes burnt through it that way.

I started with a silver dollar and rolled it out. I figured I’d just keep rolling until it was big enough for the shape I needed (barely big enough), which came out to about 22-24 gage. Thin like that usually gives more relief and a better pattern. As I rolled it down, every time I annealed it I pickled it as well, which gets a good jump on the depletion silvering. After that, I repeated the depletion silvering a half dozen or so more times to get it nice and even. It’s better to overkill that part than under kill. I’m using my Map gas torch for the heat source,… same torch I use for silver brazing and fabricating. It has a nice bushy flame.

DSCN3753.jpg


DSCN3762.jpg


DSCN3770.jpg


DSCN3773.jpg


DSCN3778.jpg


DSCN3782.jpg


DSCN3802.jpg


DSCN3808.jpg


DSCN3815.jpg


DSCN3827.jpg


Here’s a separate thread for discussion on it:

http://www.bladeforums.com/forums/showthread.php/954979-reticulated-silver
 
Last edited:
ok, I have been a little neglectful of this particular page, and I went and finished the knife without documenting much of it. I took the heat treated blade then finished it to 600 grit, then did a gun blue and bleach finish (thanks Rich Marchand for the info) and it is really cool. It is durable and looks great. The handle is oak that has been treated with vinegaroon and is wrapped in hemp, soaked in epoxy. Here is some video of me doing some chopping with it, keep in mind it is my first video upload to youtube, so please be nice :) I am just chopping some of that miserable sumac, but it will slip through stuff about 2" thick without much problem. I am not gifted in tamishegeri, or however it is spelled, but I can lay waste to plenty of sumac.
Here it is
IMG_1590.jpg


And here are some videos of it in action.

http://www.youtube.com/watch?v=Q0ku-5IhIfI

http://www.youtube.com/watch?v=FtHEDLvTzt8


I still havent made a sheath for it yet, but I have too many other knives in the fire right now.
 
Last edited:
One down and two to go…

Soldered from the inside so as not to get solder all over the outside texture.

DSCN3830.jpg


Each section will be separated by a half round band of sterling silver.

DSCN3834.jpg


DSCN3856.jpg
 
Last edited:
Matthew/Rick, I'd love to get some info on how you get the antique finish like that
I'm not Matthew or Rick, but here's how I do the antique etch. First cold blue the blade.......I use Birchwood Casey's superblue.......then submerge the blade in bleach for about 10 min. It'll look nasty when you take it out.........knock off the loose rust with scotchbrite or steel wool and repeat bleach if a deeper etch is wanted. After I get the texture I want I lightly polish with 1500 grit paper and mineral oil. Looks COOL(use your imagination) when it's done.
Hope this helps,
Darcy
 
Last edited:
Jason,
I do it pretty much as Darcy stated. I left it in a little longer, close to a half an hour, and ended up doing a second etch. I wanted it pretty deep, because I knew that I would be using it pretty heavily. I have hacked through quite a few sumac, some 2x4's and some old dead wood that has been laying around my campfire spot, and you can't even see it on the finish. I did not do the 1500 grit finish that Darcy stated, but I did not want any exposed shiny steel, so that is just personal preference. Rick mentioned doing a higher polish along the edge, which I also neglected. I basically just did the two etches, then scrubbed it with steel wool. After that, I oiled it pretty good. You saw the results.

This was fun, I just wish I had documented more of it in pictures, but sometimes I get caught up in the making of the knife and forget.
 
Back
Top