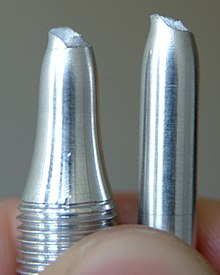
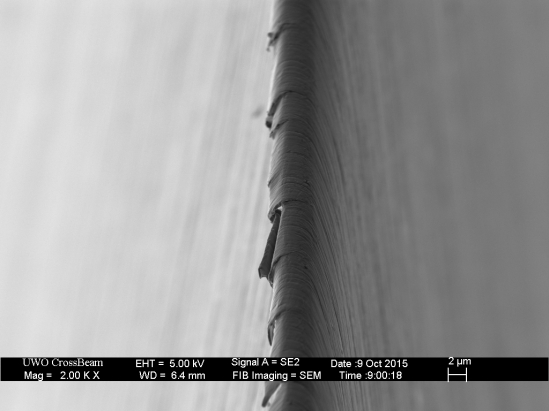
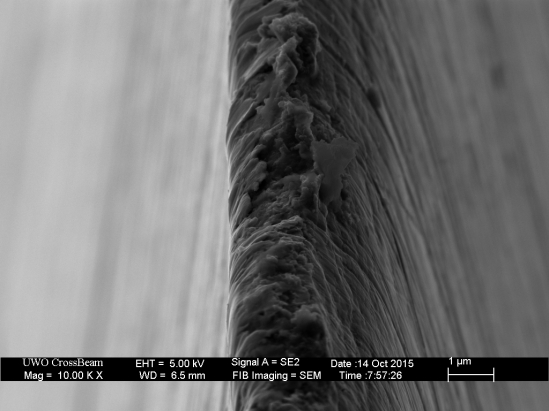
Is a bur actually needed?

The entire topic of burr formation, burrless sharpening, burnishing mechanisms is tough to pin down.

In my experience, using a smooth steel on low RC cutlery improves edge retention. Nothing crazy, but there is an improvement. I liken this to the small anvils used to workharden the edge of certain unhardened/partially hardened agricultural cutting tools (Fortytwo blades can elaborate on this better than me). Yes, repeated steeling will lead to brittle failure or a drawn out edge at some point, but all edges dull anyway and whatever maintenance is needed after the initial cycle, it doesn't matter if you continue steeling or take it to a mug or stone - the edge became dull from use.

Part of an experiment I ran on higher RC sporting cutlery (58-60), coming off of the initial bevel setting I smooth steeled the edge with upwards of 3-4 lbs of pressure at the exact same working angle, using a 1/4" hardened rod. In some cases this drew out the edge a small amount, in many cases it didn't. The edge was then finished with either a microbevel or at the original angle with a finer stone. If the edge had experienced a pressure burr from the steeling, this was removed with the higher angle and edge re-established at the target angle.

These were compared against edges that did not have this pre-treatment. The hypothesis was twofold - either the edge will fail early due to subsurface plastic deformation, or it will last longer due to the effect of workhardening increasing tensile strength and hardness.

There was no appreciable difference between the four preparations.

I have likewise run tests using plateau sharpening vs edges crafted with a small burr. Again, there was no appreciable difference.

Theoretically, any workhardening from flipping the burr should actually be beneficial - increase tensile and hardness trade off for decrease in ductility. This is the exact strategy employed in many laminated steels, tho arrived at using different process - the cutting edge doesn't need to be ductile. Take a piece of 3/4" copper tubing and bend it 30-40°. Now bend it back. Repeat. You'll find it gets extremely tough, tougher than you might have imagined if you've never actually done this before. Which would you rather make a cutting tool from, the workhardened piece or the original highly ductile piece? I realize this is not the same as a knife edge, but then neither is the paperclip analogy.

Ultimately, I came to the conclusion that whatever effect this factor contributes, it is absolutely dwarfed by other contributors. Tracking this down would require a huge sample from many different participants. When one person is prepping and testing for all we know the only thing we've learned is that they're better at one form of edge finishing than another.

Something important to bear in mind when talking about work hardening is that it only increases resistance to dulling via plastic deformation, but doesn't increase wear resistance. Since this is a method most commonly used with European style scythes, it's worth noting my observations regarding blade hardness between European scythe blades, which have their edges peened to shape, vs American blades (which are hard, and have their edges ground to shape.) Euro blades, with rare exceptions (like Russian blades) are usually only about 45 RC and the edges then drawn out with a special hammer and anvil, which both provides a thin bevel and a work-hardened edge which helps that very low angle soft steel not simply buckle on itself in use. However, American blades tend to be more like 54-58 RC. Peening the edges (of Euro blades) has been lab tested in the past and it only raised the hardness by a couple points, while the actual composition of the steel remained the same--mostly pearlite. The hardness of the American blades is attained through heat treatment and is the result of the martensitic structure of the steel rather than disruptions of the crystal lattice like it is in work hardening. Martensite is much more wear resistant than pearlite, and so between the large hardness difference in general plus the wear resistance of the martensitic structure I get something like 5x the edge holding out of American blades. Even if you were to heat treat one blade to 47 RC and another to 45 RC but then work hardened it up to 47, you'd be getting better performance out of the one that was simply heat treated and left unhammered. The reason for using the soft steel in that case is because of structural factors with how they manufacture them that drastically reduces failure rates, and also happens to make the steel easier to hammer out in beveling...which is kind of a self-fulfilling prophecy of sorts.

In general it tends to be better to just use harder steel rather than imparting any deliberate work hardening, but sometimes ease of sharpening takes priority over other factors.
 
IIRC some engineering-minded foodies did a number of RC testing on common Western kitchen cutlery. At the low end they were running the mid to upper 40s. At the high end they were mid 50s. Most were in the low50s upper 40s. I'll see if I can find that article...

I continue wondering as I see the results from roller/ball burnishing for machine surface finishing. Again, a very different application but there are similarities.
Like I said, I haven't seen any difference in my testing (aside from improvement smooth steeling budget kitchen cutlery), which was perhaps the most surprising outcome. I genuinely expected a notable difference up or down - 4lbs on a 1/4" rod is a heap of unit pressure.
 
I'm not sure I totally buy that the "paper clip bending" analogy applies to what is going on when removing a burr or wire edge. Seems like it applies more if I were bending the actual edge back and forth... not the fatigued metal in "front" of it. (Maybe grind the end of a paper clip until you get a burr... then see what happens)? :confused:
Hi,
Why not, how do you think its different , whats your thought process here?
Did you watch the video or ...?
Did you try bending a wire or paperclip or coat hanger?
Go ahead and do that now please :)
When you bend it in half,
and it stays bent,
and keep bending until it breaks,
do you see how the parts next to the fold/break are also bent?
They're bent because they have been damaged its called plastic deformation , its like instant metal fatigue.
The damage isn't only at the point of the bend, it is also above/below it, because metal will stretch, stretching is also plastic deformation. All the stretched metal before/after the bend/break is damaged/deformed/weaker than it used to be.
220px-Al_tensile_test.jpg


Got a rubber band?
You know how you stretch it a little and it doesn't change color much?
Thats elastic deformation, it goes back to original shape without being damaged.
But then when you stretch it a lot using two hands, you can see different color banding/"cracks" appear ?
These sections are thinner/damaged/overstretched, its plastic deformation,
If you keep stretching it , it will break at one of these "cracks".
Rubber has a huge elastic range its super elastic, steel not so much.
 
It returns to what i already said... I don't see any evidence that what occurs when breaking a paper clip, is what occurs when removing a burr... so breaking another paper clip won't change my thought. A burr isn't "attached" to the edge in the same way (if that makes sense)... so does bending it back and forth cause the same result/damage? Not seeing evidence it does (and lots of magnified views of edges that it doesn't). Plus, in most cases, the burr is also removed by abrasion in addition to bending (or, depending on how it's removed, abrasion exclusively)... so that will also effect the outcome.
 
In all reality, the trough margins made from an abrasive scratch are also evidence of plastic deformation. Much of the surface evidence is removed by the abrasives alongside and behind it, which are also making their own troughs. Abrasion with a hard fixed abrasive is the process of material removal by scratch. The abrasive grains are literally plowing through the metal and disturbing it in all directions (I'll refer back to Brent Beach's page from my earlier post, graphics included with full credit).

Sam%20Ed4228.jpg


In effect, even burrless sharpening is going to have a "disturbed" layer of steel under the surface, as this layer extends more than deep enough to meet up beneath an apex depending on the size of the abrasive used. And this not including any initial grinding of the edge (de-stressing/pre-stressing?), whether a burr is produced or not.

Work hardening does increase tensile strength and hardness right up to fracture. It actually makes more sense to shoot for a burr but then aim to remove it with a minimum number of flip passes, or one specified by alloy/HT. In practice, the overwhelming bulk of humanity will not notice a difference. And that doesn't even speak to the use of a loaded strop or other form of fine abrasive microbevel that will go a long way toward removing any residual thin layers of work hardened material, whether they be good or bad.

Its a non-issue, a matter of preference.
 
I like to use a 10X magnification eye loop to inspect the edge while sharpening.
Very easy to observe small burrs and for my free hand sharpening, some burrs are local for a short length of the edge and other areas are incomplete apex.
It also shows where you have not reached a true apex along the final edge.

Years ago I attended a woodworking show that had Haroldson Stanley as an exhibitor.
He is the USA distributor for Shapton stones and I requested he sharpen my Benchmade 812, I really wanted to see his technique.

He explained burr formation and the problems with tearing it away with wood, cork or leather stops.
He also had a USB microscope set up with a computer screen,,, very interesting.
Stanley recommended removing the burr with your finest stone, use very light pressure or no downward force at all,, and run the blade at 90 degrees down the stone for one short stroke,,,, observe the burr or lack of burr.
Then make a few passes with again, very light pressure to further refine the edge at your apex angle.
The torn away burr was easily seen under magnification and cutting away the burr with the stone then further refinement showed nice improvement.

Some recommend as a final step, forming a micro bevel which may or may not remove the burr with abrasive cutting. I believe it just rolls the burr to the opposite side, it becomes smaller and with some steel alloys, very difficult to completely remove all of it.

One technique I like is to charge a hard leather strop with diamonds,, this does cut away the burr and leave a highly polished edge which is somewhat convex.

Cliff Stamp claims the edge has deformation of the steel under the actual apex after use,,, he cuts away that week bond with a few light stokes, 90 degrees, at the beginning of his sharping cycle. The deformed edge is ragged and weak compared to the tougher steel below,,, we are talking of a very small amount of steel removal, not like the YouTube guy that runs his blade down a brick at 90 degrees for 20 stokes, then proceeds to sharpen.

Regards,
FK

I use Shapton water stones and some times struggle with burr removal. You mentioned the Shapton rep recommend to make one short stroke at 90 degrees on your finest stone.

Does this mean running the edge parallel along the stone or raise the blade to 90 degrees and do one stroke like you would when you normally sharpen? And did he recommend this be done between all stones or just before the finishing stone?

Thanks
He is saying the shapton rep used that technique as type of burr assessment or prior step to final removal.

Not a final step to burr removal.

The difficulty people have with burr removal is.

1. Not making a burr or making it even.
2. Making a burr too big
3. Not using light pressure when deburring.
4.not hitting the same angle when deburring.
5. Edge is too convexed to hit the true Apex to deburr.
6. Not weakening or reducing burr before moving to wood, cork and other means.

The Shapton reps technique is not going to override this.

There are no shortcuts. It's all in the technique and execution.
 
He actually does it as a burr removal step.

(Skip ahead to 21m mark to see it).

It's done on the finest stone you have... 1 pass as light as possible.
 
Last edited:
He actually does it as a burr removal step.

(Skip ahead to 21m mark to see it).

It's done on the finest stone you have... 1 pass as light as possible.
He is still doing edge trailing strokes afterwards my man
 
He is still doing edge trailing strokes afterwards my man

Haha... ok... I guess you know better than what the guy actually does and says in the video... that it's done to "pull the burr off"... not as a "burr assessment" (what you said). :rolleyes:

Trailing strokes done after can be done to further clean up an edge after removing a burr. Commonly done.
 
Traditional burr removal will tear the burr away leaving a ragged edge apex behind.

Shapton method will leave a clean even edge ready for final apex forming.

Very simple concept and was clearly demonstrated with USB microscope and large computer screen.

Regards,
FK
 
Haha... ok... I guess you know better than what the guy actually does and says in the video... that it's done to "pull the burr off"... not as a "burr assessment" (what you said). :rolleyes:

Trailing strokes done after can be done to further clean up an edge after removing a burr. Commonly done.

Sometimes I find it's impossible sometimes to discuss the finer details in a forum since everything has to be in the format of "always and Never"
So black and white.

It's not going to remove the burr 100 percent with that technique. There are always going to be some stragglers.

As far as it not being used as burr assessment

You need to look deeper then the face value of the video.

If you have a burr you can feel it on the pass And some will strip off on the stone. Confirming there was a burr.

Listen man.

We are all painting the same picture.

Some of us are just using different brush strokes.

Ok man....

I'll leave you to your.... "interpretation". :confused:
 
It returns to what i already said... I don't see any evidence that what occurs when breaking a paper clip, is what occurs when removing a burr... so breaking another paper clip won't change my thought. A burr isn't "attached" to the edge in the same way (if that makes sense)... so does bending it back and forth cause the same result/damage? Not seeing evidence it does (and lots of magnified views of edges that it doesn't). Plus, in most cases, the burr is also removed by abrasion in addition to bending (or, depending on how it's removed, abrasion exclusively)... so that will also effect the outcome.
Hi,
So is it true that now you do agree that bending a paperclip/coathanger, the damage extends beyond the point of bend?

But a burr (fatigued metal) is different because the "attachment" is different somehow?

Have you seen the video where some guy (bluntcut?) uses a piece of wood to remove a burr, and then holds up a 2inch long piece of wire that came from the edge?
What do you believe happened to the edge ?
 
Here's another test that might shed light or blow more smoke depending on one's POV.

Take a mild steel bolt and bend it back and forth in a vice. You'll notice it gets harder at first, then it suddenly gets easier, then it breaks.

Now take a punch, hold a hammer at a repeatable height above the undisturbed part of the bolt and let it fall. Take note of the amount of disturbance around the indent as well as the depth.

Move the punch/hammer to an area right near the break - you can even hit right on the break if you want. Again take note of the depth and surrounding disturbance, observe how the depth of penetration and amount of displaced steel is less in the "damaged" region than it is in the healthy region. Hmmm, the literature predicted this - increased tensile strength and hardness in exchange for reduced ductility right up to failure by fracture. In hardened steels, increased hardness usually = increased edge retention, balanced against the need to make the rest of the tool tough enough to withstand impact or lateral stresses.

Draw conclusions. Perhaps even extrapolate theoretically to a cutting edge, although this requires a lot of assumptions. Maybe this isn't a "draw conclusions" sort of observation...

Any sort of exhaustive testing is a lot of work and includes a ton of variables, requiring a large sample to be finished by a variety of prep-persons using different burr and burr-less methods. Or one could always just do solo testing and declare some sort of universal principles at work here, based on preference and backed up with a bent paperclip (we'll toss the bolt in a scrap bin to be recycled).

One last time - this is a non-issue.
 
Last edited:
...
Have you seen the video where some guy (bluntcut?) uses a piece of wood to remove a burr, and then holds up a 2inch long piece of wire that came from the edge?
What do you believe happened to the edge ?

Not sure I've seen that particular video... but if it was bluntcut... I believe he finished sharpening, and was left with a great edge that cut well. He knows his stuff.

One last time - this is a non-issue.

Pretty much sums it up. :thumbsup:
 
When you bend metal, the amount of tension/compression increases with distance from the neutral plane. A knife burr is much thinner than paperclip or a bolt, and so there is much less stress induced. This is why burrs can grow so large with edge trailing strokes (and low sharpening angles). Try the "paperclip experiment" with a sheet of aluminum food wrap...
bending2.gif
 
When you bend metal, the amount of tension/compression increases with distance from the neutral plane. A knife burr is much thinner than paperclip or a bolt, and so there is much less stress induced. This is why burrs can grow so large with edge trailing strokes (and low sharpening angles). Try the "paperclip experiment" with a sheet of aluminum food wrap...
Hi,
:D
What happens when you bend that golf club past 45 degrees? 90 degrees? 180 degrees? Repeatedly?
It breaks right?
Just like a burr when you bend it past 90 and keep bending it repeatedly?
Or a paperclip or coat hanger?
And the metal weakens past the bend/break point?
Isn't that what the paperclip/coathanger experiment is about?
To demonstrate to your own eyes plastic deformation , and that the damage extends beyond the point of bend/break.


It doesn't take much testing to see this with a knife,
sharpen knife without raising burr,
slow slice one piece of cardboard ,
count the slices/inches,
until it stops shaving arm hair,
then sharpen by raise a huge burr,
strop the burr off using heavy force,
then count the slices/inches of cardboard until it stops shaving,
and repeat,
the difference should be easy to see
even without pictures like these

gnv_k6ket_rwood_01.jpg

gnv_k6ket_redwood_newspaper_03.jpg

diamond-plus-paper-cut01.jpg


Can even use wood for testing, pressure is key
Edge retention carving pine : 10V, 9Cr13MoV, AUS-6, 440C, N690Co, 15N20 - CliffStamp
 
Last edited:
My own testing showed no real difference. While I've done plenty more tests since, this one is pretty good. I got plenty of passes on seasoned red oak, and not with the grain either - across the end grain with many pounds of pressure per pass. You can see the effect of the combined pressure and abrasion of the oak.

http://www.cliffstamp.com/knives/forum/read.php?7,32681

And the test was repeated with even better longevity following stropping on paper with compound, repairing substantial superficial wear and some damage from the microscope objective.

Believe it, if you cleanly remove the burr there will be no difference. If you don't....there will.
 
Back
Top