Thanks, and yes I’ll try to polish it, I have to make the pins for it still the ones in there aren’t the right sizes yet, I just wanted to see how everything went together, it’s all just parts I had around and mostly not from the same knives. I’ll go up to 7000 grit sand paper, that seems to have been enough in the past so I assume it will now, if not I’ll have to try to find something higher.Thanks! The knife is one of several white bone Rough Riders that @5K Qs gave me as a "patron of the arts"I've got plans for the next one that I'm kinda excited about.
Wow, that's nifty! How are you going to polish it? (I assume you're planning to, although the frosty surface looks cool, too)
I think I like looking glass acrylic because my first knife was a Kutmaster girl scout camper with the clear covers on top. I was fascinated by the way a scratch on the top surface made a shadow on the lower surface that would move around with the light.
You are using an out of date browser. It may not display this or other websites correctly.
You should upgrade or use an alternative browser.
You should upgrade or use an alternative browser.
Modified Production Knives (traditional only)
- Thread starter supratentorial
- Start date
Rose and Thistle Custom
Josh Mead
- Joined
- May 9, 2018
- Messages
- 2,301
This is 3000 then hand buffed (buffing wheel was melting the surface) with an automotive polishing compound.


That’s awesome was it liquid or did you start with a solid piece?This is 3000 then hand buffed (buffing wheel was melting the surface) with an automotive polishing compound.
View attachment 1183997 View attachment 1183998
Rose and Thistle Custom
Josh Mead
- Joined
- May 9, 2018
- Messages
- 2,301
It's cut from a solid piece. Basically plexiglass, can't remember at the moment which kind but there are two basic types of plexiglass and one is more durable. I have some left, will throw a bit in that box.


3-1-1
Gold Member
- Joined
- Apr 2, 2012
- Messages
- 2,039
Beautiful work. Curious what did you use to secure the paper to the metal before the pour?Still more polishing but pretty much done, I fairly happy with it.
View attachment 1184216 View attachment 1184217
I poured a little of the acrylic in and made sure it fully covered the bottom and put the paper down and poured the rest on top and used the popsicle stick to make sure the picture was centered so is basically encased in the acrylic instead of sandwiched.Beautiful work. Curious what did you use to secure the paper to the metal before the pour?
JohnDF
Gold Member
- Joined
- May 14, 2018
- Messages
- 28,366
That has to be my favorite modified that I've seen yet.Still more polishing but pretty much done, I fairly happy with it.
View attachment 1184216 View attachment 1184217

Rose and Thistle Custom
Josh Mead
- Joined
- May 9, 2018
- Messages
- 2,301


- Joined
- Sep 9, 2005
- Messages
- 132
Hi, folks,
I am working up the nerve to modify a Case pen blade to a Coping blade -- first blade mod ever. One thing that concerns me is
the location of the nail nick -- fairly near where the top edge of the blade starts to drop down towards the center. I have played
with profile variations using a Sharpie marker on the original pen blade, to get an idea of how it should end up.
Question: I think that going slowly will help reduce my chances of making a mistake. Is it practical to file the blade down with it clamped
in a vise? Or would it be much better to use a grinder or sander (neither of which I have), going slowly and keeping the blade from getting
hot and affecting the temper?
Any hints would be much appreciated!
Thanks,
John
black mamba
Gold Member
- Joined
- Oct 21, 2009
- Messages
- 21,305
I always wrap cardboard around the base of the blade and pivot, taping it strongly in place to ensure the blade does not close on me. Then I freehand grind/sand the blade into shape, making sure to go slow and dip the blade in cold water between each pass or two to protect the temper. The straight edge of the pen needs to continue for a decent length past the end of the nail nick to allow for a pleasing slope down to the point. If the nail nick is too close to the tip to look right, I just don't do it.
- Joined
- Mar 8, 2018
- Messages
- 1,169
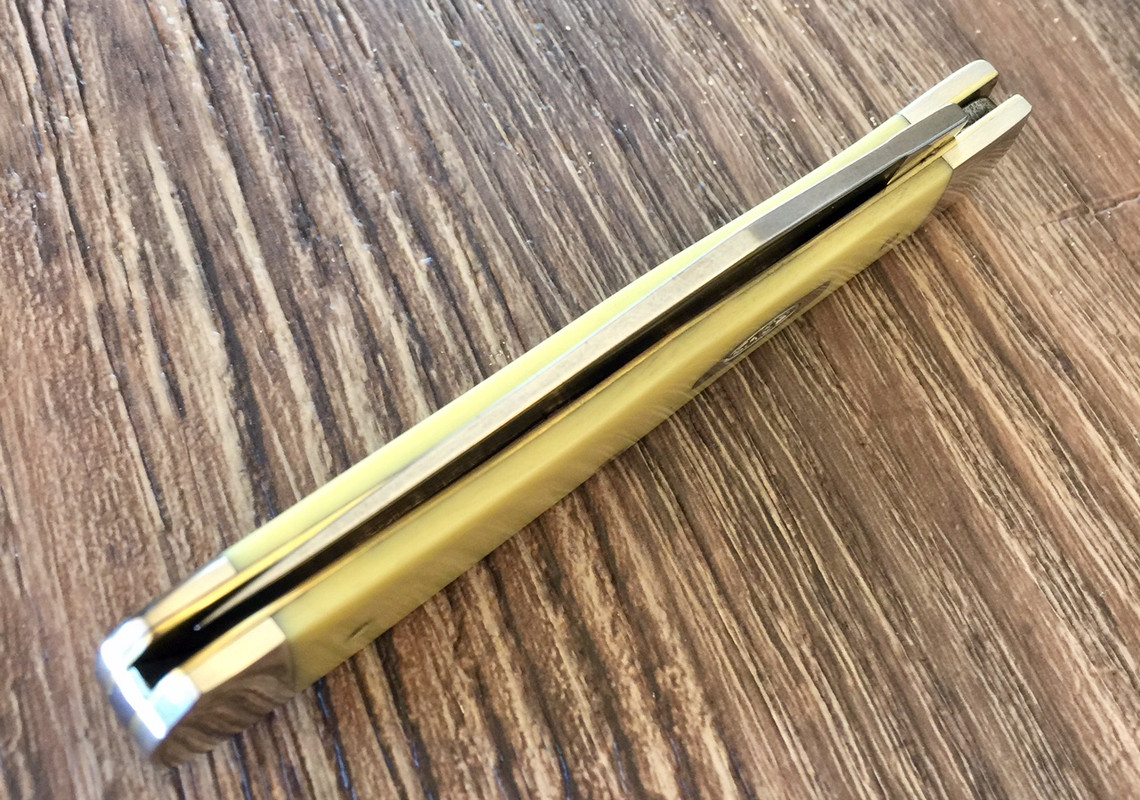
Finally got some good pictures for the thread. Idk what he did to the LB7 blade but the satin finish looks way better than when I sent it and made it uniform rather than having the zero edge grind line. Beautiful clawed amber bone. Rather hefty. Centered the blade and polished the brass inside too ultra smooth action.


Hi, folks,
I am working up the nerve to modify a Case pen blade to a Coping blade -- first blade mod ever. One thing that concerns me is
the location of the nail nick -- fairly near where the top edge of the blade starts to drop down towards the center. I have played
with profile variations using a Sharpie marker on the original pen blade, to get an idea of how it should end up.
Question: I think that going slowly will help reduce my chances of making a mistake. Is it practical to file the blade down with it clamped
in a vise? Or would it be much better to use a grinder or sander (neither of which I have), going slowly and keeping the blade from getting
hot and affecting the temper?
Any hints would be much appreciated!
Thanks,
John
I’ve generally only done minor blade mods spear to drop point, “fixing” broken tip. Never pen to coping or anything but fixing the broken tip would be similar. I’ve always found that sandpaper on a flat surface works best, it seems to bite into the hardened steel better than a file. I agree with black mamba that if you can’t get the nail nick right it’s best not to do it, with the exception of making an unusable knife usable, if the nick is off it will never look right, like if the blade stops and the nail nick goes off the edge. I’ve always held the blade and run it along the sandpaper that’s on the bench, I’m not sure if black mamba uses a sander and that’s why he dips it in water but I’ve never really thought it would get hot enough doing it by have to do anything to the temper. I would think you could drop the blade off fairly soon after the nail nick ends and if the blade is still curving up at that point you could sharpen it flat if it’s not too much. It’s all just opinions though, a lot of different things work, and a lot of different things look good to different eyes.I always wrap cardboard around the base of the blade and pivot, taping it strongly in place to ensure the blade does not close on me. Then I freehand grind/sand the blade into shape, making sure to go slow and dip the blade in cold water between each pass or two to protect the temper. The straight edge of the pen needs to continue for a decent length past the end of the nail nick to allow for a pleasing slope down to the point. If the nail nick is too close to the tip to look right, I just don't do it.
- Joined
- Sep 9, 2005
- Messages
- 132
Hi, Black Mamba and jwdistin,
Thanks much for the good ideas! I hadn't thought of sandpaper, but that's probably the method I'll use, as I don't have a belt sander
or grinder. I will study how the edge angles and where the point should come out on the coping modification, plus location of the
nail nick. If all looks well, I'll take the plunge, and post the results here -- unless it's especially cringe-worthy!
Thanks again, and I appreciate your help!
John