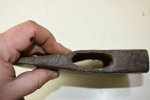
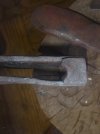
R&D,18th c.American axe

With a fair certainty i think i can say this:
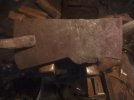
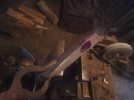
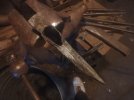
Them axes are quite old,anywhere from 500 to 1500 years or so.
They're made very well,it took quite a skill and not a shabby tool-set to do this.
The iron was quite good quality to begin with,it was made carefully and well in small batches,and was refined very thoroughly(unlike the iron of that mortising axe above).
I'd not be surprised at all if they had a steel edge insert welded in that is heat-treated.
These are well-made tools of a culture that had their woodworking lined out,had nice trees around them and knew what to do with them:)

This is why it's so sad that these are deprived of their provenance.We'll never know if that bottom bearded job was a viking ship-carpenter's hatchet or a tribal take on one,hundreds of miles and years removed,or about anything else in between!:)
 
Excellent point made of the ice chips, chipping away, into the face...i feel that description having played with axes on the ice of a frozen lake.

The history and conditions of these areas you mention are most difficult to say the least, and if i or my family were desperate, i understand completely.
That said, we have lost here, but only in the sense that we may probably never know conclusively the intended use for the tool(s).
What we gain is the period of time can be dated, the tools were crafted with care and intent of a duty by a people and culture we can still learn about and possibly from, just fragmented perhaps.

Thanks as always J jake pogg
 
I am glad you are here to share your experience and point out my misconceptions. Thank You.
I assumed that long handle (20 inch and longer), extra heavy head pointed to 2 hand short stroke, controlled (relying more on gravity than force of muscles) chopping movement. And then, at the back of my mind was angle of the bit on this McKinnon axe.
vintage-mckinnon-mortising-axe_1_5943516585936a4bc22620a73118767b.jpg

https://www.worthpoint.com/worthopedia/vintage-mckinnon-mortising-axe-1888664801
I have just stumbled on those mortising axes. Short handles, double bits (definitely no need for a mallet).

antique-lancaster-co-blacksmith-hand_1_6055891214cf785e83a0c14093d48f12.jpg

https://www.worthpoint.com/worthopedia/antique-lancaster-co-blacksmith-hand-1947339277
antique-blacksmith-forged-mortis-axe_1_164b6fdc4cb82ef02c3fadf59ad12e66.jpg


https://www.worthpoint.com/worthopedia/antique-blacksmith-forged-mortis-axe-1889607044
vintage-antique-primitive-mortise-axe_1_b74481f1c79bc638a45bd4e4a2a900a0.jpg

https://www.worthpoint.com/worthopedia/vintage-antique-primitive-mortise-axe-1863712279
vintage-mortising-axe_1_fa5eced7f80415b6011045a658e8c75e.jpg

https://www.worthpoint.com/worthopedia/vintage-mortising-axe-412544190
long-double-end-mortise-axe-head_1_04152c0183aeeaa4cc5eb50ffa10e58c.jpg

https://www.worthpoint.com/worthopedia/long-double-end-mortise-axe-head
 
Last edited:
Thanks,crbnSteeladdict,you often find these very interesting(and pertinent)examples...And here you go again....
What makes these especially valuable is that number of variations within the common type...Neat.

Americans used mortise&tenon joinery in construction fairly late into 1800's...Here's an article about joinery used in early to middle 19th c. Chicago:https://www.urbanremainschicago.com...among-19th-century-chicago-wood-frame-houses/
Presumably,these types of tools lived on as long as the constr. methods they were designed for originally...(at least i presume that they're in the least descendants of mortising tools,even if it's true that they may've been purposely forged for rail-fence and other cruder types of work...).
 
Ok,Gentlemen,months late,but i Am attempting to get back in the saddle here.
It's the dead of winter here,and going from fairly deep cold to stormy and back again.
But,i fear that Spring will bring with it some mad busy-ness,and i Must try to get my forging in...

No problem making charcoal,at least that is all good.But operating the forge very tough,exhausting really,so will move along here very slowly and methodically.

First order of business is to dope out how This juncture(cheeks to poll) is made(photo of a Stohler from the web provided by a friend:
stohler-1.jpg

I just tried to approach it head on-to laminate a thin cheek stock flat onto chunky poll-,but with
very poor results.(that double of image above a mistake,sorry)
stohler-1.jpg
Here's what i meant to post:
2043.jpg
There's some trick/finesse to it that i must discover.
In general,Stohler axes Very rarely display even slightly open beginnings of welds radiating from eye.I want to know why.
The original in above photo also presents this very fluid,gradual transition into that oval of an eye.That corner is "filetted",if you will.It's not a bend,nor a sq. corner of a juncture;it has extra material in it.I must know where it gets it.

While weather is like this(forecasted -30/-40 all coming week),my chores,both house and forge related take up most of the day,but there will always be if only a few hours for an experimental hot-work.Research in the morning and evening,thinking when the old brain allows(not too cold or tired).
 
Dang it,hard to believe it's been nearly a week...Not an ideal time of year for fun&games at the forge,too much energy goes into just staying warm enough to move and hopefully think.
Tools are on strike,PH most notably,cannot be brought into battle unless it's -10 or warmer.
I did catch a small break in the weather,here's a quick report.

Previous idea and associated prototype was a total wash.Starting with thin rolled stock for cheeks can only result in sq. corners at the poll.
So a new forging where the cheek mat'l is 3/8" thick,and indents for future eye are forged in before assembly&welding.

2041.jpg

Again,at this exact point i'm pursuing specifically that radiused back of poll strictly(as per that photo of an original above,(Post #266).
For Stohler in particular it doesn't seem like it was a very common eye-shape(teardrop),however we certainly do see those Stohler axes around.
We've looked at this method of constr. before so i'll make it brief.
I find this doable(would become quicker/easier with practice),but it sure is a lot of dicking about.
Forging two pieces separately,adjusting them to each other,again,separately forging 3 more components to complete assembly-Was that the production sequence that Stohler and other(admittedly smaller)forges used?
Many remaining axes by Stohler alone differ from one another quite a bit...Were they a "custom" shop,working to order,and according to the customer's specific requirements?
It's not that i mind taking the time and care with each head,it's that i can't help wondering if there was a System,a core method that was at the root of their production,and that i'm not seeing here.
Many German and other N.European axes of the time were "wrapped",the iron forming the cheeks bent clear around the eye.If the idea was to make a rounded in the back poll,it seems like a more expedient way,the forces acting on the eye by drifting it to shape(as well as normal forces of the haft in using the tool)would be better distributed.
Whatever increased poll mass can then be added to the outside of the resulting loop,welding would still be required,but manipulating a single piece pre-form would save time...
Why Did they stack up the poll like that?There Has to be a reason...

Anyway,it kinda worked,it Looks like the necessary shape,and seems ok mechanically.
(i would feel easier in mind as far as forcibly jamming the drift in such eye after the hard poll-plate is on;the way those welds are oriented does not provide the greatest resistance in the direction of their being spread apart;and it's not only the weld-seams themselves-the nature of this(and Stohler's)iron was piled,layered,and had tendency to delaminate easily along the slaggy layers in iron itself):

2054.jpg
I'm on my way to take advantage of these few warm days to hopefully use PH to work up some blade material.Will try to blade this,and weld on the poll-plate,and see how kindly the composite will take to drifting the eye.

Overall shape for now:

2055.jpg
 
Your work and ciphering and all very reminiscent of tries I watched occur in recreating the old-time Swedish timmerbila last year which resulted in all kinds of different construction and sequencing possibilities, eliminating initial assumptions and dampening overly optimistic expectation with no definitive answers at the time in terms of some kind of standard process emerging to the frustration of the ones having a go. I have to wonder if such a thing can even ever be known at all, like grabbing jello with a fork, the end result there in front of us but the process and sequence, the fruits of that much collective knowledge never concretely stipulated so elusive in practice. Still, looks like you continue to forge ahead, narrowing it down a bit.
 
Thank you,Ernest.That is very well put,and i must admit to that sleazy part in my brain that rejoices at the thought of others being challenged similarly...(and the event mentioned involved some Very no-nonsense others...yes,i'm very gratified:))

I tried to download a free PDF of M.T.Richardson the other day,unsuccessfully alas(have no idea where my paper copy is).
It's a great document,and hilarious in parts,where all these smiths argue vehemently about the "proper",or "best",et c.,procedure...And they're all of them right,for the most part!:)
It's uncanny just how many ways there is to achieve the one and the same goal in ironwork.
(i'm thrashing in the dark trying,hoping,to stumble across even the one...).
 
Dang it,hard to believe it's been nearly a week...Not an ideal time of year for fun&games at the forge,too much energy goes into just staying warm enough to move and hopefully think.
Tools are on strike,PH most notably,cannot be brought into battle unless it's -10 or warmer.
I did catch a small break in the weather,here's a quick report.

Previous idea and associated prototype was a total wash.Starting with thin rolled stock for cheeks can only result in sq. corners at the poll.
So a new forging where the cheek mat'l is 3/8" thick,and indents for future eye are forged in before assembly&welding.

View attachment 1285504

Again,at this exact point i'm pursuing specifically that radiused back of poll strictly(as per that photo of an original above,(Post #266).
For Stohler in particular it doesn't seem like it was a very common eye-shape(teardrop),however we certainly do see those Stohler axes around.
We've looked at this method of constr. before so i'll make it brief.
I find this doable(would become quicker/easier with practice),but it sure is a lot of dicking about.
Forging two pieces separately,adjusting them to each other,again,separately forging 3 more components to complete assembly-Was that the production sequence that Stohler and other(admittedly smaller)forges used?
Many remaining axes by Stohler alone differ from one another quite a bit...Were they a "custom" shop,working to order,and according to the customer's specific requirements?
It's not that i mind taking the time and care with each head,it's that i can't help wondering if there was a System,a core method that was at the root of their production,and that i'm not seeing here.
Many German and other N.European axes of the time were "wrapped",the iron forming the cheeks bent clear around the eye.If the idea was to make a rounded in the back poll,it seems like a more expedient way,the forces acting on the eye by drifting it to shape(as well as normal forces of the haft in using the tool)would be better distributed.
Whatever increased poll mass can then be added to the outside of the resulting loop,welding would still be required,but manipulating a single piece pre-form would save time...
Why Did they stack up the poll like that?There Has to be a reason...

Anyway,it kinda worked,it Looks like the necessary shape,and seems ok mechanically.
(i would feel easier in mind as far as forcibly jamming the drift in such eye after the hard poll-plate is on;the way those welds are oriented does not provide the greatest resistance in the direction of their being spread apart;and it's not only the weld-seams themselves-the nature of this(and Stohler's)iron was piled,layered,and had tendency to delaminate easily along the slaggy layers in iron itself):

View attachment 1285513
I'm on my way to take advantage of these few warm days to hopefully use PH to work up some blade material.Will try to blade this,and weld on the poll-plate,and see how kindly the composite will take to drifting the eye.

Overall shape for now:

View attachment 1285514

Great work! Really a good looking axe already.

It would be nice to have a look at those tongs. Are they giving you a good grip on the work? I might have Andy make me a pair.

I'm noticing the dip in the top of your axe above the eye. I was just thinking about how useful that step would be in preparing to drift the eye. As the eye elongates during drifting that dip will disappear. Without the dip you'd end up with a lump that you'd have to try to forge back in or more likely just grind off.
 
It would be nice to have a look at those tongs. Are they giving you a good grip on the work? I might have Andy make me a pair.

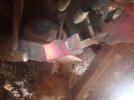
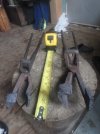
Yessir,no problem,i'll run out and take a few photos of the tongs(i've two sets,a smaller and a larger one,i found them in a tailings pile when scavanging for steam engine parts south of Ruby,in an old mining district...they came there in late 1800's,built a blacksmith shop,and started mining.After a few years the ground was all petering out,and some smartass remembered that they never mined under that big shop...So they bladed it off,tools and all,and there's still hardie tools and everything else mixed with the gravel:)
 
These are obviously not factory,and they're made Very well,by a most experienced smith.
(i took kinda goofy photos...:(...let me know what particulars you'd like to see better).2030.jpg

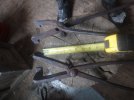
In this photo you can see those ring-end rivets,punched and drifted larger,must be to hold the longer work steady(these are all bent now because of how rough i am on tools....:(...when i got them they were very straight,and set to hold maybe 1/2" or 5/8" strap,couple inches wide).

Everything is kinda gently tapered away from the fulcrum,very elegant,that,that was not a lazy smith...

2031.jpg

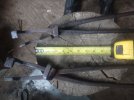
The boss is forged to an ample area,but also-very important-left full thickness of stock.
Those 90 deg. bends(the one in-plane with the flat)are made by some tricky method,it's anything but a "bend"(i'm actually not sure how it's done...bad dog...:(

The starting stock for these was obviously 1/2" strap;reigns are ditto round.Welds joining the reigns are almost seamlessly blended in...(without even trying,you can just tell).

All in all,Most enviable skill went into these...

Today of all days i'm glad to have someone else's work to talk about,for i just went and lost another patient...
 
So,the long and the short of it was that i'm again using that very old,layered WI.Some spots in it are worse than others,and i ran into a delam immediately after starting.
Was too stupid to discard it and immediately get another chink,i thought i could ride it out,and if successful,end up with an old,fissured-looking Stohleresque job.
But i didn't have enough skill to finesse this,and the fissure kept increasing(with my over-working the piece in my ineptitude),and so the side of an eye finally took a dump.
(of course After all the welding was done,the poll,the blade,everything!:)

2023.jpg

OTHER than that,it was developing into a kinda promising prospective tool...

2021.jpg

Oh,here `we go,i took a photo of that bad spot at so(already pretty late)point...Like i said,i Was managing to stay on top of it for a while...(or only though i did).
Long time ago people were way more skilled,and worked hotter,and just plain knew what they were doing!:

2017.jpg
 
These are obviously not factory,and they're made Very well,by a most experienced smith.
(i took kinda goofy photos...:(...let me know what particulars you'd like to see better).View attachment 1285917

In this photo you can see those ring-end rivets,punched and drifted larger,must be to hold the longer work steady(these are all bent now because of how rough i am on tools....:(...when i got them they were very straight,and set to hold maybe 1/2" or 5/8" strap,couple inches wide).

Everything is kinda gently tapered away from the fulcrum,very elegant,that,that was not a lazy smith...

View attachment 1285919

The boss is forged to an ample area,but also-very important-left full thickness of stock.
Those 90 deg. bends(the one in-plane with the flat)are made by some tricky method,it's anything but a "bend"(i'm actually not sure how it's done...bad dog...:(

The starting stock for these was obviously 1/2" strap;reigns are ditto round.Welds joining the reigns are almost seamlessly blended in...(without even trying,you can just tell).

All in all,Most enviable skill went into these...

Today of all days i'm glad to have someone else's work to talk about,for i just went and lost another patient...

Gawd those tongs are beautiful! Someone knew what they hell they were doing. I love the loop-end rivet. What a great idea for handling heavy objects with 2 hands.
 
I think I owe it to the forum and especially to Jake to give an update on the earlier axe Jake made last year. He sent it to me for hanging. Sadly I've been delayed by many things and somewhat irresponsible not to have completed my work and posted it by know.

As a refresher, here is the axe in as forged condition.

As%20forged%201.jpg

As%20forged%202.jpg


After some initial clean-up by Jake and a little more by me we came to this.

Step%20one.jpg


We had a few emails back and forth about where to go from here. I think Jake had been somewhat overcome by forge fumes when he granted me artistic license to finish it as I saw fit. "Make it into something you would use", was his instruction. I don't doubt he had regrets about that after he got some fresh air.

Progress%2002-17-20%201.jpg


I also had a few discussions with Old Axeman about making a haft for it. I wanted to do something period - circa 1800. I looked at pictures of his period axes and how he had handled them with straight handles similar to those he had seen on axes of that age. I liked those and decided to do something along those lines.

For the haft I chose a black locust stave that I've had drying for about 3 years. Old Axeman had the great idea to leave the haft with a drawknife finish. I love the idea and attempted that but because of the wild grain changes in the wood I found I didn't have the skill to pull that off. So I finished it with rasps and I'm leaving it with a rasp finish. I figure smiths of the period had access to rasps, especially if they were also shoeing horses.

Here's where I was at this morning. I had the handle shaped.

Progress%2002-17-20%202.jpg

Progress%2002-17-20%203.jpg

Progress%2002-17-20%204.jpg

Progress%2002-17-20%205.jpg


I thought about finishing this to a mirror polish and then seeing if I could enlist I Think Very Deeply to give it one of his beautiful bluing jobs. But I thought it should look rougher than that so I'm just sanding it to 200 grit and I will soak it in vinegar to reveal the different steels in the axe. I want its construction to be plainly visible in the finished product.

That handle itself has proved quite a challenge and was responsible for some of the delay. The stave had warped during drying and required quite a bit of work and 2 rounds of steaming to get the straight haft I have now. But I'll save that story for another post when I finally finish this project and hang the axe.

Jake, brother, I am grateful to you for your patience.
 
But I thought it should look rougher than that so I'm just sanding it to 200 grit and I will soak it in vinegar to reveal the different steels in the axe. I want its construction to be plainly visible in the finished product.


Jake, brother, I am grateful to you for your patience.
Now, I know why I love this thread so much!!! Great job, both of you!!!
I might have a small suggestion to consider. Just wrap the surface in vinegar soaked paper towels and put it in freezer bag so vinegar doesn't penetrate welds from inside of the eye.
 
Last edited:
Back
Top