R&D,18th c.American axe

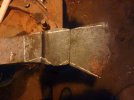
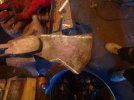
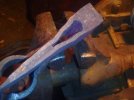
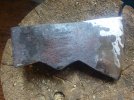
So here's the photo of both sides done:
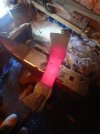
2014.jpg

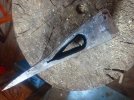
And the same on edge(i worked those transitions to be kind of abrupt;they form the scarfs of the poll-weld and need to come together positively):
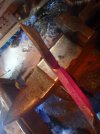
2016.jpg

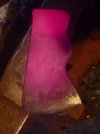
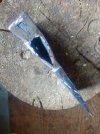
Now it's time to think of blade steel.Way too cold to use PH to work up some spring,so i end up using this old circular saw-blade i was given some years ago by Mark Knapp.I think he said it May've been L6,since,i started thinking it's more likely 15N20,but in any case i've bladed tools with it before,and it lends itself well to simpler HT(i take a chunk out of the "hub" of it where it's slightly thicker,just a touch under 1/4"):
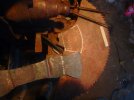
2019.jpg

Another thing i'm attempting to pay more attention to is welding itself.Bad enough that i'm using junk,i must try to be more careful and systematic.I'll not weld this as an ugly 3-and more part sandwich,i'll weld the steel to one side of pre-form first,then close and weld the second half over it.
It is a more responsible method.Less air intervening between composite parts,heat distributed more evenly.Axes are the worst things to weld-wide and flat and very difficult to heat throughout and evenly.
No welding or wire,i'll just hold the steel with the preform like with a shovel;that's how chisels and many other tools were steeled,higher-melting point low-C iron in the fire,more delicate edge steel on top,protected by iron from blast and more likely to be up in the zone of reducing Atm.

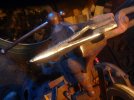
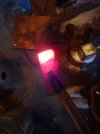
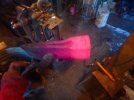
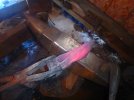
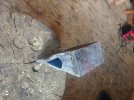
Here it is right after welding.It has the appearance of being very thin.It's an illusion,due to it's developing convexity.I welded it edge steel down to the anvil,and in the process the iron outside
got pretty convex(?)...:
\
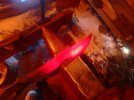
2023.jpg

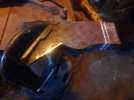
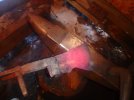
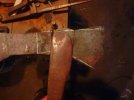
And this is it,steeled,and tentative lines again re-drawn,with drift offered up.
2030.jpg

I misplaced the bit in welding just a tad,IF this head survives,it'll be slightly longer in the eye fore-and-aft.That last photo shows that:
(i hear people complaining about this often...and am appropriately grieved...but i was lucky as it was, to slap it down where it landed,it slip-sliding all over on molten flux:)

2026.jpg
 
So here's the photo of both sides done:

View attachment 1292355

And the same on edge(i worked those transitions to be kind of abrupt;they form the scarfs of the poll-weld and need to come together positively):

View attachment 1292357

Now it's time to think of blade steel.Way too cold to use PH to work up some spring,so i end up using this old circular saw-blade i was given some years ago by Mark Knapp.I think he said it May've been L6,since,i started thinking it's more likely 15N20,but in any case i've bladed tools with it before,and it lends itself well to simpler HT(i take a chunk out of the "hub" of it where it's slightly thicker,just a touch under 1/4"):

View attachment 1292358

Another thing i'm attempting to pay more attention to is welding itself.Bad enough that i'm using junk,i must try to be more careful and systematic.I'll not weld this as an ugly 3-and more part sandwich,i'll weld the steel to one side of pre-form first,then close and weld the second half over it.
It is a more responsible method.Less air intervening between composite parts,heat distributed more evenly.Axes are the worst things to weld-wide and flat and very difficult to heat throughout and evenly.
No welding or wire,i'll just hold the steel with the preform like with a shovel;that's how chisels and many other tools were steeled,higher-melting point low-C iron in the fire,more delicate edge steel on top,protected by iron from blast and more likely to be up in the zone of reducing Atm.

Here it is right after welding.It has the appearance of being very thin.It's an illusion,due to it's developing convexity.I welded it edge steel down to the anvil,and in the process the iron outside
got pretty convex(?)...:
\
View attachment 1292370

And this is it,steeled,and tentative lines again re-drawn,with drift offered up.

View attachment 1292371

I misplaced the bit in welding just a tad,IF this head survives,it'll be slightly longer in the eye fore-and-aft.That last photo shows that:
(i hear people complaining about this often...and am appropriately grieved...but i was lucky as it was, to slap it down where it landed,it slip-sliding all over on molten flux:)

View attachment 1292372
Fascinating stuff! Thank you so much for taking the time to document! Look forward to seeing more!!!
 
So here's the photo of both sides done:

View attachment 1292355

And the same on edge(i worked those transitions to be kind of abrupt;they form the scarfs of the poll-weld and need to come together positively):

View attachment 1292357

Now it's time to think of blade steel.Way too cold to use PH to work up some spring,so i end up using this old circular saw-blade i was given some years ago by Mark Knapp.I think he said it May've been L6,since,i started thinking it's more likely 15N20,but in any case i've bladed tools with it before,and it lends itself well to simpler HT(i take a chunk out of the "hub" of it where it's slightly thicker,just a touch under 1/4"):

View attachment 1292358

Another thing i'm attempting to pay more attention to is welding itself.Bad enough that i'm using junk,i must try to be more careful and systematic.I'll not weld this as an ugly 3-and more part sandwich,i'll weld the steel to one side of pre-form first,then close and weld the second half over it.
It is a more responsible method.Less air intervening between composite parts,heat distributed more evenly.Axes are the worst things to weld-wide and flat and very difficult to heat throughout and evenly.
No welding or wire,i'll just hold the steel with the preform like with a shovel;that's how chisels and many other tools were steeled,higher-melting point low-C iron in the fire,more delicate edge steel on top,protected by iron from blast and more likely to be up in the zone of reducing Atm.

Here it is right after welding.It has the appearance of being very thin.It's an illusion,due to it's developing convexity.I welded it edge steel down to the anvil,and in the process the iron outside
got pretty convex(?)...:
\
View attachment 1292370

And this is it,steeled,and tentative lines again re-drawn,with drift offered up.

View attachment 1292371

I misplaced the bit in welding just a tad,IF this head survives,it'll be slightly longer in the eye fore-and-aft.That last photo shows that:
(i hear people complaining about this often...and am appropriately grieved...but i was lucky as it was, to slap it down where it landed,it slip-sliding all over on molten flux:)

View attachment 1292372
Looks really great Jake! As Meek1 said I really appreciate you taking the time to explain and take photos too. I have no understanding of smithing yet. So this helps a lot! Plus it's just fun to watch you get it figured out.. Badass my friend!!
 
Thanks,Josh,and all you guys,for support.

Yes,Josh,forging is all about Thinking in iron,the work itself is fairly simple,and not even that hard physically...You'll enjoy it Lots,i bet,but prepare to think and concentrate intensely.

If i was smarter i'd probably have an easier time of it,and not loose this many patients...(those last two in a row was harsh...but in the same time totally predictable,If i had the brain clicking over in the right way).

I've no idea if i'm even on the right path.
This bizness of forging out the pre-form into the near-blade shape is highly questionable:Welds of a large flat area are hard to make.
It's concievable that the oldtimers made the welds while stock was still in original,strap shape,and Then formed the blade out of welded laminate.
I learned that it's not an option for me:The alloys i use for edge steel are Way too different from body,WAY stiffer.They move at a much too different of a rate.
Another way of looking at it is that i lack the force of my hammer-blow to Penetrate the entire thickness of laminate.Instead my blows only distort the outside,softer layers,in effect smearing them over the harder core.That creates shearing forces that ruin the welds inside.

Back then the differential of hardness was not so steep,i don't think.Plain carbon steel would move more consistently with it's lower-carbon counterpart.
But those guys were also not shy about using their power equipment;some of those helve-hammers struck with intense force,in the 100's of pounds(of falling mass,how hammers are rated).

Also seems like the entire US has eventually gone over to overlaying their bits...I wonder if this inlayed biz,with steel extending clear to the eye,was inherently a b...ch to do:)

From what inexpert research i've done it wasn't that popular in Europe either,at no time really,ancient or more recent.If inserting the bit,it was cleft-scarfed and went only part way to the eye(with few exceptions,as always,but really Few).
 
The alloys i use for edge steel are Way too different from body,WAY stiffer.They move at a much too different of a rate.
Another way of looking at it is that i lack the force of my hammer-blow to Penetrate the entire thickness of laminate.Instead my blows only distort the outside,softer layers,in effect smearing them over the harder core.That creates shearing forces that ruin the welds inside.

Fascinating stuff!

How do you think it would go if you had plain carbon steel in the 1060 - 1070 range? Or how about swaping the wrought for something like 1018 or A36. Do you have access to those types of steel in your scrap pile and a way to identify them?
 
(DIY quote function:))
"How do you think it would go if you had plain carbon steel in the 1060 - 1070 range? Or how about swaping the wrought for something like 1018 or A36. Do you have access to those types of steel in your scrap pile and a way to identify them?"

Square_peg,i can only wonder...Unfortunately no scrap 10xx anywhere(in any decent size,that is;not unless i actually pile the stuff up myself,or carburate rods or plates and Then pile:)...
My very ample heap of crap contains only the most heinously-alloyed stuff...:(
I even have some Udeholm Bohler K510,Silver steel,new,11/16 round...but it'd only steel the very edge...

I Did switch to mild,(probably A36 knowing where it comes from);would prefer 1018/1020,but it's fine so far,i can't fault it in no wise,and i've access to tons of it literally,so it's a good base-line data and i should stick to it.

I screwed up this forging as well(three's the charm?...),again-weak weld.
One,the sonofab...ch,out of a whole bunch...and only a section of one even...But i don't like it,not in the least.Something is amiss.

So yes,i need to get off my duff and get some from Mark,i can have a friend pick it up who works here week on/week off...(hope Mark has it in decent width,and at least 1/4" thick;i'm just out of 1095 and 1074 i had of his and it was Lovely...).

Ok,i've got some photos for you guys of a failure,processing them now.
(i take lots of photos,but they each take reducing in format for me to send them with my satellite connection,so i keep it to a minimum;but if anyone is interested in something in particular chances are i have it and will gladly post it).
 
I suppose you have charts like these but some of the other forum members may find them interesting.

Junk%20steel%20types.jpg


Steel%20grades%20and%20uses.jpg


These charts can give you an idea which types of objects found in a junkyard you might wish to test to see if they are suitable for your purposes.
 
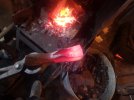
So everything went as planned.Pre-form with blade already welded to one side got nicked in the center and folded,(ground CLEAN beforehand!),and welded.

Here it is,blade portion all welded,lines drawn to where i'll trim it to shape(i never yet trimmed the upper lugs,and in general a big sloppy flat weld like this takes some edge trimming.Coincidentally it allows a peek into the welds,for any obvious signs of crapulousness).

2007.jpg

After cutting the edges with a disc,and/or grinding them,they're very reflective,and nearly impossible to photograph(in my light conditions et c.).
But,i see NO signs of any bullshit whatever-welds look good,there's the normal silvery line of decarb along each,nothing out of the ordinary.
Let me see if any pictures i took of that are worth processing and posting...
 
Not really...But here's one anyway.
However,myself,in real life,i can see NO sign of any problem at that point.

2016.jpg

Everything looks fine,top and bottom.

And it's here that i make a fatal mistake(that's what i'm thinking now,unwinding after a fairly brutal day,6 hours of forging alone,+making fuel,+all sorts of things going on and the usual chores et c.So again,this is Now,i may have more ideas as time goes on and may completely change my take on it).

But what i did is leave that last weld fairly unworked.I only have taken oh,maybe 4 heats on it,and once it felt good and solid under the hammer i was impatient to cut into it with the grinder to see the inside of welds.

and Then i got the bright idea that i'll go ahead and let these welds hang while i go ahead and do whatever needed doing to the poll.
THEN,when i have the entire assembly,i'll go back and forge the blade to shape refining,improving the welds in the process.

That was bad and wrong.I'm old enough to know how much stress,harmonics,all sorts of filthy forces the forging will undergo in this process.Should've never trusted this fresh weld to hang through the coming ordeal.

But the forging looks decent all trimmed,and i cut it to length now(i started with 12" of 2"x1/2",and now cut off 2";that makes it 6 cu.inches - 1,so 5 cu.inches x 0.28 lbs for weight of body alone,no poll or blade steel).

2021.jpg
 
As usual Greed is eating at me,i want that poll as Fat as i can get it!(foolishness...but i've forged So many where the mass just escaped me,got way too skinny...).
So i stick a 1/2" thick chunk in,for a combined 1 1/2" poll thickness!!!:)...But it's pre-weld,and we're experimenting here anyway..
Here it is,the extra piece is WI(mild really don't like self,in welding,always good to intersperse it with different stuff).

2027.jpg

And it's just fine,nice and solid.I get ballsy,forge it on edge,then on end,it don't say boo.
Ok,i grind it flat and plate it.

Same deal,a chunk out of that same disc that the blade is from.
My normal "champagne cork" system for holding it on for welding.

2037.jpg

and it works perfectly fine...i even took this photo in the process of welding,after a heat or two...Edges are a little proud,they'll get wrapped around the sides giving it the appearance of a thicker plating,just like many old axes...

2041.jpg

Here it is,looking perfectly civil,and i'm beginning to think that i've actually skated this time...

2045.jpg
 
...and only when my attention finally wonders back to the blade section of the forging do i notice that one of my welds leading from the eye is turning into a nasty black line...
It's not easy to see in this photo(seems like the best one i took unfortunately),but it's in the upper portion of the blade,from the eye about an inch out...

2053.jpg

As they say,"Sometimes you eat the bear,and sometimes the bear eats you"...

Back to the drawing board...

P.S.

As a separate issue,looking at the forging overall i still get this sense of missing out on some important proportional issue...It's subtle,but a definite miss;i'd not mistaken this even in outline with one of the old originals...Can't really put my finger on it either,but a strong sense is definitely there...

2048.jpg
 
Last edited:
I spent the day attempting to salvage the bad forging.
Straightening out the eye and the whole mess has opened the bad weld some more,so i figured what the heck,fluxed the daylights out of it and worked it over,very hot,and very hard.

It actually worked.Not for "realz" as kids say nowadays,it'll never be a 100% forging,and the damage to my pride is irreparable,but it's worth HT-ing and sticking a stick into to maybe learn a bit more about balance et c.
The crack is still visible on outside for about 5/8",it was too oxydised to fix,but the inside i think has formed Some degree of a bond.
I think that because of a way it glows when cooling-any voids in a laminate show immediately by developing different colors,and shadows where parts are not one piece.

2075.jpg

2078.jpg

All in all i spent several hours doing all sorts of torturous things to it,but i never did get up the nerve to give it an honest stiff drifting...i just Knew it can't take it.
So the eye will now always be on an ugly,misshapen side(i may give it a ream with some files if indeed it survives HT).

Then i ground it all over,hard and deep,and again found all other welds perfectly fine.
So still sticking with original guess-i didn't finish making that weld,moved on too soon to other parts,and it was too fresh and insufficiently worked over to stand the harmonics of work being done on the other end.

The dimensions i aimed at,6"L+ x 4" worked out pretty good,it's 6 5/8" long with an edge exactly 4".This is a side view at present:

2094.jpg

And here's the top,with that pain in the neck crack:

2095.jpg 2095.jpg

Bottom:
 
(sorry about the double photo above)...again,bottom shot:

2097.jpg

And,my favorite thing-why i went back to messing about with this screwed up forging-my nice fat poll!:)...Love this stupid thing...it's 1 1/4" wide by a couple + inches long...I just really enjoy the heft of it,and how if i wanted or needed to,i Could forge a real wedge...

2099.jpg
 
(sorry about the double photo above)...again,bottom shot:

View attachment 1293815

And,my favorite thing-why i went back to messing about with this screwed up forging-my nice fat poll!:)...Love this stupid thing...it's 1 1/4" wide by a couple + inches long...I just really enjoy the heft of it,and how if i wanted or needed to,i Could forge a real wedge...

View attachment 1293817
Man I really like it Jake! It looks awesome!
I think it's proportions are just about perfect... I hope it holds up for you man... You deserve to have a good axe out of that...
 
Thanks,Josh,it's very kind of you!
Alas,i can never have a good axe...:(
I have too many friends...and they spend too much time doing stuff out in the woods...And they can absorb Infinite number of axes...
They loose them when the snowmachine goes rolling,or when a kid gets sent out to drive the boat stake leaves the axe where he used it on the bank,and in one thousand and One other ways....

But that's ok,and here we're only after Knowledge(and it's wonderful that the Wilderness absorbs our mistakes tracelessly!:))

So that was # 10,and what did we learn?
I want to say that 1/2" gauge of stock is about the right stuff(makes sense,very common for wagon tire stock,right?).
That a stack of three,or a hypothetical 1 1/2" at poll gives up plenty,can probably use 3/8" for middle insert.
That the poll needs to be welded and plated and Done,before the blade;and once the blade gets welded in one must just keep on going in finishing the head,none of that back-and-forthing.

Of the bigger questions remaining are:Did they insert the edge first and Then pounded the blade to shape?
It'd be great for welding,IF one had Power to penetrate 1/2"+/- laminate...
By hand-i,personally,don't.I use a 10 lb-er to close welds,but even choked up on it i've not that great of a control with it.And even that is marginal,insufficient,really.(And,it's taking out my wrist,slowly but surely).

Once it's a bit warmer i'll use PH.The dies in it are not right for axe-work though.
There is a funky creature i could make called a "frog",it's a spring-die that sets about the right taper for smashing down an axe-blade on a proper angle.(or just bolster up the bottom die to that taper).

If they used straight-up 1/2",plus whatever steel inside(say 1/4"),that would be about twice or even more the mass necessary for the blade.Such compaction,50% +,would do wonders for blending in and strengthening the blade...
Over an inch thick,and few inches sq. in area,i wonder if my poor old LG is up to it...
IF that's how those guys did it their helve hammers must've been monstrous-big...
(a while back i watched some German video of guys replacing a rotted out stump for anvil on one of those..They used an elm stump well over 2' across,and about 5' long that they buried almost to the hilt...surely they did it for a reason,the force of that hammer must be That badass..).

The Spring is slowly approaching,it gets much warmer in the afternoon,and may actually begin to warm up sooner or later...They must be getting ready for maple syrop works in the Northeast(and Northwest?)...

My house marten frolics about the yard,i can just tell the sunshine is affecting her too...

2073.jpg
 
Back
Top